
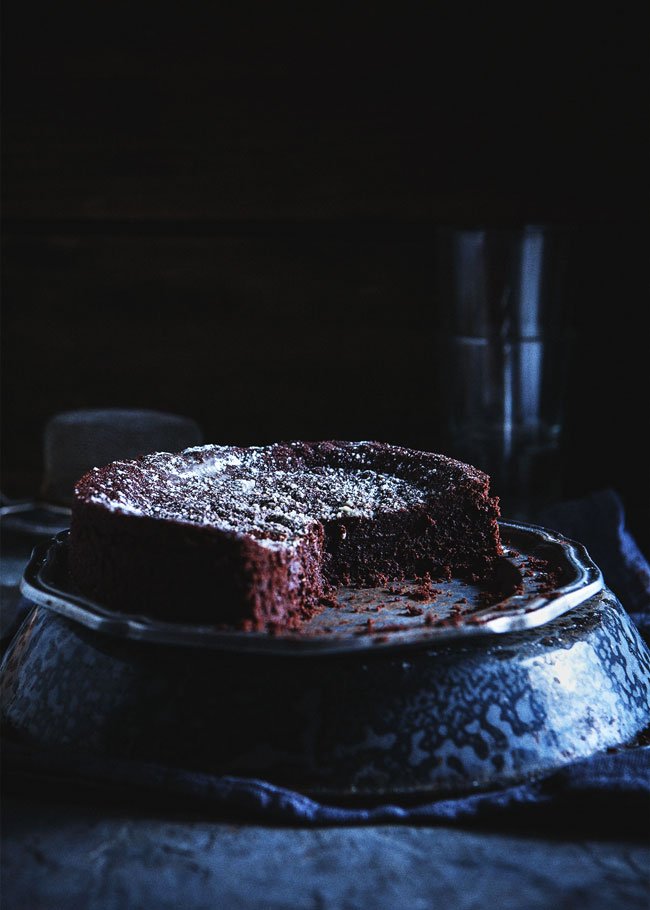
Evelyn Sharpe’s Chocolate Cake

Medically reviewed by Christiana George Updated Date: June 8, 2023
Valentine’s Day has long felt like an occasion for suckers, suckering poor couples out of paying exorbitant prices to observe their love for each other, that is. For a long time, Chris and I played into that game. And really, it’s not the consumers’ faults that their only recourse, should they decide to seek out a nice dinner, are restaurants that jack up their prices and force you to participate in the prix fixe menu concept.
A few years ago, we decided to start taking short trips as a way to escape those pressures. We’d drive to places a little out of the way, Bolinas for example when we were still living in San Francisco, and go to some dive-y restaurant that didn’t acknowledge the existence of Valentine’s Day. There, we’d enjoy a lowbrow dinner that was usually replete with multiple pints of cheap beer. It was a fine way to commemorate the occasion. Philistines! you must be thinking. But we loved it.
We were going to do the same this year, but memories of our visit to Montauk reminded us how our last-minute tendencies are not as forgiving out here. If we’d wanted to go somewhere, we probably should’ve thought about it earlier than yesterday.
That’s why we’ve decided to boycott the entire dining out experience and cook at home! I’m really excited. (The fact that this idea just occurred to us gives you an idea of how indoctrinated we are with the idea that eating out is the only way to do Valentine’s Day—how silly, right?)
I have all these ideas swarming in my head—these sliders, for instance, which have been on my mind for a good half year, and Momofuku-style pork buns. I’m still narrowing down the list, but one thing’s for certain: dessert will most certainly be Evelyn Sharpe’s chocolate cake.

This recipe is officially titled Evelyn Sharpe’s French Chocolate Cake. But because I don’t see what’s so French about this cake, I decided to omit that part of the title so as not to confuse you like it confused me. (Edit: a nice commenter informed me that this cake is how chocolate cakes are like in France—much denser and chocolatey-er cakes than American cakes—making it very much French-style. Thanks for clearing that up Tessa!) Other than that, it’s pretty much perfect the way it’s written. It’s so dense with chocolate that it’s fudgy and indulgent, but it doesn’t feel heavy or overly-sweet (there’s only half a tablespoon of sugar in the entire thing!). I also threw in a huge pinch of Maldon salt, so occasionally a piece surfaces and sends a little jolt of sublime through your taste buds. And, the recipe, halved, results in the perfect amount of cake for two people, enough to fit a 6-inch pan. It’s lovely. I’m planning on serving it with freshly whipped cream, a little creme fraiche folded in for good, tart measure.
You can read about the background behind the cake in the original article by (THE) Amanda Hesser. Basically, Evelyn Sharpe’s identity is unknown, so please don’t ask me who she is. But I’m sure she was some woman; I can almost imagine her whipping out this most special of cakes with aplomb whenever the occasion called for it.
Happy Valentine’s Day, all of you! (And I hope secret admirers surface, for those this might apply to! The intrigue of the day used to be my favorite part when I was a teenager—oh the raging hormones.)
EVELYN SHARPE’S CHOCOLATE CAKE
Adapted from the New York Times via The Wednesday Chef
Makes one 6-inch round cake
Ingredients:
8 oz. bittersweet chocolate (mine was 64%)
5 Tbsp unsalted butter, softened
Pinch of Maldon salt
1/2 Tbsp all-purpose flour
1/2 Tbsp sugar
2 eggs, separated
Creme fraiche whipped cream
Directions:
Heat oven to 425 degrees. Generously butter a 6-inch round pan (the original recipe calls for using a springform pan, but I don’t have one in a 6-inch size, so I used a regular round pan; it works just fine. You’ll have to be careful when removing the cake as it’s quite delicate.)
Melt the chocolate (either with a double broiler—I used a makeshift one—or in the microwave). Remove it from the heat and stir in the butter, salt, flour, and sugar. Lightly beat the egg yolks and gradually stir them in.
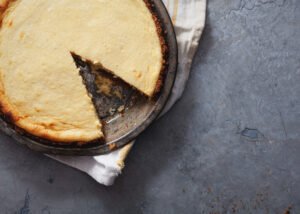
Beat the egg whites until they’re holding their shape, but are not stiff or dry. Fold them into the chocolate mix smoothly, quickly, and easily. Pour the batter into the prepared pan and bake for about 10 minutes until the cake looks firm on the edges but is still a bit runny in the middle. Turn off the heat, open the oven door, and let the cake cool in the oven. It’ll firm up a bit more.
Once it’s only a little warm, remove it from the pan gently. Serve each slice with a dollop of whipped cream. Enjoy!
Related Posts


Subscribe for New Racipies
Get mental health tips, updates, and resources delivered to your inbox.
Candy Coated Oreo M&M;’s

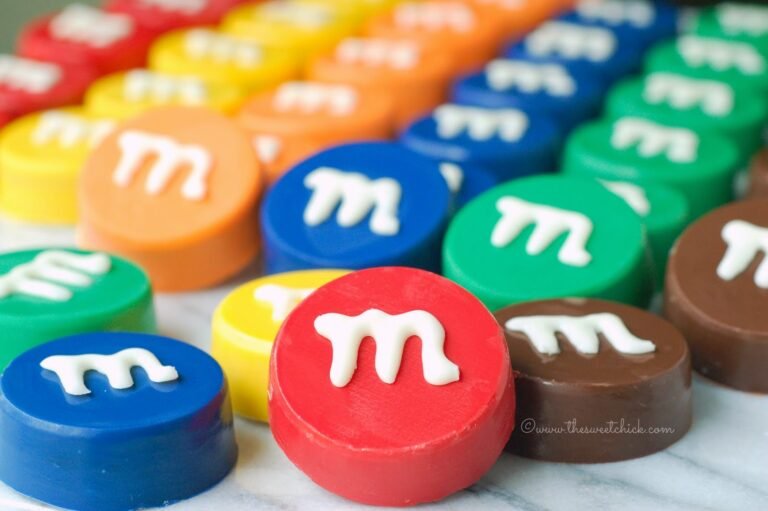
Summer is coming to a close. Kids are going back to school in two weeks. Yay! I love my kids, but I need a break. The past couple of weeks have been busy. We drove up north for a week to see family and friends. It’s was nice to see everyone, but man, that drive is killer. Then last week I was occupied with making treats and decorations for my son’s birthday. He loves M&M’s, so I scoured Pinterest for ideas on doing an m&m party. I found a few things, but these Candy Coated Oreo M&M’s were my idea. I’ve been wanting to make them for a while, so I thought this was the perfect opportunity. They came out pretty cute.

I was able to find all the color candy coating I needed at Walmart. They carry the Wilton, Chocomaker, and Candiquik brands. I used Birthday Cake Oreos for the center, but you can use regular Oreos. If you choose to do Double Stuf Oreos, you will need a different mold.

I bought these candy molds at a small culinary shop while I was up north, but they also sell similar ones on Amazon. They are made for candy coating Oreo shaped cookies. I bought four sets of molds so by the time I finished the last cookies, the first ones were ready to pop out and I could continue using the mold.
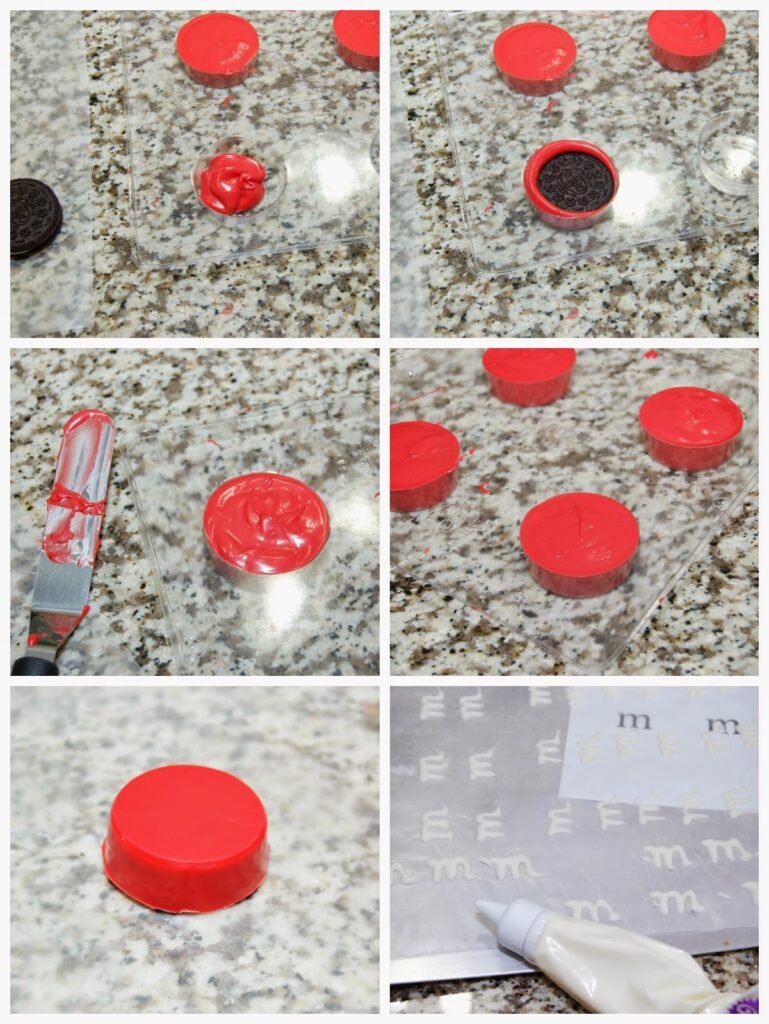
This was my first time trying this. It was a learn as you go process. I poured about a tablespoon or so of candy melt into the mold, then pressed an Oreo cookie into the middle and twirled it around to cover the sides. Then I added candy melt to the top and flattened it out with a spatula. By the second tray I had figured out not to overfill the cavities. You have to tap the mold a few times against the counter to get the air pockets out and that also levels out the candy melt. I placed them in the fridge to harden quickly. You have to work a little to loosen the hardened candy from the mold, but it didn’t take too long.
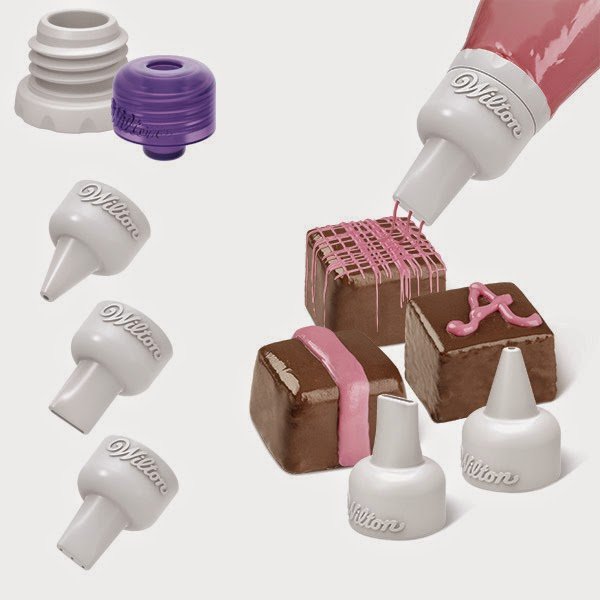
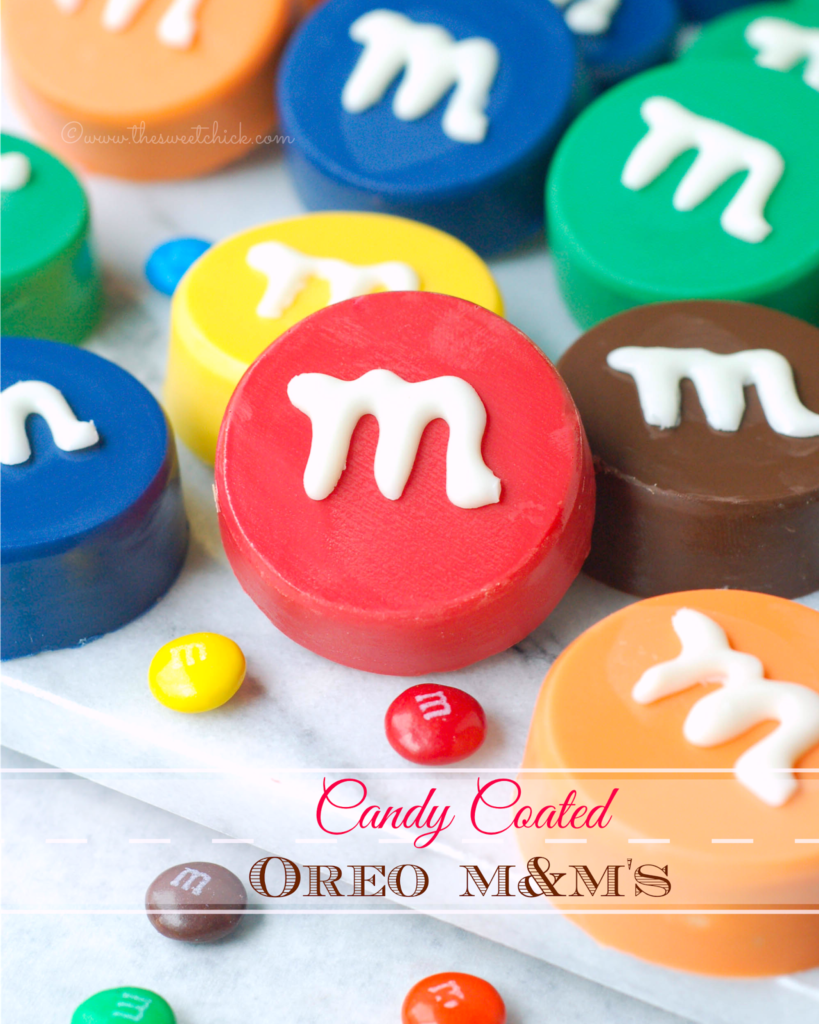
For the “M’s”, I bought the Wilton Candy Melts Decorating Tip Set at Walmart. The writing tip worked perfect. I printed some “M’s” on my computer and placed the printer paper under a piece of wax paper and traced them the best I could. You could write directly on the candy coated M&M’s, but I was too scared to mess them up. When the candy “M’s” had hardened, I attached them to the Oreos with a few dabs of candy coating.

I made these as treats for the party, but they make great party favors also. You can place them in little bags or boxes and make some cute tags to attach to them. All the party guests loved them.
Candy Coated Oreo M&M’s
by The Sweet Chick
Prep Time: 1-1.5 hours
Cook Time: 10-12 minutes
Keywords: microwave dessert snack candy melt birthday cake oreos birthday cookie candy American
Ingredients (48 treats)
For the cookies
- 2 Packages (15.25 oz. each) Birthday Cake Oreos
- 1 package (12 oz.) Wilton’s Candy Melt, green
- 1 package (12 oz.) Wilton’s Candy Melt, red
- 1 package (12 oz.) Wilton’s Candy Melt, yellow
- 1 package (12 oz.) Wilton’s Candy Melt, orange
- 1 package (16 oz.) Chocomaker candy wafers, dark blue
- 1 package (16 oz.) Candiquik candy coating, chocolate
For the “M’s”
- 1 package (16 oz.) Candiquik candy coating, vanilla
Additional items needed
- 2-4 candy molds for plain cookies
- Wilton’s Candy Melt Decorating Tips
- 1 box (12) Wilton’s Disposable Candy Decorating Bags.
Instructions
For the cookies
Using one color at a time, melt candy coating according to instructions on the back of the package. (Usually it’s 30 seconds at a time in the microwave.) I melted a 1 cup at a time. You can always add more if needed. You will not use the entire bag of candy melt. Make sure you candy melt is warm, but not hot before pouring into the mold.
Pour about 1- 1 1/2 tablespoons of candy melt into each cavity of the mold. ( I worked with one mold of 4 at a time). Place one Oreo cookie in the center of each cavity on top of the candy coating. Gently press the cookie down and spin is slowly to coat the sides.
Add a bit more of candy coating on top of the Oreo, careful not to overfill. Spread the candy melt out with a spatula. Then gently tap the mold a few times on a hard surface to release any air bubbles.
Place finished mold(s) in the fridge for 5-10 minutes to speed up the hardening of the candy melt. I continued the same process with another color while the first color was setting. I used 2 molds per color, so it worked out great.
When the candy coating has hardened, remove from fridge and gently wiggle the mold to release the cookie. The flat surface will be the top of the “M&M”.
For the “M’s”
Once all the colors are done, it’s time for the “M’s”. If you are confident about your writing skills, you can write directly on the candy coated cookies. I wasn’t, so I made a template on my computer and printed it out. I placed the template under a piece of wax paper to write my “M’s”. My “M’s” were about an inch tall.
Melt the vanilla candy coating according to the package instructions and pour into a disposable candy decorating bag with writing tip attached.
Trace the “M’s” onto the wax paper over your template. Practice makes perfect.
I placed my template and wax paper on a cookie tray so I could pop it in the fridge for a quick set. I also used a sharp knife to cut off any “tails” that occurred due to run-off candy coating.
Once the “M’s” have set, carefully remove from the wax paper, add a couple of dabs of vanilla candy coating to the backs and place them on your candy coated cookies. Let dry and you are done!
Related Posts


Subscribe for New Racipies
Get mental health tips, updates, and resources delivered to your inbox.