
Moonshine Marshmallows

Medically reviewed by Christiana George Updated Date: June 8, 2023
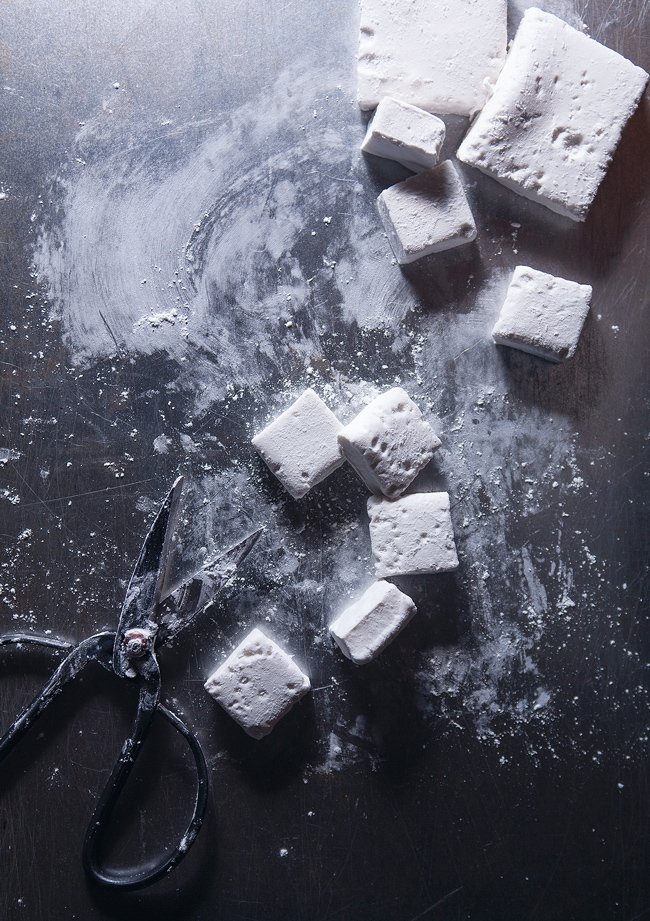
I was originally inspired by the recipe for Blue Bottle Coffee’s moonshine marshmallows, but after making it multiple times, and failing, I finally had to admit defeat. But that doesn’t mean I can’t use the name, now does it? A moonshine marshmallow certainly sounds much more intriguing than a bourbon marshmallow.
This is my first entry for a giftable holiday treat, and a winning one it is at that. These marshmallows look adorable, feel as soft as, no, wait, softer than pillows, and taste incredibly luscious.
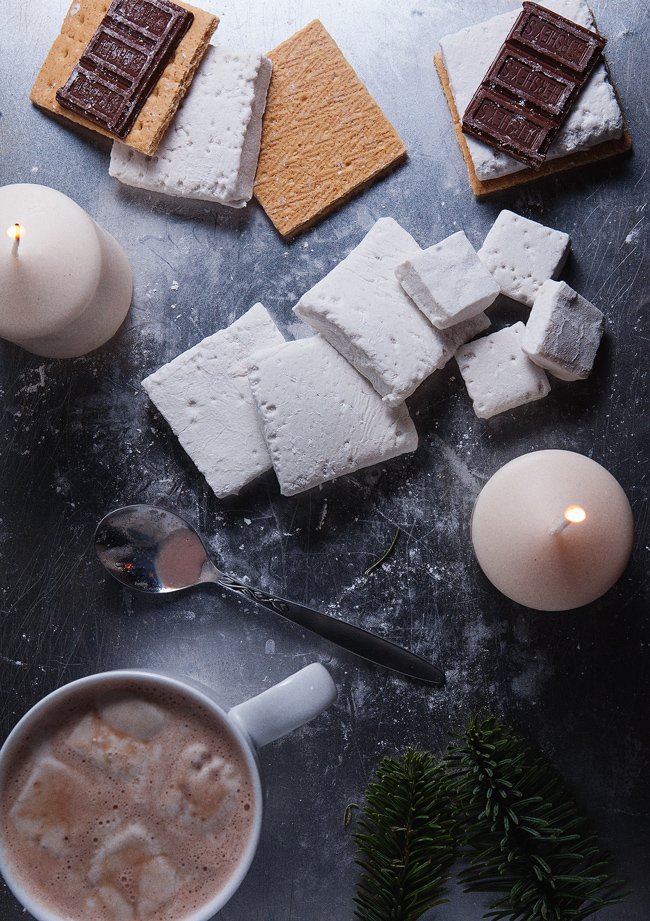
Imagine creamy hot chocolate spiked with bourbon marshmallows… perfect for sipping in front of a wood-burning fireplace. Or for those of us who don’t have wood-burning fireplaces, our radiators. Actually, that’s the last place I want to be when it’s on; our apartment is hot enough as it is.
These also taste great in adult-flavored s’mores. (And if you use a 9-inch square baking pan instead of 8-, they cut into perfect-sized squares for the graham crackers.) To toast them, because again, there’s no wood-burning fireplace in my dinky little apartment, I pop them in the toaster oven where they do that funny expansion thing, bubbling and swelling like they’re about to come alive, and let them slowly turn buttery-brown. By then, the s’mores is a hot mess, melted chocolate and gooey marshmallow everywhere. It’s pretty much perfect.
Homemade marshmallows are pretty much perfect.
There’s no need to stick to bourbon. I imagine Bailey’s would work wonderfully. Or kahlua, or anything besides vodka (which doesn’t taste like anything except alcohol). You don’t even have to use alcohol at all—I imagine the recipe would work just as well with water—but what’s the point? Actually, scratch that. I’m not judging. I’m not the biggest fan of alcohol-tasting desserts. (But this one’s different, I swear!)
If you’re going to make substitutions with the sugar, I would advise against maple syrup. It tends to crystallize, and form razor shards. I cut myself on a piece, and it looks and feels like a paper cut. (They’re the worst!) I was initially uncomfortable with the idea of using corn syrup, but David makes a good case for it, and especially after my incident with the the maple syrup, I decided to just swallow my unease and pour it all in. The entire cupful.


MOONSHINE MARSHMALLOWS
Adapted from Epicurious
Makes 16 2×2-inch marshmallows or 64 1×1-inch marshmallows
Ingredients:
- 3 (1/4-ounce) envelopes unflavored gelatine
- 6 Tbsp bourbon, divided
- 1-1/2 cups sugar
- 1 cup light corn syrup
- 1/2 cup + 2 Tbsp water, divided
- 1/4 cup corn starch
- 1/4 cup confectioners sugar
Tools:
candy thermometer
Directions:
Line an 8-inch square baking pan with 2 sheets of parchment paper (completely covering all the edges inside the pan). Lightly oil the sides and bottom of the pan.
In a separate bowl, sift together the corn starch and confectioners sugar. Sift enough of this mixture into the prepared pan to completely and generously cover the bottom. Reserve the remaining cornstarch mixture.
Sprinkle gelatin over 3 Tbsp bourbon and 5 Tbsp water in bowl of mixer and let soften while making syrup.
Stir together sugar, corn syrup, a pinch of salt, the remaining 3 Tbsp bourbon, and the remaining 5 Tbsp water in a medium heavy saucepan (I used a 4-quart saucepan and it barely contained the liquid when it boiled up). Boil over medium heat, without stirring, until candy thermometer registers 238 to 240°F. Remove from heat.
With mixer at low speed, pour hot syrup into gelatin mixture in a slow stream down side of bowl. Increase speed to high and beat until very thick and mixture forms a thick ribbon when beater is lifted, 11 to 13 minutes.
With a lightly oiled spatula, scrape marshmallow into baking pan and smooth the top. Let stand, uncovered, at room temperature until surface is no longer sticky, 2 to 3 hours.
Remove from pan and carefully peel away the parchment paper. Dust the top and all the edges with the remaining corn starch mixture. Using a knife or scissors dusted with the corn starch mixture, cut the marshmallow into whatever shape you’d like. Dust all cut edges with the corn starch mixture to prevent sticking.
These should last for about a week or so, if kept in an airtight container at room temperature. If stacking the marshmallows, line between layers with parchment paper.
Related Posts





Subscribe for New Racipies
Get mental health tips, updates, and resources delivered to your inbox.
Tartine Croissant Recipe


Every now and again, I like to tackle big projects. I’m good at big projects. There’s something so reassuring about them, like you know there’s an end in sight, eventually, but it’s so far away that you’re not focused on it. Instead, you get to hunker down, keep your head low, and really sink yourself into the process. Drink some coffee while you’re at it, noodle around with other things while waiting (there’s always a lot of waiting).
BUT. Everything will be going swimmingly, until everything goes awry. That’s when, say, you open the oven to discover a hot tub’s worth of butter oozing around on the floor of your baking pan. It might be kind of like how Alexander Fleming felt when he realized he’d left a Petri dish uncovered in the lab—the horror!, the shame!, the contamination (him)!, the smell of frying croissants (me)!—except he discovered penicillin, and I ended up with rubbery croissants.
It’s in moments like these that your character will come through. You could give up, throw in the towel, decide to start down another path altogether. Knife-sharpening comes to mind, although that’s another one of those projects you could (and will be told to) spend a lifetime mastering. Or attempting the elusive scorpion pose. (I know, scary.) Alternatively, you could also decide to try again. According to my assessment, the latter demonstrates true grit. Or so I have to believe. Fine, mostly, I didn’t want to feel like I’d been defeated by a baked good.

So I took a step back and really tried to figure out where I’d gone wrong. I think it came down to one main reason: the butter hadn’t been soft enough when I’d started the lamination process. It seems that butter that isn’t sufficiently malleable will clump up and tear through the layers, resulting in lots of leakage points. Does that sound about right, seasoned croissant makers? But, a little leaking is normal too, and should not be a cause for concern. Along with a few other small tweaks, I felt ready to give croissants another go.
I’d initially made half a batch of plain croissants and half a batch of ham and cheese, but for my second attempt, I decided to pare down my expectations. If I could successfully make a batch of plain croissants, I could begin thinking about incorporating other ingredients. It’s kind of like how in Japan, sushi apprentices spend years mastering the art of making rice before they’re allowed to move on to even touching the other stuff. (Talk about integrity!)

Of course you’re wondering how my second attempt went? Pretty well, I think. The insides were a bit doughier than I would’ve liked, but they actually tasted like croissants. Buttery, flaky, layers shattering upon contact. I love that initial tenderness of the innards when the croissants are pulled apart. They’re still steaming from their bake and taste incredibly luscious and fresh. I also love the way the tips burn slightly. They’re the crispest parts, all puff pastry-like and caramelized. And the shape, the shape! While svelte and long are generally qualities esteemed by women the world over, I love how cute and round mine came out. They’re like the Volkswagon Beetles of the croissant world.
I don’t know, I think Tartine just might approve.


TARTINE CROISSANTS Recipe
Adapted from Tartine
Makes 10
Ingredients:
- For the preferment:
- 6 Tbsp nonfat milk
- 1/2 T (or 1.5 t) active dry yeast
- 2/3 cup all-purpose flour
And everything else:
- 2 t active dry yeast
- 1 cup minus 2 T (or 14 T) whole milk
- 3 cups all-purpose flour
- 1/6 cup sugar
- 2 t salt
- 1/2 T unsalted butter, melted
- 2-3/4 sticks (or 22 Tbsp) unsalted butter, cool but malleable
- 1 egg & a pinch of salt for the egg wash
Tartine Croissant Recipe Directions:
For the preferment: Heat up the milk so it’s warm but not hot (I mixed whole milk with hot water that had been heated in the kettle earlier in the day to make warm-ish “nonfat” milk.) and pour it in a mixing bowl. Sprinkle the yeast on top, stir to dissolve, and mix in the flour until a smooth batter forms. Cover and let rise until almost doubled in volume, 2 to 3 hours (or overnight if stored in the fridge).
For the rest of the recipe: Make the dough. Transfer the preferment to the bowl of a stand mixer fitted with the dough hook. Sprinkle in the yeast and mix on low speed until incorporated, a minute or two. You can stop the mixer to scrape down the sides if needed. When the mixture is well-mixed, increase the speed to medium and mix for a few minutes. Slowly add in half the milk and continue to mix until the milk is fully incorporated. (This will take awhile. I helped the process along by stopping the mixer and scraping down the sides.) Reduce the speed to low, add the flour, sugar, salt, melted butter, and the rest of the milk, and mix until everything comes together in a loose, shaggy-looking dough, about 3 minutes. Stop the mixer and let the dough rest for about 15 minutes. Once again, turn on the mixer and mix until the dough is smooth and elastic, no more than 4 minutes. (Mixing encourages gluten growth, which is not what you want in this case, so try to keep the mixing time as short as possible.) Once you’ve achived a smooth dough, cover the bowl and let the contents rise in a cool place until the volume increases by about half, 1.5 hours.
Lightly flour a work surface and transfer the dough to the surface. Press it into a rectangle about 2 inches thick, wrap in plastic wrap, and place the dough in the fridge for about 4 to 6 hours.
About an hour before removing the dough, put the butter in the bowl of your stand mixer fitted with the paddle attachment, and mix it on medium-high speed for a few minutes. This part is important, as the consistency of the butter is really important for lamination. What you’re going for is butter that’s malleable, but not melting. It should still be cool but amorphous, not retaining its original shape. I found it helpful to stop and scrape the butter that had built up on the side of the bowl with a spatula and into a bowl. If you do this a few times, poking the butter out of the holes of the paddle, you’ll end up with soft but cool butter. Place the bowl in the fridge to firm up a bit.
Now the lamination begins: Lightly flour a work surface and take dough and butter out of the fridge. Unwrap the dough and set it on the surface. With a rolling pin, roll the dough into a pronounced rectangle 20 inches wide and 8 inches long. Make sure the long side is facing you. Starting from the left, spread the butter over 2/3 of the dough using a combination of your hands and a spatula to apply it evenly (leave a slight margin). Fold the uncovered third over the center third, then fold the left third over that. (It’s like folding a letter.) What you end up with is called a plaque. Seal the seams of the plaque so that the butter is sealed within the dough.
Now onto the second turn: Turn the plaque 90 degrees so that the long side is once again facing you. Again, roll the dough out to a pronounced 20′x8″ rectangle and fold it like you did earlier. All the while, feel free to scatter a little flour over and under the dough to keep it from sticking to the rolling pin/surface, but brush off excess flour as it will affect the final product. Wrap the plaque in plastic wrap and place it in the fridge for about 1.5 hours.
The third and final turn: Repeat rolling out the plaque and folding it. Re-wrap it in plastic wrap and place it back in the fridge for about 1 hour. (At this point, the dough can be frozen, but let it warm up by spending a night in the fridge before rolling it out.)
Shaping: This time, roll the dough out to a pronounced rectangle at least 22.5″ wide and 9″ tall. Using a sharp knife or pizza wheel, cut off the excess margins. You basically want a 22.5″x9″ rectangle with the sides all trimmed off. Using a ruler, slice the dough into five equal rectangles that are 4.5″ wide and 9″ tall. Slice each of these in half so that you have 2 right-angled triangles (with a long side about 10″).
Have a large baking sheet covered with parchment paper ready. To shape, position each triangle so that the base faces you. Take the two points of the base in your fingers and stretch them a bit. Then furl the base upwards into a roll. Continue rolling with your palms, and at the end, grab the last tip, give it a slight stretch, and tuck the point underneath the rolled dough.
Place the croissant on the baking sheet, giving it plenty of space (Please note: in the picture above of the raw croissants, they are way too closely-spaced!). After all the croissants have been placed on the pan, set the croissants in a draft-free, cool place for a final rise, 2 to 3 hours. I placed the baking sheet in a large empty plastic bag. (It keeps a skin from forming, inhibiting the rise.)
Preheat your oven at 400 degrees F. When the croissants are just about ready (they’ll be puffy, and when you push one with your fingertips, the indent will stay), prepare the egg wash by whisking together the egg, a pinach of salt, and a splash of water. Apply the wash with a pastry brush over all the surfaces and edges. Slide the croissants into the oven. After 5 minutes, reduce the temperature to 350 degrees F and bake another 20 minutes until the croissants are golden-brown. And if some butter seeps out, that’s totally okay.

Check More Recipes:
Apricot Raspberry Galette, Or Look What I Made!
Related Posts





Subscribe for New Racipies
Get mental health tips, updates, and resources delivered to your inbox.