
Aunt Sassy Cake, Or Pistachio Layer Cake With Honey Buttercream

Medically reviewed by Christiana George Updated Date: June 8, 2023
The search for the perfect wedding cake continues. Today I introduce to you, Aunt Sassy, the pluckiest pistachio cake you’ll ever meet, flavored with real pistachios (as opposed to pistachio extract, which a recipe my sister found called for) that impart the barest of green to four dreamy layers of cake. She’s wearing her Sunday’s finest, a lush buttercream laced with glossy honey (that I sort of butchered because I lack cake decorating skills. Sorry Aunt Sassy.)

In truth, the cake is not as forwardly pistachio-tasting as you might think. What it really reminds me of is a nut bread, dense yet moist, and textured in that whole-grainy way. This may, in part, be due to the fact that I hand-ground, using a mortar and pestle, the pistachios, an imprecise process that yielded not the fine grain that the recipe called for, but something a little coarser, more similar to sand. But no matter. I liked it, a lot. Chris did too, and I gave him all the cake tops to take to work so I wouldn’t end up snacking on them throughout the day.
But the true gem was the honey buttercream. It was superb, absolutely superb! It was wistfully velvety with the slight aftertaste of honey (meaning, not too sweet) and a lightness kind of sort of like whipped cream. I found ample excuses to conduct multiple taste tests: while scraping down the bowl, while filling the cake, while frosting the crumb layer (which I liberally applied for that very purpose), while cleaning out the bowl that I used to hold the crumb-filled frosting. And all the while, my brain kept saying ‘no, no, no, put down the spatula, Linda!’ because, being the sensible organ that it is, you can’t get past it the fact that the frosting is made almost completely of butter(!).
Other thoughts. It reminded me of a Swiss meringue buttercream, but did not turn stale-buttery or yellow over time. This is valuable information. Also, it’s egg-less. Actually, this is where I wish I could talk food history, because the method of making this frosting seems quite unusual. At its base, it’s a mixture of sugar, milk/cream, and flour that’s cooked over a low heat until it thickens. Is flour a common frosting ingredient? What is its history? Is it an old-fashioned Southern technique? That would excite me greatly.
Finally, regarding the cake as a whole, I’m thinking a three-layer cake, two of pistachio, one of chocolate, with this very buttercream frosting might be just the ticket.
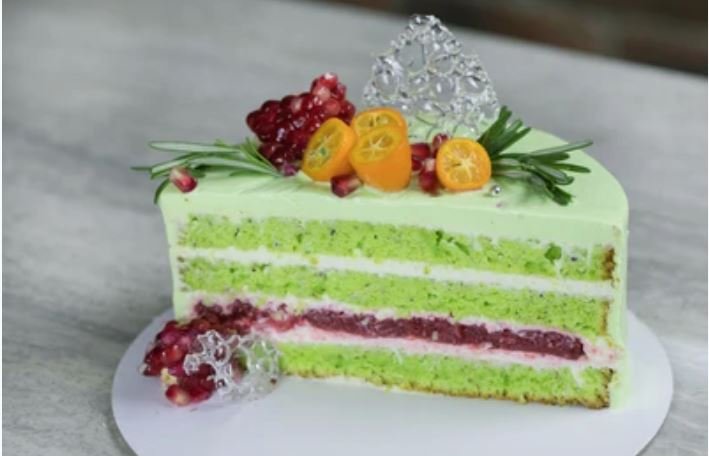
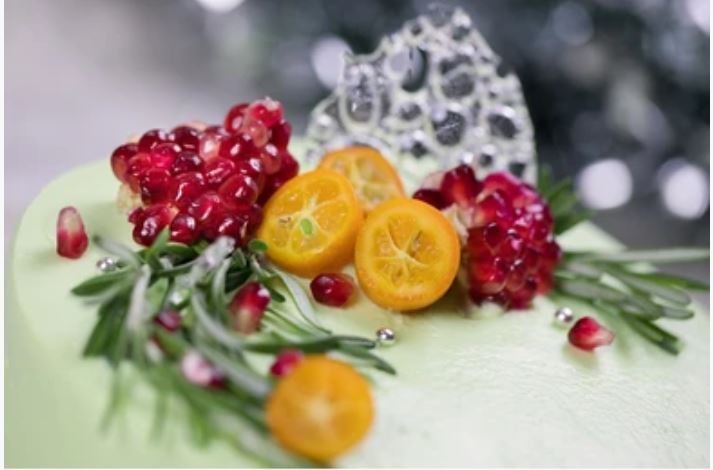
PISTACHIO LAYER CAKE WITH HONEY BUTTERCREAM
Adapted from Baked Explorations, via Oprah
Makes 1 six-inch 4-layer cake
Note: The original recipe called for vegetable shortening, which I decided not to use, because anything with the word ‘shortening’ in it sounds highly suspect to me. If you do decide to use it, replace half of the butter (1/2 cup) with 1/2 cup of vegetable shortening.
Ingredients:
For the pistachio cake:
1 cup shelled pistachios
2-1/2 cups cake flour
3/4 cup all-purpose flour
1 Tbsp baking powder
1 tsp baking soda
3/4 tsp salt
1 cup butter, softened
1-3/4 cups sugar, divided
1 Tbsp pure vanilla extract
2 large eggs
1-1/2 cups ice water
3 large egg whites, at room temperature
1/4 tsp cream of tartar
For the frosting:
1-1/2 cups sugar
1/3 cup all-purpose flour
1-1/2 cups whole milk
1/3 cup heavy cream
3 sticks unsalted butter, softened, and cut into small pieces
1 tsp pure vanilla extract
3 Tbsp good honey
Directions:
For the cake:
Preheat the oven to 325 degrees F. Butter four 6″ cake pans (or however many you have, but you’ll have to work in batches). Line the bottoms with circles of parchment paper, dust the pans with flour and knock out the excess.
In a food processor, pulse the pistachios into a coarse grind, remove 2 Tbsp, and set them aside in a medium bowl. Process remaining pistachios just until finely ground to a powder. Sift cake flour, all-purpose flour, baking powder, salt, and baking soda into the same bowl with the 2 Tbsp chopped pistachios. Stir in pistachio powder.
In a stand mixer using the paddle attachment, beat butter on medium speed until creamy, about 1 minute. Add 1-1/2 cups sugar and vanilla and beat until fluffy, 4 minutes. Scrape down the bowl, and with mixer on low speed, beat in eggs one at a time until well blended. Beat in the flour mixture in 3 additions, alternating with the cold water, beginning and ending with flour mixture. Beat until blended, scraping bowl; then beat batter 15 more seconds. Scrape into a large bowl.
With a clean bowl and using the whisk attachment, beat egg whites and cream of tartar on medium speed until foamy. With mixer on medium-high speed, add remaining 1/4 cup sugar and beat just until soft peaks form, taking care not to over beat. (For some reason, I did this by hand. It took some serious arm power, and I’m not sure I attained the foaminess that the recipe called for. Use your mixer if you can.). Gently fold whites into batter just until no white streaks remain.
Divide batter between prepared pans (or about an inch into each pan) and spread evenly. Bake 35 to 40 minutes, or until a toothpick inserted in center of cakes comes out clean. Transfer pans to wire racks and let cool 20 minutes. Turn cakes out onto racks, remove parchment paper, flip them over, and let cool completely.
Cake rounds can now be covered in plastic wrap and stored in the fridge overnight.
For the frosting:
In a heavy, medium saucepan, whisk sugar and flour until well blended. Add milk and cream and cook over medium heat until mixture thickens and comes to a boil, about 10 minutes. (This is where the quality of your pan comes through. Using a sub-standard saucepan like I did? Keep the heat on low and stir constantly.) Reduce heat to low and cook, stirring, for 2 more minutes.
Transfer the mixture to the bowl of a stand mixer. With the paddle attachment, beat the mixture on high speed until it cools completely, about 10 minutes. On medium speed, beat in the butter. It’ll gradually start incorporating into the mix and look more and more like frosting; it takes about 5 minutes. Increase the speed to medium-high until the frosting is fluffy and smooth, about 1 minute. Beat in honey and vanilla until incorporated. Taste for the honey and add more if necessary.
The frosting can now be refrigerated, covered, but before you use it, let it come to room temperature and mix it until it regains its fluffiness.
Assembling the cake:
I found that there was just enough frosting to frost the entire cake. Use about 1/2 to 3/4 cup of frosting in between layers.
Related Posts
Subscribe for New Racipies
Get mental health tips, updates, and resources delivered to your inbox.
Homemade Yeasted Apple Cider Doughnuts (Fluffy & Fried)

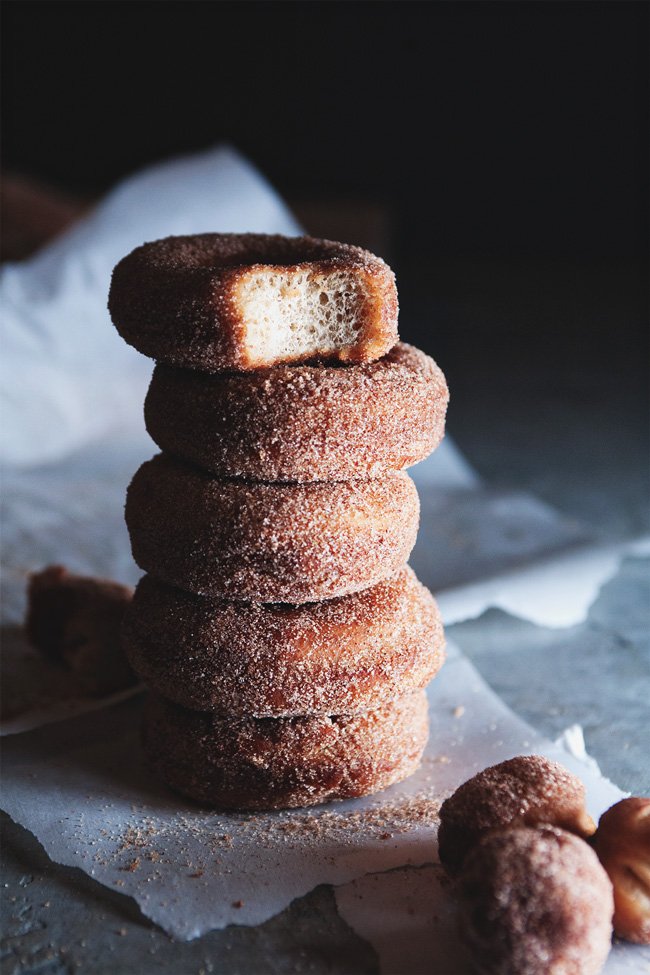
These soft, fluffy yeasted apple cider doughnuts are the perfect autumn treat. Infused with fresh apple cider and rolled in cinnamon sugar, this recipe brings the best of the farmers’ market right to your kitchen.
Capturing the Flavors of Fall
The last couple of weeks: Full of visitors, mostly conversation, and good food too. The three always happen to coincide, don’t they?
Earnest walks, feet pounding pavement to the tune of miles of city blocks, great big swathes of condensation disappearing into the air as we talk, scarves up to our ears, gloved hands stuffed into pockets. The cold is omnipotent and inescapable.
The couch served double-duty as a bed, throws unfolded and refolded, and finally heaped together over the rip in the couch. Towels bunched up on the rack, foreign toothbrushes and contacts, and creams on the counter.
Squished together like sardines around the table. Plates and bowls cycled over and over. Coffee and coffee and coffee and coffee. The twice-daily sauna turns us into captives of the heat, shedding layers as if on cue as the radiator whistles on.

And then there was Thanksgiving…
And then there was Thanksgiving. I can’t even think about it. So much food. My role as the preparer of brussels sprouts, though, thankfully, not much else. Watching as the guys prepared the turkey, standing on tiptoes with my cameraphone poised above the headless carcass.
It was salted, backbone cut out, pushed down hard until its breastbone cracked. Piercing it with a meat thermometer a million and one times, unsure why its internal body temperature kept vacillating. As a result, dry white meat but done in 90 minutes.
For dessert, a pumpkin pie. There was also homemade cinnamon ice cream—thanks, Alanna, for implanting the idea in my mind! It tasted just like Cinnamon Toast Crunch.
Discovering the Perfect Apple Cider Doughnut
The return to normalcy. Decompression. Time once again ours. Sleeping in and in and in. Leftovers. Sitting on the couch, which was once again a couch, and streaming Breaking Bad until Walt started getting annoying.
Christmas tree shops set up on street corners, and wreaths, big ones and decorated ones and plain ones too. I cracked open my computer for the first time in what felt like weeks. Black Friday emails are days late, but overflowing my inbox nonetheless. I also ate my first apple cider doughnut.
And then I had to make them.
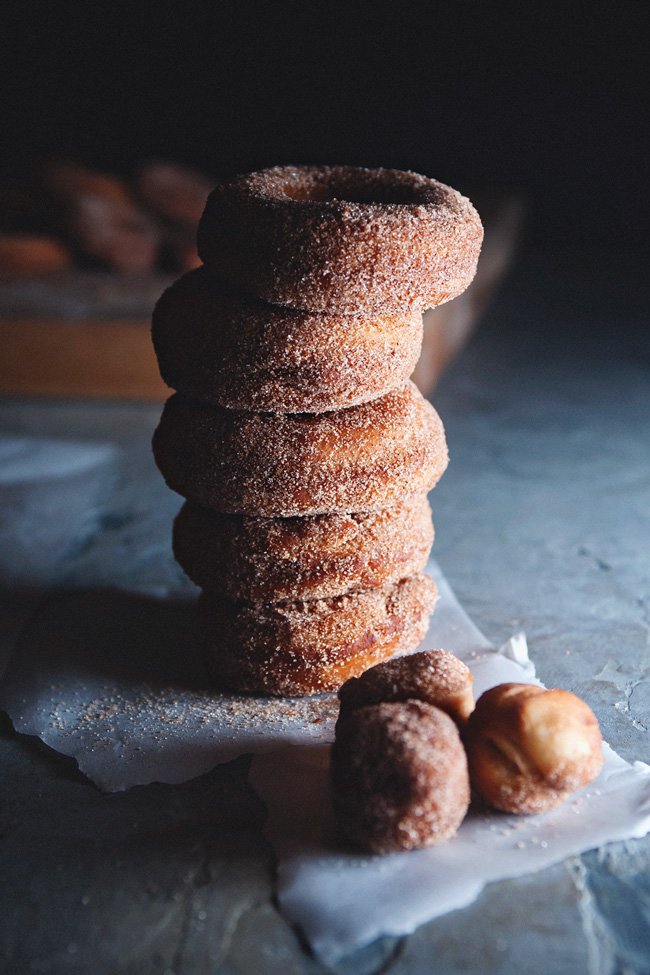
Because what I ate was cushiony and soft, full of air pockets, a real treat for gluten-vores. It was also heady with autumn spices and dusted with coarse sugar, really underscoring the apple cider flavor just like they should. In short, it was completely unlike anything I’d expected, and it was amazing.
Yeast vs. Cake Doughnuts: Why Yeast Wins
I’m not usually a fan of cake doughnuts. In fact, I’m not sure the doughnut I had on Saturday was a cake doughnut – it was far too luscious and fluffy. But I love anything apple cider flavored, so I decided to make my own version with yeast.
This recipe is close. It’s not fluffy enough in my opinion, but then again, I wonder if the doughnut of my dreams is exactly that: not real. Nevertheless, there’s something really exciting about making doughnuts at home (another one of those look-what-I-made! foods), and these taste delicious when they’re fresh out of the, um, fryer?
Is that what you call your pot when you’re using it for deep-frying? Not every person is ready to spend a lot of money at an online casino, and it is okay. For those of you who want to play slot machines with a small deposit, our friends from Fancasinos.com have created a rating of minimum deposit casinos in 2023. People are able to play there with $10 and get a bonus.
Tips for Frying Homemade Doughnuts
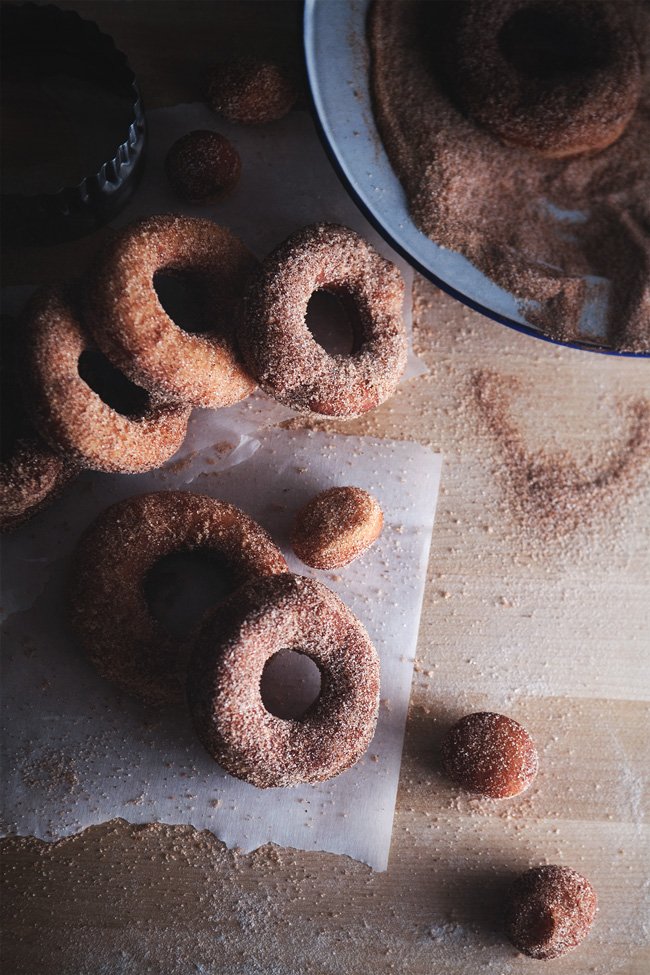
Monitor the Heat: Use a candy thermometer to keep oil at 360°F.
Don’t Overcrowd: Fry 2-3 doughnuts at a time to maintain oil temperature.
The Flip: Use chopsticks for an easy, gentle flip.
YEASTED APPLE CIDER DOUGHNUTS
Makes 12 doughnuts plus 12+ doughnut holes
Adapted from Chow
Ingredients:
- 2-1/2 cups all-purpose flour, plus extra for rolling out
- 1-1/2 tsp ground cinnamon
- 1/2 tsp freshly grated nutmeg
- 1/2 tsp fine salt
- 2-1/4 tsp active dry yeast
- 1/4 cup plus 1 tsp granulated sugar
- 3/4 cup apple cider
- 2 large egg yolks
- 1 Tsp vegetable oil
- 1 tsp vanilla extract
- 1 Tsp unsalted butter, room temperature
Neutral oil for frying
1/2 cup sugar (optional)
1 Tbsp ground cinnamon (optional)
Directions:
Whisk the flour, cinnamon, nutmeg, and salt in a large bowl to combine, and set aside.
In a medium bowl, mix the yeast and 1 tsp of sugar. Heat 1/2 cup of the apple cider until it’s warm but not hot, and add it to the yeast mixture. Stir to combine. Let it sit until it’s foamy, about 5 minutes.
Then, add the remaining 1/4 cup sugar, remaining 1/4 cup apple cider, egg yolks, oil, and vanilla and whisk to combine. Add this mixture to the flour mixture and stir with a wooden spoon until the dough comes together and begins to form a ball.
Transfer the dough to a lightly floured work surface. Scatter the butter pieces over the dough and knead until the butter is fully incorporated and the dough is smooth and elastic, about 6 to 8 minutes. You might need to add up to 1/4 cup of additional flour to keep the dough from being too sticky.
Oil the sides of a large bowl. Form the dough into a ball, and place it in, turning to coat. Cover the bowl and let the dough rise in a warm place until doubled in size, about 2 hours.
Line a baking sheet with parchment paper. Punch down the dough, transfer it to a lightly floured work surface, and roll it out until it’s about 1/2 inch thick. Using a 3-inch round cutter, stamp out as many dough rounds as you can.
Use a 1-inch round cutter to make the inner hole (or, in my case, an icing tip that was about 1.5″ in diameter) and place the doughnuts and doughnut holes on the prepared baking sheet. Gather the dough scraps and repeat.
Discard any remaining dough scraps. Cover the doughnuts and let them proof until they’re about 3/4 inches in height, 30 minutes to an hour.
Fill a heavy-bottomed pot with about 2 inches of neutral oil. Clap a candy thermometer on the side. Heat the oil on medium heat until it reaches 360°F.
It should take a little while, so in the meantime, prepare a rack where the doughnuts will drain by laying over it a few sheets of paper towels. If you’re planning on topping the doughnuts, prepare the cinnamon sugar in a large plate and set it close by.
Once the oil is ready, add the first doughnut. Fry until golden brown, about 30 seconds, then flip it over (I used chopsticks). Add the second doughnut and repeat. Move the first one to the rack when it’s ready, and continue frying the rest.
I was able to balance frying three at a time. Once the doughnut has cooled a little, dip it in the cinnamon sugar until it’s generously covered. Move on to the doughnut holes.
Related Posts
Subscribe for New Racipies
Get mental health tips, updates, and resources delivered to your inbox.