
Preserved Lemons, A Work In Progress

Medically reviewed by Christiana George Updated Date: June 8, 2023
I don’t have a recipe to share, just the beginnings of a process. While I’m mostly there in muscle work, the wait has just begun.
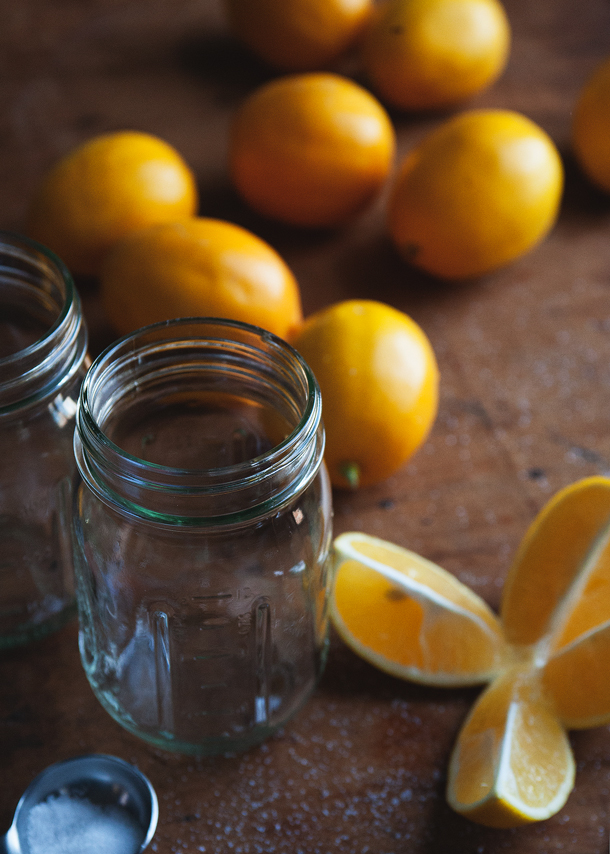
The story starts with ten Meyer lemons, four of which are present in the shots below. They were gifts from my sister, who gave them to me, freshly purchased from the farmer’s market, right before Chris and I left for the airport. The precious bundle became part of my check-in baggage, wedged carefully under the seat ahead of me much to the amusement of the passenger to my left. Clearly he didn’t realize they weren’t ordinary lemons.
For days, I contemplated what I would make, all the endless possibilities, but my mind had already made itself up. It was going to be preserved lemons. I’d been thinking about making my own for awhile, but my hangup has always been the fact that the jar would be sitting on the counter at room temperature for days. Doesn’t botulism develop under such conditions?
But how exactly does botulism develop in a jarful of acid and salt? Reason conquered dramatics. Plus, I sterilized my jar.
So, without further ado, a free form how-to on making preserved lemons, gleaned from multiple sources (but I like the pictures here the best.)

You start with a sterilized jar (I’m not sure how necessary this step is, but do it just to be safe) and however many of these babies you think will fit in it snugly. (I ended up misjudging, thinking I could fit four lemons in a 12-oz. mason jar when it only fit three. But my lemons were huge.) Make sure to scrub them very very well, because the peel is what you’ll be eating.

Chop off the tops, then slice each lemon into four segments…

… stopping a little short of the end so that they’re still attached.

Then, using non-iodized salt (iodized imparts an unpleasant taste), stuff each lemon with about 1 Tbsp of salt. Rub the salt all over (but watch those tiny paper cuts and hangnails as they will sting!), jam it in.

Cover the bottom of the jar with a layer of salt, and then squelch a lemon in. Push it in hard, so that the juices squirt out.

Between lemons, add more salt, and spices if you decide to use them (some choices include whole black peppercorns, cinnamon sticks, dried bay leaves, cloves, coriander seeds). I would spice sparingly.

In the end, I managed to fit three lemons in the jar very snugly. (I considered preparing a second jar, since I’d already prepared a fourth lemon, but in case the jarring doesn’t go well, I’d like to have lemons left over to make other delicious things with.) And they were very juicy, so I was able to cover the lemons with the juice. If the wedges are not covered, squeeze in more juice until it covers the wedges. Make sure there’s some air space left behind (I’m afraid my jar is too full, but let’s see, shall we?).

Screw on the lid, and you’re done!
Now, The Wait. Leave the jar on the counter for the next few days, giving it a shake every now and then to distribute the salt and juices. Transfer the jar to the fridge and let it sit another month or so. Give it a shake every now and then.
Alright, in true journalistic fashion (this is very serious reportage here), I’ll report on the progress of my preserved lemons every week or so and give you guys an update. (This is kind of like a reality show, isn’t it?) And when they’re finally ready… well, those tantalizing thoughts are best buried in the back of the mind, but I’ll be featuring recipes here, that’s for sure!
Related Posts


Subscribe for New Racipies
Get mental health tips, updates, and resources delivered to your inbox.
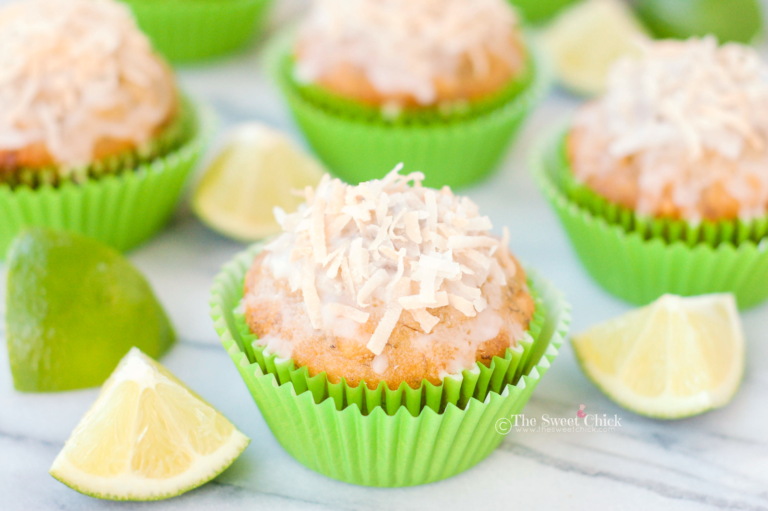
Coconut Banana Muffins


In between all the rain showers, we have had some pretty nice days. This past Sunday was one of them. My husband and I actually took the kids to our community pool. They have been begging to go since it opened April 1. Only the neighborhood kids ventured out into the not so warm water. The adults were all lounging around in the hot sun. I am looking forward to some summer weather. For now, I will have to do with some summer inspired treats. These Coconut Banana Muffins with Tequila Lime Glaze fit the bill perfectly.

As you can see, these have the same makings as most of my muffins. I just swapped out a few of the flavors.
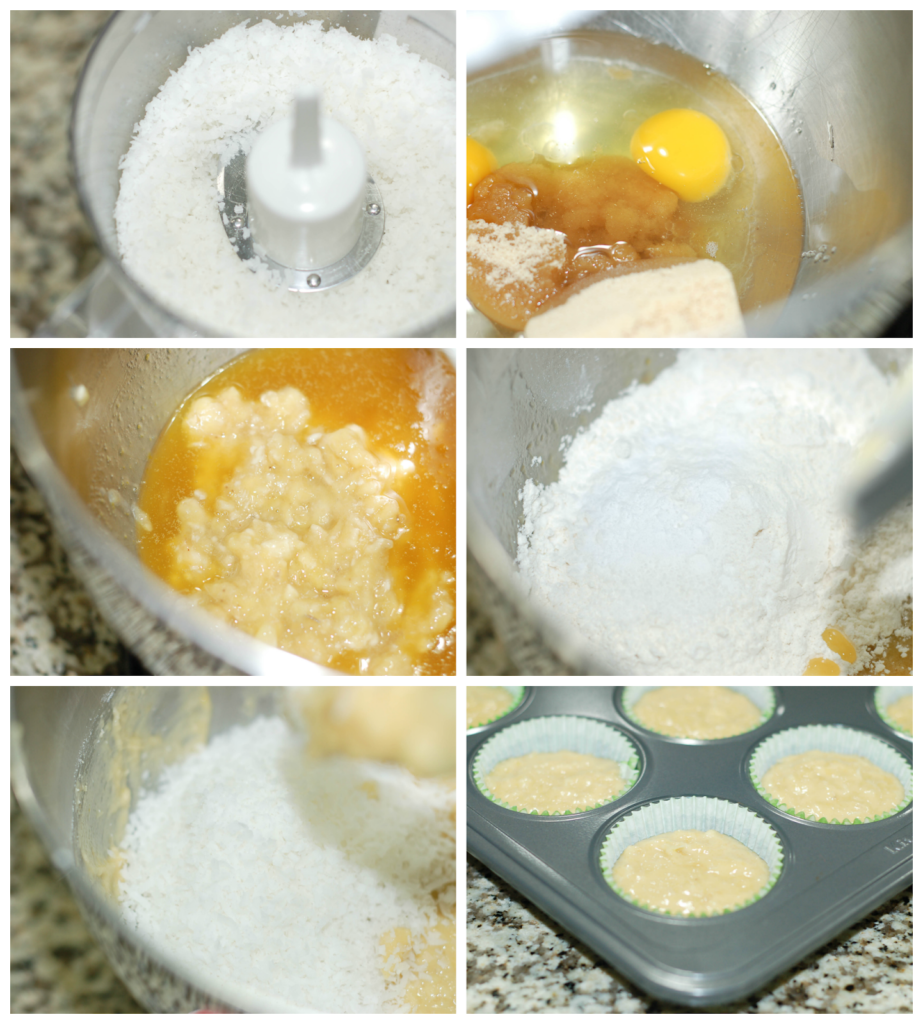
I know not everyone likes the texture of shredded coconut, so I pulsed it a few times in the food processor to get smaller pieces. I just loved how well these muffins rise. They are always light and fluffy.

When I was taste testing the glaze, it was pretty strong. However, it ends up soaking into the muffins and the tequila taste mostly goes away. I actually ended up double glazing mine because I forgot to have the toasted coconut ready before the first layer of glaze set. The toasted coconut flakes added more flavor and a bit of crunch.

These Coconut Banana Muffins came out moist and full of coconut flavor, without being dense or overly sweet. The Tequila Lime Glaze added a little tang to balance the sweetness of the coconut. If you just want to add a lime glaze, you could just replace the tequila with water.

Just looking at these muffins has got me thinking of summer; sitting by the pool with a margarita in hand. Oh yeah, baby! I am ready. Are you? Perhaps you should make some muffins to get you going.
Coconut Banana Muffins
by The Sweet Chick
Prep Time: 15 minutes
Cook Time: 15 minutes
Keywords: bake bread breakfast dessert snack coconut coconut oil banana tequila Cinco de Mayo muffins bread American spring summer
Ingredients (12 muffins)
For the muffins
- 2/3 cups light brown sugar
- 1/2 cup coconut oil, melted
- 2 eggs, room temperature
- 1 teaspoon imitation coconut extract
- 2 medium bananas, mashed
- 1 2/3 cups all purpose flour
- 1 teaspoon baking soda
- 1/2 teaspoon salt
- 1 cup sweetened coconut flakes
For the glaze
- 1 cup powdered sugar
- 1 tablespoon fresh lime juice
- 1 tablespoon tequila
- 1 teaspoon water
Optional toppings
- sprinkles
- toasted coconut flakes
Instructions
For the muffins
Preheat oven to 375ºF.
Place solid coconut oil in a microwave safe bowl and microwave for about 20 seconds until melted.
In a stand mixer bowl add sugar, oil, eggs, and coconut extract. Mix on low speed until completely blended.
Then add mashed bananas and mix until smooth.
Next add in the flour, baking soda, and salt. Mix until well blended.
Lastly, add the shredded coconut to the mixer bowl and mix on low until completely incorporated.
Spoon batter into greased/lined muffin tins until about 3/4 full.
Bake at 375ºF for 15 minutes or until toothpick inserted in center comes out clean.
Remove from oven and place on cooling rack. Cool completely before adding glaze.
For the glaze
In a small bowl, whisk together the powdered sugar, lime juice, tequila, and water until smooth.
Brush the glaze over the tops of the muffins.
Let the glaze set.
For the optional toppings
If you add sprinkles or toasted coconut flakes to the tops of the muffins, do so before the glaze sets.
Notes
To make toasted coconut flakes, lay out 1/2 – 1 cup of sweetened coconut flakes on a parchment lined cookie sheet and bake at 325°F for about 10 minutes or until golden brown, stirring them around half way through. Let the toasted coconut flakes cool before adding to the muffins. You can keep any extra flakes in an air tight container and use it over ice cream, waffles, etc.
If you do not want to add tequila to the glaze, simply replace the quantity with water.
If you want to add more glaze, let one layer of glaze set before brushing on another.
Related Posts


Subscribe for New Racipies
Get mental health tips, updates, and resources delivered to your inbox.