
Apricot Raspberry Galette, Or Look What I Made!

Medically reviewed by Christiana George Updated Date: January 7, 2026
Under Elisabeth Prueitt’s tutelage, I feel invincible.
She’s the co-founder of Tartine Bakery in San Francisco, head pastry chef, and, purveyor of all things baked and sweet and wonderful. Along with her husband Chad Robertson, they’ve turned Tartine into something of an institution. This is a widely-acknowledged fact. Even if institutions are generally quite a bit older than the 10 years that this bakery’s been around. Anyway, I’m sure many of you savvy cooks and bakers have heard of it, so I won’t wax any more poetic except to say that the almond croissants are SO SO good.
Instead, I meant to give you a recipe for an apricot raspberry galette.

I’ve always been charmed by galettes; they’re so endearing and sweet, homely little things brimming with the fresh and organic. At the same time, I’ve always been intimidated by the idea of making the crust—tart doughs seem such fickle things. So in undertaking this recipe, I knew that I wanted to turn to Prueitt’s cookbook Tartine… she’s never led me astray, you see.
She describes galettes as “quintessentially beautiful rustic tarts… they are very satisfying to make.” I wanted to grasp satisfying! More than that, I wanted to feel the gratification that comes from sinking my teeth into something substantial. I wanted to feel the flour and butter between my fingers, build something lovely and wholesome completely out of scratch. The process of baking, of creating really, is never as palpable as when you’re getting your hands (and in my case, feet) dirty, smearing butter everywhere, flexing those arm muscles rolling and lifting and pleating. It’s a rewarding feeling.
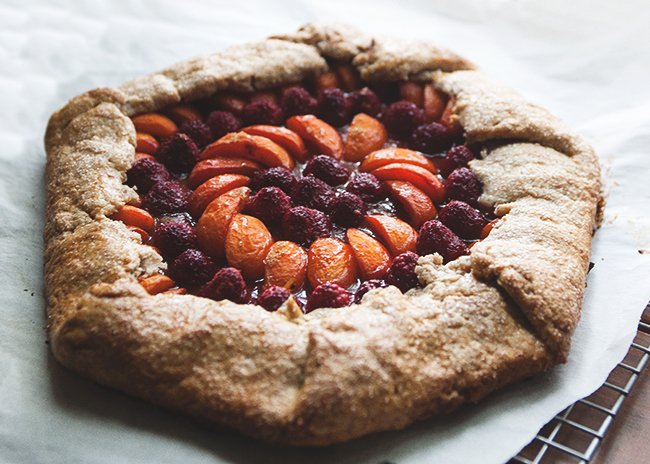
So I took out the rolling pin—we don’t see much of it these days—and began the painstaking process of flattening frozen butter into long thin strips in flour. Which came together into something that resembled dough. Which came together into something that resembled a free-formed tart. And when it came out of the oven, I was astonished to find a galette. It came out rustic indeed. Seven-sided, lopsided, shriveled fruit and all, I loved it upon sight. Because I’d made it from scratch.


APRICOT RASPBERRY GALETTE
Fruit Galette recipe in Tartine by Elisabeth Prueitt & Chad Robertson
Makes 1 large galette or 6 mini galettes
Ingredients:
For dough:
1 cup (2 sticks) unsalted butter, very cold
1/2 cup water
3/4 tsp salt
1 cup rye flour
1-1/2 cups all-purpose flour (or use all all-purpose if you’d like)
For filling:
3 cups fruit (berries, stone fruit, sauteed apples or pears, etc.)
2 to 4 Tbsp brown or granulated sugar
Lemon juice if needed
Egg wash:
1 large egg yolk
1 Tbsp heavy cream
Granulated sugar for sprinkling
Directions:
Cut the butter into 1-inch cubes and put them in the freezer. Measure the water, dissolve the salt into it, and put it into the freezer. Chill both the butter and the water for about 10 minutes.
Measure the flour onto your work surface and spread it into a rectangle about 1/3 inch deep. Don’t worry about mixing it, as it’ll get mixed in the process. Scatter the butter cubes over the flour and toss some flour over them so they don’t stick to your rolling pin. Begin rolling. When the butter starts flattening into long, thin strips, use a bench scraper to scoop up the sides so it’s about the same size as when you started. Repeat this rolling and scraping 3 to 4 more times.
Make a well in the center and pour in the cold water. With the bench scraper, scoop the sides of the dough into the center, mixing the water and flour in a cutting motion. Keep scraping and cutting until the dough is shaggy, then shape it into a rectangle about 10 by 7 inches. Dust the top lightly with flour. Roll out the flour until it’s about half as thin, then scrape all four sides back to its original shape and reroll. Repeat this a few more times until your dough is smooth, cohesive. You should end up with a 10 by 7 inch rectangle.
Transfer the dough to a large baking sheet, cover it with plastic wrap, and chill for about 1 hour.
While the dough is chilling, prepare your fruit. Peaches can be sliced into eighths, apricots quartered.
When the dough is chilled, you can divide it into six equal parts at this point. Roll the dough into a rough circle of about 14 inches in diameter if making a single galette or 6 to 7 inches if making mini galettes. (Prueitt gives lengthy instructions on how to do this, but for the sake of not being too fussy, I won’t go into details) Transfer the circle/s to a baking sheet and chill about 10 minutes.
Fill the center of each circle with fruit, leaving a 2-inch border if making a large galette, or a 1-inch border if making small. At this point, taste the fruit to decide how much sugar you want to sprinkle on top, anywhere from 2 to 4 Tbsp on the large galette or 1 to 2 tsp on each small galette. If you want, squeeze some lemon juice on top. Fold in the sides into that classically gorgeous galette shape, making sure to seal crevices where the juice can leak out. Chill for about 10 minutes, and start preheating the oven at 375 degrees F.
At this point, Prueitt says you can store them in the fridge, unwrapped, for a few hours or wrap them airtight and store them in the freezer for up to 2 weeks. Otherwise, make your egg wash by whisking together the cream and egg yolks. Brush the egg wash on the pastry edges and sprinkle them with granulated sugar.
Bake the galettes until the crust has visibly puffed and baked to a dark brown and the fruit juices are bubbling, 45 to 60 minutes for the large galette and 40 to 50 minutes for the small. Rotate halfway through for even browning. (If baking them straight from the freezer, tack on about 10 minutes to the baking time.) Remove from the oven and serve immediately, or let it cool and serve warm or at room temperature.
Related Posts





Subscribe for New Racipies
Get mental health tips, updates, and resources delivered to your inbox.
Grandma Old Fashioned Sweet Potato Pie Recipe

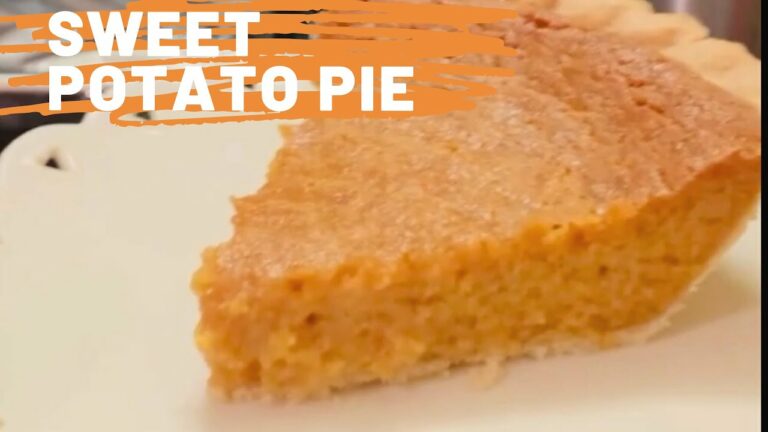
Few things conjure up feelings of warmth and nostalgia like an Old Fashioned Sweet Potato Pie, a classic favorite that has been cherished in family gatherings for generations. This delicious dessert often brings to mind cozy family dinners, laughter around the table, and stories from the past.
What if you could recreate this mouthwatering delight, just like grandma used to make? Today, we’re going to do just that! This article will introduce you to Grandma’s old-fashioned sweet potato pie recipe that will bring you back to those beautiful memories of yesteryears.
Grandma’s Recipe
A Culinary Journey into the Past: We know that the best recipes are those that have stood the test of time, and grandma’s old-fashioned sweet potato pie is a shining example. This delicacy is not just a pie; it’s a narrative of generations, woven with love, warmth, and of course, unbeatable flavors.
How Sweet Potato Pie Became a Classic?
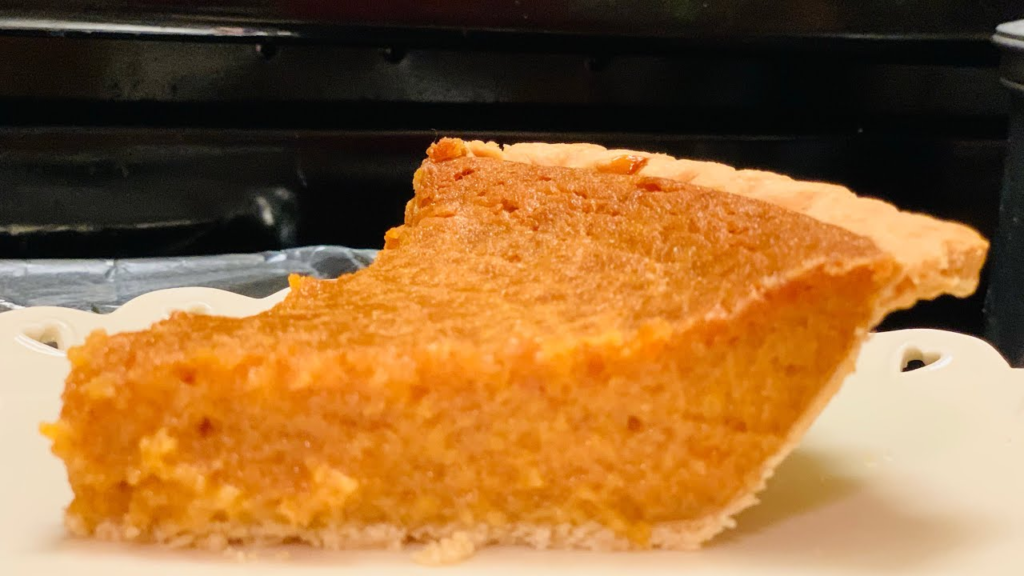
Sweet potato pie is a Southern delicacy that has been loved for centuries. It’s believed to have originated from African-American culture during the era of slavery, as an alternative to the European-style pumpkin pie. Over the years, it has become a favorite, especially during holidays like Thanksgiving and Christmas. Grandma’s old-fashioned sweet potato pie recipe is a testament to this culinary tradition.
How to Make Grandma’s Old Fashioned Sweet Potato Pie?
Creating this nostalgic treat is a labor of love, as it involves careful preparation and attention to detail. Here’s a step-by-step guide to making your own old-fashioned sweet potato pie, inspired by grandma’s recipe.
Ingredients:
- 2 cups mashed sweet potatoes (about 3-4 medium-sized sweet potatoes)
- 1 cup granulated sugar
- 1/2 cup unsalted butter, melted
- 1/2 cup milk
- 2 large eggs
- 1 teaspoon vanilla extract
- 1/2 teaspoon ground cinnamon
- 1/4 teaspoon ground nutmeg
- 1/4 teaspoon salt
- 1 unbaked 9-inch pie crust
For the whipped cream (optional):
- 1 cup heavy cream
- 2 tablespoons powdered sugar
- 1/2 teaspoon vanilla extract
Instructions:
- Preheat your oven to 350°F (175°C).
- Peel the sweet potatoes and cut them into chunks. Place them in a large pot of boiling water and cook until tender, about 15-20 minutes. Drain the sweet potatoes and mash them using a potato masher or fork until smooth. Let them cool for a few minutes.
- In a large mixing bowl, combine the mashed sweet potatoes, sugar, melted butter, milk, eggs, vanilla extract, cinnamon, nutmeg, and salt. Stir well until all the ingredients are fully combined and the mixture is smooth.
- Place the unbaked pie crust in a 9-inch pie dish. Pour the sweet potato mixture into the pie crust, smoothing the top with a spatula or the back of a spoon.
- Bake the pie in the preheated oven for about 55-60 minutes or until the center is set and the pie is golden brown. You can test for doneness by inserting a toothpick into the center of the pie – if it comes out clean, the pie is ready.
- Remove the pie from the oven and let it cool completely on a wire rack. Once cooled, refrigerate for a few hours or overnight to allow the flavors to meld together.
- If desired, prepare the whipped cream. In a chilled bowl, beat the heavy cream, powdered sugar, and vanilla extract together using an electric mixer on medium-high speed until soft peaks form.
- Serve the sweet potato pie chilled or at room temperature, topped with a dollop of whipped cream if desired. Enjoy your grandma’s old-fashioned sweet potato pie!
Note: This recipe is for a single 9-inch pie. If you want to make multiple pies, you can adjust the ingredient quantities accordingly.
Conclusion
There you have it, Grandma’s old-fashioned sweet potato pie recipe! This isn’t just any dessert—it’s a piece of history, a comforting treat that carries the flavors of love, tradition, and nostalgia. Whether you’re a novice baker or a seasoned chef, this recipe will help you create a timeless delicacy that is sure to impress. From the aroma that fills your kitchen to the sweet, rich taste in every bite, you’ll see why this pie has been a cherished dessert for generations.
Remember, like any traditional recipe, you can add your own touch to this old-fashioned sweet potato pie. Maybe you’ll even start a new family tradition. We’d love to hear about your experience and how you made this recipe your own. So, put on your apron and get ready to enjoy the taste of tradition—happy baking!
Related Posts





Subscribe for New Racipies
Get mental health tips, updates, and resources delivered to your inbox.