
Korean Fried Chicken

Medically reviewed by Christiana George Updated Date: January 2, 2026
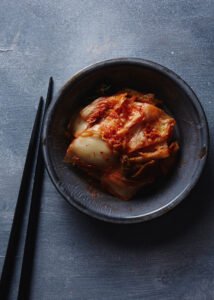
I have had the most incredible hankering for Korean food recently. I can’t explain it, except that this current weather makes me want to cuddle up with a bowl of soondubu and freshly cooked rice, made in a stone pot of course. I also just recently discovered Maangchi, who is just about the cutest woman alive other than my mom. They remind me an awful lot of each other actually.
Maangchi doesn’t do anything in half measures, meaning everything she cooks is in huge quantities. She whips out 10 pounds of kimchi at a time, fries huge basins of japchae. I can’t imagine the number of people she cooks for, but in the case of the recipe I’m sharing today, she deep-fried three pounds of chicken wings. For Chris and me, two to three wings/drumettes each, so maybe half a pound of chicken total, is sufficient. Although maybe we’re just light eaters. It’s hard to say.
But hold it! I’m misleading you, aren’t I? I actually didn’t end up following Maangchi’s recipe. It was pretty good, but I found that I preferred Saveur’s version better. The two taste totally different; I just found her version to be a bit cloying. (Also, I don’t understand why corn syrup seems to end up in a lot of Korean dishes—is it a common ingredient? And why?)

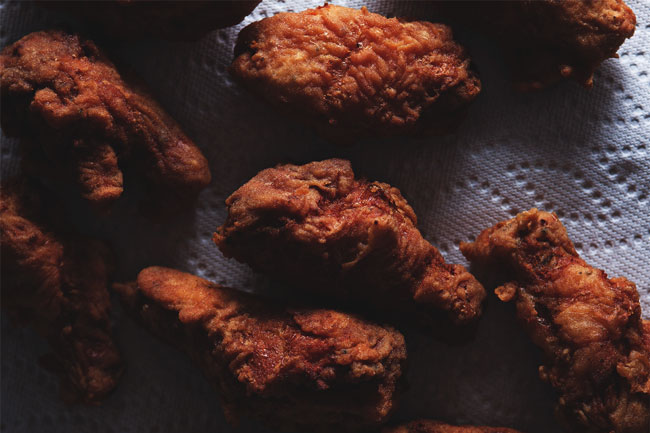
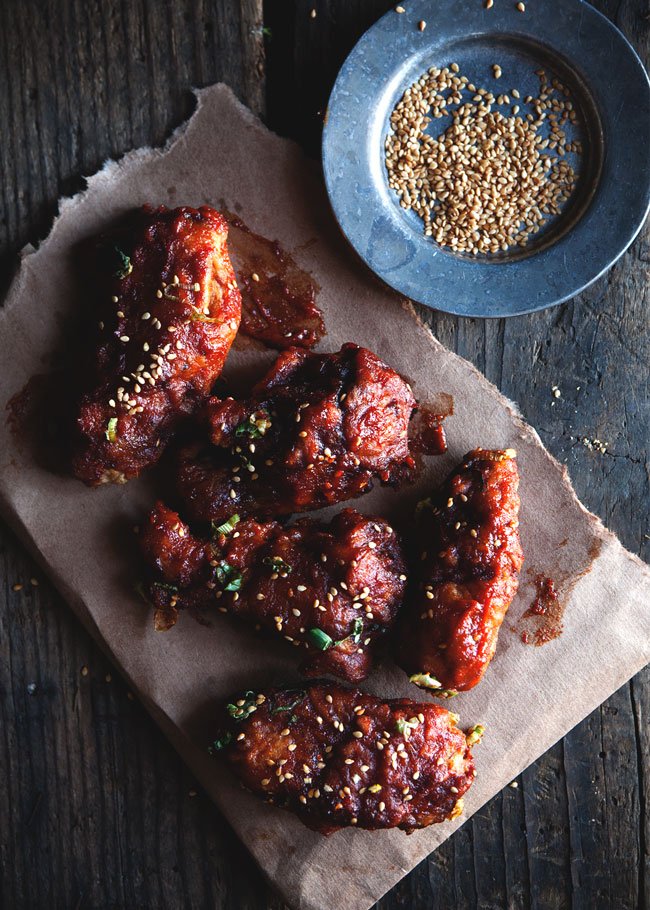
What the two versions have in common—and what makes Korean fried chicken so dang addictive—is that the chicken is fried twice. This results in a Seriously Crispy Crust. It’s the difference between a weak handshake and a firm one, sallow and sturdy. A robust crust, if you will. I think it’s dead simple and pretty genius. (The only downside is that you have to withstand being barraged by oil twice as long. Actually, come to think of it, that’s a pretty big downside. Deep-frying is freaky. Make sure you wear long sleeves. And gloves. And clear everything away around the perimeter of the pot because it’s going to get dirty.) And then you smother it in a hot-garlicky-mouth-puckering sauce and away you go!
(On an unrelated note, if you follow me on Instagram, you might know that I was in California last week, where I got to meet the newest generation of the Anderson clan, aka Chris’s brother’s four-and-a-half month old son and our nephew! I get a little giddy calling him this, because it didn’t really occur to me that he WAS related to me until Chris’s sister-in-law [which makes her my sister-in-law?] called me Aunt Linda. Aunt Linda! That’s so exciting! And now that I’ve seen him and fallen in love, I want to buy him things like this onesie. What do you think? Isn’t it adorable?? [Now my mom thinks I want to start popping them out. Ha. Ha ha ha. Sorry Mom. You’ll have to give me time.])

KOREAN FRIED CHICKEN (aka KFC)
From Saveur
Makes 16 pieces
Ingredients:
- 5 cloves garlic, chopped
- 1 (1.5″) piece peeled ginger, chopped
- 3 Tbsp soy sauce
- 3 Tbsp gochujang
- 1.5 Tbsp rice vinegar
- 1 Tbsp Asian sesame oil
- 1 Tbsp honey
- 2/3 cup flour
- 1 Tbsp cornstarch
- 2/3 cup water
- 16 chicken wingettes/drumettes (from 8 chicken wings)
- Canola oil, for frying
- Sesame seeds and chopped green onions for topping
Directions:
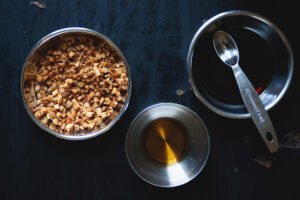
Make the sauce: process the garlic, ginger, soy sauce, gochujang, rice vinegar, sesame oil, and honey with a food processor/immesion blender until blended (or mince the garlic and ginger and whisk the ingredients together by hand).
For the chicken: in a bowl, whisk the flour, corn starch, and water. Add the chicken and toss. In a medium-sized heavy-bottomed pot, pour about 2 inches of oil. Clip a candy thermometer onto the side of the pot and heat the oil until it reaches a temperature of 350 degrees F. Add the chicken pieces gently, but don’t crowd the pot; you’ll have to work in two or three batches. Fry chicken until golden, about 6 to 8 minutes. Drain on paper towels. Reheat the oil to 350 degrees and fry chicken again until crisp and medium brown, 6 to 8 minutes. Drain.
In a large bowl, toss the chicken pieces with the sauce, top with sesame seeds and green onions if using, and serve. With lots of napkins.
Related Posts


Subscribe for New Racipies
Get mental health tips, updates, and resources delivered to your inbox.
Black Sesame Bread

Guys, I’ve been meaning announce this for almost two weeks now: my blog just celebrated its first anniversary! For the occasion, I’d actually made a cake, four layers of chocolate wedged with peanut butter mousse in between, but it turned out to be an absolute dud, so I made another one. Again, I was not impressed. While third time’s usually the charm, I’d lost patience with cake-making (which happened to coincide perfectly with the fact that the weather started heating up) so I gave up and racked my brain for other ways to commemorate the occasion.
…And then two weeks passed.
Whoops. But the fact still remains the same: this blog is now over a year old. Whoa.
Thinking back on last summer, I still remember how hellish it felt at times with the combination of the weather and the oven/stove on and the lack of air conditioner/ventilation and our tight living quarters, but those are memories I prefer to repress most of the time because they’re painful to think back on. I guess I was just a woman possessed, taken over with such a fervor towards my new pasttime that all hardships could be ignored, or at least, soothed over with the discovery of how beautifully food could be photographed. In short, I’d never felt so passionate about anything in my life. I was completely smitten.
A year later, and that enthusiasm has settled to more manageable levels. From my perspective now, I prefer this more balanced lifestyle—hell, I finally have time to hang out with friends and get out into the city more, which is totally healthy, right? It seems unimaginable now to willingly choose that boot camp all over again. But it was pretty crucial, those months, kind of like nursing a young one past infancy (in a small, small way). I’m still in love, but it’s a more sustainable kind of love, one that’s not going to take over my life or burn me (literally).
I wanted to tell you how thankful I am for this little web space of mine, and all the wonderful people I’ve met over the year and had the chance to work with. I’ve also really appreciated all the kind comments I’ve received. You’ve all been tremendously encouraging. Thank you. I can’t wait to see where I am a year from now.
Now let’s talk about this bread. Have you ever heard of the tangzhong method? I ate a lot of Chinese bakery bread growing up, and all the rolls and loaves we bought, a), always gave off a really distinctive smell I couldn’t explain, and b), were always soft, moist, and incredibly tender, and pulled apart in silky, glutinous strands. You could basically gorge on the stuff because it was light and fluffy and completely addicting.
The tangzhong method produces that kind of bread. What? You want me to explain? Okay, basically, you make a paste, called the tangzhong, that consists of water and flour that’s been heated over a stove until the flour does its thickening thing and turns the whole mixture pudding-like. This is because the flour has trapped the moisture from the water (I imagine amoeboid action going on here), thereby producing the moistness and softness and all the aforementioned attributes I described. It’s pretty scientific, isn’t it? But seemingly foolproof, and so much easier than I’d imagined.
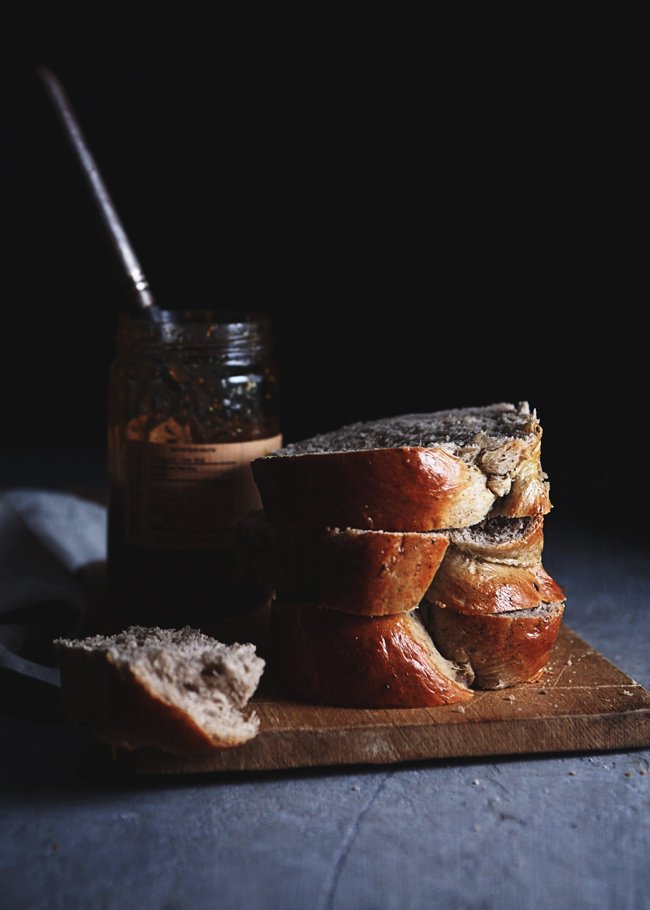
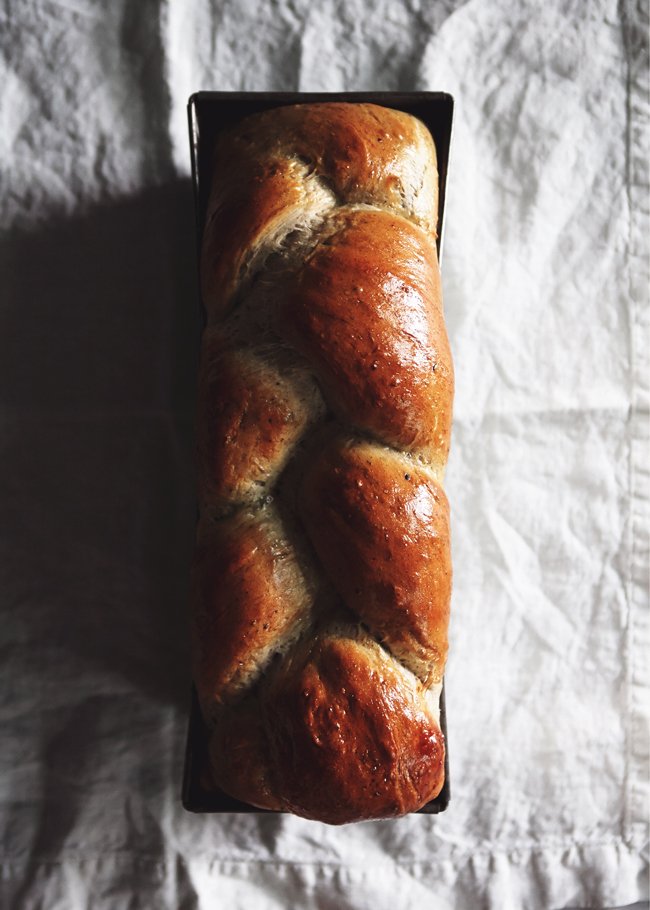
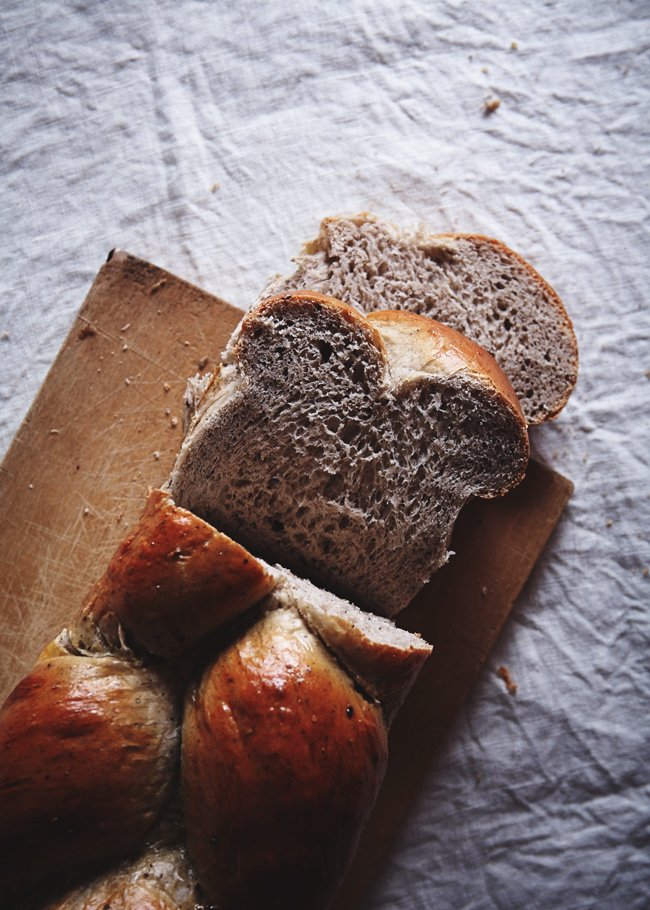
I finally got around to trying this method, and the results were amazing. The first thing I noticed when I took the loaf out of the oven was how, well, distinct it smelled, like I’d somehow bottled the Chinese bakery scent and unleashed it in my kitchen. That alone, funnily enough, would’ve made the whole experience worth it. But the loaf itself was beautiful, all glazed and golden brown, and springing with gluten-y goodness. And when I finally cut it open, what appeared were the silky, sticky strands (not an oxymoron) and effervescent pockets of air. The bread was colored a purplish-gray due to the black sesame seeds, and it was lovely.
Finally, I got around to tasting the stuff, and yes yes yes, it was soft and tender and delicious, and Chris and I and his dad (his parents are visiting this week) somehow managed to eat almost the entire loaf over the weekend. All in all, I’d reproduced Chinese bakery bread at home!
If you can’t tell, I haven’t felt this exhilarated in awhile. Actually, scratch that, last last week’s homemade farfalle made me feel the same way. There’s just something about making from scratch things you would normally buy, like marshmallows, cheese, ice cream, and preserved lemons (although I have yet to use them, oops), that I find most rewarding.
One year ago: (I’ve really been looking forward to doing this!) Quinoa with corn, mint, and scallions
BLACK SESAME BREAD
Adapted from many sources, including The Fresh Loaf and Maameemoomoo
Makes 1 loaf
Ingredients:
For the tangzhong:
- 1/3 cup all-purpose flour
- 2/3 cup water
- 1/3 cup milk
For the bread:
- 1/2 cup milk + 1 Tbsp, lukewarm
- 2 tsp active dry yeast
- 3 cups all-purpose flour
- 1/4 cup sugar
- 1 tsp salt
- 1 large egg
- 2 to 3 Tbsp black sesame powder
- 1/2 the tangzhong which comes out to 1/2 cup (refrigerate the other half—it’ll keep for a few days. Or, halve the tangzhong or double the bread)
- 3 Tbsp butter, softened and cut into pieces
- 1 egg for the egg wash
Directions:
First, make the tangzhong:
Whisk the ingredients together in a small saucepan and cook at medium-low heat, stirring constantly. After a couple minutes, the mixture will start thickening. When it’s uniformly thickened to about the consistency of pudding, remove the saucepan from the heat and let the tangzhong cool. You can use it right away or keep it in the fridge for a few days.
For the bread:
In the bowl of your stand mixer, add the milk, yeast, and a pinch of sugar. After about 10 minutes, the pool should be bubbly, meaning the yeast is ready to go. Add the rest of the ingredients except for the butter, and, using the dough hook, start mixing on medium-high. When the ingredients are reasonably combined, add the butter in pieces until it’s smoothly incorporated. Continue mixing on medium-high for about 20 minutes until the dough is not so sticky that you can’t manage it with your hands. Turn off the mixer, cover the dough with a towel, and let it rise until it’s doubled in size, about 1 hour.
On a floured surface, cut the dough into three equal-sized balls. Roll them into long ropes and press the ropes together at one end. Braid the ropes. Once you’ve reached the other end, press the dough together and tuck both ends under the braid. Place the braided dough into a loaf pan so it fits comfortably, then cover and let it rise for another 30 minutes or so.
At this point, you can brush the top of the dough with an egg wash. Beat the egg and brush.
Preheat your oven to 350 degrees F. Put the loaf in the oven and bake for about 20 minutes until it’s golden brown. Let it cool before removing the loaf from the pan.
Related Posts


Subscribe for New Racipies
Get mental health tips, updates, and resources delivered to your inbox.