
Shakshuka

Medically reviewed by Christiana George Updated Date: June 8, 2023

Hi guys! Quick post today so I can tell you about my latest obsession: shakshuka. It’s kind of a round-the-clock dish, just as appropriate for breakfast as it is dinner… which is how we’ve been enjoying it in our household. All three meals of the day, that it is.
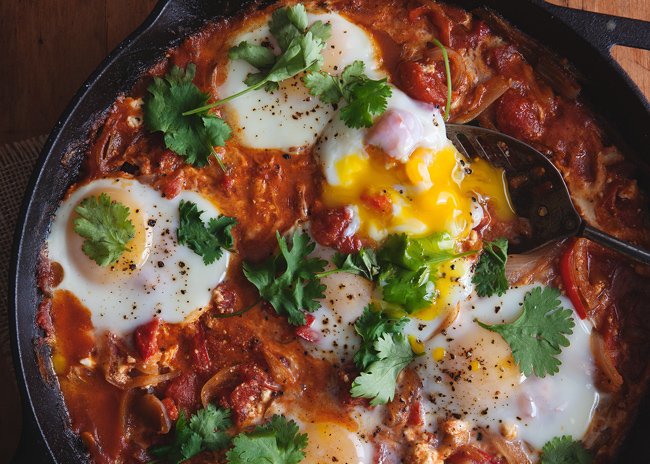
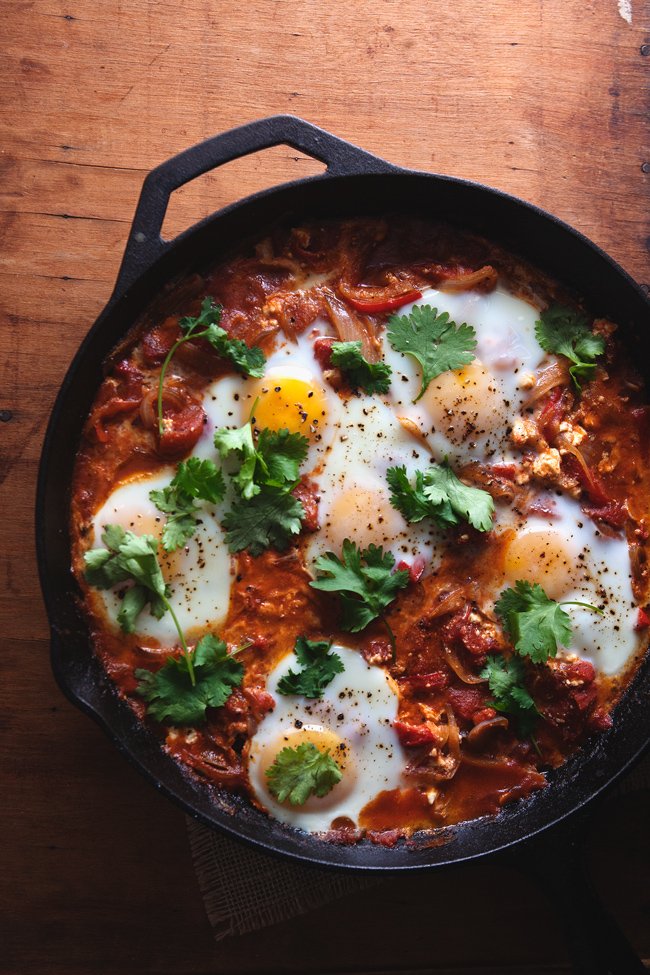
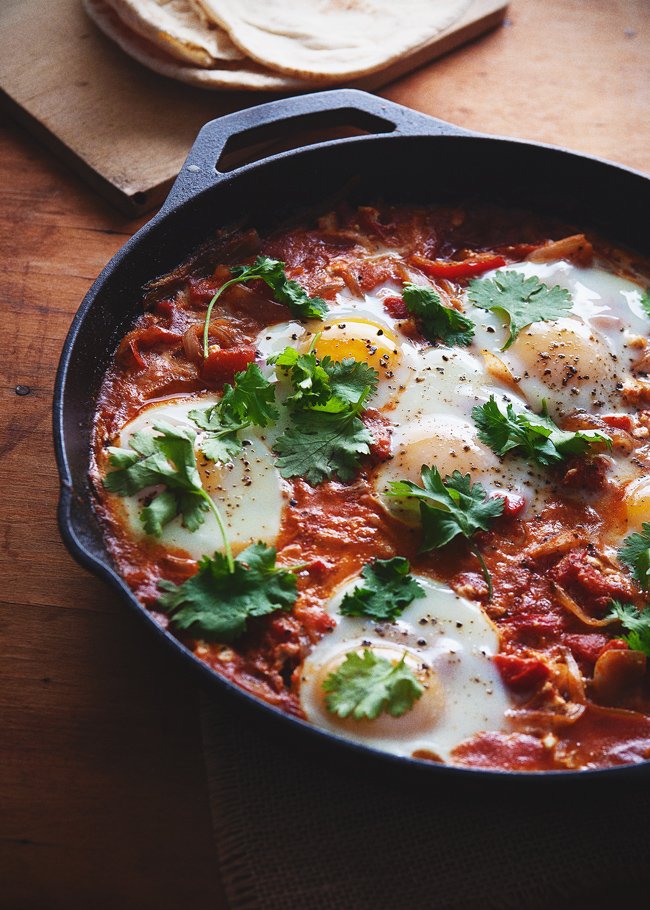
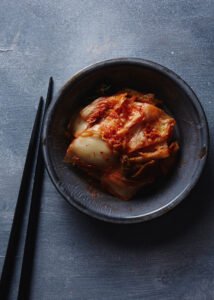
A little bit of background, shakshuka is North African in origin, and it means ‘mixture’ in Arabic (thanks Wiki). And that it is. It’s essentially an egg dish, but it’s got a whole mess of tastes and textures to fill out all its nooks and crannies: slippery onion and bell pepper, a spicy and fragrant tomato sauce, salty briny crumbly feta, the cleanness of fresh scattered cilantro leaves. And to top it all off, barely-set eggs that tumble into puddles of yolk when prodded. Doesn’t that sound amazing? To me, it’s a dream.

A couple other items of note: our cast-iron skillet is monstrous in size and has a permanent place on the stovetop because it’s too big to go anywhere else. My efforts always feel so dwarfed by it—like I should be preparing dinner for six rather than dinner for two. This recipe, then, is perfectly-sized. And you’ll want to use your extra-large skillet so you too can make an extra-large batch to enjoy for multiple meals.
Also, for those of you who are, like me, efficiency nazis, I LOVE how easy this dish is to prepare! It’s one of those one-pot meals that Deb often extols. I totally get her. Even if I don’t do the dishes, I am a huge fan of the simplicity of One-Pots (deserving of capitalization, I think). They’re a whole class of recipes in themselves.
Alright, well, I feel awkward for checking out so abruptly, but… have great rests of the week and let’s re-convene next week, sound good?
Oh, before I forget, I wanted to tell you all about the nonfiction book club I’ll be helping moderate! Check it out! It’s headed by lovely Eva over at Adventures in Cooking, and the other moderators are Carrie, Izy, and Brianne. A fabulous group, right? The first book we’ll be tackling is The Disappearing Spoon, starting next week. Come join us! It’ll be fun.
SHAKSHUKA
Adapted from Melissa Clark for the New York Times
serves 4 to 6
Ingredients:
3 Tbsp olive oil
1 large onion, sliced thinly
1 large bell pepper, deseeded and sliced thinly
3 garlic cloves, sliced thinly
1 tsp ground cumin
1 tsp paprika
1/2 tsp cayenne pepper
1 28-ounce can diced tomatoes with juices
salt and pepper to taste
1-1/4 to 1-1/2 cups crumbled feta
6 large eggs
cilantro, hot sauce, pita bread (or any bread really), hummus for serving
Directions:
In a large skillet, heat oil over medium-low heat. Add the onion and bell peppers, and cook until very soft, about 20 minutes. Add the garlic and cook for another minute or so until fragrant, then stir in the spices. Cook another minute, then pour in the tomatoes. Season with salt and pepper, and let simmer for about 10 minutes until the sauce has thickened. Stir in the feta cheese.
Gently crack in the eggs evenly around the pan over the sauce. Top them with a little more salt and pepper, then simmer until the eggs are just set, about 10 minutes. Serve with lots of pita bread to mop up the sauce.
Related Posts


Subscribe for New Racipies
Get mental health tips, updates, and resources delivered to your inbox.
Alice Medrich’s Cocoa Brownies

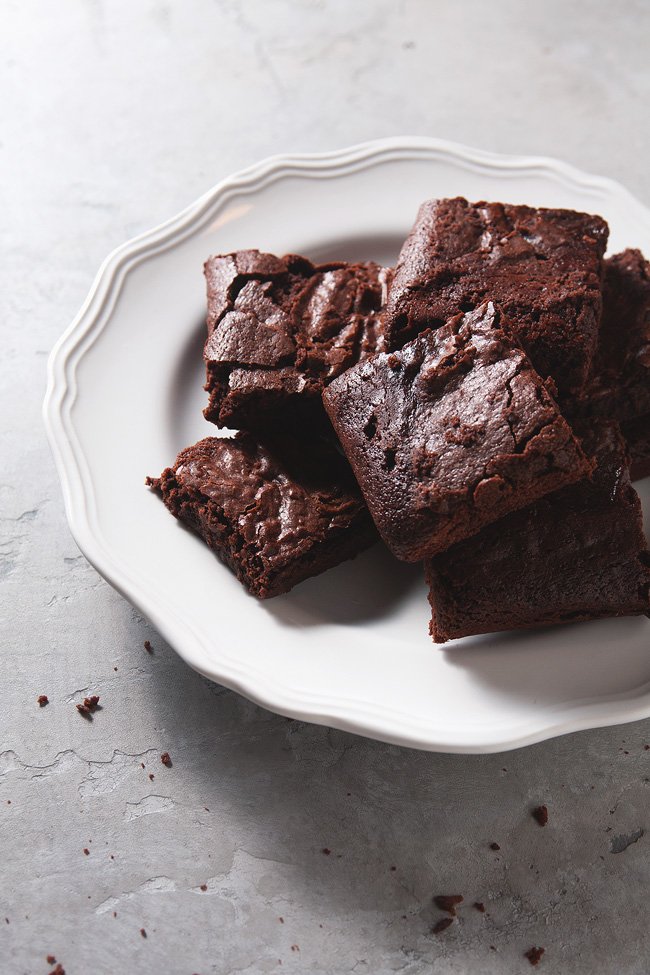
Let’s get things straight here: I am no food stylist. If I were, I would know that trying to cut into a panful of brownies immediately after taking them out of the oven would result in extremely jagged edges, serrated knife and all.
But good-looking brownies be damned. Yesterday was my birthday and I didn’t think I should have to wait. The temptation was just too great: its crackly top gleamed diffusely, its gorgeous smell tickled my nose, and most importantly, there was the knowledge that a truly great brownie—possibly the brownie—was waiting. After all, no Genius Recipe has failed met yet. This one was no exception.
You all probably know Alice Medrich better than I do. I’ve only recently been officially introduced to her and her incredible repertoire of desserts, but long before I became aware of the obsessions of the food world, her kamut pound cake had already collapsed synapses in my brain—in a good way, haha—something that no baked good has done in quite the same way since. I was a fan way before I even knew it.

I think these are probably the best brownies I’ve ever had. Their crackly top is exemplary, and, though I know we all judge our brownies by different metrics so that there is no universally-accepted Best Brownie, these are, conclusively, it. This statement comes from the mouth of someone who has not done all that much perfect-brownie-chasing in her life but recognizes instant chemistry when it happens. It’s like falling in love all over again. I mean, it is falling in love all over again, only with a brownie.

I don’t even know why I felt like brownies yesterday. My birthweekend (a phenomenon which inevitably happens when your birthday falls on a Monday) had already been full of beyond-normal levels of hedonism. I can only offer this, something my mom told me yesterday: it had been snowing when I was born. Do you think this explains my predilection for the gooey, rich, and chocolate-y? Whatever the case, they are definitely the perfect way of easing myself into my XXth (I’m keeping the figure undisclosed) year.
Cheers, y’all! And go make some brownies!


ALICE MEDRICH’S COCOA BROWNIES
Makes 16 to 25 brownies
Adapted from Alice Medrich’s Bittersweet via Food52
Ingredients:
10 Tbsp (1-1/4 sticks) unsalted butter
1-1/4 cups sugar
3/4 cup plus 2 Tbsp unsweetened cocoa powder (natural or Dutch-process)
1/4 tsp salt
1/2 tsp vanilla extract
2 cold large eggs
1/2 cup all-purpose flour (unsifted, measured by stirring briefly, spooning into the measuring cup until it’s heaped above the rim, then leveling it with a straight-edged knife or spatula — it should weigh nearly 2.5 ounces)
2/3 cup walnut or pecan pieces (optional—I didn’t use them)
Directions:
Preheat oven to 325 degrees F. Line an 8″ square pan (I used a 9″, which resulted in slightly flatter brownies) with parchment paper so that there is an overhang on each side.
Let a skilletful of water come to a gentle simmer. In a heatproof bowl, place the butter, sugar, cocoa powder, and salt, and place it in the skillet. Stir while the butter melts. Once the mixture is hot, remove the bowl from the skillet and let it cool until it’s only warm. Using a wooden spoon, stir in the vanilla, then stir in the eggs, one a time, vigorously. Once the batter looks shiny and well-blended, stir in the flour until no streaks remain. Vigorously beat the batter for 40 strokes. Stir in the nuts if using. Spread the batter evenly into the pan, then place it into the oven.
Bake until a toothpick in the middle comes out slightly moist with batter, 20 to 25 minutes (in my 9″ pan, it took about 20 minutes). Remove and let cool completely before lifting out of the pan and transferring to a cutting surface. Cut to your desired size.
Related Posts


Subscribe for New Racipies
Get mental health tips, updates, and resources delivered to your inbox.