
Red Velvet Cake Balls

Medically reviewed by Christiana George Updated Date: December 17, 2022
I hope everyone had a lovely Christmas. I sure did, although it was quite hectic. I was planning on talking about cake balls before the holiday, but just didn’t have time. But now I have some time to share this great recipe.
I have been making Red Velvet Cake Balls for the past 2 years now, since I found them on Red Velvet Cake Balls. They are pretty simple to make and I always get compliments on them. Bakerella is a very talented woman. It is amazing what she can do with cake balls. Check out her site, if you haven’t already.
There are not many ingredients. A cake mix, pre-made frosting, and some candy melt. Easy peasy.


So far I have found that only Duncan Hines makes a Red Velvet Cake Mix and Cream Cheese Frosting and not all stores carry them. I always find mine at Price Chopper.

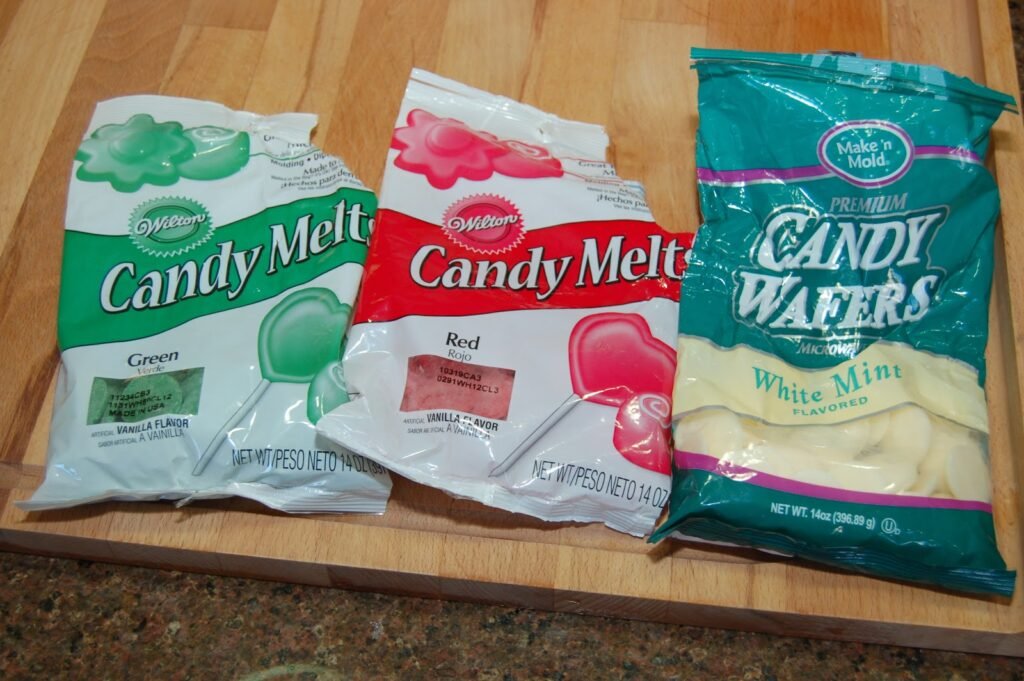
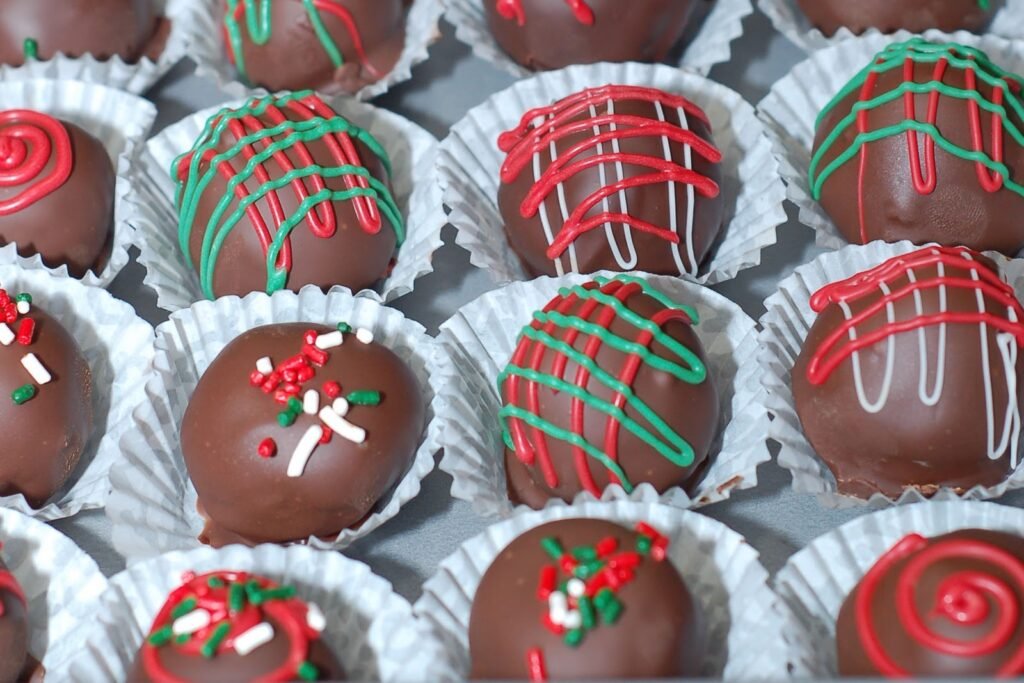
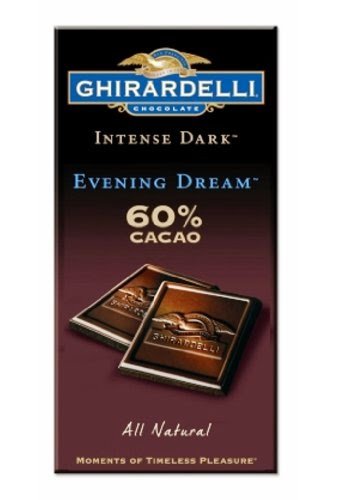
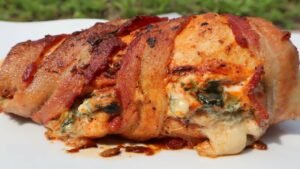
I usually dip the cake balls is a mix of dark cocoa candy melt and a bar of dark chocolate like Ghiradelli for a more intense chocolate taste, but a hard candy coating. And since I usually do mine around the holidays, I buy colored candy melts to decorate.

Last year for decorating, I used my cake decorating bags and tips, but this year I decided to try squeeze bottles. The squeeze bottle has more control, but I like the smaller holes on the cake decorating tips. Either way, everyone loves them. Adults and kids. The taste is incredible and they are so moist. I get compliments every year. I had to make a double batch this year to please everyone.

Red Velvet Cake Balls
Ingredients
- 1 pkg red velvet cake mix
- 1 container (16 oz) cream cheese frosting
- 1 pkg (14 oz) dark cocoa candy melt
- 1 large bar dark chocolate
- 1 pkg (14 oz) red candy melt
- 1 pkg (14 oz) green candy melt
- 1 pkg (14 oz) white candy melt
- optional sprinkles
Cooking Directions
- Bake the cake mix as per instructions on the box for a 9 x 13 cake.
- Once cake is completely cooled, crumble it by hand into a large bowl.
- Then add in the cream cheese frosting and mix well. This can be done by hand or throw the crumbled cake and the frosting into a large mixer and mix on low.
- Then take a scoop at a time of the mix and roll into small balls about the size of a quarter. This will be very messy and you may have to wash your hands several times. But please refrain from licking them!
- Place the balls in a freezer friendly container lined with parchment/wax paper.
- When all balls are complete, place them in the freezer overnight or until you have time to do the rest of the recipe.
- When you are ready to dip, melt the dark cocoa candy melt and the dark chocolate together in a deep bowl in the microwave 30 seconds at a time until all melted.
- Dip the cake balls in the chocolate mixture and place on parchment/wax paper until chocolate has hardened. ( I use a fork to dip, roll, and shake off any extra chocolate.) If you want you may add fun holiday sprinkle before the chocolate hardens.
- In separate bowls, melt the red, green, and white candy melt and place in the squeeze bottles. Then decorate with any patterns you like. Or if you want, dip some of the balls in the colored candy melt instead of the chocolate.
- Makes about 50 cake balls.

I did buy pretty boxes to place the cake balls in to give as gifts for my daughter’s teachers and a few other people, but I was so busyI forgot to take pictures of the boxes all tied up with a nice ribbon and tag. But here are what the balls looked like decorated.

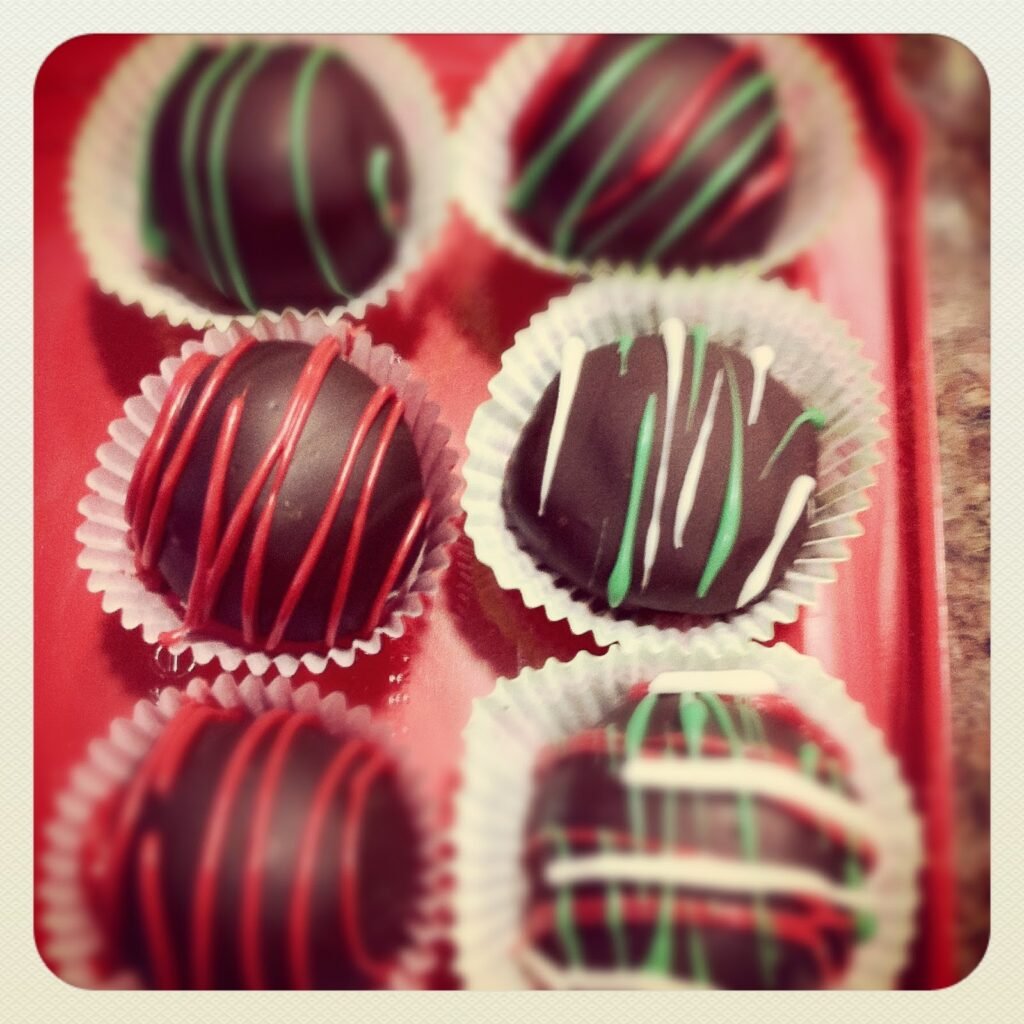
Last year I put them in tins to give out as gifts. Here is what they looked like. I placed the cake balls in mini cupcake liners to they don’t stick together and they look pretty. There are so many ways to decorate the cake balls and many different varieties of cake mixes and frosting to use.
The best part of the recipe is that it can be done in stages. One night I bake the cake. Another night I crumble and mix with the frosting and make the balls. I freeze them until I have the time to finish. I had them in there for a week and no worries. I think I will make some again for Valentine’s day.
Related Posts


Subscribe for New Racipies
Get mental health tips, updates, and resources delivered to your inbox.
Pappardelle With Wild Mushrooms


With Thanksgiving over, I’ve switched to Winter Mode.
Winter Mode consists of uplifting meals whose main ingredients might include any or all of the following: pasta and/or noodles, cheese, butter, cream, and excessive liquid. Bacon makes a recurring appearance. As does chocolate. My preferred mode of cooking becomes baking. Or boiling. Boiling noodles, that is.

Of course, because our radiator goes on overdrive each and every night, we’re met with a rather bewildering dinnertime situation. To set the scene: we’re minimally dressed. No socks, no sweaters. We’re wearing t-shirts, shorts even. The window’s open—god, can we get some snow in here or something? (Just kidding, but I can’t wait!) While we eat, pools of sweat build up on our foreheads, right by our hairlines. (Why do I bother washing my hair?) My armpits start feeling damp, I’m blowing like crazy on each bite to cool it down.
It’s contradictory-feeling, the heat, and confuses my body greatly. I’m craving fats and proteins, but responding to the stuff adversely once I get it.
But it’s alright. There’s ice cream in the freezer, the perfect after-dinner aid. Armed with a heaping bowl each, we can dangle our feet on our fire escape and contemplate the following day.

To counter the richness, there are mushrooms.
In my estimation, mushrooms are the perfect stand-in for meat. They’re portly and satisfying, with their own irresistible flavors to boot. Plus, they’re not bad on the eyes. (Can tofu boast such a quality? I think not.)
I like shiitake mushrooms the best, but I like mixing them even more. This wild mushroom pasta serves them up simply, with a liberal sprinkling of parmesan cheese and parsley. I think the trick is to not overdo it on the pappardelle, which has the tendency to dry out the dish. While the original recipe called for an approximate one-to-one ratio of pasta and mushrooms, I would halve the heavy (albeit delicious) pappardelle and even increase the amount of mushrooms just a tad.
That way, you’ll really taste the garlicky mushrooms but get to savor the luscious pappardelle as well.
My body can cope with that.


PAPPARDELLE WITH WILD MUSHROOMS
Adapted from The Naked Chef by Jamie Oliver
Serves 2
Ingredients:
- 12 oz. mixed mushrooms
- 3 Tbsp olive oil
- 2 cloves of garlic, finely chopped
- Dried red pepper flakes, salt, and pepper to taste
- juice of 1/2 lemon
- up to 8 oz. pappardelle
- 1/2 stick (2 ounces) unsalted butter
- a small handful of grated Parmesan cheese
- a handful of fresh flat-leaf parsley, roughly chopped
Directions:
Brush off dirt from the mushrooms and slice thinly. In a very hot frying pan, add the olive oil, then the mushrooms. Let them fry fast, tossing once or twice, then add the garlic and red pepper flakes with a pinch of salt (season lightly, Jamie instructs, as a little really brings out the flavor). Continue to fry fast for 4 to 5 minutes, tossing regularly. Then turn the heat off and squeeze in the lemon juice. Toss and season to taste.
Meanwhile cook the pasta in boiling salted water until al dente. Add to the mushrooms, with the parmesan, parsley and butter. Toss gently, coating the pasta with the mushrooms and their flavor. Serve, scraping out all of the last bits of mushroom from the pan, and sprinkle with a little extra parsley and Parmesan.
Related Posts

Subscribe for New Racipies
Get mental health tips, updates, and resources delivered to your inbox.