
M&M; Birthday Party

Medically reviewed by Christiana George Updated Date: December 19, 2022


I put together my son’s 4th birthday party last week. He’s into a lot of things, but nothing in particular stood out as a theme. That is until someone posted a photo of an M&M wedding cake on Facebook. I had my inspiration. My son loves M&M’s in all different varieties. He devours whatever flavored M&M’s I buy to make recipes with. He’s not picky when it comes to his favorite candy. So I researched Pinterest for DIY party decor and kept my eyes open when I was out shopping. I tried to keep it simple because it wasn’t going to be a terribly big party, but I wanted it to be special for him.

I put together my son’s 4th birthday party last week. He’s into a lot of things, but nothing in particular stood out as a theme. That is until someone posted a photo of an M&M wedding cake on Facebook. I had my inspiration. My son loves M&M’s in all different varieties. He devours whatever flavored M&M’s I buy to make recipes with. He’s not picky when it comes to his favorite candy. So I researched Pinterest for DIY party decor and kept my eyes open when I was out shopping. I tried to keep it simple because it wasn’t going to be a terribly big party, but I wanted it to be special for him.

The first thing I had found was 10 inch red plastic M&M dispenser at CVS pharmacy. I used that as my centerpiece. It was too cute to pass up. Then I found a small 5 inch plastic bubble gum machine at Toys R Us that I used as a cake topper.
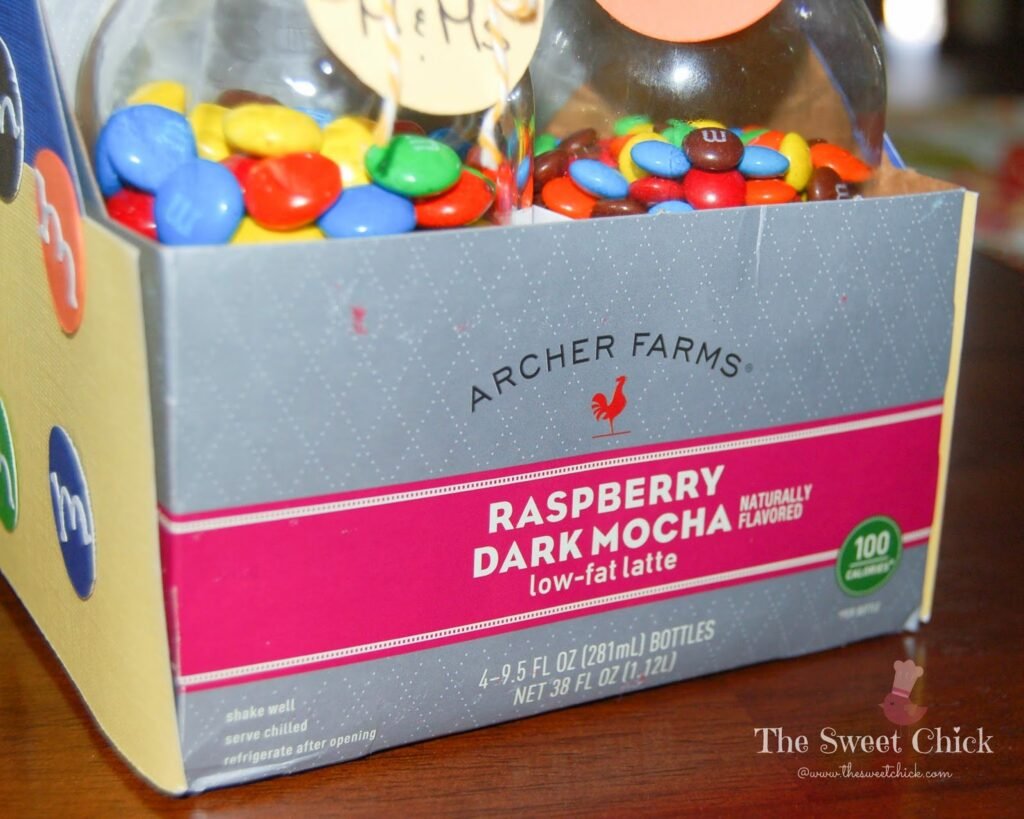
I wanted the party goers to have a selection of M&M’s to choose from, so I decorated a Archer Farms carton with some card stock I had on hand. I cut out some circles with my Fiskars ShapeCutter Template, then embellished it with little “m’s” I cut out with my Sizzix Sizzlets dies in the Bounce font (which apparently they don’t make anymore, my scrapbook tools are now antiques). I added some circle tags to label the M&M flavors.
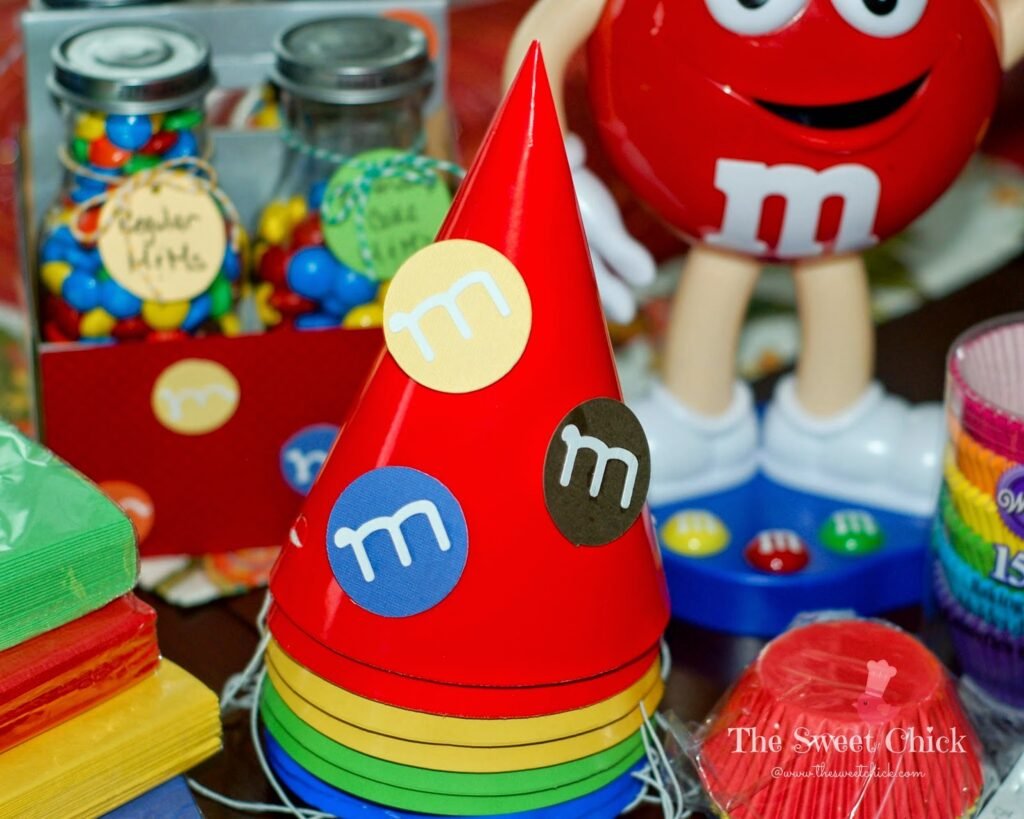
I found most of my other supplies at Walmart. I bought plates, napkins, and party hats in all the M&M colors (except brown). I jazzed up the plain party hats with some more cut outs. For these “m’s”, I used my Cricut machine with the Tear Drop cartridge. I was trying to use what I had on hand. If you want the official “M”, you can find it on the Cricut Plantin SchoolBook cartridge.

I used my Cricut machine to cut out these big “m’s” also. This was one of the ideas I found on Pinterest for wall decorations. I used double stick tape to keep them up.

He’s the whole thing all together. Simple, but colorful and fun. It was raining outside, so we played some movies for the kids, but they didn’t care, they ended up going in the pool anyway.
I made all sorts of treats to go with the theme, Chocolate Chip M&M Cookies, M&M Rice Krispie Treats, M&M Pretzel Sticks, and more.

I use the extra “M’s” I cut out to decorate the table. I placed the M&M dispenser on a candlestick holder I had to make him more prominent.

Here are the Candy Coated Oreo M&M’s I blogged about earlier this week. I placed each in matching cupcake liners from Wilton that I had found at Walmart.

This is the cake I made, inspired by this one below. The kids thought it was amazing. Mission accomplished.

Here’s the birthday boy all smiles when he saw his cake. He was excited by all the mini M&M’s pouring down the front. All the kids wanted a slice with the M&M’s on it.

The cake was just two Pillsbury Funfetti cake mixes and two cans of Betty Crocker Fluffy White frosting. I knew I would be spending all my time perfecting the decorating, so I didn’t make the cake and frosting from scratch this time. Plus, I really love Funfetti cake. And if you are wondering if I place each M&M individually on the cake , the answer would be YES! My husband thought I was nuts. He said I should just throw them on there, but I am a type A personality and everything has to be perfect.

For the favor bags, I bought individual packs of Birthday Cake M&M’s and added some bubbles and other candies. The clear bags are from Walmart and the tags I made myself. I put all the kids names on the back. I attached the tags with matching bakers twine I had on hand.

It was a lot of work, but I like being creative. The looks on the kids faces said it all, it was worth it.
Related Posts


Subscribe for New Racipies
Get mental health tips, updates, and resources delivered to your inbox.
Pumpkin Picking

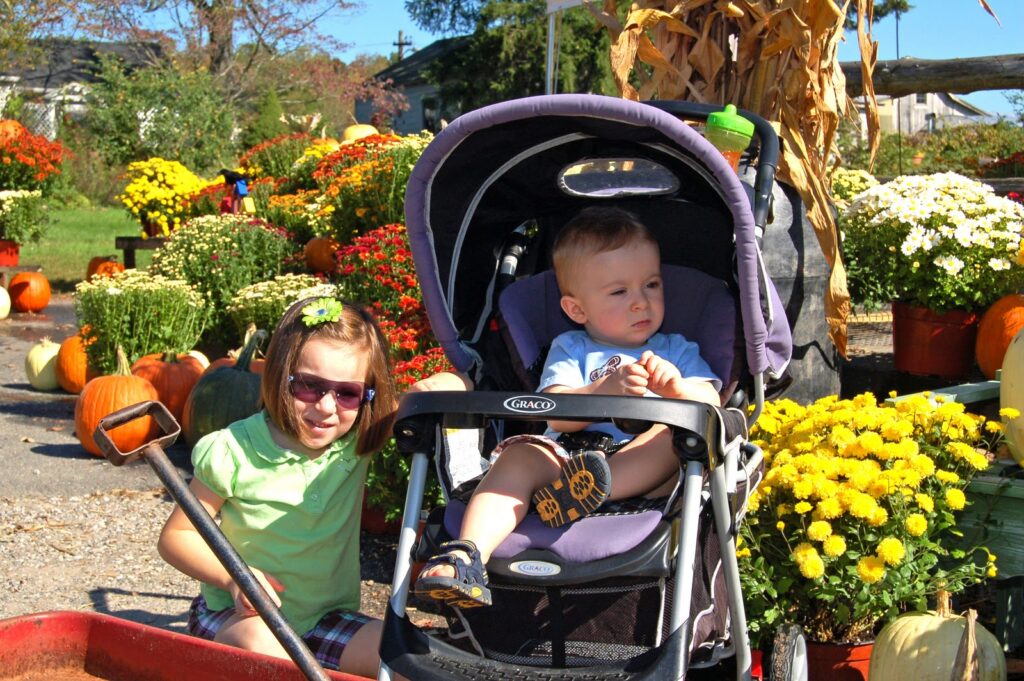
With snow on the ground this morning I am reminiscing about our pumpkin picking day about 2 weeks ago. The weather was so warm. This is the first year that my kids are wearing shorts and flip flops for our pumpkin picking photos.

My daughter is always ready to pose for pictures. I’ve had a camera in her face since she was born. She can say “cheese” on demand. My son on the other hand is not so interested in having his picture taken. You can see he looks quite bored by the whole process. Oh well, he will have to deal with it because I do take a lot of photos.

It’s not always easy to pick the best looking pumpkins. We were able to find three that we liked.
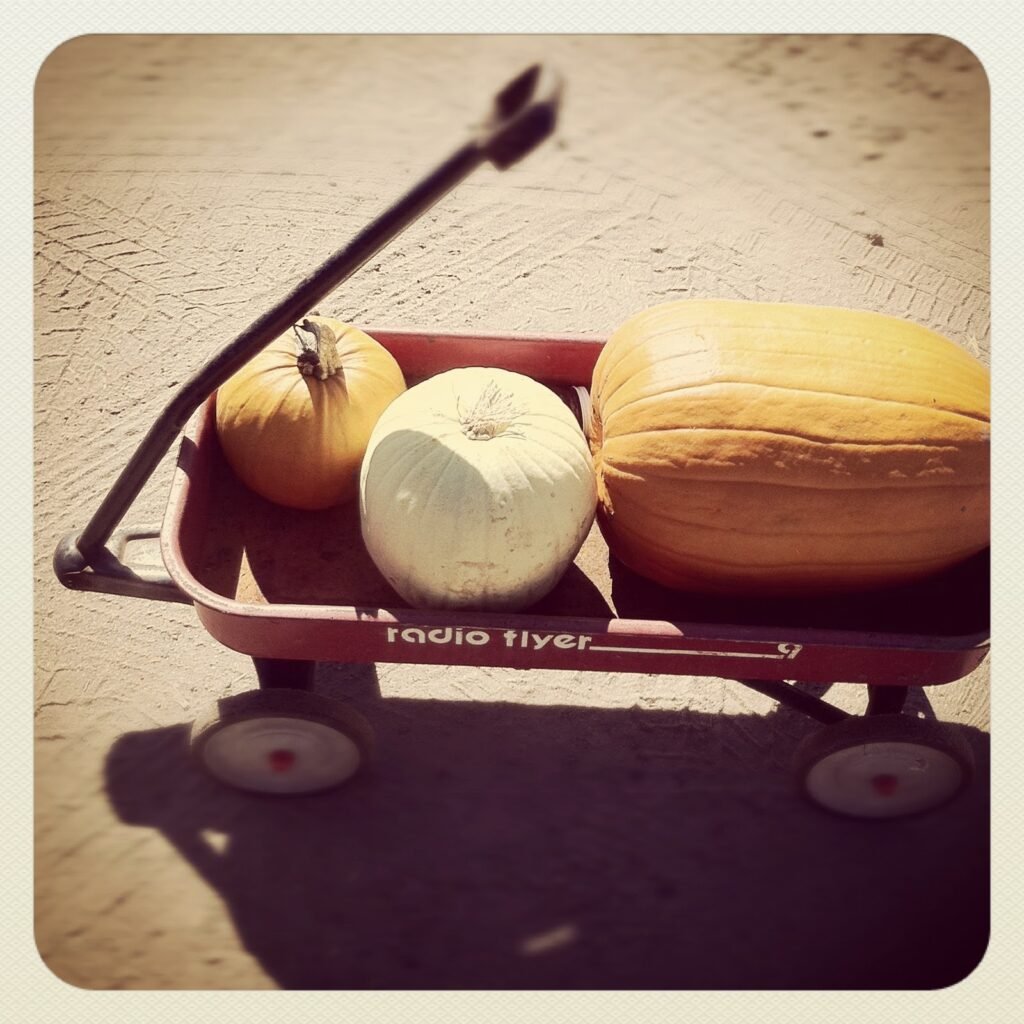
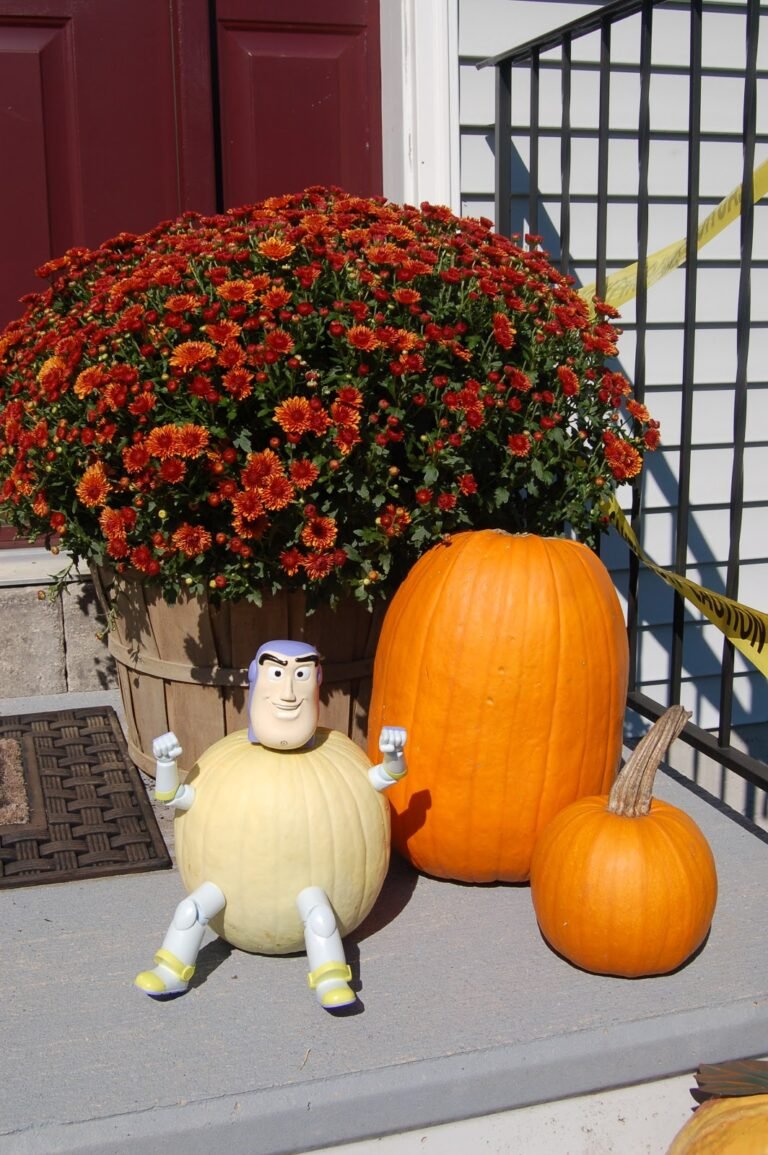
The big one was for me to carve. My daughter had chosen a template to a skull, which would look perfect on that pumpkin. Unfortunately, we had a lot of rain after that weekend and one day I came home from work to find a pile of mush on my front doorstep. I had to take out that snow shovel to scoop up the mess and throw in the garbage and then hose down the steps. There was pumpkin ooze everywhere. Well at least Buzz and the little pumpkin survived.
The pieces for Buzz I found at Target for $6. It was too cute too pass up. My daughter loves Buzz Lightyear. She is dressing up as him for Halloween again this year.
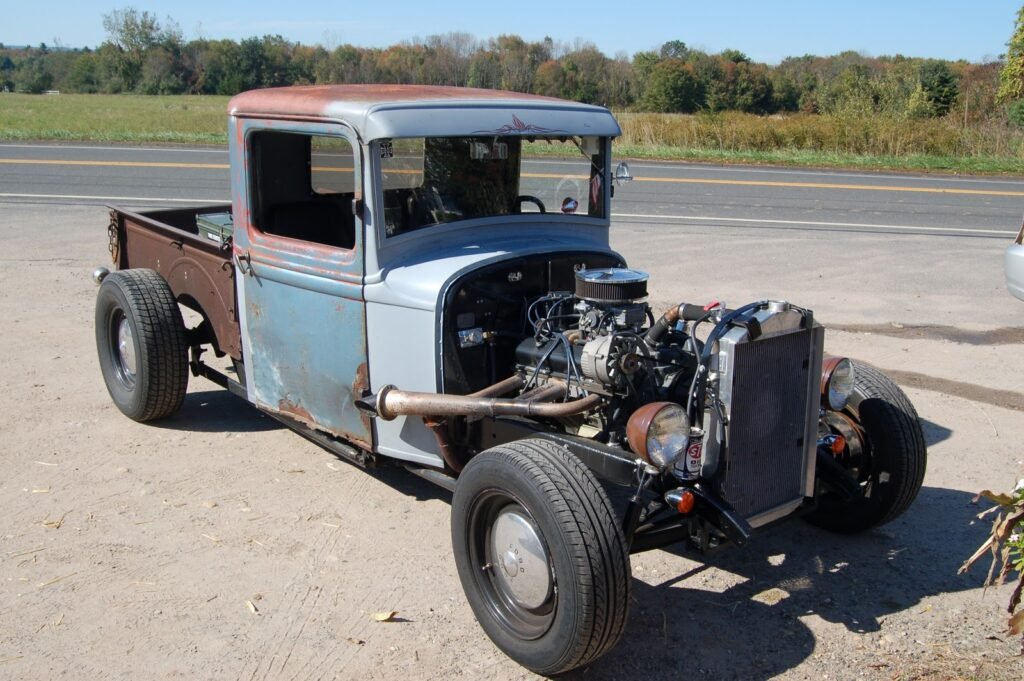
I just thought this was interesting. Someone drove up in this vehicle at the pumpkin farm. I don’t think I have ever seen anything like it.
Related Posts
Subscribe for New Racipies
Get mental health tips, updates, and resources delivered to your inbox.