
Maple Pumpkin Rice Krispie Treats

Medically reviewed by Christiana George Updated Date: January 6, 2026
I had some leftover maple butter from this recipe and some pumpkin puree leftover from this recipe. What to do, what to do?? How about some Rice Krispie Treats? Well, that’s just what I made. I am really beginning to like pumpkin.
I also ended up throwing in some leftover dark chocolate chips at the last minute. That was a good call.
This is such a quick and easy recipe. And so far this is my favorite of all my Rice Krispie treats. It has all the wonderful flavors of pumpkin spice, maple, and dark chocolate with an added crunch factor. It doesn’t taste anything like your average Rice Krispie treat.
In fact, it almost tasted like a granola bar. It had a bit of a nutty flavor and was super moist and chewy.
I cut mine out in the shape of a pumpkin for fun, but you can certainly make yours into bars and drizzle with dark chocolate.

Maple Pumkin Rice Krispie Treats
by The Sweet Chick
Prep Time: 15 minutes
Cook Time: 5 minutes
Keywords: no bake dessert pumpkin maple butter dark chocolate chips rice krispies rice krispie treats fall
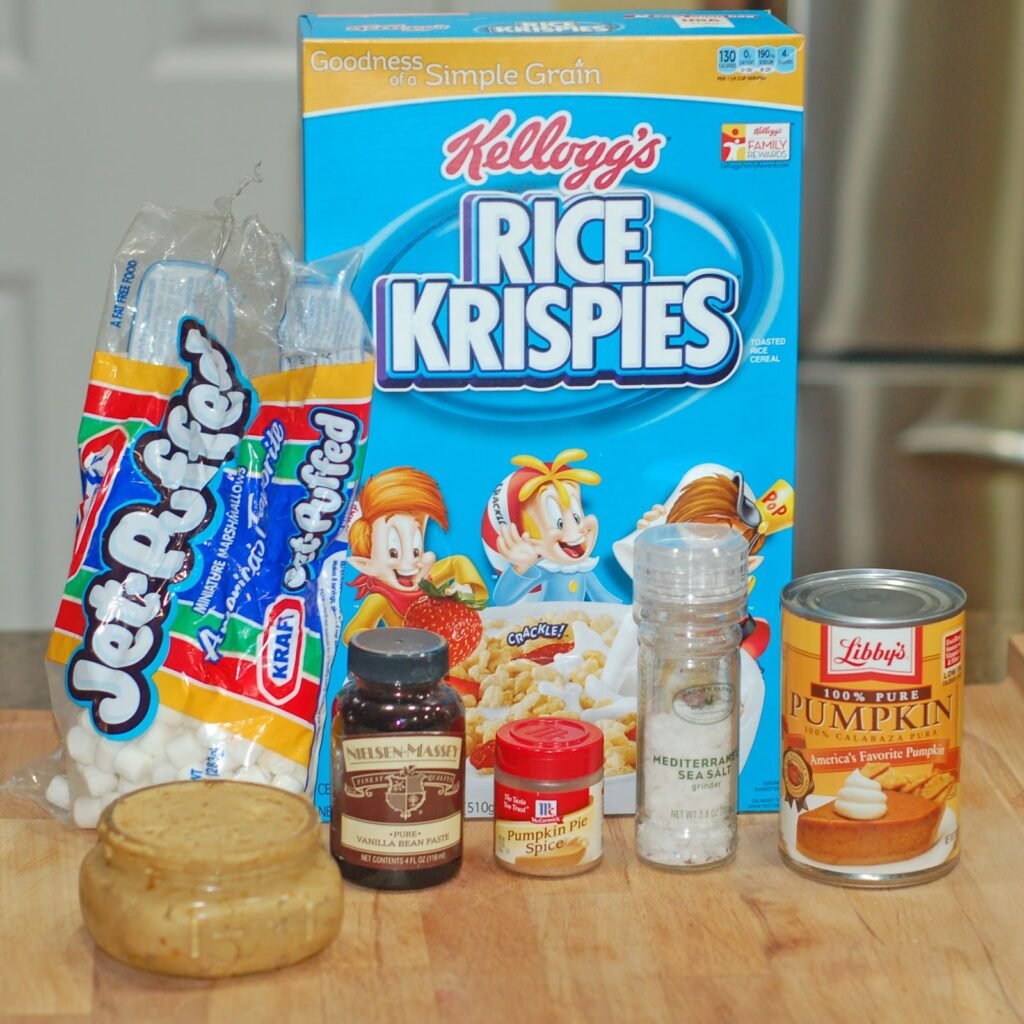
Ingredients (12 pumpkins or 24 squares)
For the treats
- 5 tablespoons maple butter (see recipe below)
- 1 package (16 oz.) marshmallows or 4 cups mini marshmallows
- 1/3 cup canned pumpkin puree
- 1/2 teaspoon pumpkin pie spice
- 1/4 teaspoon vanilla extract or paste
- 1/4 teaspoon salt
- 7 cups Rice Krispie cereal
- 1 cup dark chocolate chips
For the maple butter
- 3/4 cup butter, softened
- 1 cup pure maple syrup
For the decoration
- 2 cups orange candy melt
- 1/2 cup dark chocolate candy melt
- 1 cup green candy melt
Instructions
For the treats
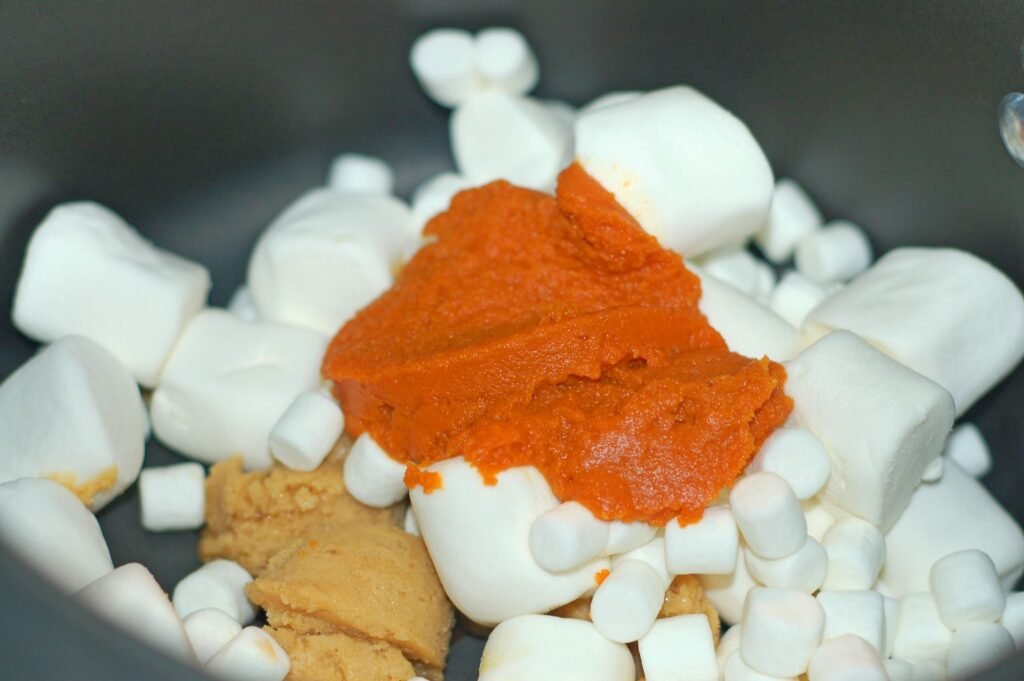
In a large sauce pan, melt butter, marshmallows, and pumpkin over low heat. Stir until completely melted.
Remove from heat and add pumpkin spice, vanilla, and salt. Let mixture cool for 5 to 10 minutes.
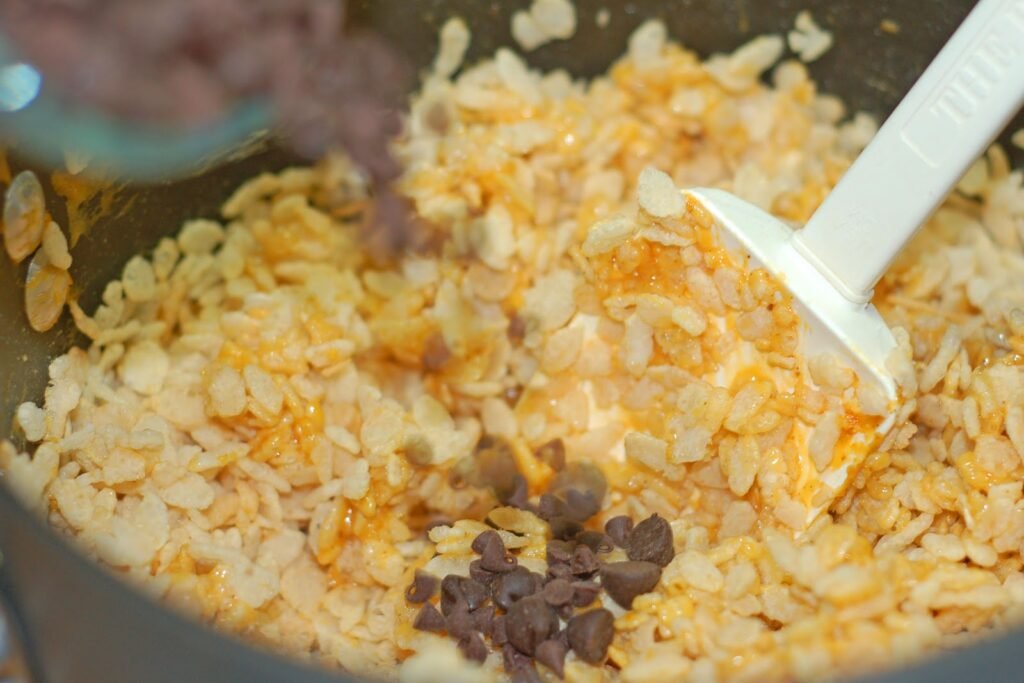
Once cooled, add Rice Krispies one cup at a time and stir until it is all well blended.
Then add the chocolate chips and stir gently. Some of the chocolate may melt. It’s ok.
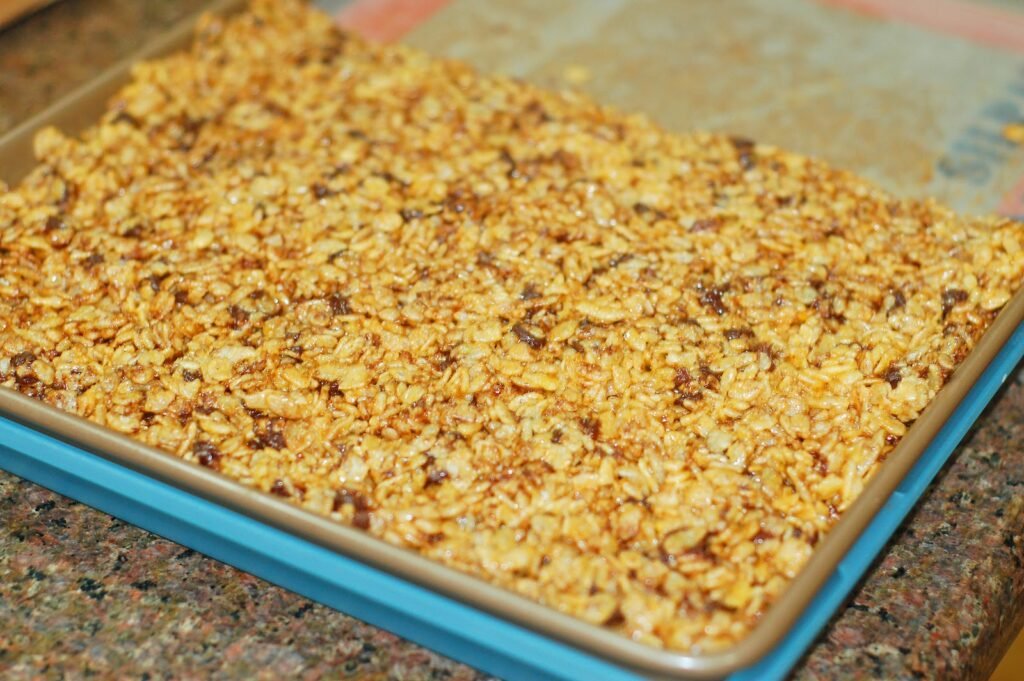
Pour the mixture into a greased 9 x 13 pan or a cookie sheet and spread it evenly with a piece of waxed paper.
Place in fridge to cool.
For the maple butter
Place the butter in a small microwave safe bowl and heat in the microwave for 20 seconds, until softened.
Add maple syrup and mix together with hand mixer until smooth.
Place in fridge for 1 hour to set.
For the decoration
Place dark chocolate candy melt in a microwave safe bowl and melt for 30 seconds at a time until completely melted. Outline the shape of the stem with the candy melt and fill in.
Then melt the orange candy melt and place in another Ziplock bag with tip snipped off and carefully outline the pumpkin shape with the candy melt and fill in.
Last melt the green candy melt in the same fashion and place in a third Ziplock bag with tip snipped off and carefully draw a leaf and a curly vine.
Place the treats back in the fridge to cool.
Related Posts


Subscribe for New Racipies
Get mental health tips, updates, and resources delivered to your inbox.
Snowman Marshmallows


This is actually a project I did in January, but since we have just started getting snow here recently, I thought it would be appropriate. My daughter needed to take something to school for her Discover and Share that had a winter theme. So I thought snowmen marshmallows would be cute. I found a recipe for homemade marshmallows at. It looked easy, albeit perhaps messy. But, hey, with two small kids, it’s always messy here anyway.
First I tested the recipe to make sure they would taste good and come out okay.

Homemade Marshmallows
by My Baking Addiction
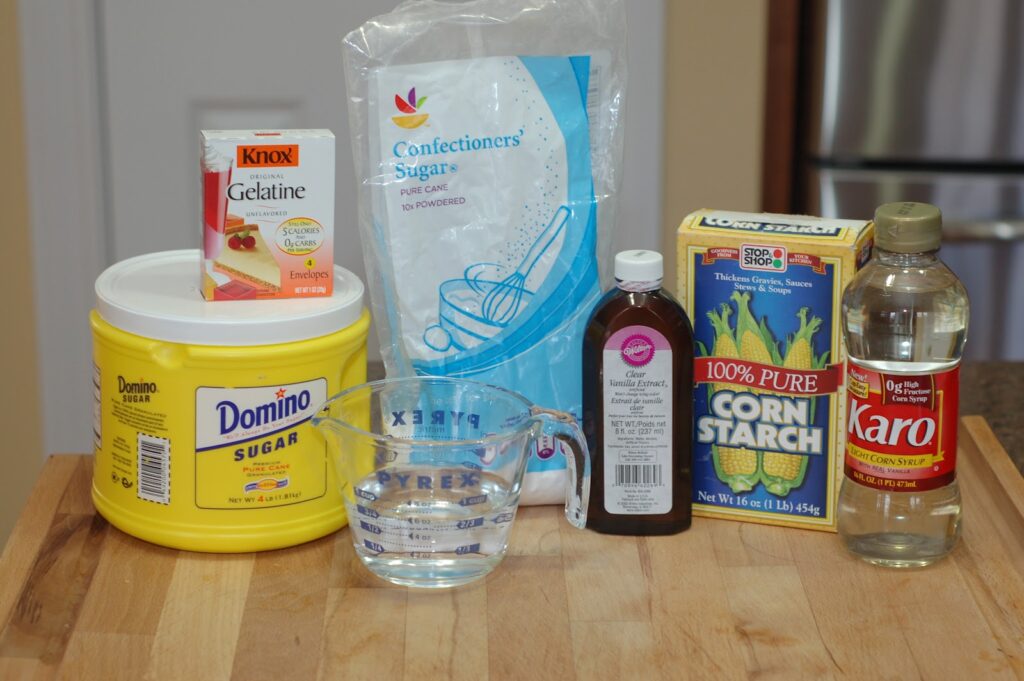
Ingredients
- 3/4 cup water, divided
- 3 (.25 oz.) packages, unflavored gelatin
- 2/3 cup light corn syrup
- 2 cups white sugar
- 1 tbsp vanilla extract
- 1/4 cup cornstarch
- 1/4 cup confectioner’s sugar
Cooking Directions
- Line a 9×13 inch baking dish with plastic wrap and spray with non-stick cooking spray. Spray another piece of plastic wrap to cover the top, and set aside.
- Place 1/2 cup of water in the bowl of an electric mixer fitted with the whisk attachment, and sprinkle gelatin on top of water to soak.
- While gelatin is soaking, combine 1/4 cup of water, corn syrup, and sugar in a saucepan. Bring the mixture to a boil over medium heat. Boil the mixture hard for 1 minute.
- Carefully pour the hot sugar mixture into the gelatin mixture and beat on high for 12 minutes with electric mixer, until the mixture is fluffy and forms stiff peaks. Add in vanilla extract and beat until just combined.
- Pour the marshmallow mixture into the prepared baking dish, using a greased spatula to smooth the top. Cover the candy with the piece of prepared plastic wrap, pressing it down lightly to seal the covering to the top of the candy.
- Allow the marshmallow candy to rest for 4 hours or overnight.
- Mix together cornstarch and confectioner’s sugar in a shallow dish. Using oiled scissors or an oiled kitchen knife, cut the marshmallow candy into strips, then into 1 inch squares. Dredge the marshmallows lightly in the cornstarch mixture and store in an airtight container.

I did use clear vanilla extract as she suggested to keep the marshmallows pure white. Let me just say one thing though, the smell of the hot corn syrup mixture combined with the gelatin as it is being mixed is very off putting. It smelled like manure in my kitchen and I was very afraid of what these marshmallows would taste like, but have no fear, the smell does go away and does not affect the taste.

The first batch I made, I just cut them into squares. Okay, very large squares. Here is my assistant dredging them in cornstarch and confectioner’s sugar.

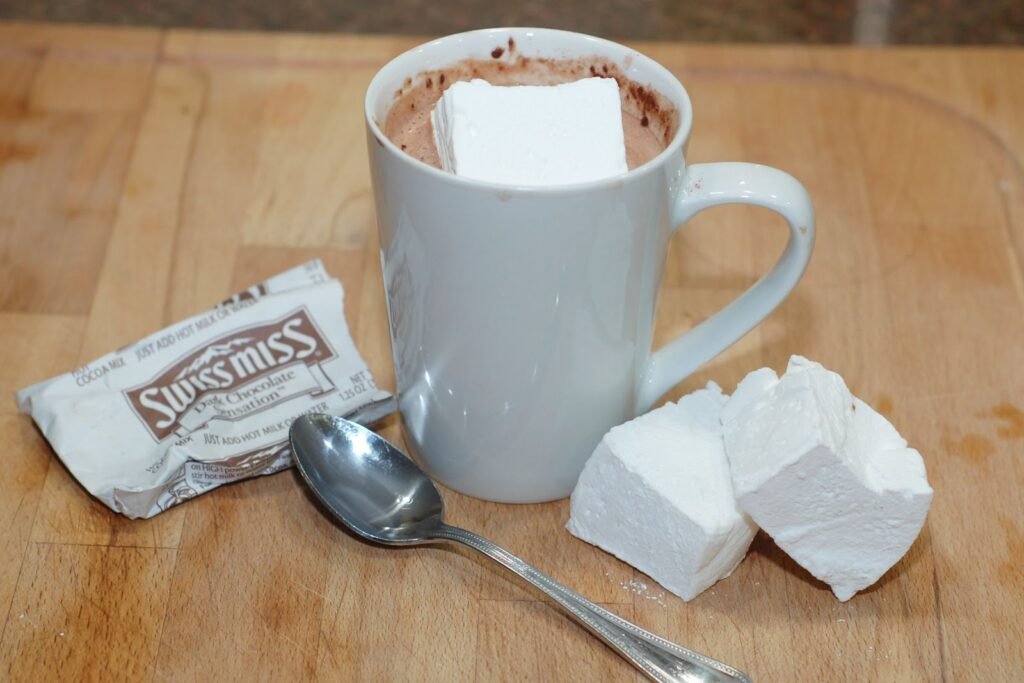
And here she is taste testing for me. She gave them her seal of approval. They really were quite good. Much better than the store bought ones. They are lighter and fluffier.

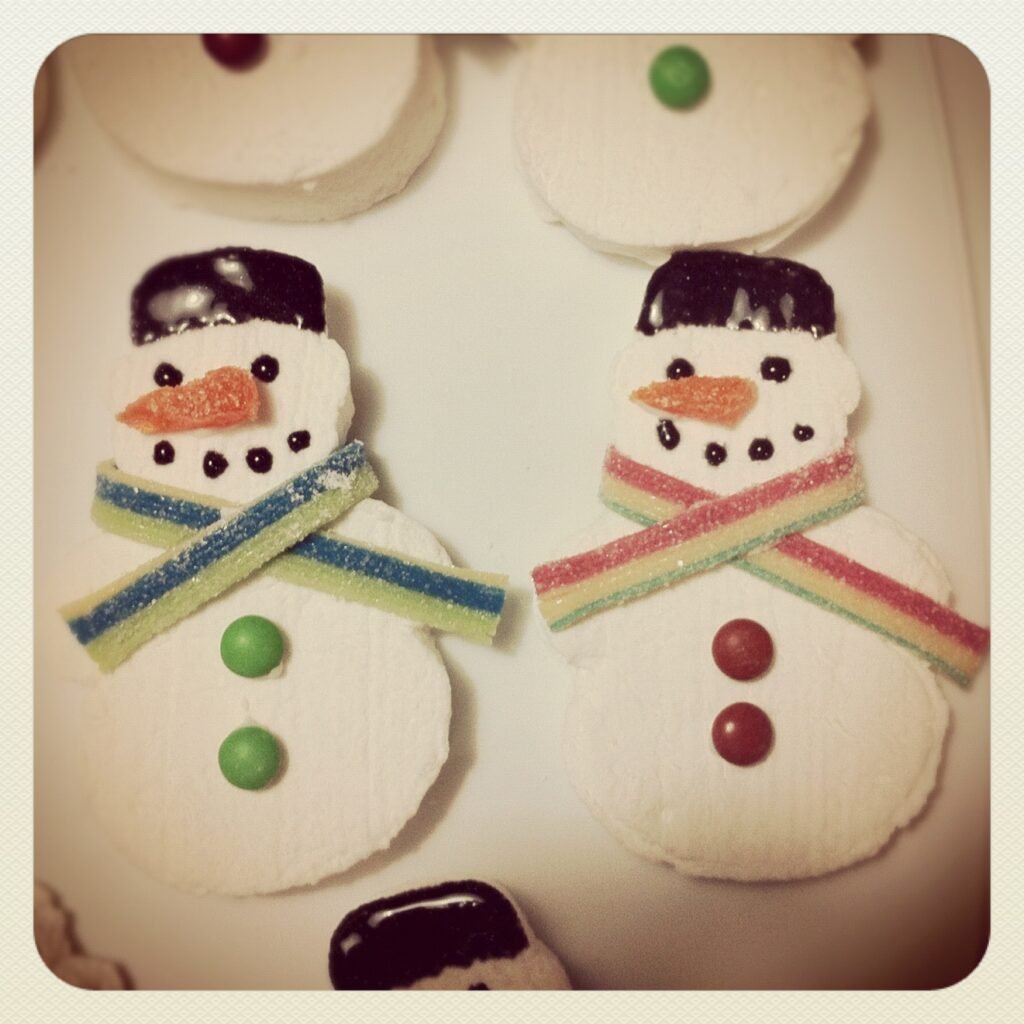
The real test for me, was to have some with a cup of hot cocoa. Yep, they were delicious in my book too. So then I knew I would make more and shape them into snowman for the kids. At first I was going to cut the marshmallows into circles and stack them up on a candy stick to make the snowmen, but when I went to get my circle cookie cutter, I found a snowman cookie cutter and went a different route.
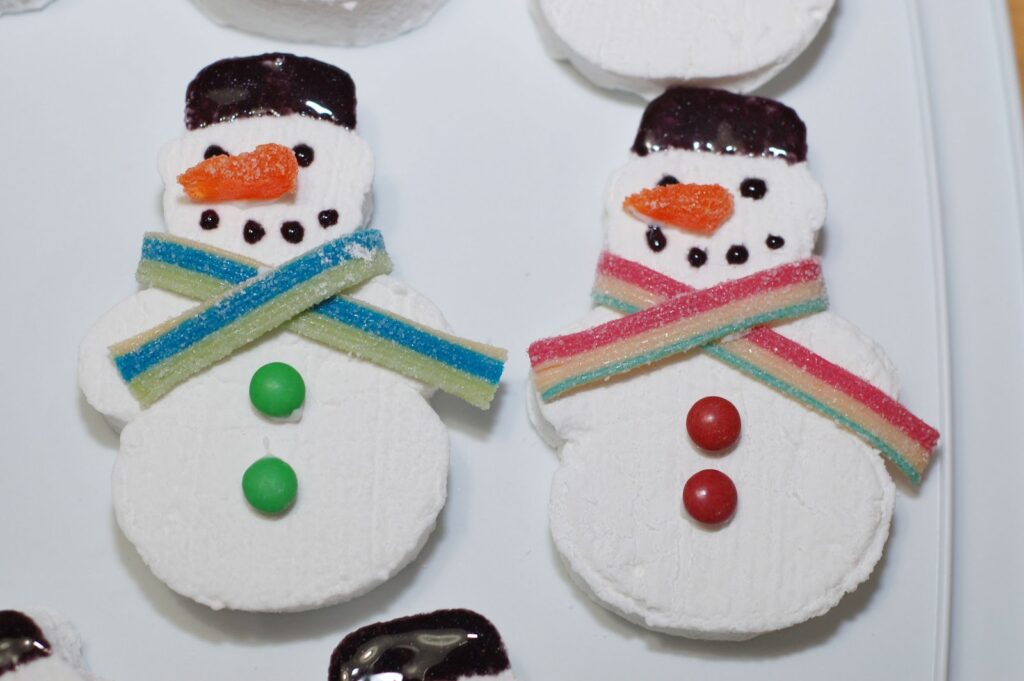
I then when to the store to see what kind of candy I could find to decorate with. I found mini M&M’s for the buttons, some sour candy strips for the scarves, and orange slices for the nose. I had some black glitter gel for the hat, eyes, and mouth and I used cookie icing to glue things together.

I cut small triangles out of the orange slices to make the carrot nose.

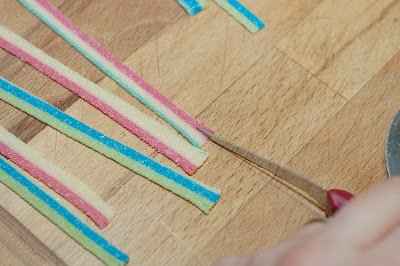
I cut the sour candy strips in two lengthwise for the scarves and even fringed the ends by making small slits with a sharp knife.
Here is the completed project. The black icing didn’t spread as well as I thought, so I just ended up using the black gel for the hat, eyes, and mouth. I think they came out pretty well.
My daughter was excited to see them. I made girl ones and boy ones for her classmates.
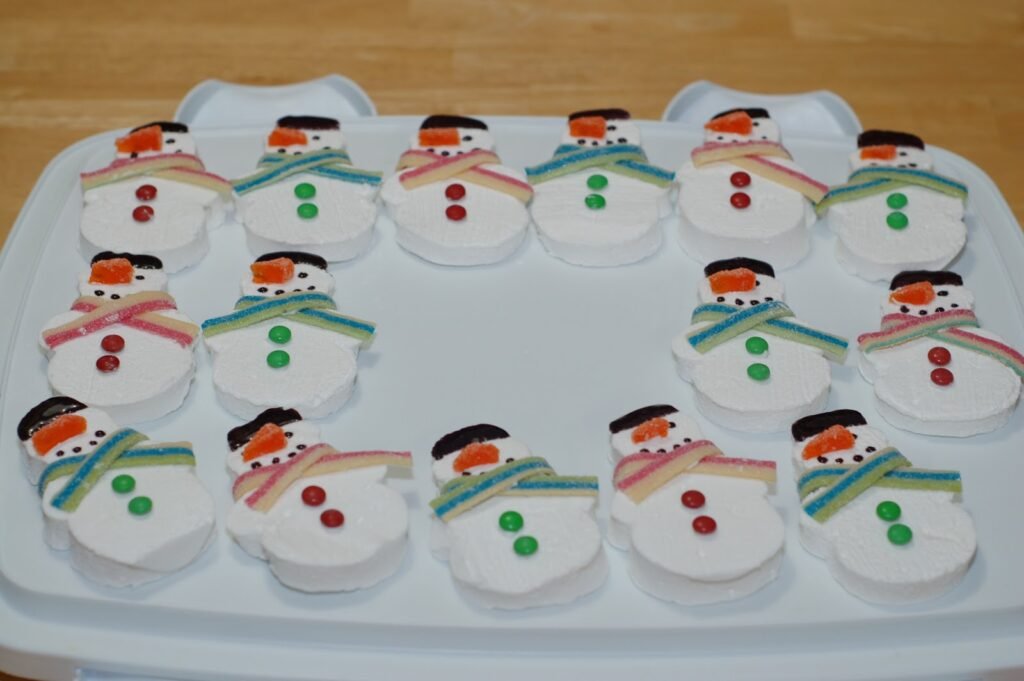
The kids really did like them and they tasted good. I will bookmark this recipe to do again next year.
Related Posts
Subscribe for New Racipies
Get mental health tips, updates, and resources delivered to your inbox.