
Honey Carrot Scones

Medically reviewed by Christiana George Updated Date: December 18, 2022

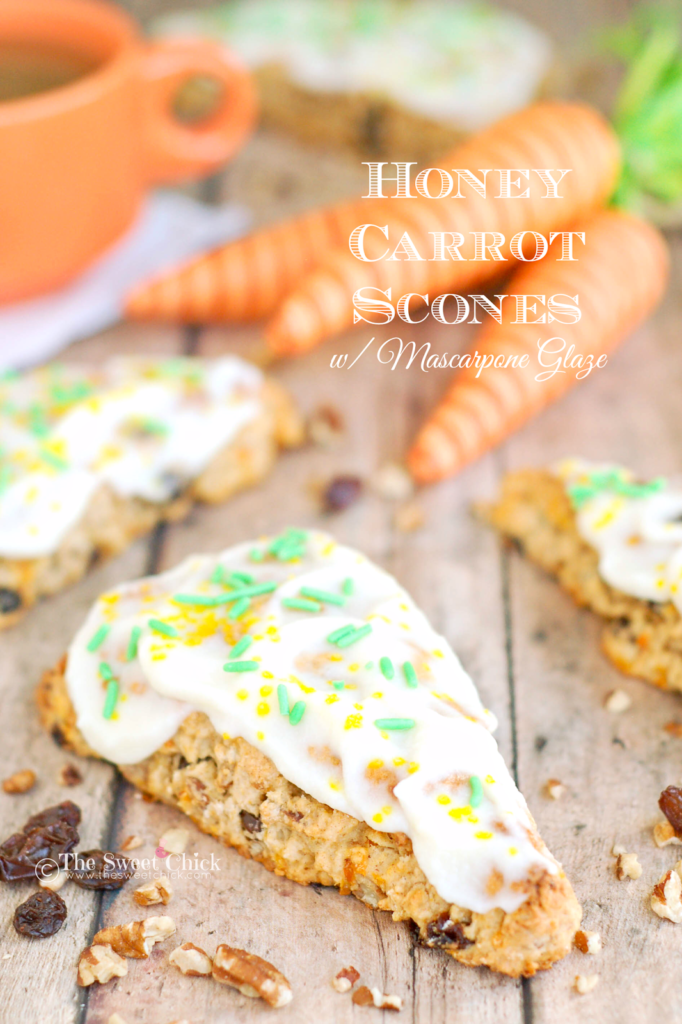
I can’t believe Easter is just around the corner. I still have a lot of prepping to do, but I took a break to make some scones. These Honey Carrot Scones with a Mascarpone Glaze are perfect for an Easter brunch or any day for a coffee break. They are sweetened with honey and are chock full of carrots, raisins, and pecans. The mascarpone glaze is to die for and perfectly compliments the scones. These were a winner in our household over the weekend.
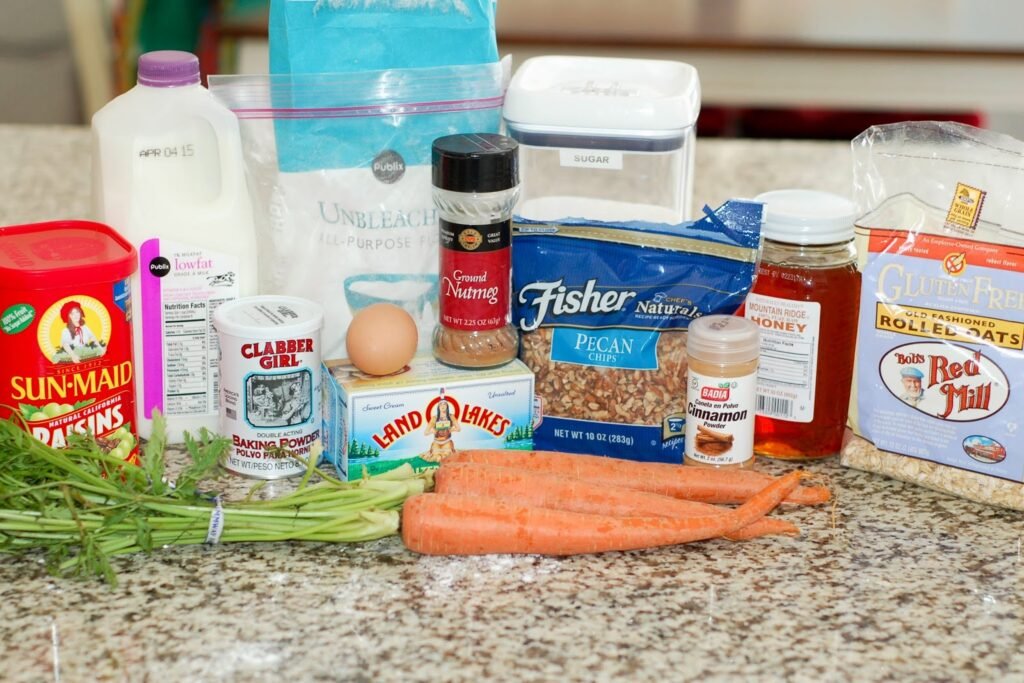
The scones do taste a bit like carrot cake, but just not as super sweet as carrot cake. At least the one my mom has always made is very sweet. I don’t know about yours.
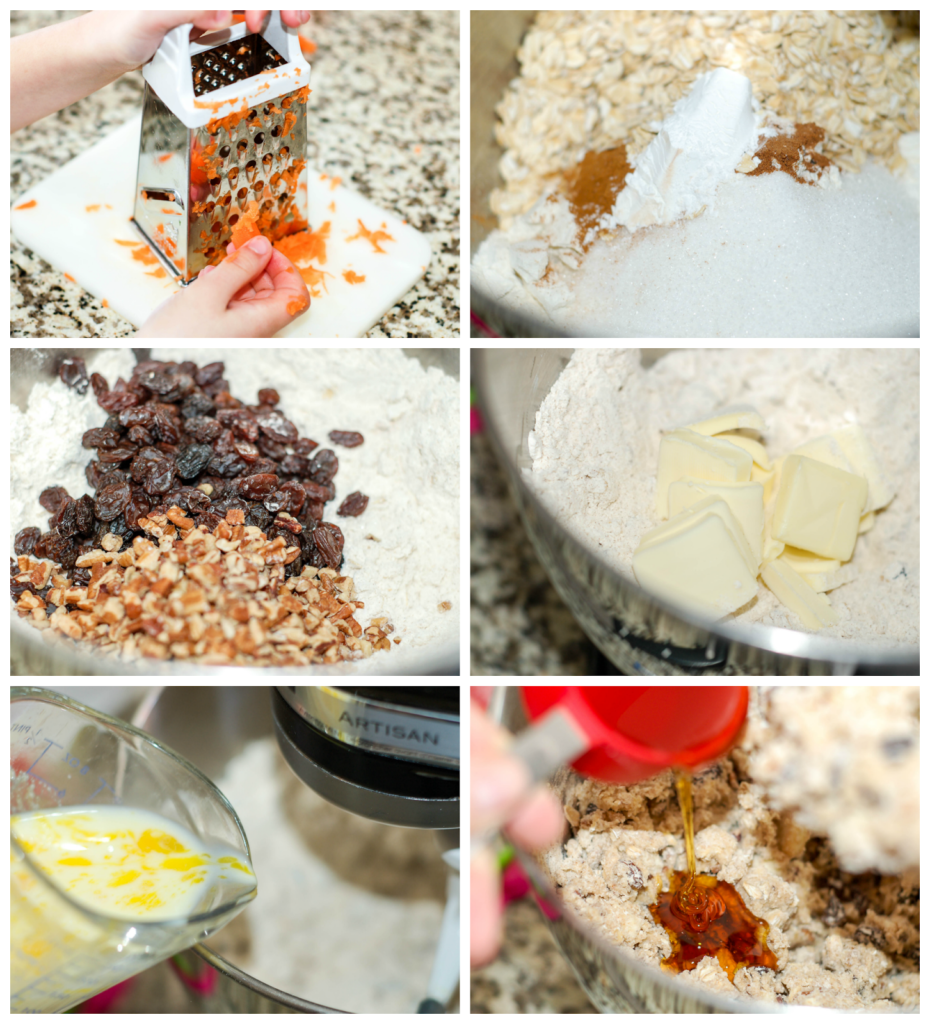
No my hands are not that tiny. I enlisted my daughter to grate the carrots. She wanted to help out.
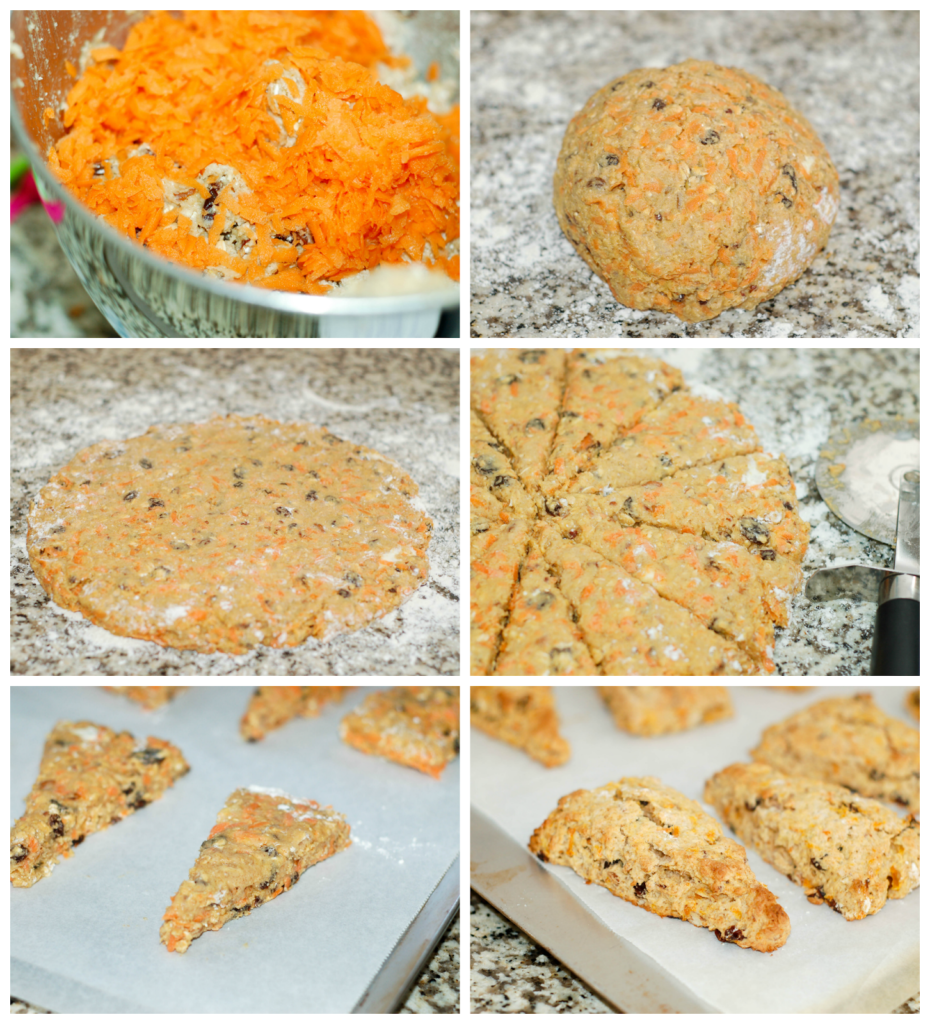
I made them the traditional way. Rolling out the dough and cutting them into triangles, but you can also just use a large cookie scoop (ice cream scoop) and make them round like I did for my Orange Basil Scones, Cranberry Ginger Scones, and Lemon Blueberry Scones. The dough was a bit sticky, but workable. I didn’t want to add too much more flour because, they would become too dry. I just dusted the top lightly to roll it out and cut the shapes.
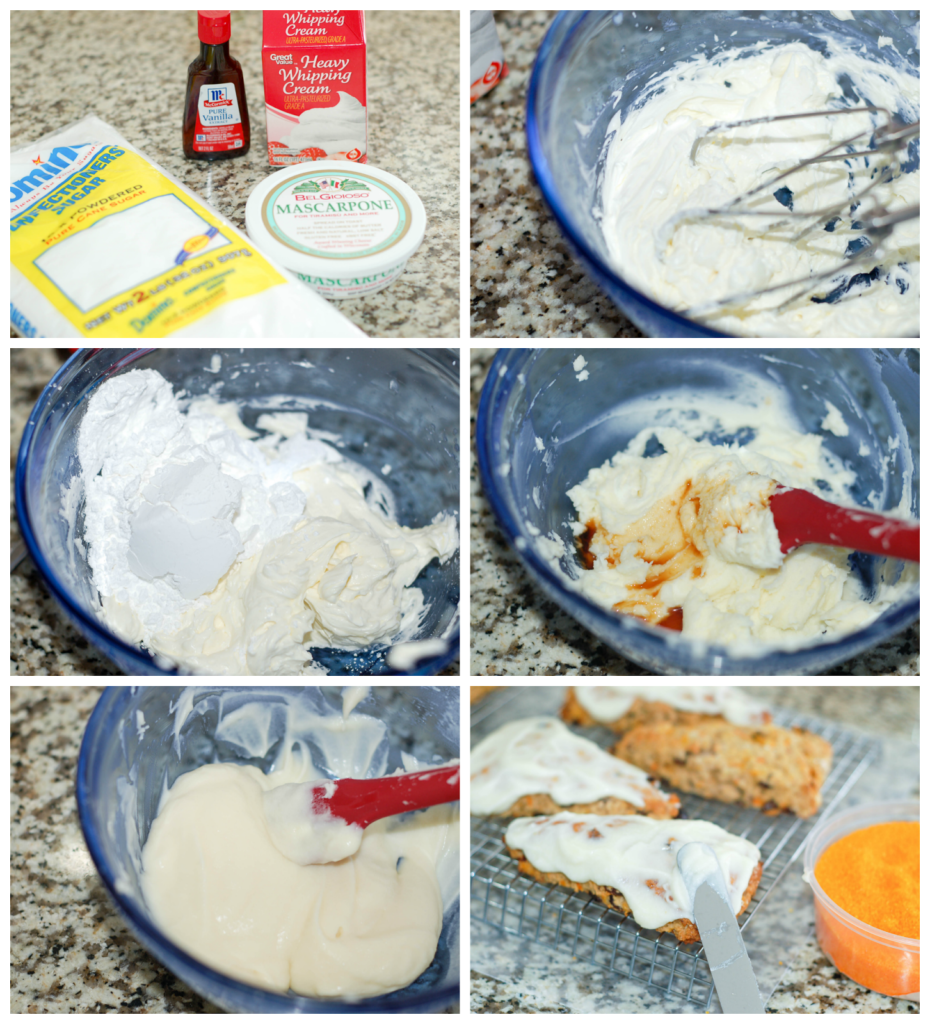
To top these beauties, I made a simple mascarpone glaze. I really love mascarpone cheese if you haven’t noticed. I think it tastes better than cream cheese, but if you want to make a cream cheese glaze, go right ahead.
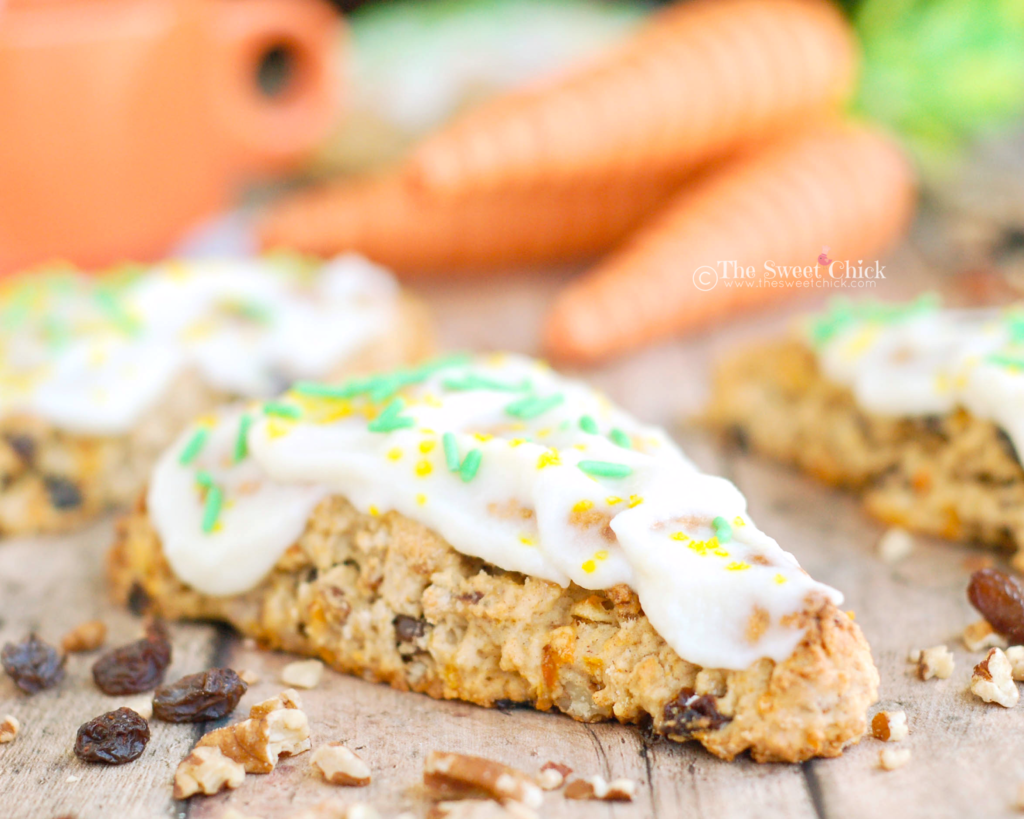
I love how rustic these Honey Carrot Scones came out. You can see all the bits of carrots and the speckles of cinnamon and nutmeg.
The texture of these scones was spot on. They are crumbly, but not too dry. They are just sweet enough, especially with the glaze. And they have a vegetable and a fruit inside, so you can kinda call it healthy. These will be a great break in between all the chocolate bunnies you will be eating on Easter day. Hope you all have a Happy Easter!
Honey Carrot Scones
by The Sweet Chick
Prep Time: 15 minutes
Cook Time: 13-15 minutes
Keywords: bake bread breakfast snack dessert carrots raisins rolled oats pecans Easter scones American spring
Ingredients (12 scones)
For the scones
- 2 1/2 cups flour
- 1/3 cup sugar
- 2 teaspoons baking powder
- 1 1/2 teaspoons ground cinnamon
- 1/2 teaspoon ground nutmeg
- 1 cup quick oats
- 1 cup raisins
- 1/2 cup chopped pecans
- 6 tablespoons cold butter
- 1/2 cup milk
- 1 egg
- 1/3 cup honey
- 1 cup shredded/grated carrots
For the glaze
- 4 oz. mascarpone cheese
- 1/2 cup confectioners sugar
- 1/2 teaspoon vanilla extract
- 3-4 tablespoons milk
Optional toppings
- sprinkles
- colored sugar
Instructions
For the scones
Preheat oven to 425° F.
In a stand mixer, mix flour, sugar, baking powder, spices, and oats, until well blended.
Then add the raisins and pecans and mix well.
Cut up butter and add to flour mixture, mixing on low speed for 1 minute.
In a small bowl/measuring cup mix egg and milk until blended and add to the flour mixture.
Then add honey and mix on low speed until fully incorporated.
Lastly, add the shredded carrots and mix until evenly distributed.
Remove dough from the mixer and roll into a ball. The dough will be a bit sticky, but manageable.
Place the ball onto a lightly floured surface and flatten out to about a 10″ circle. Sprinkle with a bit of flour to help flatten it out, just don’t overdo it.
With a knife or pizza cutter, divide the dough circle into 12 equal triangles.
Separate the triangles and place on a parchment lined cookie sheet.
Bake at 425 degrees for 13-15 minutes or until tops are golden and a toothpick inserted in the middle of the scone comes out clean.
Remove from the oven and allow to cool before glazing.
For the glaze
Place the cheese in a small bowl and beat with a hand mixer until fluffy.
Mix in the sugar by hand until smooth, then add the vanilla and mix until well combined.
With a spatula, spread the glaze over each cooled scone and enjoy!
Optional toppings
You can add festive sprinkles or colored sugar if you like on top of the glaze.
Notes
If you are making the scones ahead of time, wait till you serve the scones to add the glaze.
Related Posts






Subscribe for New Racipies
Get mental health tips, updates, and resources delivered to your inbox.
Christmas Rice Krispie Treats

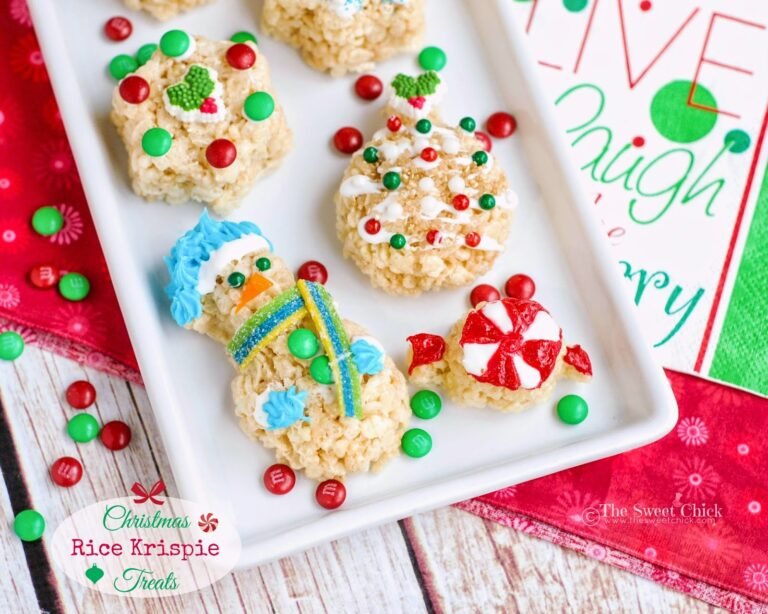
Having the kids home for winter vacation is always difficult. They always seem to get bored, no matter how many toys, crafts, or games they have. Cold, rainy days make it even harder because they can’t go play outside. So today I kept them busy for a little bit with some fun Rice Krispie Treats we shaped out of a Jello Jigglers mold. They came out really cute, so I thought I’d share them with you.
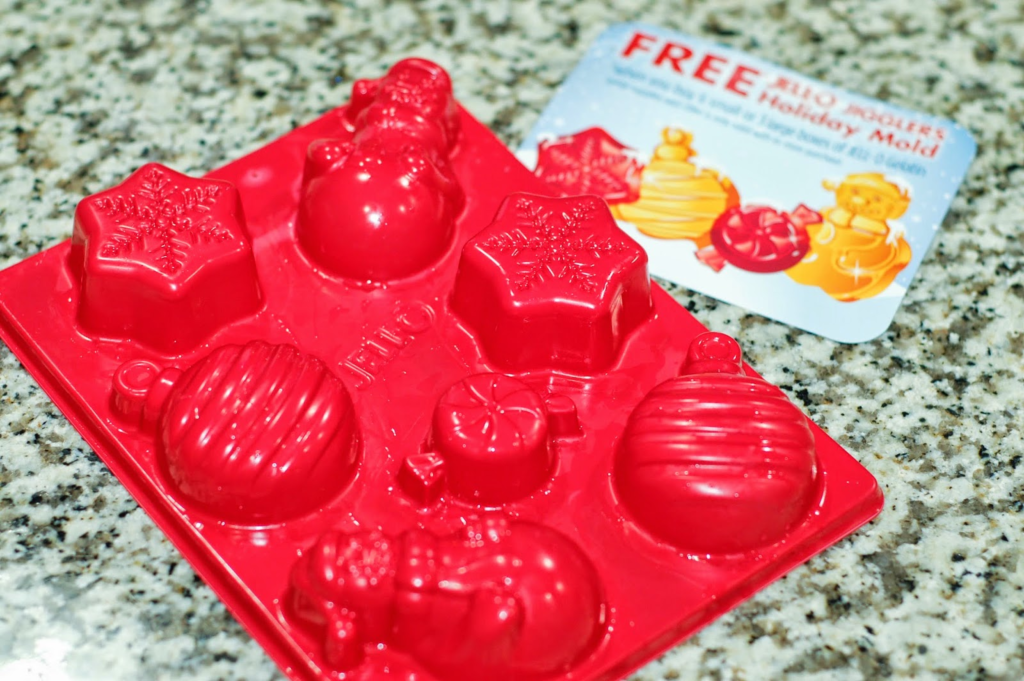
I got this mold free at the supermarket and hadn’t used it yet. I kept meaning to make Jello, but kept forgetting. I had some Rice Krispie cereal left in the pantry that I wanted to use up, so that seemed like a more interesting choice for this mold.
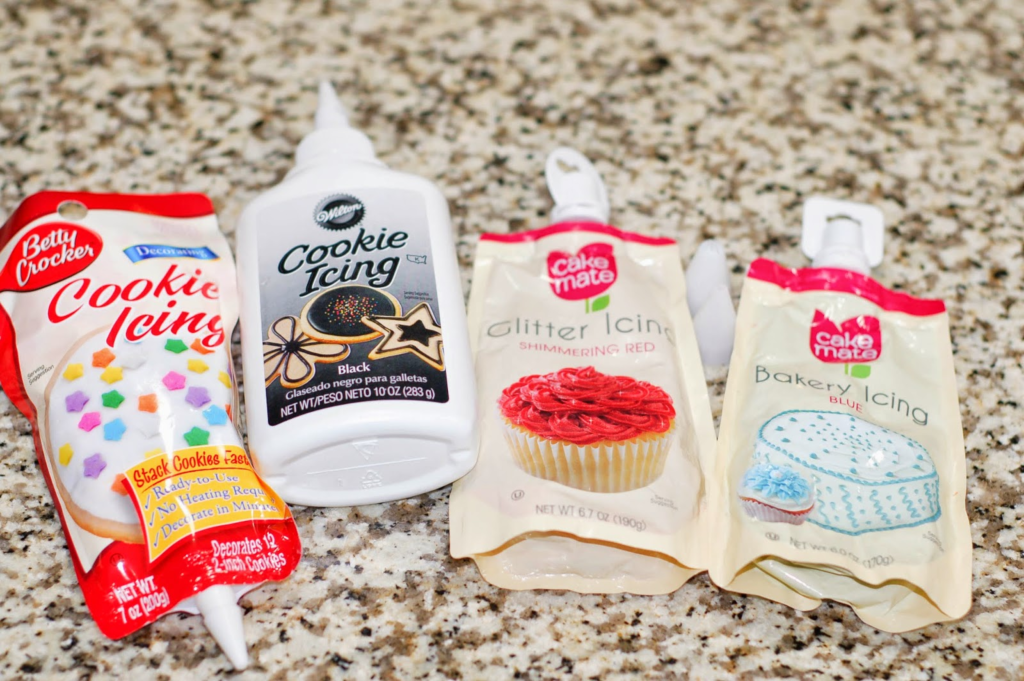
I went through the pantry for icing and candy to decorate the treats. I had cookie icing and regular icing. Cookie icing is great for glueing on candy because it hardens. The other icing will get stiff, but not harden as much. It does make for pretty decorations though, especially the glitter one.
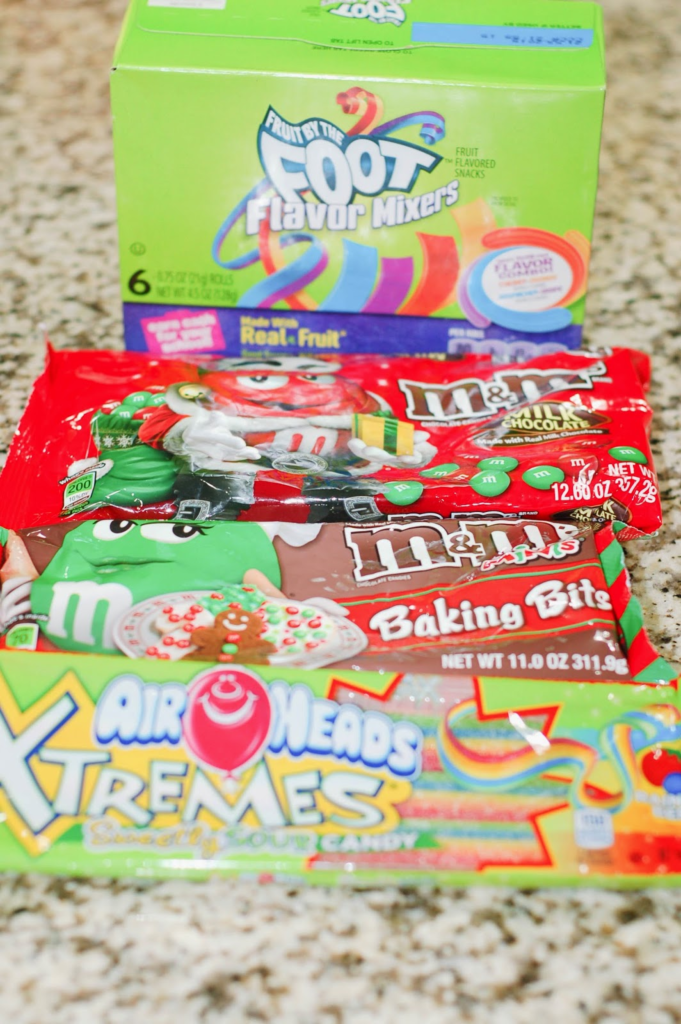
Besides sprinkles, I also pulled out some fruit roll-ups, Air Heads candy strips, and regular and mini M&Ms.
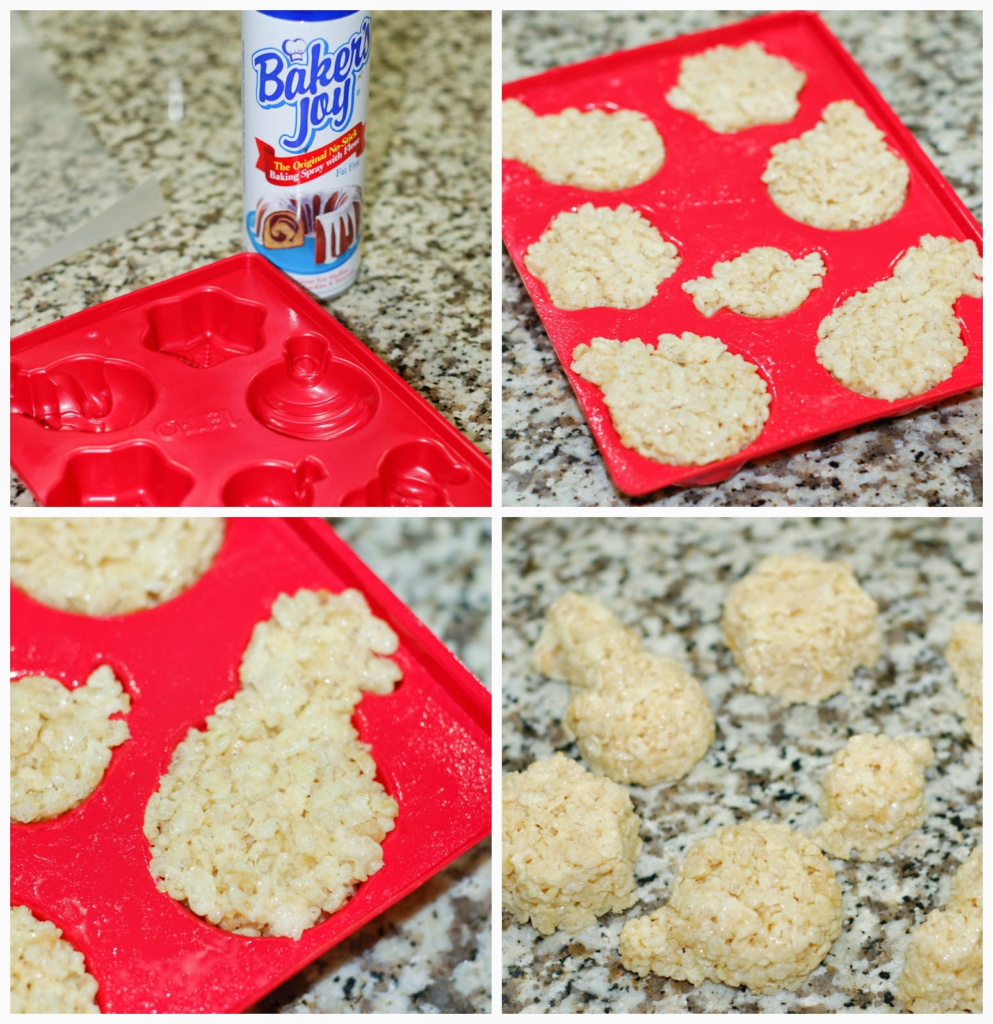
After I mixed the Rice Krispies with the melted butter and marshmallows, I just took scoops and place them in the mold cavities and pressed them in to form the shape. By the time I filled in the last cavity, I was able to flip the mold over and the shapes slid out thanks to the Baker’s Joy non-stick spray I used. So I just kept refilling the mold and making more shapes. I was able to fill the mold three times before running out of the Rice Krispie mix. I placed the molded treats in the fridge to firm up a bit more before decorating them.

Here’s where the kids had fun. My daughter usually takes her time decorating, while my son just likes to put as many candies as possible like he did for our gingerbread cookies a few weeks ago.
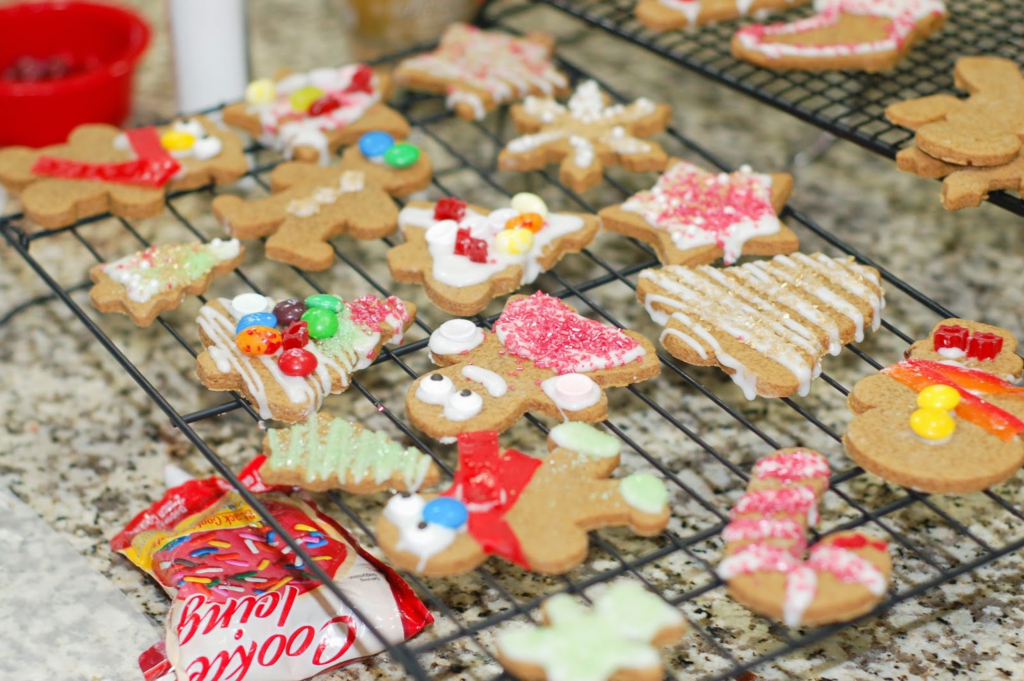
We didn’t end up using all the candies and sprinkles I pulled out, but the Air Heads made for some nice scarves on the snowmen. The fruit roll ups I used to wrap around the tops of the ornaments and for the snowman noses.
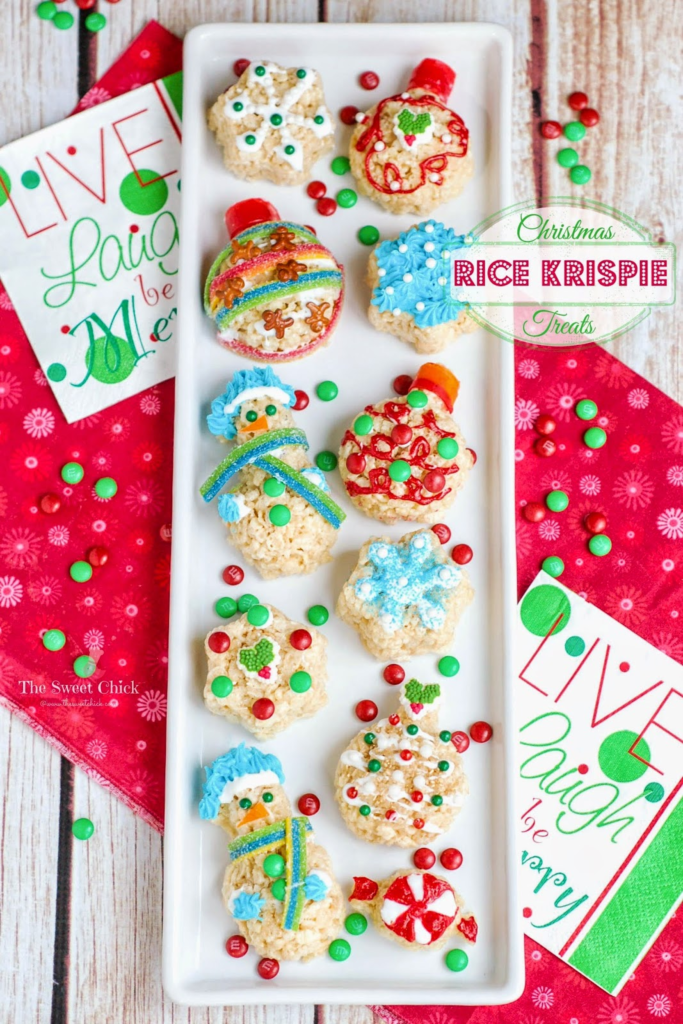
My kids enjoyed themselves and it kept them from fighting and driving me nuts for about an hour. And the treats came out reasonably good looking, so it was a success in my book. What are your kids doing for winter break?
Christmas Rice Krispie Treats
by The Sweet Chick
Prep Time: 20-30 minutes
Cook Time: 5 minutes
Keywords: stove top dessert snack rice krispies marshmallows cookie icing candy Christmas rice krispie treats American winter
Ingredients (21 treats)
For the treats
- 3 tablespoons butter
- 3 cups mini marshmallows
- 4 cups Rice Krispie cereal
For the toppings
- mini M&Ms
- sprinkles
- fruit roll ups
- Air Heads Extremes
- Betty Crocker cookie icing
- Cake Mate glitter icing/ bakery icing
Additional items
- Jello Jigglers holiday mold
Instructions
For the treats
In a large sauce pan, melt butter and marshmallows over low heat. Stir until completely melted.
Remove from heat and add Rice Krispie cereal. Mix until fully incorporated.
Spray Jello mold with non-stick spray.
Once the cereal mixture has cooled slightly, and can be touched, place spoonfuls of mixture into the mold cavities.
Press the mixture in with your hands to form the shapes, filling the cavities flush.
Once all cavities are filled, flip the mold over and the treats should fall out by themselves. If not, give the mold a slight tap.
Place finished treats aside and fill the mold again.
Once all mixture is used, place finished treats in an airtight container and place in the fridge for about an hour or overnight.
For the toppings
Once the treats have set, let the decorating begin. Use your imagination.
Use the cookie icing as the glue to hold candies in place and also as a decoration. The fruit roll ups and Air Heads work great as scarves, just cut to fit.
The Cake Mate icing bags come with different tips (sold separately), so you can experiment. I used the star tip to make the snowman hat and mittens.
It’s all about having fun. Enjoy!
Notes
The treats can be made ahead of time and decorated another day.
Finished treats can be kept in an airtight container at room temperature or in the fridge for longer storage.
Related Posts



Subscribe for New Racipies
Get mental health tips, updates, and resources delivered to your inbox.