
Orange Basil Scones

Medically reviewed by Christiana George Updated Date: December 18, 2022


My husband was in the mood for some scones. I decided to make these Orange Basil Scones again. I had made some before the holidays hit, as a trial run and they were a hit, so I made some more. The combination of orange and basil gives a refreshing flavor to these scones. The tangy flavor of the citrus goes well with the sweetness of the fresh basil. They came out with the perfect amount of moistness, but still crumbly. Oh, I do so love a good scone.
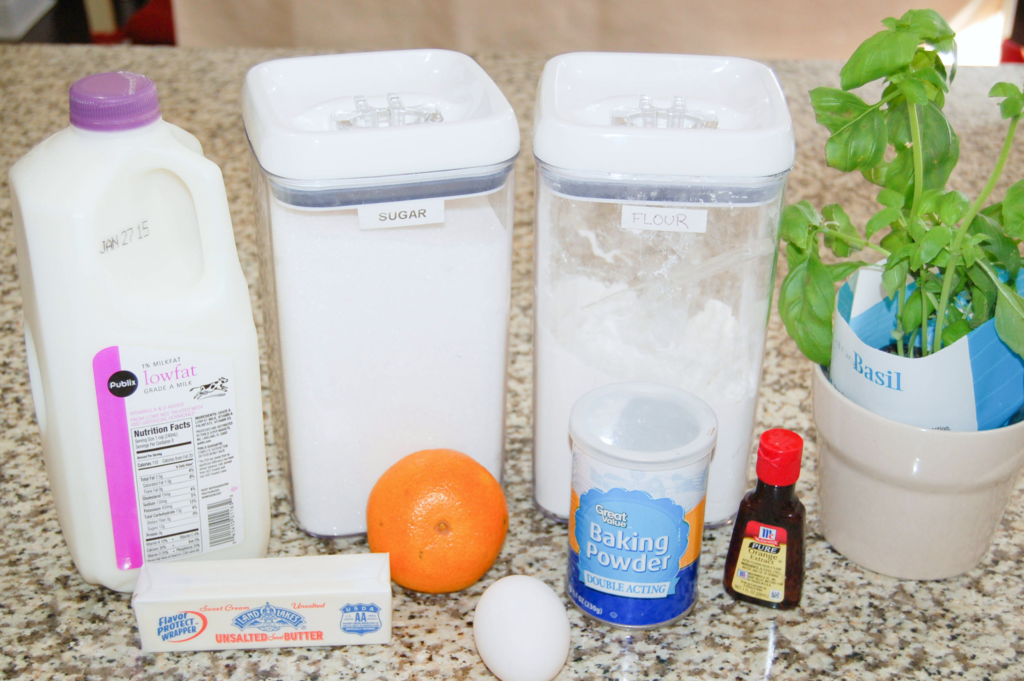
There are really not many ingredients needed. It’s a pretty basic recipe. The orange zest and fresh basil are what make the recipe special.
I love the smell of fresh basil. Can’t you just smell it through your screen right now?

You get little bits of orange zest and basil in every bite. The glaze gives them a bit more sweetness without overdoing it. You can add more or less as you wish. I just did a little drizzle. Even my daughter loved these. Of course, she is the one that always picked fresh leaves off my basil plants and ate them straight up. She knows good flavor when she tastes it and so will you when you make these Orange Basil Scones.
Here are some other great flavors I have made:


Orange Basil Scones
by The Sweet Chick
Prep Time: 15 minutes
Cook Time: 15 minutes
Keywords: bake bread breakfast dessert snack orange extract orange zest basil scones American
Ingredients (8 scones)
For the scones
- 2 cups flour
- 1/3 cup sugar
- 2 teaspoons baking powder
- 6 tablespoons cold butter
- 1/2 cup milk
- 1 egg
- 1 teaspoon orange extract
- 1 teaspoon chopped orange rind
- 2 tablespoons chopped fresh basil
For the topping
- 2 tablespoons milk
- 1-2 teaspoons sugar
For the glaze
- 3/4 cup powdered sugar
- 1- 1 1/2 tablespoons milk
- 1/4 teaspoon orange extract
Instructions
For the scones
Preheat oven to 425° F.
In a stand mixer, mix flour, sugar, and baking powder.
Cut up butter and add to flour mixture, mixing on low speed for 1 minute.
In a small bowl mix egg, milk, and orange extract until blended and add to the flour mixture. The batter will be a dough like consistency.
Next add in the basil and orange zest and mix until well distributed.
With a large scoop, place dough onto a greased or parchment lined cookie sheet. Do not flatten.
For the topping
Brush the tops and sides of each scone with milk and sprinkle with about 1/4 teaspoon or less of sugar.
Bake at 425°F for 13-15 minutes or until toothpick inserted in middle comes out clean and tops are a golden color.
Remove from oven and carefully place scones on cooling rack with wax paper underneath. (Scones will be extra hot due to the sugar.)
For the glaze
In a small bowl whisk together powdered sugar, milk, and orange extract until smooth.
Using the whisk, drizzle the scones with as much or as little glaze as you prefer.
You can wait for the glaze to set or go ahead and eat one!
Related Posts


Subscribe for New Racipies
Get mental health tips, updates, and resources delivered to your inbox.
Spiked Lemon Oreo Truffles


Sometimes adults have to have their own special treats. Sorry kids. These Spiked Lemon Oreo Truffles are to die for. They have a nice crunchy vanilla outer shell and a soft gooey lemony center, with a little help from some Bacardi Limon Rum. If you love lemon desserts, you are going to want to make these. I think my husband ate about half of them. The other half, I was kind enough to share with my neighbors. I am going to have to make another batch for the 4th of July neighborhood party.
The Bacardi Limon Rum really kicks up the lemon flavor of the Oreos. I can’t say that there is much of an alcohol taste. They just taste really good.

The initial prep for the Spike Lemon Oreo Truffles is fairly easy. Chop up the Oreos in a food processor till you get a fine consistency, then combine it with the cream cheese and rum. After that melt you white chocolate and add it into the mix.

The dough was too soft to roll it into balls. I didn’t want to add any more white chocolate because I didn’t want to mess with the luscious lemon flavor. So I just used a cookie scoop with a little bit of flour coating and made mounds instead. After I froze them, they were easy enough to dip in candy coating and decorate. I usually use Wilton’s candy melt for the coating, but recently I have been using Candiquik and I find that it melts better and stays smoother. And the taste it better also.

Look at that gooey center. Yep, so glad I didn’t add more chocolate. They are perfect. I did keep these refrigerated after I made them because of the cream cheese. I don’t like to leave dairy unrefrigerated for long periods of time. But hey, that’s just me.

Look at that gooey center. Yep, so glad I didn’t add more chocolate. They are perfect. I did keep these refrigerated after I made them because of the cream cheese. I don’t like to leave dairy unrefrigerated for long periods of time. But hey, that’s just me.
Hope you all enjoy the 4th of July holiday weekend. I will be hanging out with our neighbors and relaxing, eating all sorts of good food and yummy treats.
Spiked Lemon Oreo Truffles
by The Sweet Chick
Prep Time: 1.5 hrs (including freezer tim
Keywords: no bake dessert snack Lemon Oreos cream cheese
Ingredients (27 truffles)
For the truffles
- 1 package (15.25 oz.) Lemon Creme Oreos
- 1 container (8 oz.) cream cheese
- 1 tablespoon Bacardi Limon Rum
- 1/2 cup white chocolate chips
For the coating
- 1 package (16 oz.) Candiquik candy coating (vanilla/white)
Optional toppings
- 1/2 cup red, white, and blue sprinkles
- 1/4 cup white pearl sprinkles
Instructions
For the truffles
Crush Oreo cookies in a food processor until they are a dirt like consistency.
In a stand mixer or with a hand mixer, mix the rum and the cream cheese until softened.
Then add the crushed Oreos a little at a time until well incorporated.
Melt the white chocolate chips in a heat safe bowl over a pot of slightly boiling water, until completely melted and smooth. Stir often.
Add the melted chocolate to the Oreo mixture and mix until it becomes a dough like consistency.
With a cookie scoop, measure out 27 mounds and place them on a wax paper lined air-tight container. ( I sprinkled a little flour on the scoop to keep the dough from sticking.)
Place the container in the freezer for at least 1 hour to set.
For the coating
After the balls are set, melt candy coating in the microwave as per directions on package.
Remove Oreo balls from the freezer. (Do a small batch at a time so they don’t fall apart. If you need to, just place them back in the freezer for a few minutes.)
Dip the Oreo balls into candy coating mixture until all covered. (I use a fork.) Once covered, remove and softly tap until excess candy melt falls off. Then place the balls on wax paper until the candy melt hardens.
For the toppings
Carefully add the sprinkles to the top of the balls before the candy melt hardens.
Notes
These truffles can be made ahead of time and refrigerated for 3-4 days.
Related Posts
Subscribe for New Racipies
Get mental health tips, updates, and resources delivered to your inbox.