
Lemon Ginger Scones

Medically reviewed by Christiana George Updated Date: December 17, 2022

Well, it’s been quite a while since I posted. The lovely folks at The Ginger People wanted to share my recent recipe for Lemon Ginger Scones, so I thought I’d make it available for everyone to share. It’s just another version of a basic scones recipe that I used for my Orange Basil Scones , Cranberry Ginger Scones , and Lemon Cranberry Scones. I hope you enjoy them!
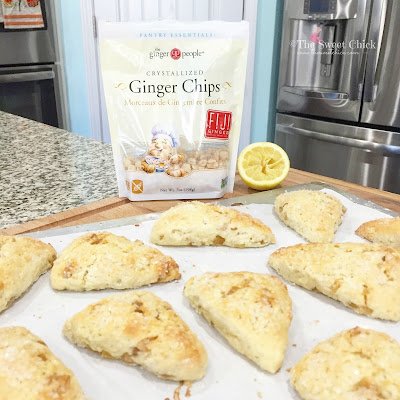
I usually find the crystallized ginger chips at World Market. They also carry The Ginger People Organic Ginger Syrup which is fabulous on waffles, salads, and in a tea. I have also found the chips at T. J. Maxx. But if all else fails, you can always find them on good old Amazon. I have used the chips in my Maple Ginger Banana Muffins , Cranberry Ginger Scones , and Pumpkin Gingerbread Cupcakes. I love the extra ginger kick they give to baked goods.

Instead of topping the scones with a sweet glaze, I chose to just sprinkle them with Bob’s Red Mill Decorative Sparkling Sugar before placing them in the oven. It gave the scones a bit of sweetness, but didn’t over power the lemon and ginger flavors. If you like you scones extra sweet, then by all means you can add a simple lemon glaze like the one I drizzled on my Lemon Blueberry Scones.
Although I love to bake and do so every week, I became a bit disenchanted with the whole blogging business. What started as a fun, creative outlet, became more of a headache over the years. There is a lot more to blogging than baking and taking pretty pictures. For now, I prefer to stick to just the baking part. That’s what makes me happy! I will try to share when I have a chance.
Lemon Ginger Scones
by The Sweet Chick
Prep Time: 15 mins
Cook Time: 15 mins
Keywords: bake bread breakfast dessert snack scones American
Ingredients (8-12 scones)
For the scones
- 2 cups flour
- 1/3 cup sugar
- 2 teaspoons baking powder
- 6 tablespoons cold butter
- 1/2 cup milk
- 1 egg
- zest of one lemon
- 2 tablespoons freshly squeezed lemon juice
- 1/2 cup crystallized ginger chips (I used The Ginger People brand)
For the topping
- 2 tablespoons milk
- 1/4 cup sparkling sugar (coarse sugar)
Instructions
For scones
Preheat oven to 425 degrees.
Mix flour, sugar, and baking powder. Cut up butter and add to flour mixture. In a separate bowl mix egg and milk until blended and add to the flour mixture. Add lemon rind and lemon juice, mix well.
Next mix in the crystallized ginger chips until well distributed. The batter will be a dough like consistency.
Take the dough and roll it into one big ball. Place the ball onto a lightly floured surface and flatten out to about an inch thick. With a knife or pizza cutter, divide the dough circle into equal triangles. I made eight big scones, but you can make yours a little smaller if you like by dividing the dough into two balls before rolling out and cutting triangles.
Separate the triangles and place on a cookie sheet lined with parchment paper.
For the topping
Brush the tops of each scone with a little bit of milk and sprinkle with the sparkling sugar.
Bake at 425°F for 13-15 minutes or until toothpick inserted in middle comes out clean and tops are a golden color.
Related Posts


Subscribe for New Racipies
Get mental health tips, updates, and resources delivered to your inbox.
Flower Blanket


When my daughter was a baby I had brought her to have her picture taken, but I was not happy with the results. So I decided to take matters into my own hands and try to take pictures of her at home. I had just bought a new DSLR camera, all I needed was some kind of background. One of the backgrounds I loved was a blanket of flowers. My first thought was, heck, I can make one of those!
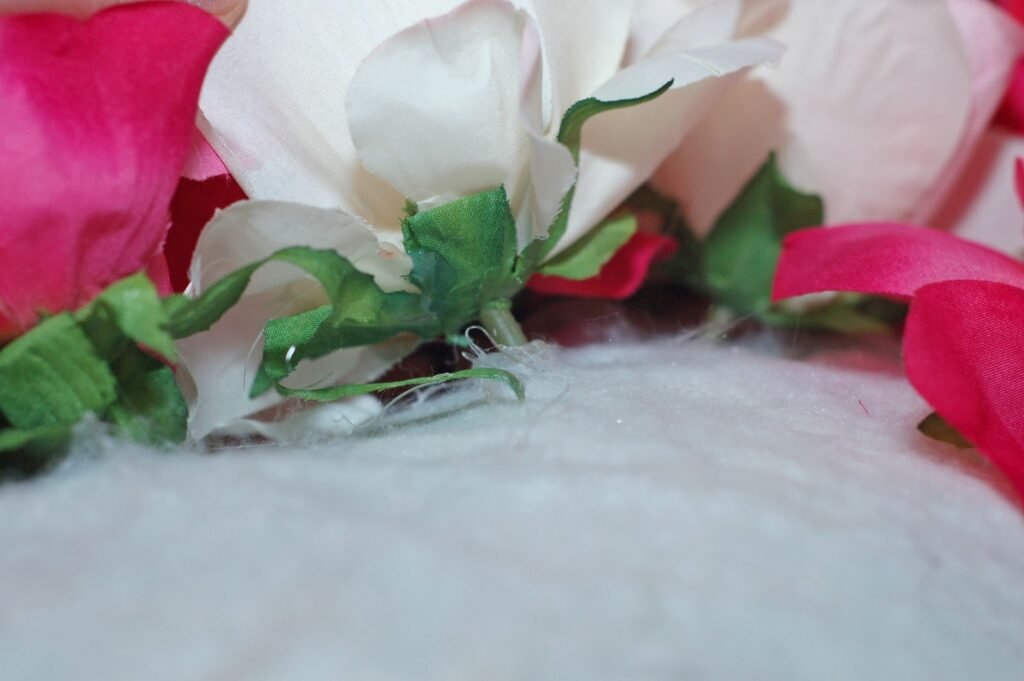
So I went to the craft store and bought tons of huge pink roses. They felt soft and fluffy, so I thought they would be perfect for my daughter to lay on.

I bought a mix of dark pink and light pink roses. Then I started thinking about what to glue them to that I could drape over my reading chair in my bedroom to take the pictures. It had to be something flexible, but sturdy. Light bulb! I asked my mom if she had any vinyl tablecloths she could spare. It didn’t really matter the pattern on the vinyl side, because I was going to glue the flowers to the felt side. This one happens to be fall one.

Then I went to get my glue gun. I took all the roses off their stems and started gluing them one by one to the white felt side of the table cloth. I glued them a little ways apart to kept the feel of them soft an pliable. I needed my daughter to be happy and comfy when I laid her on it, not crying.
It was a pretty easy project and I received a lot of compliments on it. I even had a photographer friend ask where I had bought the blanket when she saw the photo because she was looking for one. She was impressed when I told her I had made it myself. It pays to be crafty.
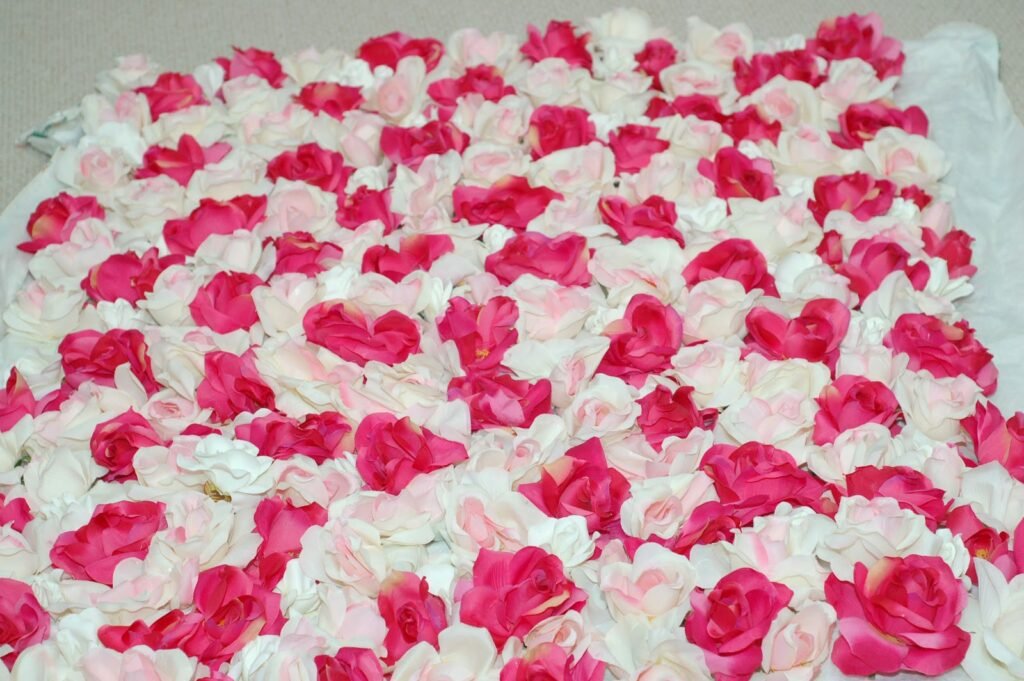
Here is the completed project. I ended up taking some cute pictures of my daughter when she was eight months and used it again last year when she was four (she was jealous that I was taking pics of her baby brother, so I had to take some pics of her too). I am in no way a professional photographer, but I was very happy with my pictures and at least I can say I did it myself.


So if you are interested in making one of these blankets, here is what you need:
-1 vinyl felt backed table cloth
-several bunches of large soft flowers
-1 glue gun and some glue sticks
Related Posts
Subscribe for New Racipies
Get mental health tips, updates, and resources delivered to your inbox.