
Red Velvet Oatmeal Cookies

Medically reviewed by Christiana George Updated Date: December 18, 2022


I am still on a red velvet kick. I had bought a box mix to make a red velvet cake for Valentine’s Day, but then decided to use it to make some fun cookies. I had seen recipes for red velvet banana bread and red velvet oatmeal cookies, so I kind of combined the two and made these with Red Velvet Oatmeal Cookies with bananas. I wasn’t too sure about the taste of bananas and red velvet together, but O.M.G, these came out so good. They even have a double dose of chocolate with semi-sweet chocolate chips inside and half-dipped in dark chocolate on the outside. I even threw in a Red Velvet M&M for decoration.
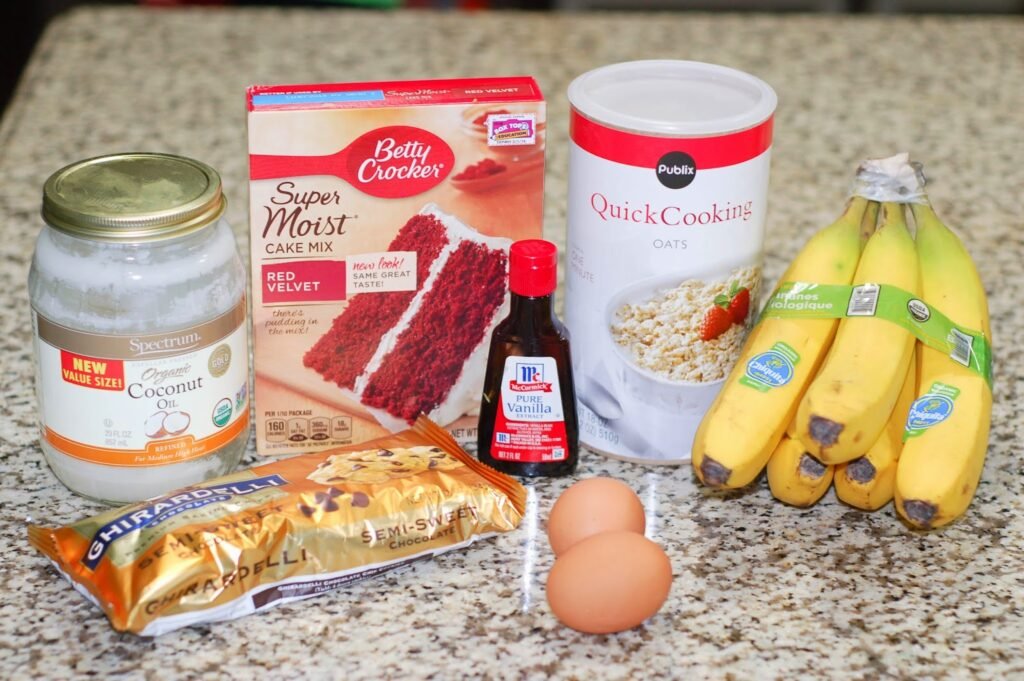
This recipe does call for ripe bananas and as you can see, mine are not there yet. However, I have learned a little trick and have been using it for awhile. Just place the bananas you need in the oven while it is warming up and watch them turn brown/black. How long it takes depends on how ripe they were to begin with. Mine took about ten minutes. I usually flip them at least once to get them brown all over. You can place them directly on the oven rack or in an oven safe dish. You will need to let them cool off a bit before slicing them open.

I did make these cookies three different ways to see which I liked best. The first way was just to place scoops onto a parchment lined cookie sheet and pressed three Red Velvet M&Ms into the mounds before baking.

They were not very visually appealing and the colors of the M&Ms bled into the cookie, especially the white. You can try just using the red and burgundy colors if you prefer to make them this way.
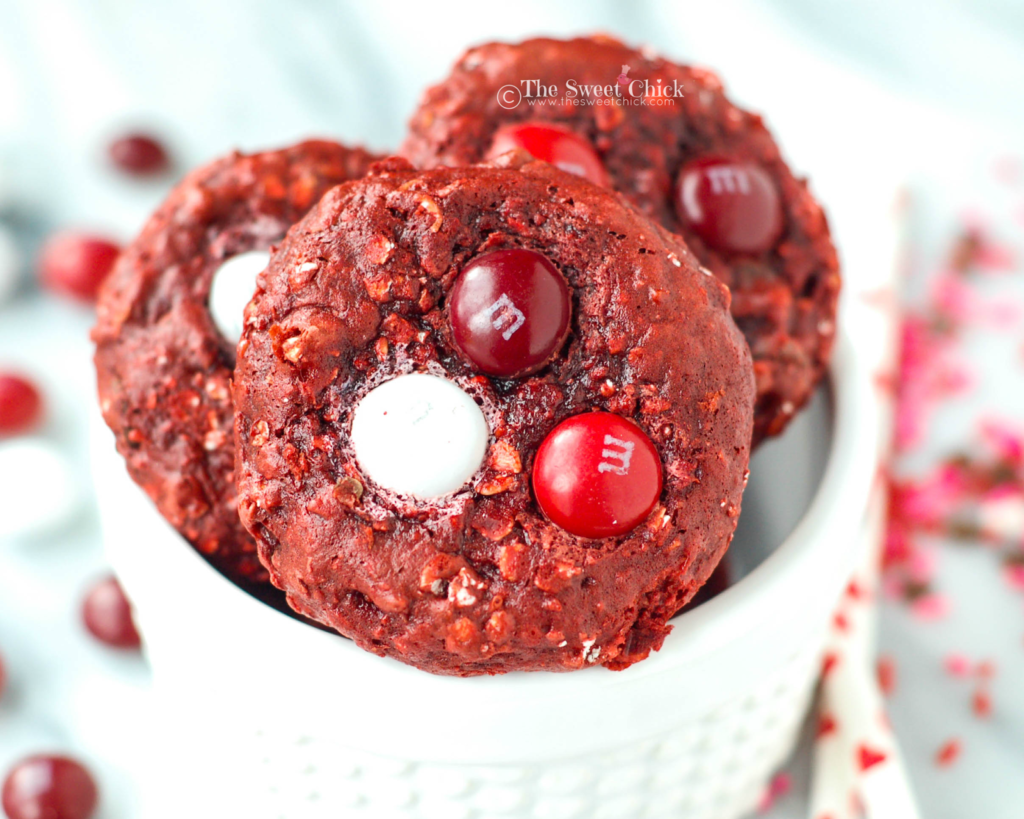
Next, I tried my Wilton Heart-Shaped Whoopie Pie pan. I used the same amount of dough, but I had to press the dough into the shape because these cookies do not spread much. It was a little messy, but doable (I would suggest using a greased piece of waxed paper to press the dough). They looked really pretty after they were dipped and decorated. Don’t forget to grease your pan if you plan on using this method. (You may need to press the dough down again after they bake, if they rise too much.)

The easiest way to make these cookies, is to stick with the original scoop onto a cookie sheet method. It’s less trouble and the cookies still come out pretty once decorated.

I dipped these cookies in dark chocolate, but you can use semi-sweet if you prefer. I do recommend Ghirardelli chocolate chips because they melt so beautifully in the microwave. I used the same Wilton sprinkles that I had used for my Red Velvet Brownie Krispies last week. I found them at Walmart, along with the Red Velvet M&Ms.
These Red Velvet Oatmeal Cookies are moist and chewy like an oatmeal cookie should be. They are filled with plenty of chocolate, banana, and red velvet flavors. You can taste each flavor separately, but they magically all come together smoothly and seamlessly into one incredible flavor sensation for your taste buds.

I am trying to save some of these for Valentine’s Day on Saturday, but we can’t stop eating them. Guess I am going to have to stock up on red velvet cake mixes for future cookie making.
Red Velvet Oatmeal Cookies
by The Sweet Chick
Prep Time: 15-20 minutes
Cook Time: 10-12 minutes
Keywords: bake dessert snack healthy red velvet cake mix quick oats coconut oil banana Valentine’s Day cookie American spring
Ingredients (36 cookies)
For the cookies
- 1/4 cup coconut oil, melted
- 2 medium ripe bananas, mashed
- 1 teaspoon vanilla extract
- 2 eggs, room temperature
- 1 (15.25 oz.) package Betty Crocker Red Velvet Cake mix
- 2 cups quick oats
- 1 1/2 cups semi-sweet chocolate chips
Additional toppings
- 1 package (10 oz) Ghirardelli 60% Cacao Bittersweet chocolate chips (or semi-sweet)
- 1 container (2.5 oz) Wilton’s Chocolate Hearts Mix sprinkles
- 1 package (9.90 oz) Red Velvet M&Ms
Instructions
For the cookies
Preheat oven to 350º F.
In a stand mixer, mix together the oil, bananas, vanilla and eggs on low speed, until well blended.
Add the dry cake mix a little at a time, continuing to mix on low. Scrape down the sides of the bowl as needed.
Next add the quick oats and mix on low until all incorporated.
Then add chocolate chips and continue to mix on low until evenly distributed
With a regular cookie scoop, drop by scoopful onto a greased or parchment lined cookie sheet at least 2 inches apart.
Bake at 350º for 10-12 minutes or until a toothpick inserted in the middle comes out clean. (Mine only needed 10 minutes.)
Remove from oven and let cool for 2 minutes on the cookie sheet, then move to a cooling rack to completely cool.
For the additional toppings
Melt chocolate chips according to instructions on the back of the package.
Dip half the cooled cookie into the melted chocolate and place on a sheet of wax paper to allow the chocolate to harden. ( I left mine out a room temperature to harden.)
Add sprinkles and M&M candies to the chocolate before it completely hardens.
Notes
I kept my finished cookies in an airtight container at room temperature. If you feel the need to refrigerate yours because you are making them far in advance, I suggest you leave out the M&M’s because they lose their color when refrigerated. You can always add them later with a dab of melted chocolate if you wish.
Related Posts






Subscribe for New Racipies
Get mental health tips, updates, and resources delivered to your inbox.
Is Broccoli acidic? Broccoli and Acid Reflux: Good or bad

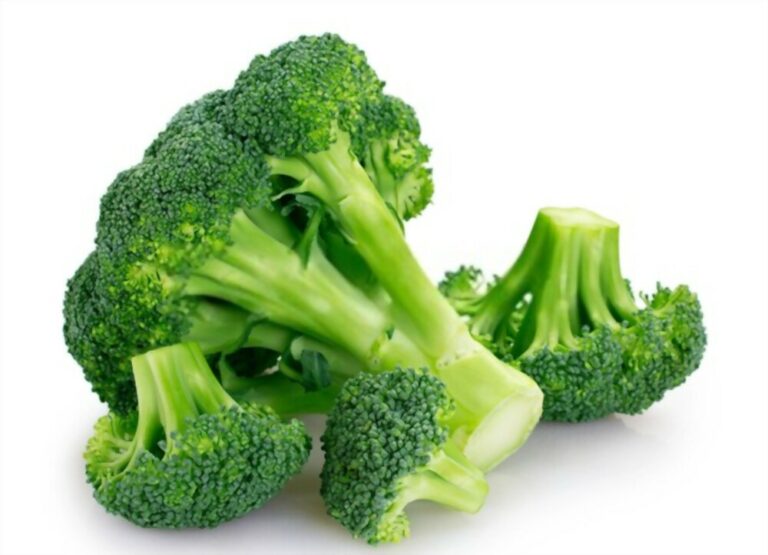
Broccoli is a member of the cabbage family known for its high fiber content and anticancer properties. In addition, it’s often touted as one of the healthiest vegetables on the planet because of its high concentration of antioxidants. It’s also a great source of vitamin C, folate, and calcium. But, despite being loaded with nutrients, many still want to know – is broccoli acidic?
Broccoli has slightly acidic PH of around 6.30-6.85. Since it is almost neutral, it does not make the environment within the stomach more acidic. Even though broccoli is slightly acidic, it actually functions as an alkaline-producing agent within the body. In addition, broccoli contains essential vitamins like A, C, and K. It is rich in antioxidants and fibers, which improve eye health, reduce cancer risk, and help to maintain healthy blood pressure.
Read on to find out more information about whether or not broccoli is acidic.
Broccoli – Acidic, Alkaline, or Neutral?
Broccoli has a PH of around 6.30 – 6.85, which is slightly acidic.
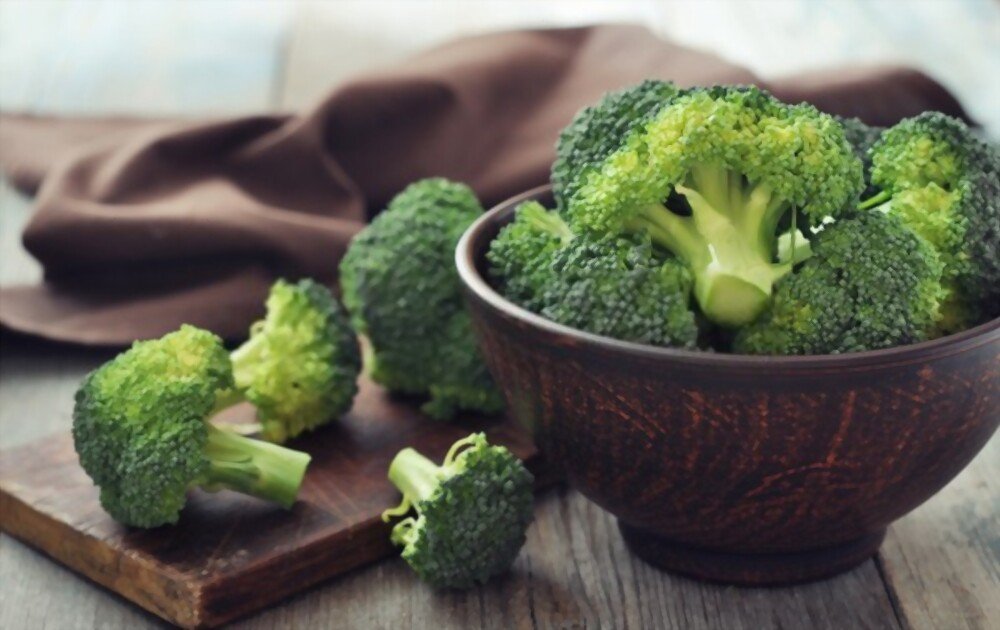
Since broccoli is almost neutral, it does not provoke acid reflux symptoms for most GERD sufferers. Moreover, broccoli actually functions as an alkaline-forming compound in the body.
This means that eating broccoli leads to formation of alkaline compounds in the body. This does not, however, change the body’s pH. The body’s pH is regulated very tightly, and not affected by foods.
So, broccoli is slightly acidic – but close to neutral, is unlikely to provoke GERD symptoms, and has no effect on the body’s pH.
pH of Broccoli
The pH of Broccoli is around 6.30-6.85. The table shows the pH of Broccoli in different types and forms.
| Broccoli | pH Value (Approximate) |
| Broccoli ( Fresh or Raw) | 6.70 |
| Broccoli (Steamed) | 6.62 |
| Broccoli ( Boiled) | 6.88 |
| Broccoli ( Baked) | 6.13 |
| Broccoli, frozen, cooked | 6.30 – 6.85 |
| Broccoli, Rabe | 6-7 |
Broccoli acid reflux: Is this True?
Broccoli is a vegetable loaded with lots of nutritional benefits. It is a member of the brassica family, which also includes cabbage and brussel sprouts. Broccoli contains high levels of vitamins A, C, K, lutein, and folate. It is also an excellent source of fiber, calcium, and iron.
However, this leafy green is not without its downsides. Like many other cruciferous vegetables, broccoli is high in sulfur compounds.
While not harmful for your health, foods high in sulfur can have some unpleasant effects. Sulfur compounds are the cause of the odors associated with passing gas.
So, the sulfur in broccoli is definitely not unhealthy, but it does make your flatulence more odorous.
Despite the smells that may be associated, broccoli has a number of health benefits.
- Vitamin C has a beneficial role in reducing inflammation in the body. It is also important in various tissues’ ability to heal.
- The folates present in broccoli also reduce acid reflux symptoms. In fact, a research study concluded that regular intake of B vitamins reduces the risk of esophagitis ( a condition caused by acid reflux).
But, if your acid reflux is associated with gas or indigestion, foods like broccoli can intensify these associated symptoms. This is because broccoli contains a significant amount of dietary fiber, which is not digested by the human digestive system. Eating broccoli can lead to gas within the digestive system, which can cause a sense of bloating.
Also read:
Are Mangoes Acidic? [Mango And Acid Reflux Good Or Bad]
Is broccoli rabe acidic?
Broccoli rabe has a pH of around 6-7, which is very slightly acidic. But once cooked it becomes alkaline. Broccoli rabe is a rich source of vitamins like A, C, and K.

It is high in folates and fibers that keep you full for a long time. Broccoli rabe is rich in water. It aids in digestion, improves vision, and contains folic acid, which is known to be important in preventing some types of birth abnormalities.
Is steamed broccoli acidic?
The pH of steamed broccoli does not differ significantly from the pH of raw broccoli. You can eat your broccoli the way you want either cooked or steamed.
Steaming is a better way of cooking vegetables than boiling. When vegetables are boiled, a lot of their vitamin and mineral contents are lost in the cooking water. When vegetables are steamed, these nutrients remain in the vegetable. So, steamed broccoli is a great choice!
Is broccoli cheese soup acidic?
Broccoli cheddar soup is delicious, and a hearty fall favorite of many people. Here, the concern is not necessarily the pH. Broccoli cheese soup is a heavy, cream-based soup.
Because of these characteristics, it can trigger GERD gastroesophageal reflux disease (GERD) symptoms. GERD is a condition in which stomach acid is allowed to flow up into the esophagus, irritating the lining of the esophagus.
For those who suffer from GERD, it is preferable to eat broth-based soups instead of heavier, cream-based soups. So, regardless of pH considerations, broccoli cheddar soup may not be the best option for GERD sufferers.
7 Ways in which broccoli is good for you
Broccoli is good for you because it’s a great source of vitamin C, vitamin K, and dietary fiber. It can also help maintain a healthy weight and reduce the risk of heart disease, cancer, and other chronic diseases.
| Nutrients Name | Amount per 91 grams raw Broccoli |
| Carbohydrate | 6 grams |
| Protein | 2.6 gram |
| Fat | 0.3 grams |
| Fiber | 2.4 grams |
| Vitamin C | 135% of the RDI |
| Vitamin B9 (Folate) | 14% of the RDI |
| Potassium | 8% of the RDI |
| Phosphorus | 6% of the RDI |
| Selenium | 3% of the RDI |
| Vitamin A | 11% of the RDI |
| Vitamin K | 116% of the RDI |
Detoxification of harmful contaminants
Phytochemicals such as glucoraphanin, and glucobrassicin have significant roles in the human body. These components help detoxify the body. It helps neutralize the stomach acids and remove harmful compounds from the body.
Reducing Obesity
Study found, Broccolis microgreens juice helps to lose weight by enhancing insulin sensitivity and modulating gut microbiota.
Broccoli contains compounds like glucosinolates which are converted to secondary metabolites during digestion. These compounds directly interfere with myrosinase enzymes. It is important in breaking down body fat.
Cardiac health
Broccoli is heart healthy. Because High amounts of selenium and glucosinolates in broccoli produce redox-regulated cardioprotective protein thioredoxin which help our heart keep healthy.
Broccoli keeps blood vessels strong. It has anti-inflammatory properties. It may stop or help reverse damage to blood vessel lining.
Good vision
You have probably heard that carrots are good for the eyes. They are! And the reason is that they contain lutein, which is an antioxidant known to be important in preserving eye health. Lutein is also present in broccoli. Another important component of broccoli is zeaxanthin, which helps protect against cataracts and lens clouding.
Lowering cholesterol
Broccoli helps in lowering cholesterol. The fiber in broccoli binds with the cholesterol in the blood, which facilitates the excretion of cholesterol from the body. This leads to a reduction of cholesterol levels in the blood.
Cancer prevention
The most crucial health benefit of broccoli is its cancer-fighting ability. Broccoli is a cruciferous vegetable. All the vegetables of this group can combat various stomach and intestinal cancers.
Two important components of broccoli are sulforaphane and indole 3-carbinol. These compounds act as detoxifying enzymes. They also regulate estrogen levels that help in fighting breast cancers.

Supports a Healthy Immune System
Broccoli contains a lot of vitamin C, which helps to boost immunity by boosting white blood cells and antibodies. It also has antioxidant properties, which protect cells from damage. Broccoli is also an excellent source of dietary fiber, which helps regulate blood sugar and prevent digestive problems.
Related:
Is Mac and Cheese Healthy? Calories, Nutrition, and a Awesome Recipe
FAQs
Is broccoli high in acidity?
No! Broccoli is a very slightly acidic vegetable, which is actually thought to form alkaline compounds in the body after digestion.
Is broccoli acidic or alkaline?
Broccoli is not high in acidity, but green vegetables such as broccoli are slightly acidic. Since its pH is around 6.5-6.8, it does qualify as very slightly acidic.
However, when digested in the body, it actually works to make the environment more alkaline. In addition, benefits include its high levels of essential vitamins like A, K, and C.
Is broccoli an antacid?
Yes, broccoli neutralizes your stomach acids and helps with indigestion. Thus it is a great antacid.
Is it OK to eat broccoli every day?
Broccoli is a great vegetable. It is high in fiber, low in carbohydrates, and contains some protein. Eating broccoli every day helps regulate bowel movements and sugar levels. It also helps maintain a healthy weight.
What vegetables are not acidic?
Most green vegetables such as celery, lettuce, green peppers, cucumber, and cauliflower are not acidic. They help regulate your acid reflux. They are a good alternative to more acidic foods for those who suffer from acid reflux.
Why is broccoli not good for you?
Although raw or cooked broccoli has many benefits for you, eating it in excessive amounts can cause bloating or gas problems. It has been reported that since broccoli contains thiocyanates, eating broccoli can lead to hypothyroidism.
This is a myth! You would have to eat an impossible amount of broccoli to interfere with your thyroid function. So, please don’t worry about your thyroid when you decide how much broccoli to eat!
Bottom Line
Broccoli has a somewhat acidic pH. But it has an alkaline foaming ability in the body. This ability helps regulate acid reflux mechanisms. The best way to eat broccoli is raw or steamed.
Broccoli regulates healthy blood sugar levels. It improves bowel movement and prevents various disorders related to the stomach like GERD. The excessive use of broccoli can cause bloating and gas problems.
Related Posts



Subscribe for New Racipies
Get mental health tips, updates, and resources delivered to your inbox.