
Candied Citrus Peel

Medically reviewed by Christiana George Updated Date: June 8, 2023
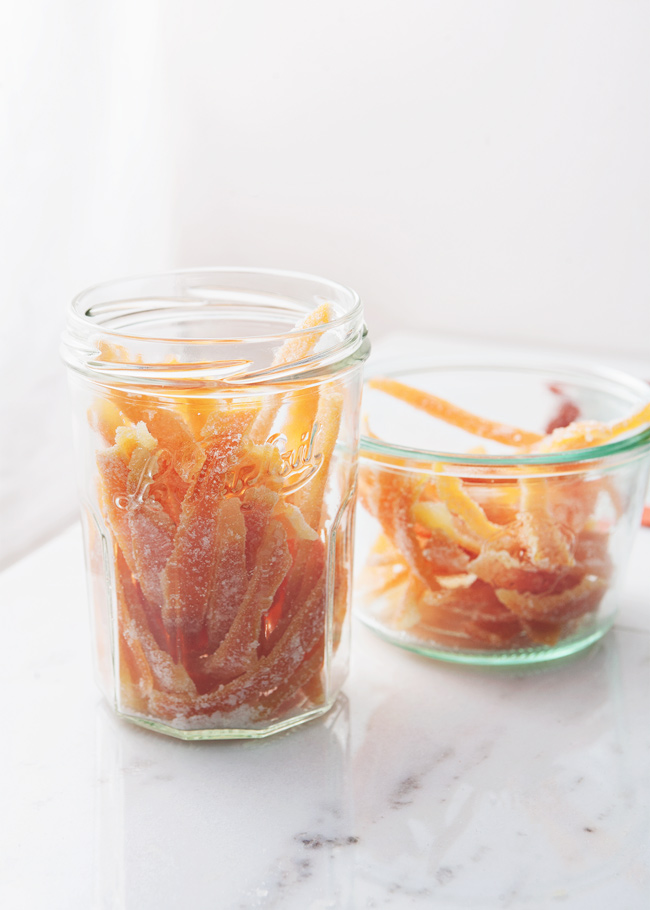
As a kid, I had a voracious appetite for, among other things, Nancy Drew mysteries, complex role-playing games (in sixth grade, my friend D’Ann devised a fantastical game for our group where each of us played a different warrior princess complete with our own unique personality [I was the spunky one], wardrobe [I wore all green], and weapon [mine was the rapier]—yes, I’m aware this is sounding suspiciously like LARPing, but our game came before all of that, plus we spent most of our time preening ourselves in our imaginary dressing room as opposed to, say, fighting evil), and candy.
Nothing, however, could’ve compelled me to eat candied orange peels. It was the equivalent of candy for old people, and therefore not sufficiently sweet. I liked greater hits of sugar, super-sugar if you will, the kind found in the cheapest milk chocolate bars, sour strips, and (I’m shuddering thinking about this now) Airheads.
Fast forward fifteen years, and I can’t say I’ve come around much. I actually don’t think I’ve given candied orange peels a single thought until the moment, a few days ago, when I decided I wanted to make panetonne. Which necessitated me making my own candied citrus peels of course.
I wasn’t even planning on sharing this recipe at all, hence no process photos, but it occurred to me you might enjoy candying your own candied peels? Yes? They’re quite good, much fresher than their storebought counterparts. I ended up candying the peels of two navel oranges and a grapefruit, and holy cow, the grapefruit tastes really good! Maybe that was the missing link this entire time.
Anyway, enjoy! If my panetonne goes well, I’ll be sharing it in this space. If not, happy happy holidays and I’ll be back very soon!
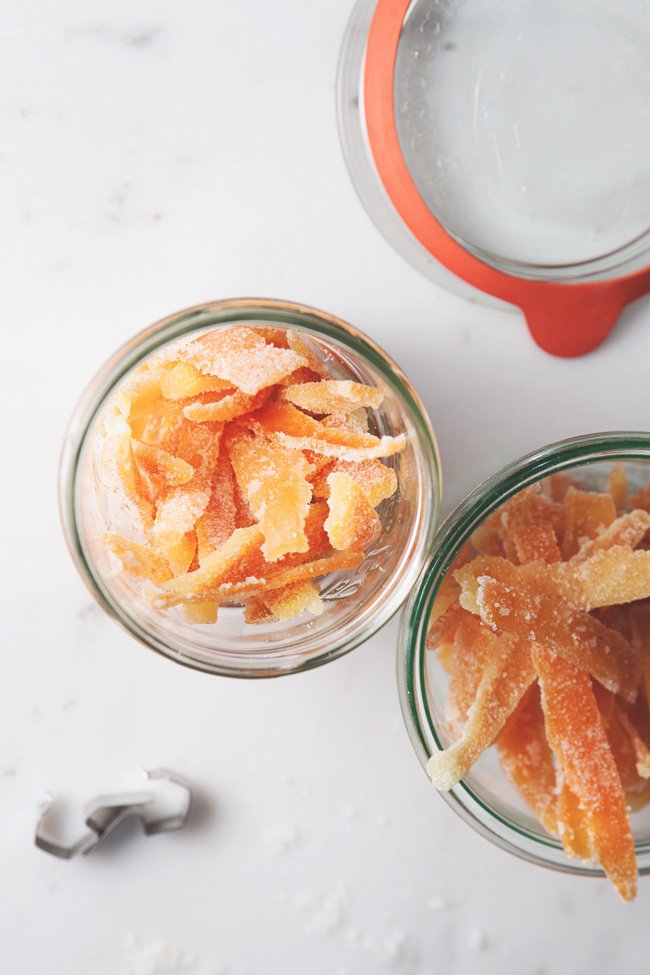

CANDIED CITRUS PEELS
Adapted from Remedial Eating (whose recipe is her mother’s!)
Makes quite a lot (enough for panetonne, plus more for snacking, or turning into orangettes!)
Ingredients:
2 grapefruits, or 4 navel oranges, or 6 lemons (I hope you get the idea—I settled on 1 grapefruit and 2 oranges. Just be sure to prepare different fruits separately or their tastes will become muddied.)
2 cups water
2 cups sugar, plus more for coating the strips
Directions:
Peel off the outer layer of the citrus and cut the pieces into thin strips. (You can cut them into thick strips too, but you’ll need to adjust the amount of time they simmer in the sugar water.) I peeled vertically, you can peel horizontally, just cut them into whatever shape you’d like. Slip the peels into a medium pot, cover them with cold water, and bring the water just to a boil on high heat. Drain. Repeat: cover the peels with cold water, bring it to a boil, drain. Repeat once more. Once they’ve cooled a little, use a sharp paring knife or small spoon to remove as much pith as you can. Set aside.
Using a pot that will slightly crowd the peels (I know this goes against conventional wisdom, but I boiled my orange peels in a pot that was too big and the sugar water boiled away quicker than I would’ve liked), add the water and sugar and turn the heat to low. Stir until the sugar dissolves, then add the peels. Let them simmer for about 30 to 60 minutes until the peels are translucent and the syrup thickens. (A thermometer will register the syrup at 220 to 222 degrees F.)
Strain the finished peel and spread it on a single layer on a cooling rack to cool and dry, 1.5 to 2 hours. When it’s no longer wet but still sticky, toss the peels in a bowl of granulated sugar until thoroughly coated. Let dry overnight, then transfer to an airtight jar to store.
Related Posts






Subscribe for New Racipies
Get mental health tips, updates, and resources delivered to your inbox.
Avocado Summer Rolls

Chris and I went out to dinner last night with an older couple—friends of Chris’s parents—who live in a posh apartment with a great view of Central Park. Ordinarily, we trek out to their place in the Upper West Side, but Chris wanted to switch things up, so he suggested they come to our neck of the woods instead.
Now, our part of Brooklyn and their part of Upper West Side aren’t so very different. Both have tree-lined streets and a neighborhood-y feel and slightly less bustle than, say, Midtown or the Villages. But where they have Columbus Circle and doormen galore and hordes of tourists and expensive restaurants that primarily service said tourists, we have cash-only dive bars and small yoga studios and cafes that fit, like, 10 people max and our local Mexican spot (replete with all the usual cheesy decor).
Our Brooklyn juxtaposed with their Manhattan is like… is like the opera to a movie theater. A glass of pinot noir to a pint of whatever’s on tap. A white tablecloth dining experience to burgers, fries, and a beer. So it only made sense that we take them to our favorite burger joint.
Normally, they take us to a fancy restaurant where we get to feel pampered by waiters who fuss over our seats and bring out our courses with flair. So you can understand why I was a bit nervous about taking them to such a low-key establishment. I’m not saying it was a hole-in-the-wall, because it wasn’t at all, but it had that whole rough-hewn, rustic look that’s so popular among Brooklyn restaurants these days, including the dreaded communal table. As luck would have it, that’s where we were seated.
I’m building this up, aren’t I? Ultimately, they loved the resutarant. We ate and talked and talked and ate, and had a wonderful time. Afterwards, we walked by the mom ‘n’ pop ice cream stand where they bought a mint chip cone to share, fighting for the last few bites. It was a great evening, and I think that whatever impression they had had of Brooklyn has been amended.
And rightly so! Despite the picture I paint, this neighborhood has come a long way. My landlord’s son told me how it had been a contested zone between rival gangs back in the 80′s. And apparently, the Mafia’s reign was still going strong up until, I dunno, the 70′s. And before all that, a gazillion years ago, it was farmland. Now, we live around the corner from a gourmet cheese shop, across the street from a high-end clothing boutique, and down the street from a newly-opened Blue Bottle Coffee. Times have changed.

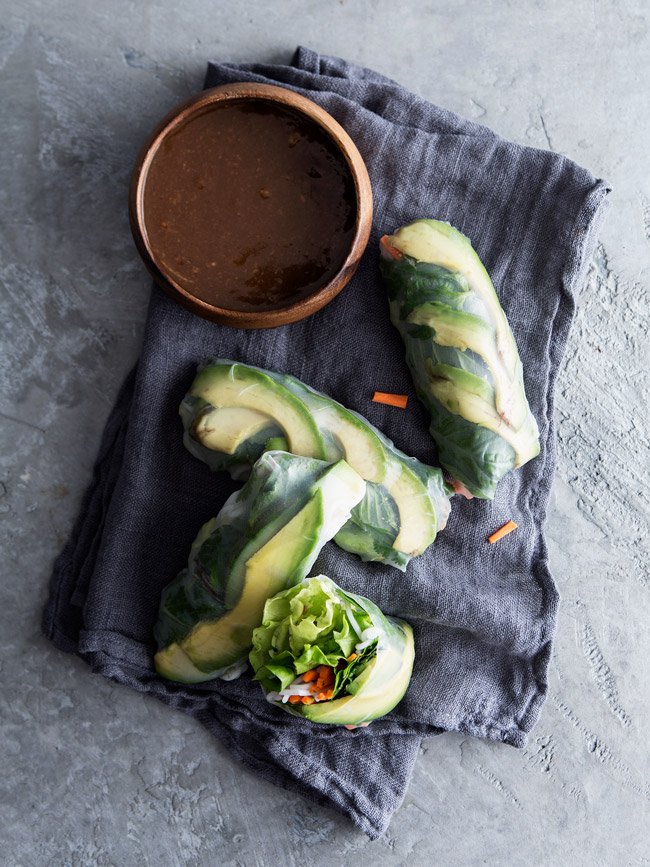
These summer rolls have nothing to do with my story except I’ve been going gluten-free recently and had to break my ban last night. I guess I didn’t want to be the debbie downer who ordered the salad while everyone else was gorging on burgers and fries, you know? These summer rolls, on the other hand, are gluten-free (with the exception of the hoisin sauce, but you can buy a gluten-free version), and vegan too I guess, and maybe even raw? The rice noodles are cooked, it’s true, but you can easily leave them out.
Since summer has officially kicked in—beginning with some minor humidity this week—I’ve been feeling the urge for fresh vegetables and herbs. And what could be more perfect than the trifecta of cilantro, Thai basil, and mint? Nothing, that’s what. NOTHING. These summer rolls are filled to the brim with earnest plant matter, and are one of the tastiest (and easiest!) foods I’ve made recently.
I realized in my last post that I’d somehow toggled off the comments. Sorry about that! I don’t know whether or not they’ll be turned back on when I publish this post, but if not, I’ll try to figure out how to turn them back on. If you have any questions, feel free to email me!
AVOCADO SUMMER ROLLS
Makes 12
Adapted from all over the place, but mostly Gourmet Live and Chow
Feel free to play around with proportions, but don’t skimp on the avocado! Its taste will be overwhelmed by the other ingredients if you don’t use enough in each roll.
Ingredients:
- 12 sheets rice paper
- 2 or 3 medium avocados, sliced into wedges
- 36 mint leaves
- 36 Thai basil leaves (regular basil okay)
- 24 sprigs cilantro
- 2 or 3 medium carrots, julienned and chopped into 1-1/2″ pieces
- 3 oz. dried rice vermicelli, cooked and drained
- 12 pieces of lettuce (I used Bibb, halving each big leaf to form 2 pieces)
Directions:
Fill a pan large enough to contain the rice paper with hot water. Prepare a moist surface (such as a damp cloth) on which to make the summer rolls. Have all the other ingredients ready around your workstation.
Take a sheet of rice paper and submerge it completely in the hot water. Remove it immediately—it should still be stiff and easy to handle—and place it on the moist surface. Place 3 slices of avocado horizontally across the center of the rice paper, leaving a 1-inch margin on either side. Place 3 mint leaves, 3 basil leaves, and 2 sprigs of cilantro on top, across the avocado slices. Grab a small handful of carrots and place them in two small heaps across the herbs. Do the same with the vermicelli. Finally, roll a piece of lettuce into a cigar shape and place it on top. Go with conventional wisdom and don’t stuff your rolls, as the rice paper is quite flimsy!
Fold the bottom edge of the rice paper over the center mound, then the left and right edges. Finally, roll the mound upward toward the final edge. Try to wrap the roll as tightly as possible.
Dip in the tahini hoisin sauce and enjoy!
TAHINI HOISIN SAUCE
Makes about 1 cup
Adapted from Gourmet Live
Ingredients:
1/2 cup hoisin sauce (gluten-free version)
1/4 cup tahini
1/4 cup water
big squeeze of lime juice
Directions:
Combine all the ingredients and stir until combined.
Related Posts

Subscribe for New Racipies
Get mental health tips, updates, and resources delivered to your inbox.