
Krispie Fruit Punch Truffles

Medically reviewed by Christiana George Updated Date: January 6, 2026

Well, we did it! We got our stubborn little four year old into a pre-school program. It has been a challenge with him refusing to potty train, but his teacher really wanted him in school and she made it happen. He wakes up every morning eager to go and doesn’t even care about leaving me. He is a smart little kid, but his stubbornness keeps him from getting things done and being on track with other kids his age.
He is making progress though. I just have to accept the fact that I look like an incompetent mom that doesn’t know how to potty train her child. Each child is different. He is nothing like his older sister. Oh well, on a happier note I made these lovely kid friendly Krispie Fruit Punch Truffles to continue celebrating summer and keep fall at bay.
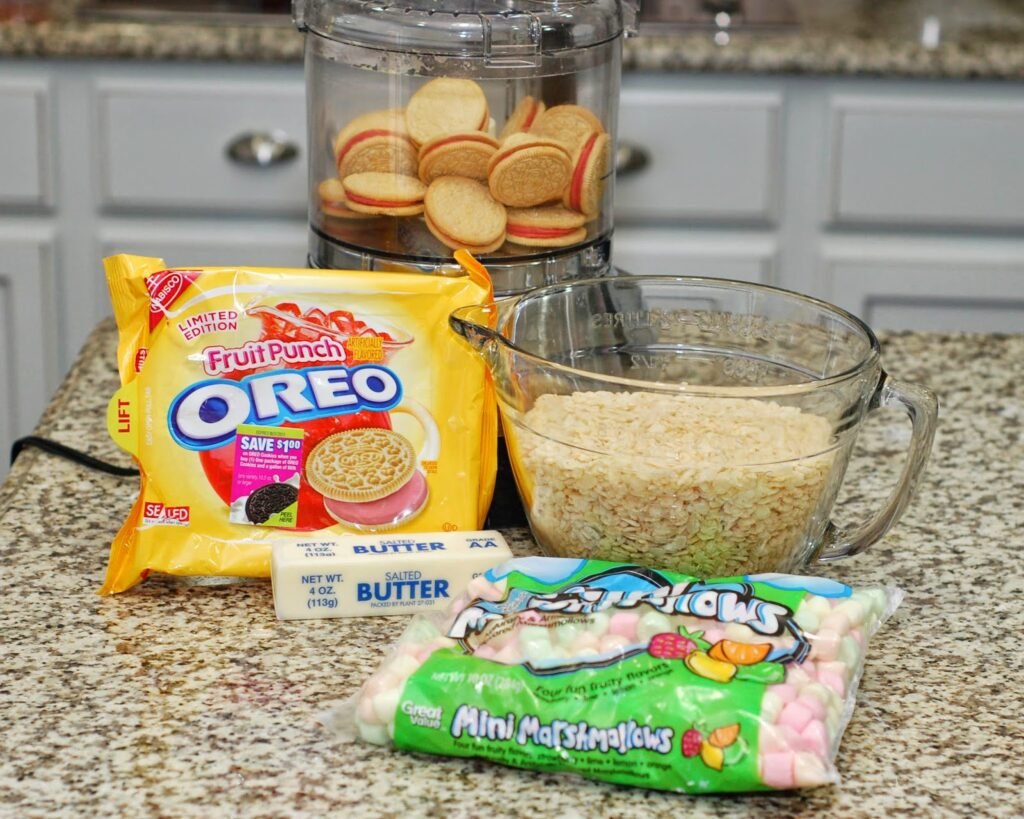
I am not a big fan of fruit punch flavor, but these Fruit Punch Oreos are not bad. A little too sweet for my taste, but the kids love them (of course). In keeping with the fruity flavor, I used fruit flavored marshmallows, but you can use regular ones if you like.
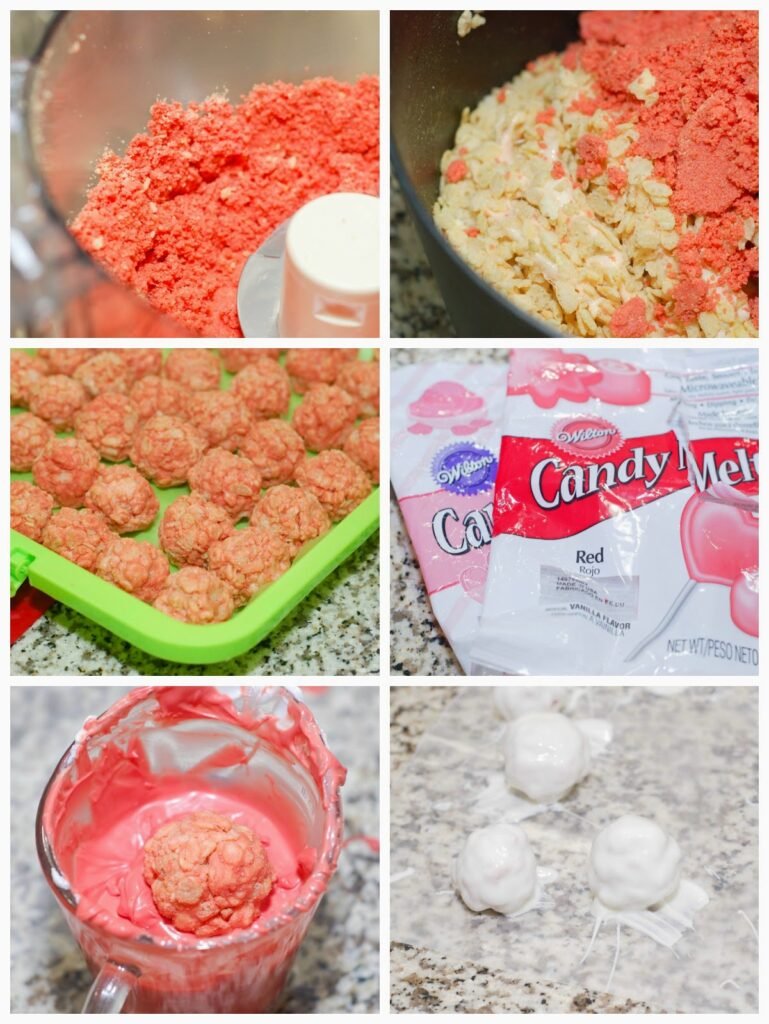
I was originally going to just make regular Rice Krispie Treats, but then I decided to have a little fun. Before the Krispie mixture set, I rolled it into one inch balls, then dipped them in candy melt and decorated. For the pink, I used a mix of red and pink candy melt to match the color of the cream in the Fruit Punch Oreos. For the white, I used vanilla Candiquik candy coating.
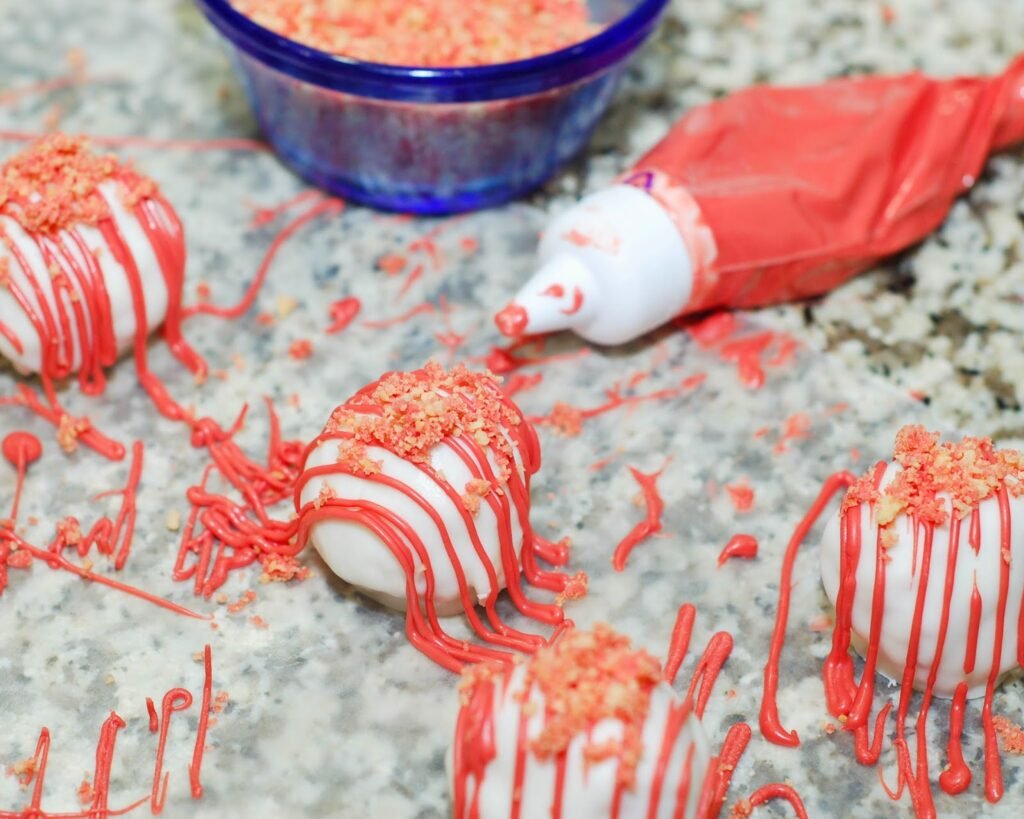
You can add more candy melt to the tops and/or sprinkles. I put aside some of the cookie crumbs to decorate. I used the Wilton Candy Melt Decorating Tip Set I had purchased to make the Candy Coated Oreo M&M’s for my son’s birthday. It works really well and if you need to reheat the candy melt, you just throw the whole thing in the microwave.
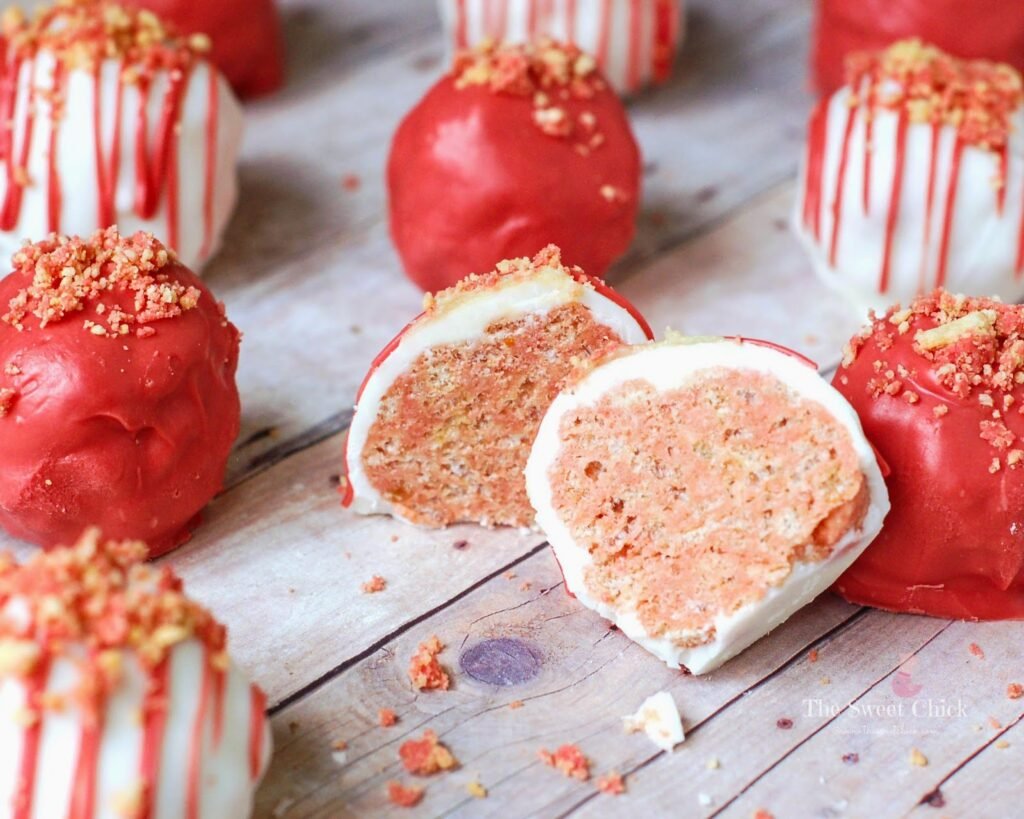
Kids will love these candy coated balls with a soft, chewy, fruit punch center. Plus, they can pitch in and help by rolling all the balls and decorating the tops. I handed my out to some very excited kids at my daughter’s bus stop.
Krispie Fruit Punch Truffles
by The Sweet Chick
Prep Time: 30 minutes
Cook Time: 5 minutes
Ingredients (48 truffles)
For the truffles
- 4 tablespoons butter
- 1 package (10 oz.) mini fruit flavored marshmallows
- 1 package 12.2 oz. Fruit Punch Oreos, divided
- 6 cups Rice Krispie Cereal
For the coating
- 1 package (16 oz.) Candiquik candy coating, vanilla
- 1 package (12 oz.) Wilton’s Candy melt wafers, red
- 1 package (12 oz.) Wilton’s Candy melt wafers, pink
Optional toppings
- cookie crumbs
- sprinkles
- candy melt drizzle
Instructions
For the truffles
Put Oreos in the food processor and chop/ grind until they are a dirt like consistency. (If you are going to use crumbs as a topping, put some aside now.)
In a large sauce pan, melt butter and marshmallows over low heat. Stir until completely melted.
Remove from heat and add Rice Krispie cereal and chopped Oreos. Mix until all is well incorporated.
Then pour the mixture into a greased pan or a cookie sheet.
Let cool slightly, then roll mixture into one inch balls and place on wax paper to set.
For the coating
After the balls are set, melt candy coating in the microwave as per directions on package. (The Candiquik you can melt in the container provided. For the Wilton’s candy melt wafers I use a glass container. I mixed 1/2 of the pink wafers with 1/2 the red wafers to get the color in the picture.)
Dip the Krispie balls into candy coating mixture until all covered. (I use a fork.) Once covered, remove and softly tap until excess candy melt falls off. Then place the balls on wax paper until the candy melt hardens.
For the optional toppings
If you are just adding cookie crumbs or sprinkles, add them before the candy melt hardens.
If you are adding candy melt drizzle, let the first coat harden, then add the drizzle. You can still add sprinkles or cookie crumbs to the drizzle before it hardens.
Keywords: no bake dessert snack Fruit Punch Oreos rice krispies marshmallows candy melt rice krispie treats truffles American summer
Related Posts


Subscribe for New Racipies
Get mental health tips, updates, and resources delivered to your inbox.
Pumpkin Brioche (with A Cinnamon Swirl)

I got my teeth whitened earlier this week. It was free, so I should’ve known better.
Besides the fact that I first had to endure the dental hygienist from hell (she gave me the most painful cleaning ever—and I usually never ever ever complain), I was put on the White Diet after the whitening. Your teeth are extremely susceptible to discoloration the 48 hours after, so you have to be very careful about what you eat.
If no one’s patented the White Diet yet, I swear I will. Here’s what Day One looked like: a white bread sandwich with mozzarella cheese and egg whites for lunch, a white bread sandwich with feta cheese and egg whites for dinner, and white bread toast topped with condensed milk (which isn’t actually white you see—it’s more a beige, which technically is still a no-no) for breakfast. I suppose none of those things are particularly healthy, but I was so afraid of eating anything not on the list that I didn’t really eat much at all. The worst part: no coffee! I walk away from this experience now knowing that I am extremely hooked on coffee and shouldn’t be allowed to operate machinery without it. In other words, it was really really hard to give it up, even for just a day. I wasted an entire morning being drowsy and sluggish, sitting in front of my computer unable to do any work.
The next day is easier since you get to drink really milky coffee with a straw, and your circle of food expands to beige and cream-colored foods. Thank god. I reverted to my usual fallback: cereal.
So that’s how I survived my white diet. I really shouldn’t be complaining though should I? I mean, I got my teeth whitened for free. My pearly whites are whiter! My smile more dazzling! My mouth looks 10 years younger!! Truthfully, the difference is negligible.
When I think about the things we do for beauty, like abstain from foods we love, I wonder where to draw the line. I mean, the whitening experience was a relative breeze compared to some of the crap people put themselves through. There was a time in my life where food was something of an enemy. Adolescence, you know.
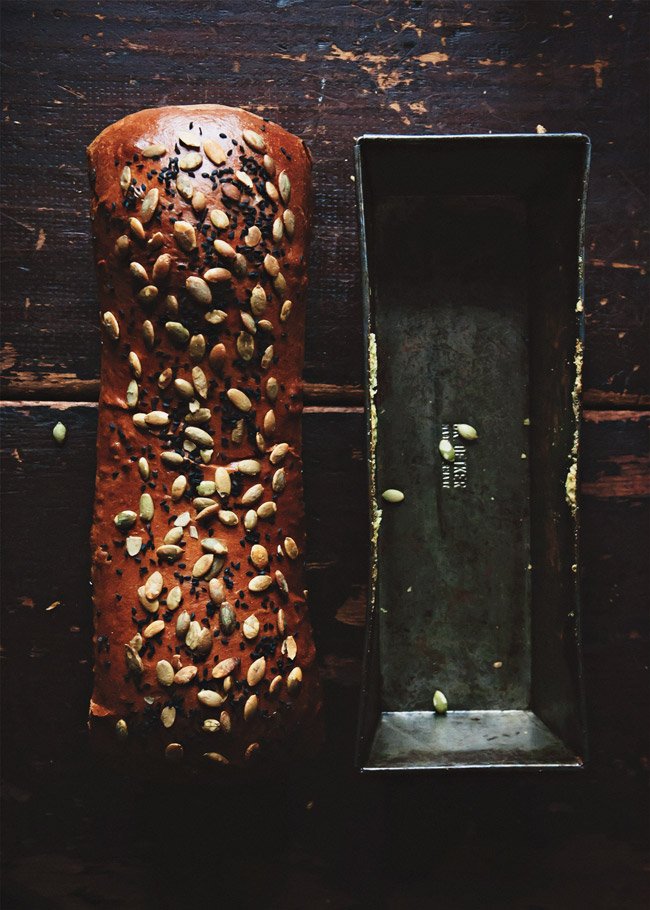
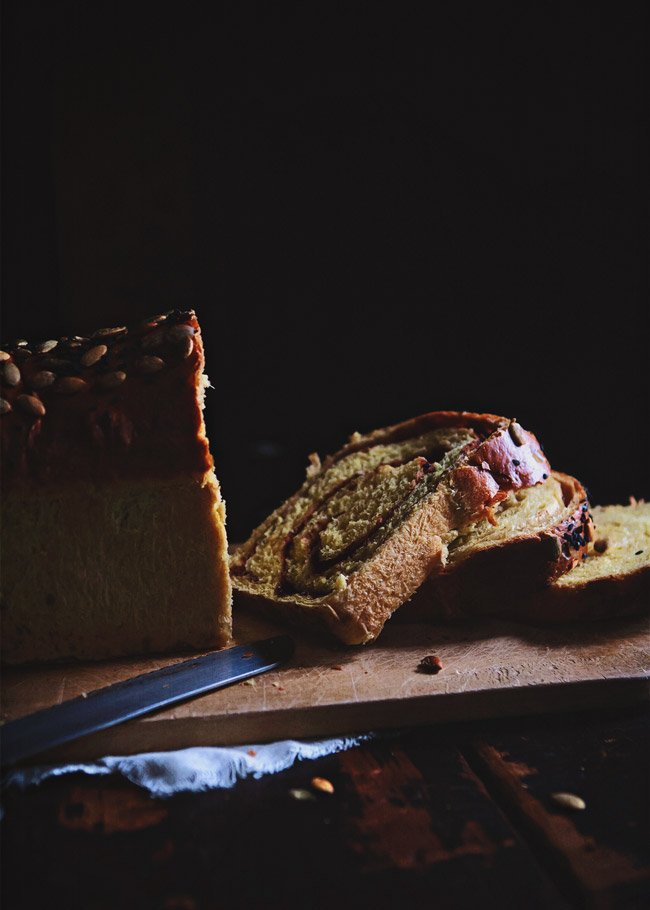
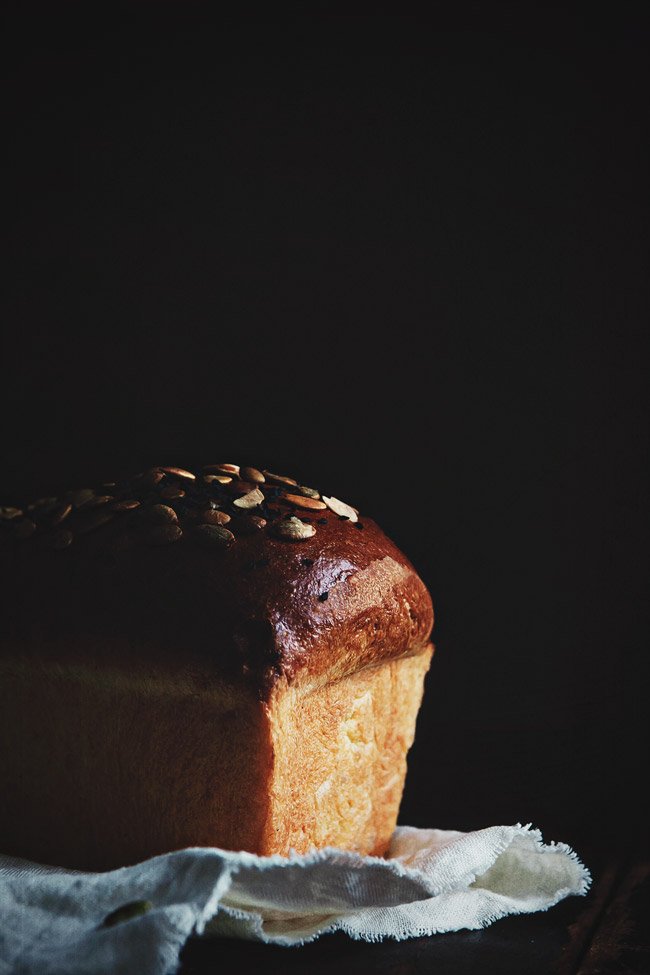
Anyway, as you can imagine, this pumpkin brioche loaf would’ve been absolutely not allowed. Especially since the pumpkin turned its innards a light mustard-y yellow. It’s really really pretty, especially with the swirl (which I’m downplaying because it came out kind of squirrely-looking—but I’m including it in the instructions anyway because it really is delicious).
I had a bit of trouble with the dough. You know when you doubt a recipe and start tampering with it? Probably not the greatest idea when you’re dealing with something as delicate as brioche, which is this whole complicated ecosystem of ingredients. But I managed to salvage it, and it came out smelling richly of pumpkin and all its accompanying spices. It captures the taste too, but subtly. Don’t expect pumpkin pie. Instead, imagine soft and glorious air pockets, a thin, toasty crust, and a murmur of spicy pumpkin flavor. It’ll make a hell of a French toast this weekend. And I won’t have to worry about my teeth turning yellow.
Cinnamon Swirl Pumpkin Brioche
Adapted from Vermont Creamery
Makes 2 regular-sized (about 9″) loaves
For the sponge:
1/2 cup whole milk, room temperature
2 Tbsp maple syrup
2.25 tsp (1 packet) active dry yeast
1 cup AP flour
For the dough:
1/4 cup brown sugar, packed
2 tsp salt
1/2 cup pumpkin puree
4 eggs
3-3/4 cups AP flour
1/2 tsp cinnamon
1/4 tsp ginger
pinch nutmeg
pinch allspice
4 oz. (1 stick or 8 Tbsp) butter, softened
egg wash (1 egg whisked with a little water)
any combination of seeds
For the swirl:
4 Tbsp butter, softened
1/2 cup brown sugar
4 tsp cinnamon
Directions:
For the sponge:
In the bowl of a stand mixer fitted with the paddle attachment, mix the milk, maple syrup, and yeast. Let stand for about 10 minutes until bubbly, then add the flour. Mix until smooth. Cover and let rise until the sponge has doubled, about an hour.
For the dough:
To the sponge, add the brown sugar, salt, pumpkin, and eggs, and mix until incorporated. Switch out the paddle attachment for the hook attachment and add the flour and spices and mix until just combined. On low speed, add the butter, a Tbsp at a time, allowing each piece to be fully incorporated into the dough. Increase the speed to medium-high and continue mixing until the dough is shiny and starts pulling away from the sides of the bowl. It’ll make a slapping sound. If it’s not coming together, add flour, a Tbsp at a time, until it does. The dough’s going to be very sticky, so don’t add too much flour, only enough so it holds together.
Transfer the dough to a well-oiled, large bowl and cover it with plastic wrap. Once it’s doubled in size, an hour to two, deflate the dough, fold it in half (tucking the seam at the bottom), and let it rise again, this time in the fridge overnight.
The next day, let the dough come to room temperature, about an hour, then, on a lightly floured surface, cut it in half. It’s going to be sticky, but resist the urge to add too much flour. With each half, roll it out to the approximate width of your loaf pan (about 9″) and about double that in length.
For the swirl, use half the ingredients for each loaf. Combine the brown sugar and cinnamon. Spread the butter evenly across the surface of the dough, and sprinkle the brown sugar mix on top.
Starting on the short side, roll the dough into a tightly-packed cylinder. Pinch the ends and fold them under and into the bottom seam. With the bottom seam facing down, gently transfer the loaves into buttered loaf pans. Cover and let rise until doubled in size.
Preheat your oven to 400 degrees. Once the loaves are ready, brush them with the egg wash and sprinkle any seeds you’re using on top. Place them in the oven and bake for 10 minutes. Then reduce the heat to 350 degrees and bake for another 15 minutes, or until the tops of the loaves are golden brown and glossy.
Note: I actually baked my dough into one monster loaf and four large rolls, but the dough should be enough for two loaves.
Related Posts


Subscribe for New Racipies
Get mental health tips, updates, and resources delivered to your inbox.