
Snowman Marshmallows

Medically reviewed by Christiana George Updated Date: December 17, 2022

This is actually a project I did in January, but since we have just started getting snow here recently, I thought it would be appropriate. My daughter needed to take something to school for her Discover and Share that had a winter theme. So I thought snowmen marshmallows would be cute. I found a recipe for homemade marshmallows at. It looked easy, albeit perhaps messy. But, hey, with two small kids, it’s always messy here anyway.

First I tested the recipe to make sure they would taste good and come out okay.

Homemade Marshmallows
by My Baking Addiction
Ingredients
- 3/4 cup water, divided
- 3 (.25 oz.) packages, unflavored gelatin
- 2/3 cup light corn syrup
- 2 cups white sugar
- 1 tbsp vanilla extract
- 1/4 cup cornstarch
- 1/4 cup confectioner’s sugar
Cooking Directions
- Line a 9×13 inch baking dish with plastic wrap and spray with non-stick cooking spray. Spray another piece of plastic wrap to cover the top, and set aside.
- Place 1/2 cup of water in the bowl of an electric mixer fitted with the whisk attachment, and sprinkle gelatin on top of water to soak.
- While gelatin is soaking, combine 1/4 cup of water, corn syrup, and sugar in a saucepan. Bring the mixture to a boil over medium heat. Boil the mixture hard for 1 minute.
- Carefully pour the hot sugar mixture into the gelatin mixture and beat on high for 12 minutes with electric mixer, until the mixture is fluffy and forms stiff peaks. Add in vanilla extract and beat until just combined.
- Pour the marshmallow mixture into the prepared baking dish, using a greased spatula to smooth the top. Cover the candy with the piece of prepared plastic wrap, pressing it down lightly to seal the covering to the top of the candy.
- Allow the marshmallow candy to rest for 4 hours or overnight.
- Mix together cornstarch and confectioner’s sugar in a shallow dish. Using oiled scissors or an oiled kitchen knife, cut the marshmallow candy into strips, then into 1 inch squares. Dredge the marshmallows lightly in the cornstarch mixture and store in an airtight container.

I did use clear vanilla extract as she suggested to keep the marshmallows pure white. Let me just say one thing though, the smell of the hot corn syrup mixture combined with the gelatin as it is being mixed is very off putting. It smelled like manure in my kitchen and I was very afraid of what these marshmallows would taste like, but have no fear, the smell does go away and does not affect the taste.

The first batch I made, I just cut them into squares. Okay, very large squares. Here is my assistant dredging them in cornstarch and confectioner’s sugar.

And here she is taste testing for me. She gave them her seal of approval. They really were quite good. Much better than the store bought ones. They are lighter and fluffier.

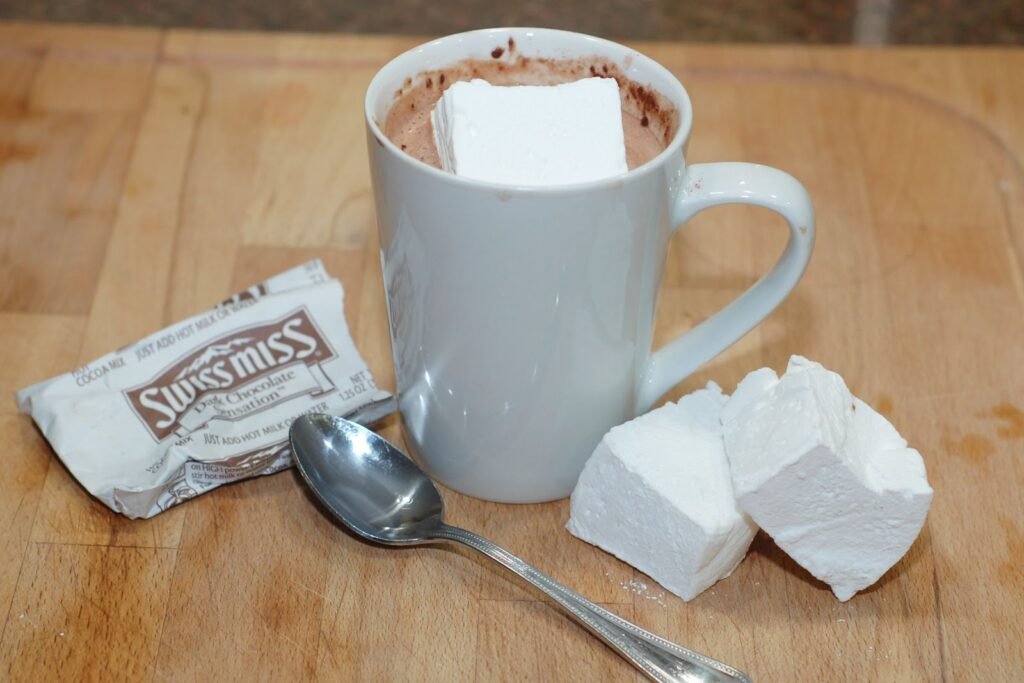
The real test for me, was to have some with a cup of hot cocoa. Yep, they were delicious in my book too. So then I knew I would make more and shape them into snowman for the kids. At first I was going to cut the marshmallows into circles and stack them up on a candy stick to make the snowmen, but when I went to get my circle cookie cutter, I found a snowman cookie cutter and went a different route.
I then when to the store to see what kind of candy I could find to decorate with. I found mini M&M’s for the buttons, some sour candy strips for the scarves, and orange slices for the nose. I had some black glitter gel for the hat, eyes, and mouth and I used cookie icing to glue things together.

I cut small triangles out of the orange slices to make the carrot nose.

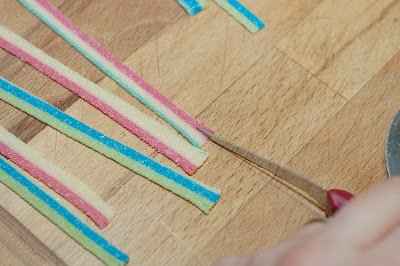
I cut the sour candy strips in two lengthwise for the scarves and even fringed the ends by making small slits with a sharp knife.
Here is the completed project. The black icing didn’t spread as well as I thought, so I just ended up using the black gel for the hat, eyes, and mouth. I think they came out pretty well.

My daughter was excited to see them. I made girl ones and boy ones for her classmates.

The kids really did like them and they tasted good. I will bookmark this recipe to do again next year.
Related Posts


Subscribe for New Racipies
Get mental health tips, updates, and resources delivered to your inbox.
Slow-Roasted Tomatoes, and other Weekend Stories

This weekend was beautiful, warm but not hot, today especially. So I took a break from the kitchen.
I bought grapes, the first of the season! While I was sad to learn that my favorite kind, muscat, is not grown in this area, I was delighted to discover many other varieties that smelled like perfume and tasted as sweet as candy. Apparently a lot of grapes are grown up near Ithaca. That’s not so very far away from here, is it?
I saw a man walking nonchalantly by my favorite home on Manhattan. It’s beautiful, and he didn’t even bat an eye. Maybe he walks by it all the time, maybe he lives just a few doors down, maybe he has no appreciation for lush, gorgeous ivy covering a stately brick exterior. Or maybe I’m just particularly sensitive towards the aesthetically pleasing. All I know is, whenever I pass it, I have stop, sigh, and admire.
I went to Chinatown and bought boba, also known as bubble milk tea. Have you ever had it? It’s probably my favorite beverage in the world, un-eclipsable by anything else, alcoholic or non-. Truthfully, Chris and I make the trip to Chinatown often to buy boba, at least twice a week. Our favorite spot is located on Canal Street, but it’s too expensive for addicts like us. So we go to another spot that’s decent, but made all the sweeter by the fact that it has a 2-for-1 deal. Alas, Chatime we’ll have to reserve for special occasions.
I had two credit cards stolen. I believe the theft occurred in a coffee shop near NYU, the unlikeliest of places if you ask me. And the funny thing is, I’d scooted my purse in closer because I’d felt uncomfortable by how near the party behind me sat. The exact same thing had happened to me in Bolivia: a man who’d sat a little too close for comfort, me preemptively pulling my purse in. He’d managed to get away with about $7 worth of cash. The thief in New York had unsuccessfully tried making a $900+ purchase at the Apple store on both cards. It serves her (her? him? Would a man try to pass a card with a woman’s name on it as his?) right.
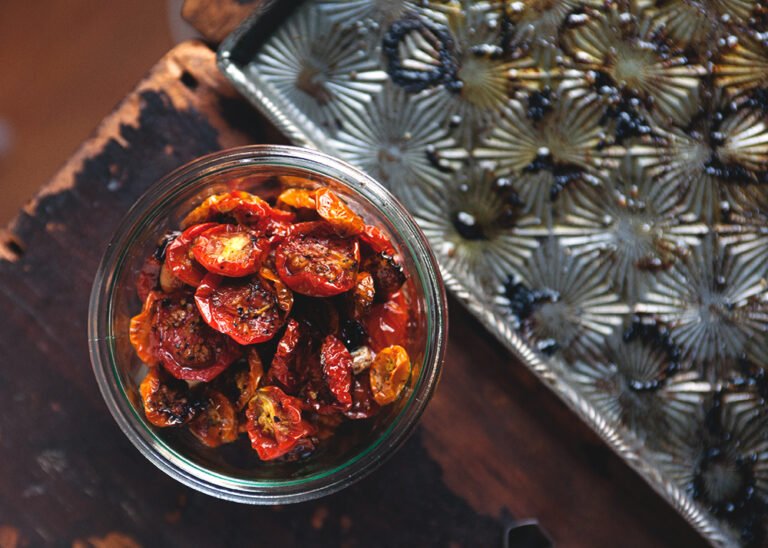
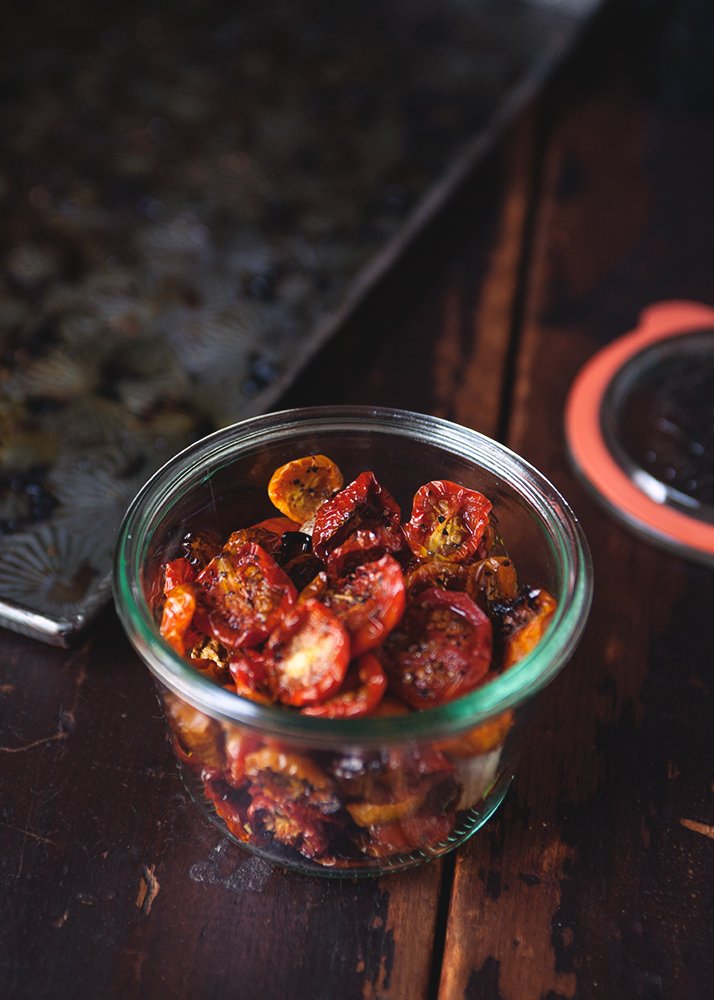
Before all this happened, on Friday, I roasted tomatoes.
I think I might’ve mentioned that I like my tomatoes raw, with just a touch of olive oil and salt. But in the case of cherry tomatoes, well, roasting them slowly on low heat, is a one-up.
The taste pierces. It’s so sharply sweet and intense, tomato condensed and condensed some more until all its taste is packaged in a shriveled, innocuous mass. For these tomatoes, I’m willing to turn my oven on, the oven that had traumatized me weeks ago, the oven that I’d vowed to part ways with until after Labor Day, until after temperatures dip below the 80′s once and for all.
A little goes a long way. I’ll be tossing them in salads, on sandwiches, on bagels, in pasta, whenever I need a boost of tomato action. Which could be anytime inspiration strikes, like when I walk by the fridge.

Yup, my weekend was punctuated by tomatoes. They’re a good thing to have around when I’m dealing with my credit card companies’ fraud departments on the phone. And for easing myself back into the work week.
Happy Monday, friends.

SLOW-ROASTED TOMATOES
Ingredients:
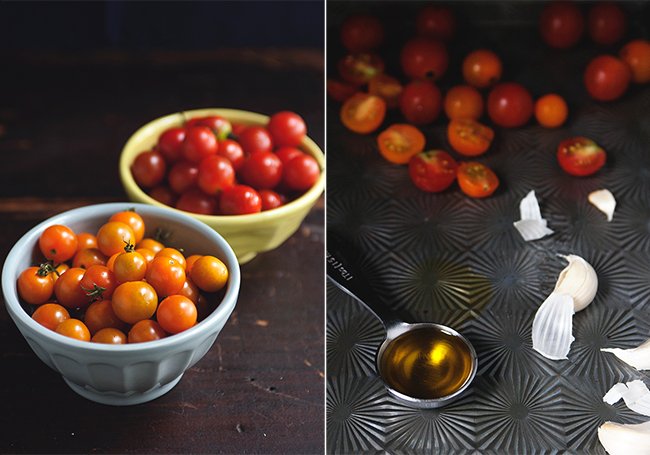
Cherry tomatoes
Olive oil
3 to 4 cloves of garlic, unpeeled
salt and pepper
Directions:
Preheat the oven to 250 degrees (Note: My oven only goes down to 300 degrees, so I had to roast them at this temperature.)
Cut the tomatoes in half. Toss with the olive oil (so they’re lightly covered) and lay the halves on a baking sheet, cut side up, along with the garlic cloves. Sprinkle with salt and pepper to taste. Roast the tomatoes for 2 to 3 hours until they shrivel but are still juicy on the inside. (Note: Because my oven was at 300 degrees, I had to turn the oven off after about an hour and 15 minutes because the tomatoes in the corners had started burning. I won’t lose any to the carbonizing effects of heat!)
To store, let the tomatoes cool and put them in a covered jar in the fridge. You may need to cover them with some extra olive oil.
Related Posts


Subscribe for New Racipies
Get mental health tips, updates, and resources delivered to your inbox.