
Gingerbread Cheesecake Truffles

Medically reviewed by Christiana George Updated Date: December 19, 2022


This year is coming to a close and it’s time to reflect upon all that has happened. I must say, 2013 was a crazy year, but overall a very satisfying one. The hubby and I decided to move to a warmer state. That meant selling our home first. It took quite a few months, but we finally accomplished it. Then I stopped working and became a stay-at-home mom. While it drives me nutty a good amount of the time, it’s nice to be more available for the kids and have more quality time together. Next was the packing of the house and the big move to a new home, new state, and new life. It was exciting, yet scary. In the end, it was exactly what we needed. I feel that as a family, we have been rejuvenated and it feels good. Hopefully 2014 will treat us just as well.

Meanwhile, I am still emptying out the pantry. I had some Gingerbread Oreos hiding in there, so I rustled up a quick treat for a party. Last year I made Gingerbread Rice Krispie Treats with them.

This time I chose to make truffles. Oreo truffles are just so easy, I couldn’t resist. Just grind up some Oreos and mix with some cream cheese.
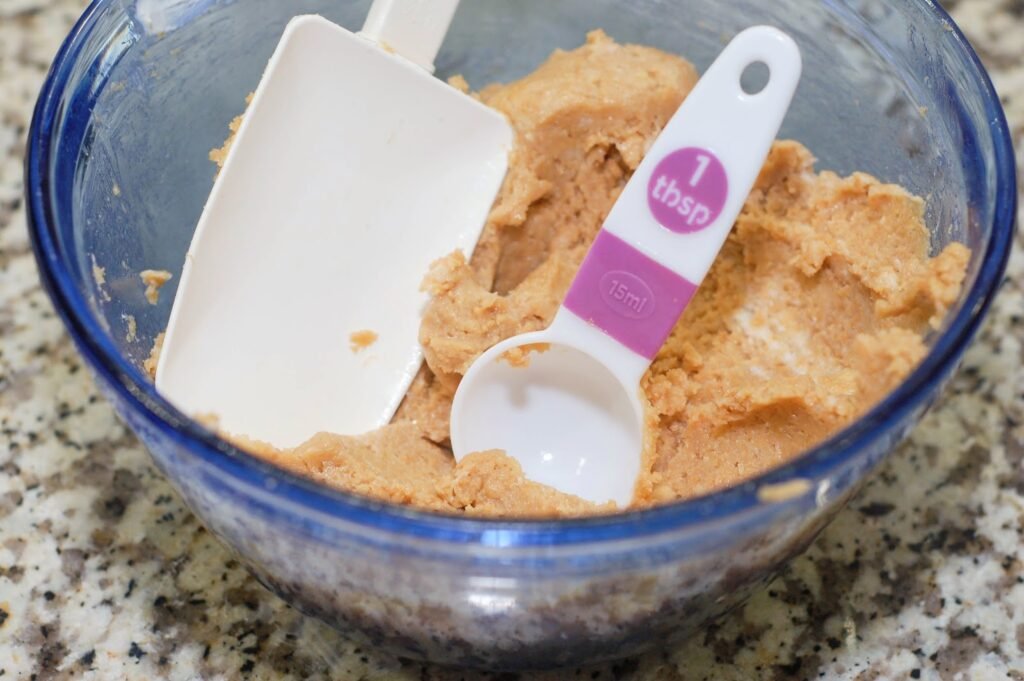

Roll the mixture up into small balls and dip them in candy melt. I had some gingerbread candy melt and eggnog candy melt left, so I used that along with some dark chocolate candy melt.
I love making these easy treats. There is no baking involving, but it’s still fun. And not much mess.
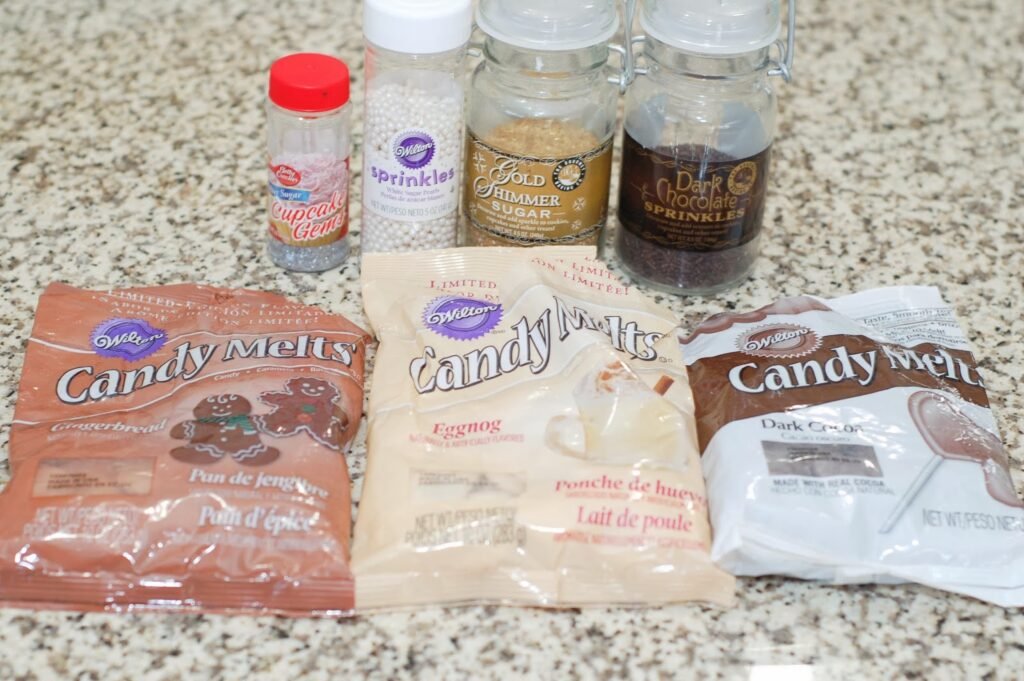
I decorated them with some shimmery sprinkles, perfect for a New Year’s Eve party. Don’t they look pretty all dressed up?
I hope you all have a wonderful New Year’s Eve. We are having a party at out neighbors house to celebrate. See you in the new year!
Gingerbread Cheesecake Truffles
by The Sweet Chick
Prep Time: 30 minutes
Keywords: no bake dessert snack cream cheese gingerbread oreos gingerbread candy melt egg nog candy melt truffles American winter
Ingredients (26 truffles)
For the truffles
- 1 package (15.25 oz.) Gingerbread Oreos
- 1 package (8 oz.) cream cheese, softened
For the topping
- 1/2 cup Wilton’s Gingerbread Candy Melt wafers
- 1/2 cup Wilton’s Eggnog Candy Melt wafers
- 1/2 cup Wilton’s Dark Cocoa Candy Melt wafers
optional
- vegetable shortening (for thinning out candy melt)
- sprinkles
Instructions
For the truffles
Grind the Oreo cookies in a food processor and hand mix or use stand mixer to combine with cream cheese until it becomes a dough like consistency.
Roll Oreo mixture into quarter size balls (about 1 tablespoon’s worth) and place in airtight container lined with wax paper.
Place the container in the refrigerator overnight to set or in the freezer for at least an hour.
For the topping
After the balls are set, melt candy candy melt (1 flavor at a time) in the microwave as per directions on package. (If the candy melt is too thick, add vegetable shortening, 1 teaspoon at a time until you reach a desirable consistency for dipping.)
Remove Oreo balls from the refrigerator or freezer.
Dip the Oreo balls into candy coating mixture until all covered. (I use a fork.) Once covered, remove and softly tap until excess candy melt falls off. Then place the balls on wax paper until the candy melt hardens.
Carefully add the sprinkles to the top of the balls before the candy melt hardens.
Related Posts






Subscribe for New Racipies
Get mental health tips, updates, and resources delivered to your inbox.
Caffeine Calculator by Weight and Age (Safe Dose, mg/kg & Sleep Impact Guide)


In my preventive medicine clinic, I regularly see patients struggling with inexplicable anxiety, racing thoughts, and chronic insomnia. Often, they simply consume too many hidden stimulants throughout their busy days without realizing the cumulative biological impact.
They rarely understand how their physical size and developmental stage directly dictate their chemical tolerance. Therefore, using a precise caffeine calculator by weight and age becomes an essential, non-negotiable tool for protecting your personal health.
You must accurately measure your daily intake to prevent exhausting crashes and dangerous cardiovascular stress. By understanding your unique metabolic thresholds, you can finally optimize your physical energy without sacrificing restful nighttime sleep.
Today, we will explore exactly how to measure your safe daily limits using proven clinical formulas. Consequently, you will gain the exact knowledge needed to build a healthier, more balanced daily routine.
TL;DR: Quick Overview
- Most healthy adults can safely consume up to 400 mg of stimulants daily without adverse effects.
- Developing teenagers must strictly limit their total daily intake to 100 mg or less.
- The clinically safe dose generally ranges between 3 and 6 mg per kilogram of body weight.
- The chemical biological half-life lasts approximately 5 to 7 hours inside a healthy human liver.
- You should completely stop consuming all stimulating beverages at least 6 to 8 hours before bedtime.
How a Weight and Age-Based Stimulant Calculator Works
Understanding the fundamental math behind biological processing helps you make significantly smarter dietary choices. A standard chemical calculator uses your total body mass to determine the exact amount your liver can safely filter. Consequently, lighter individuals naturally require much smaller doses to achieve the same exact physical stimulation.
The basic clinical formula simply multiplies your total body weight in kilograms by a specific safe dosage range. Medical professionals typically recommend calculating between 3 and 6 milligrams of active compound per kilogram of total body mass. Therefore, finding your personal sweet spot requires some simple, basic multiplication.
| Body Weight | Low Dose (3 mg/kg) | Upper Range (6 mg/kg) |
| 50 kg | 150 mg | 300 mg |
| 70 kg | 210 mg | 420 mg |
| 90 kg | 270 mg | 540 mg |
Furthermore, you must always remember that calculated upper ranges must still respect established, general safety caps. Even if your body weight suggests a massive dose, you should rarely exceed the standard adult daily maximums.
What is the Safe Daily Limit for Coffee and Energy Drinks?

Establishing firm, evidence-based daily limits actively prevents accidental chemical toxicity and long-term adrenal fatigue. Major global health organizations clearly state that most healthy adults can safely consume up to 400 milligrams daily. This amount roughly equates to four standard cups of home-brewed drip coffee spread throughout your waking hours.
However, pregnant individuals must strictly reduce their total consumption to protect vulnerable fetal development. Obstetric guidelines consistently recommend staying strictly below 200 milligrams per day to prevent dangerous vascular complications. The powerful chemicals easily cross the biological placenta and heavily influence the developing baby’s fragile nervous system.
Similarly, pediatric guidelines strongly discourage any commercial stimulant consumption for young children under twelve years old. Their rapidly growing brains simply lack the necessary metabolic enzymes to process these powerful commercial chemicals effectively. Therefore, parents must vigilantly monitor hidden sources in dark chocolate treats, like dark chocolate cherry M&M cookies, sodas, and sports recovery drinks.
Evaluating Teen Intake: Is 114 mg a Lot for a 13-Year-Old?
Parents frequently ask me during routine pediatric checkups about specific commercial energy drink consumption. If you specifically wonder whether 114 mg of active stimulant is excessive for a 13-year-old, the answer is an absolute yes. Medical guidelines establish a strict, hard ceiling of 100 milligrams daily for all developing adolescents.
Consuming 114 milligrams rapidly overwhelms a young teenager’s immature central nervous system and cardiovascular pathways. This specific chemical overload almost immediately triggers intense physical anxiety, uncontrollable jitters, and severe classroom distraction.
Consequently, the child experiences a massive, unnatural energy spike followed by an exhausting, miserable afternoon crash, especially if paired with sugary snacks like mini hot chocolate donuts.
Furthermore, this excessive dosage heavily disrupts crucial adolescent sleep cycles necessary for proper brain development. Teenagers require deep, restorative sleep to regulate their shifting hormones and consolidate daily academic learning. Therefore, allowing a 13-year-old to consume heavy energy products directly damages their fundamental biological growth.
Understanding Dosing per Kilogram of Body Weight
Calculating your exact chemical dose per kilogram of body weight provides the most accurate clinical safety profile. In my daily practice, I categorize consumption into four highly distinct biological reaction tiers based on precise body mass. Understanding these specific physiological tiers helps you precisely manage your daily mental focus and athletic performance.
- 1 to 3 mg per kg: Consuming this amount creates a very mild, pleasant baseline stimulation. This low-dose tier effectively clears morning brain fog and gently elevates your resting heart rate without causing physical stress. Most casual morning coffee drinkers naturally fall right into this comfortable, easily manageable metabolic zone, perhaps while enjoying their breakfast maple bacon scones.
- 3 to 6 mg per kg: This range represents the optimal zone for enhanced athletic alertness. Sports medicine professionals frequently use this specific dosage to help athletes push through intense, grueling physical training sessions. However, you must carefully hydrate with water when operating in this elevated, highly active chemical tier.
- Approaching 6 mg per kg: This significantly increases your immediate risk of noticeable physical side effects. At this heavy threshold, your adrenal glands aggressively release massive amounts of circulating stress hormones. Consequently, you will likely experience uncomfortable stomach cramps, a rapidly racing heartbeat, and mild hand tremors that can make even holding your morning no-bake mochaccino cookies difficult.
- Exceeding 10 mg per kg: This pushes you directly into the dangerous, high-risk clinical toxicity zone. Your liver simply cannot produce enough specific CYP1A2 metabolic enzymes to clear the powerful chemicals rapidly. Therefore, the toxic compounds build up dangerously inside your bloodstream, requiring immediate medical evaluation.
High Intake Risk Thresholds and Potential Toxicity
Recognizing the specific physical symptoms of escalating chemical toxicity can literally save your life during an emergency. When you bypass your calculated safe limits, your central nervous system rapidly begins to malfunction and misfire. Consequently, you must closely monitor your body for any unexpected, severe physiological warning signs.
| Total Dose Level | Expected Biological Effect |
| 200–400 mg | Generally safe, enhanced focus |
| 400–600 mg | Physical jitters, acute insomnia |
| 600+ mg | Severe anxiety, heart palpitations |
| 1,000+ mg | Potential life-threatening toxicity |
If you accidentally consume over 600 milligrams, you must immediately stop all further stimulant intake and drink pure water. However, if you experience crushing chest pain or severe shortness of breath, you must contact emergency services immediately.
Biological Half-Life and Its Impact on Rest
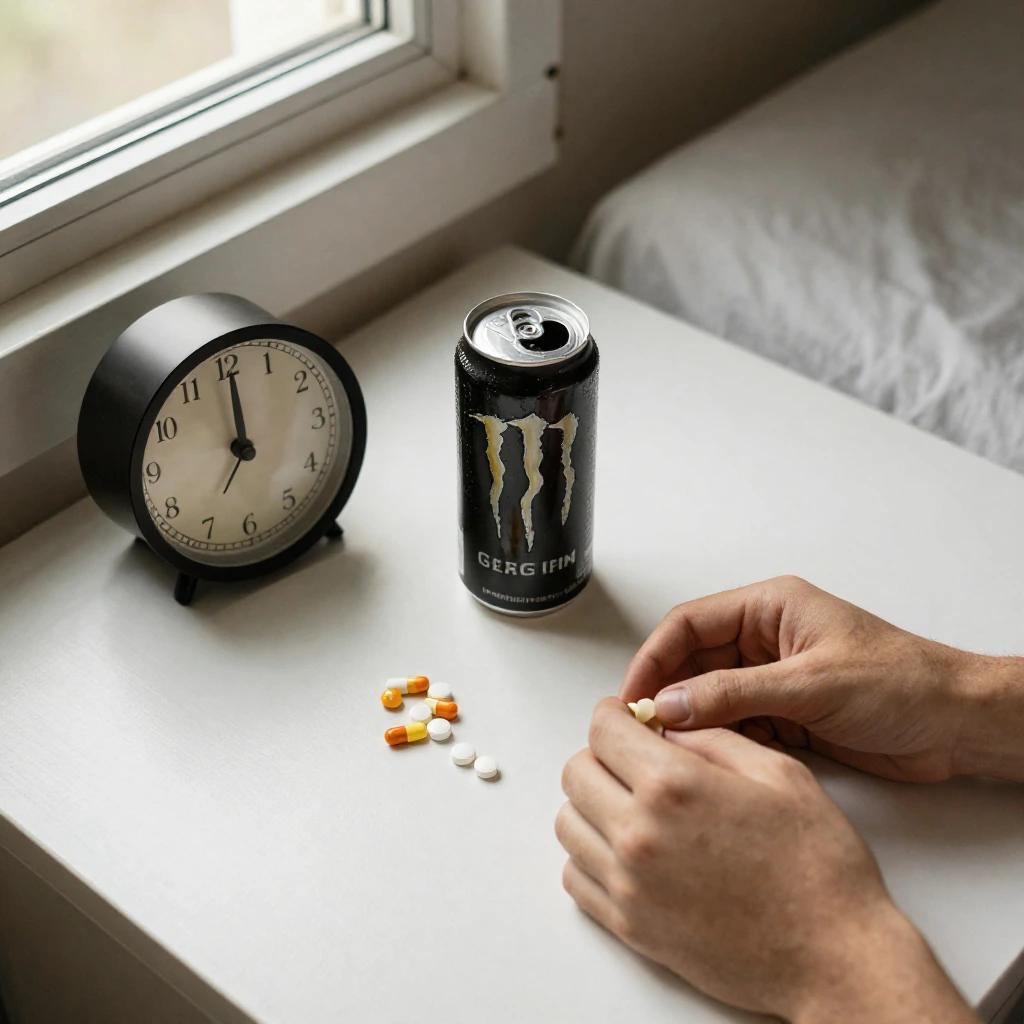
You cannot properly manage your daily energy without understanding the critical concept of biological chemical half-life. The half-life literally represents the exact time your liver takes to eliminate fifty percent of the consumed substance. For most healthy, active adults, this complex metabolic process requires approximately 5 to 7 full hours.
For example, imagine you drink a strong commercial energy beverage containing 200 milligrams at three in the afternoon. By eight or nine o’clock that evening, a massive 100 milligrams still actively circulates throughout your central nervous system. Consequently, your brain simply cannot initiate the natural, chemical relaxation process required for deep sleep.
Furthermore, certain specific genetic variations can drastically extend this natural biological elimination window. Some of my patients lack the specific liver enzymes required for rapid chemical breakdown, stretching their half-life to ten hours. Therefore, you must carefully observe your own personal sleep patterns and adjust your daily intake accordingly.
Sleep Disruption and Cut-Off Times
Protecting your nocturnal rest requires implementing strict, non-negotiable daytime consumption cut-off schedules. I consistently advise my clinical patients to enforce a strict, absolute stop time at least 6 to 8 hours before their planned bedtime. This generous buffer successfully allows your hard-working liver to clear the vast majority of circulating stimulating compounds.
For instance, if you naturally aim to fall asleep by eleven o’clock at night, you must finish your final coffee by three or four in the afternoon. Any consumption after this critical afternoon window guarantees significant, measurable disruptions to your deep REM sleep cycles. Consequently, you will wake up feeling completely exhausted, forcing you to reach for even more morning stimulants.
Daily Limits Categorized by Body Mass
Quickly referencing a standard mass-based chart helps you make fast, incredibly smart dietary decisions on the go. Here is a simplified clinical breakdown showing how total body weight dictates your safe upper boundaries.
| Your Body Weight | Calculated Safe Daily Range |
| 60 kg | 180–360 mg |
| 75 kg | 225–400 mg |
| 100 kg | 300–400 mg (Max cap applies) |
Always remember that the 400-milligram absolute ceiling firmly applies regardless of how much you weigh. Even heavily muscled bodybuilders must respect this critical cardiovascular boundary to prevent serious arterial damage.
Mechanism of Action: How Stimulants Affect the Brain
Understanding exactly how these popular chemicals physically alter your brain chemistry empowers you to use them wisely. The primary active molecule deliberately mimics a naturally occurring, sleep-inducing chemical called adenosine. Consequently, the stimulant aggressively binds to your brain’s delicate adenosine receptors, physically blocking the natural fatigue signals.
Furthermore, while blocking the sleep signals, the chemical simultaneously triggers an exciting surge of natural dopamine. This sudden dopamine flood creates the highly recognizable feelings of intense motivation, elevated mood, and sharp mental clarity. Therefore, your brain heavily associates the morning beverage with highly positive, rewarding feelings, similar to the comfort of enjoying warm lemon thyme scones with a lemon cream cheese glaze on a Sunday morning.
Additionally, this complex neurological blockade aggressively forces your pituitary gland into a mild state of emergency. The gland signals your adrenal glands to rapidly pump adrenaline directly into your moving bloodstream. As a result, your breathing tubes open wider, your heart pumps faster, and your muscles prepare for immediate physical action.
Common Side Effects of Excessive Consumption
Ignoring your calculated physical limits almost always results in highly uncomfortable, disruptive physiological side effects. The most frequent complaint I treat involves sudden, overwhelming feelings of generalized clinical anxiety and impending panic.
The artificial adrenaline surge frequently tricks your nervous system into believing you face immediate, physical danger. Even seemingly harmless indulgences containing cocoa, like spiced dark chocolate hazelnut cookies, contain trace amounts of stimulants that can contribute to this overload if you aren’t careful.
Furthermore, heavy daily consumption aggressively irritates the delicate, sensitive lining of your entire gastrointestinal tract. Patients frequently suffer from severe acid reflux, sudden painful cramping, and unexpected urgent bowel movements. Therefore, you must heavily moderate your intake if you already suffer from sensitive digestive conditions.
Finally, chronic excessive use forces your beating heart to work substantially harder than nature intended. You may experience terrifying heart palpitations, skipped beats, or dangerously elevated resting blood pressure over time. Consequently, respecting your calculated personal limits protects your vital cardiovascular system from unnecessary daily strain.
Who Should Strictly Limit Their Intake?
Certain vulnerable patient populations must treat these commercial stimulating compounds with extreme, uncompromising caution. Individuals previously diagnosed with generalized anxiety disorders must heavily restrict their exposure to prevent sudden, severe panic attacks. The artificial physical stimulation perfectly mimics and frequently triggers existing psychological anxiety loops.
Additionally, anyone managing a diagnosed cardiac arrhythmia or chronic hypertension must consult their cardiologist immediately. Adding powerful, unregulated commercial stimulants to an already struggling cardiovascular system creates a highly dangerous, unpredictable clinical scenario. Therefore, protecting your damaged heart always takes strict precedence over a temporary afternoon energy boost.
Digital Tracking Apps and Monitoring Tools
Modern digital technology makes tracking your exact daily chemical exposure easier and more accurate than ever before. Many patients utilize convenient mobile tracking apps specifically designed to log every single milligram they consume daily. These smart applications beautifully calculate your personalized decay curves and perfectly predict your ideal nighttime sleep window.
Furthermore, combining a reliable smartphone intake tracker with a biometric wearable sleep ring provides incredible health insights. You can clearly, visibly see exactly how your afternoon tea directly degrades your nighttime heart rate variability. Consequently, this hard, undeniable digital evidence frequently motivates patients to finally change their daily consumption habits permanently.
Frequently Asked Questions
What amount per kilogram is considered completely safe?
Clinical professionals generally consider approximately 3 to 6 milligrams per kilogram of body weight to be highly safe and effective.
This specific calculated range successfully provides noticeable physical alertness without heavily overwhelming your central nervous system. However, you must always accurately track your total daily sum to ensure you avoid dangerous chemical accumulation.
What is the absolute maximum recommended daily limit?
Major health organizations officially establish the absolute maximum daily limit at exactly 400 milligrams for healthy, non-pregnant adults.
You should practically visualize this specific upper boundary as roughly four standard, home-brewed cups of black drip coffee. Exceeding this critical number significantly increases your immediate risk of developing severe anxiety and dangerous cardiovascular stress.
At what point does consumption become dangerously high?
Medical professionals strongly categorize any daily consumption exceeding 600 milligrams as excessively high and potentially dangerous. Pushing your sensitive body past this heavy threshold frequently triggers extreme jitteriness, severe digestive distress, and agonizing insomnia. If you accidentally consume over 1,000 milligrams, you risk entering a life-threatening state of acute chemical toxicity.
How many hours does the chemical remain active inside the body?
The active stimulating compound maintains a biological half-life of approximately 5 to 7 solid hours inside a healthy adult. This means your liver requires that entire duration just to successfully eliminate half of the original consumed dose. Therefore, a massive dose taken late in the afternoon will heavily disrupt your brain’s ability to sleep at night.
Can teenagers safely consume commercial energy products?
Teenagers must strictly limit their total daily intake to no more than exactly 100 milligrams from all possible sources. Their still-developing, highly sensitive nervous systems simply cannot safely process the massive chemical doses found in commercial energy beverages. Consequently, allowing adolescents to heavily consume these powerful products actively damages their sleep, focus, and overall biological development.
Conclusion
Properly managing your daily energy requirements demands a highly logical, mathematically sound approach to your personal health. Using a reliable caffeine calculator by weight and age actively removes the dangerous guesswork from your daily dietary routine. By understanding your exact personal thresholds, you can safely harness the benefits of these compounds without damaging your nervous system.
You must always remember that physical size, age, and liver metabolism heavily dictate how your body processes commercial stimulants. What functions as a perfectly harmless morning pick-me-up for a large adult can severely harm a developing teenager. Therefore, applying strict, mass-based clinical math actively protects your vulnerable cardiovascular system from unnecessary, silent daily damage.
Ultimately, true, sustainable biological energy stems directly from deep sleep, proper hydration, and excellent daily nutrition. You should never use artificial commercial beverages to constantly mask chronic physical exhaustion or a terrible nighttime sleep routine. By strictly respecting your calculated daily limits, you will achieve much better focus, a calmer mind, and significantly deeper rest.
Evidence-Based References:
- Food and Drug Administration — Spilling the Beans: How Much Caffeine is Too Much?
- StatPearls — Caffeine Toxicity
- National Institutes of Health — Energy Drinks
- National Institutes of Health — How Much Caffeine is Too Much for Young Adolescents?
- National Institutes of Health — Intake and Exposure to Caffeine
- American Academy of Pediatrics — Health Effects of Energy Drinks on Children, Adolescents, and Young Adults
- PubMed — Population pharmacokinetics of caffeine in healthy male adults using mixed-effects models
- PubMed — Caffeine Disposition in Obesity
- National Institutes of Health — Exercise and Sport Performance with Low Doses of Caffeine
- Centers for Disease Control and Prevention — The Buzz on Energy Drinks
- MedlinePlus — Caffeine
- American Heart Association — Caffeine and Heart Disease
Related Posts






Subscribe for New Racipies
Get mental health tips, updates, and resources delivered to your inbox.