
Pumpkin Spice Oreo Truffles

Medically reviewed by Christiana George Updated Date: June 8, 2023
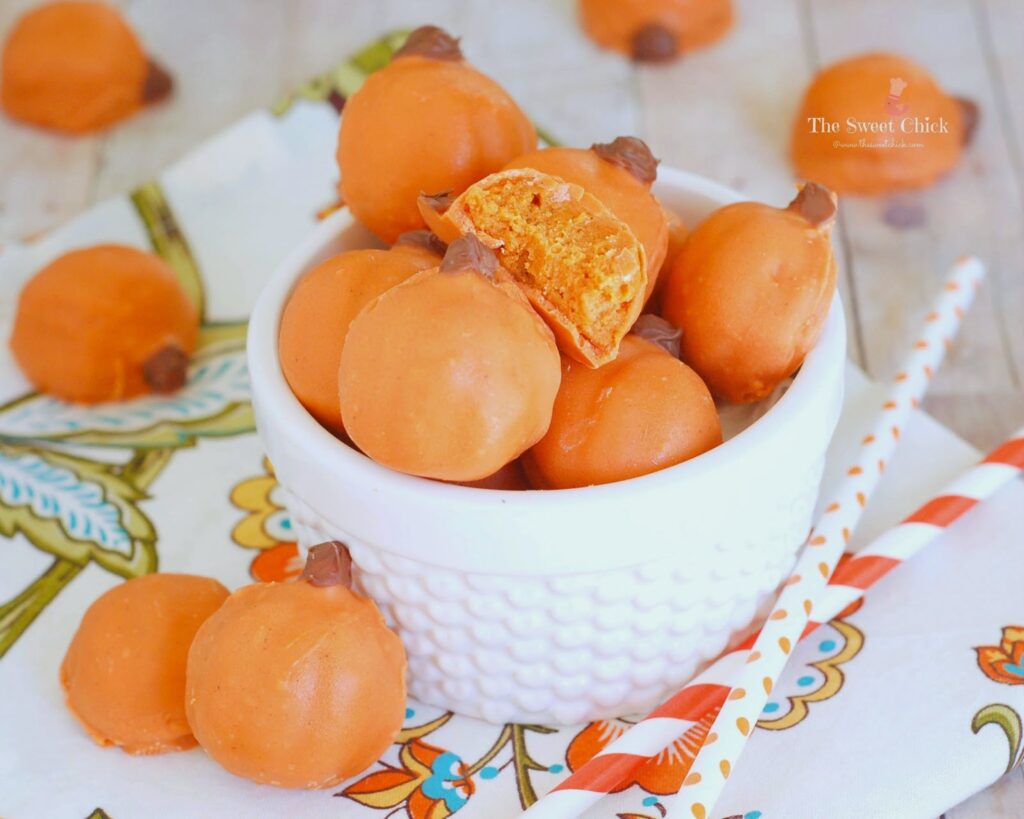

Well, I had to find something to do with the leftover Pumpkin Spice Oreos I had from last week’s Krispie Pumpkin Spice Oreo Tartlets, so I made some truffles. I love Oreo truffles. They are so easy to make and with all the different Oreos that keep coming out, there is a flavor for everyone’s liking. And you can shape the dough in a variety of ways. I used a pumpkin ice cube tray to shape these pumpkin truffles.

The Pumpkin Spice Oreos and the silicone pumpkin ice cube trays were purchased at Walmart. The Wilton’s Pumpkin Spice candy melt is from Michael’s.
You could just go the easy route and make traditional round truffles, but I thought pumpkins would be cute. I dusted the silicone trays with some powdered sugar to keep the dough from sticking. I pressed the dough into the pumpkin cavities by hand, making sure it was pressed down firmly. Then I popped them into the freezer overnight. The pumpkins came out pretty easy from the molds. What gave me the most problems was the Pumpkin Spice candy melt. I don’t know if I got a bad batch or I had water in my container, but the candy wouldn’t melt. I tried adding vegetable shortnening and that didn’t work. So then I pulled out my Babycakes chocolatier to melt it and added some orange candy melt I had to the batch. Finally, that worked and the candy melt still had plenty of pumpkin spice flavor and came out a brighter shade of orange. So all worked out well.

For the stems, I just melted a few bits of chocolate chips in the microwave and painted the chocolate on with one of my cake decorating paint brushes. You could also use a regular clean paint brush. You could also paint on some vines and leaves with some green candy melt like I did for my Maple Pumpkin Rice Krispie Treats. Either way they taste awesome.
I just love a crunchy outer shell with a creamy, flavorful center. The pumpkin spice in the Oreos and in the candy melt worked really well together. And I think the little pumpkins came out cute. The kids sure did like them.
Pumpkin Spice Oreo Truffles
by The Sweet Chick
Prep Time: 1.5hs w/freezer time
Keywords: no bake dessert snack pumpkin spice oreos cream cheese candy melt Halloween truffles American fall
Ingredients (20 truffles)
For the truffles
- 12 Pumpkin Spice Oreos
- 4 oz. cream cheese, softened
For the coating
- 1/2 package (5 oz.) Wilton’s Pumpkin Spice candy melts
- 1/2 package (5 oz.) Wilton’s candy melts, orange
- 8-10 Ghirardelli milk chocolate chips
Instructions
For the truffles
Crush Oreo cookies in a food processor until they are a dirt like consistency.
In a medium bowl, mix the crushed Oreos and cream cheese until completely combined.
Lightly dust your silicone molds with powdered sugar or flour, removing any excess.
Add a small amount of Oreo dough to each cavity pressing down with your fingers until cavity is full.
Place the molds in the freezer for at least 1 hour to set. (I left mine overnight.)
For the coating
Combine and melt all the candy melt according to the instructions on the package. You may wish to place the melted candy into a warmer like the Babycakes Chocolatier to keep it from hardening up on you.
Once the candy melt is ready, remove one tray at a time from the freezer and pop out the pumpkin truffles.
With a fork or candy dipping tool, dip the truffles one at a time into candy coating mixture until all covered.
Once covered, remove and softly tap until excess candy melt falls off. Then place the truffles on wax paper until the candy melt hardens. You can place the truffles in the fridge to quicken the process.
Once the candy melt is set, you can paint on the stems. Simply place the chocolate chips in a microwave safe container and microwave for 20-30 seconds.
Using a clean paintbrush, paint the melted chocolate onto the stems of the pumpkin truffles and let it set.
Keep truffles refrigerated until ready to serve.
Notes
It is best to have the dough as frozen as possible when dipping, so that it doesn’t come apart.
If your candy melt does not melt smoothly, you can add 1/2 teaspoon of vegetable shortening at a time to it until it becomes the right consistency for dipping.
If the bottoms of the truffles don’t get fully covered with candy melt, you can always dip them again.
These truffles can be made ahead of time and refrigerated for 3-4 days.
Related Posts


Subscribe for New Racipies
Get mental health tips, updates, and resources delivered to your inbox.
Coconut Banana Muffins


In between all the rain showers, we have had some pretty nice days. This past Sunday was one of them. My husband and I actually took the kids to our community pool. They have been begging to go since it opened April 1. Only the neighborhood kids ventured out into the not so warm water. The adults were all lounging around in the hot sun. I am looking forward to some summer weather. For now, I will have to do with some summer inspired treats. These Coconut Banana Muffins with Tequila Lime Glaze fit the bill perfectly.

As you can see, these have the same makings as most of my muffins. I just swapped out a few of the flavors.
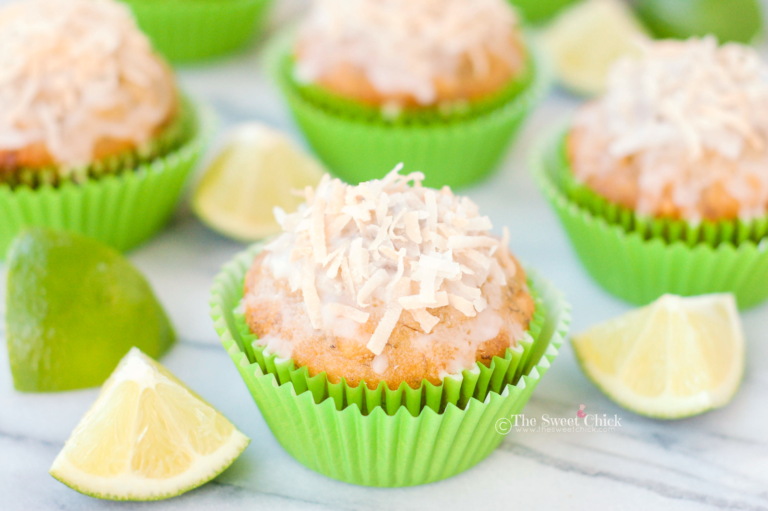
I know not everyone likes the texture of shredded coconut, so I pulsed it a few times in the food processor to get smaller pieces. I just loved how well these muffins rise. They are always light and fluffy.

When I was taste testing the glaze, it was pretty strong. However, it ends up soaking into the muffins and the tequila taste mostly goes away. I actually ended up double glazing mine because I forgot to have the toasted coconut ready before the first layer of glaze set. The toasted coconut flakes added more flavor and a bit of crunch.

These Coconut Banana Muffins came out moist and full of coconut flavor, without being dense or overly sweet. The Tequila Lime Glaze added a little tang to balance the sweetness of the coconut. If you just want to add a lime glaze, you could just replace the tequila with water.

Just looking at these muffins has got me thinking of summer; sitting by the pool with a margarita in hand. Oh yeah, baby! I am ready. Are you? Perhaps you should make some muffins to get you going.
Coconut Banana Muffins
by The Sweet Chick
Prep Time: 15 minutes
Cook Time: 15 minutes
Keywords: bake bread breakfast dessert snack coconut coconut oil banana tequila Cinco de Mayo muffins bread American spring summer
Ingredients (12 muffins)
For the muffins
- 2/3 cups light brown sugar
- 1/2 cup coconut oil, melted
- 2 eggs, room temperature
- 1 teaspoon imitation coconut extract
- 2 medium bananas, mashed
- 1 2/3 cups all purpose flour
- 1 teaspoon baking soda
- 1/2 teaspoon salt
- 1 cup sweetened coconut flakes
For the glaze
- 1 cup powdered sugar
- 1 tablespoon fresh lime juice
- 1 tablespoon tequila
- 1 teaspoon water
Optional toppings
- sprinkles
- toasted coconut flakes
Instructions
For the muffins
Preheat oven to 375ºF.
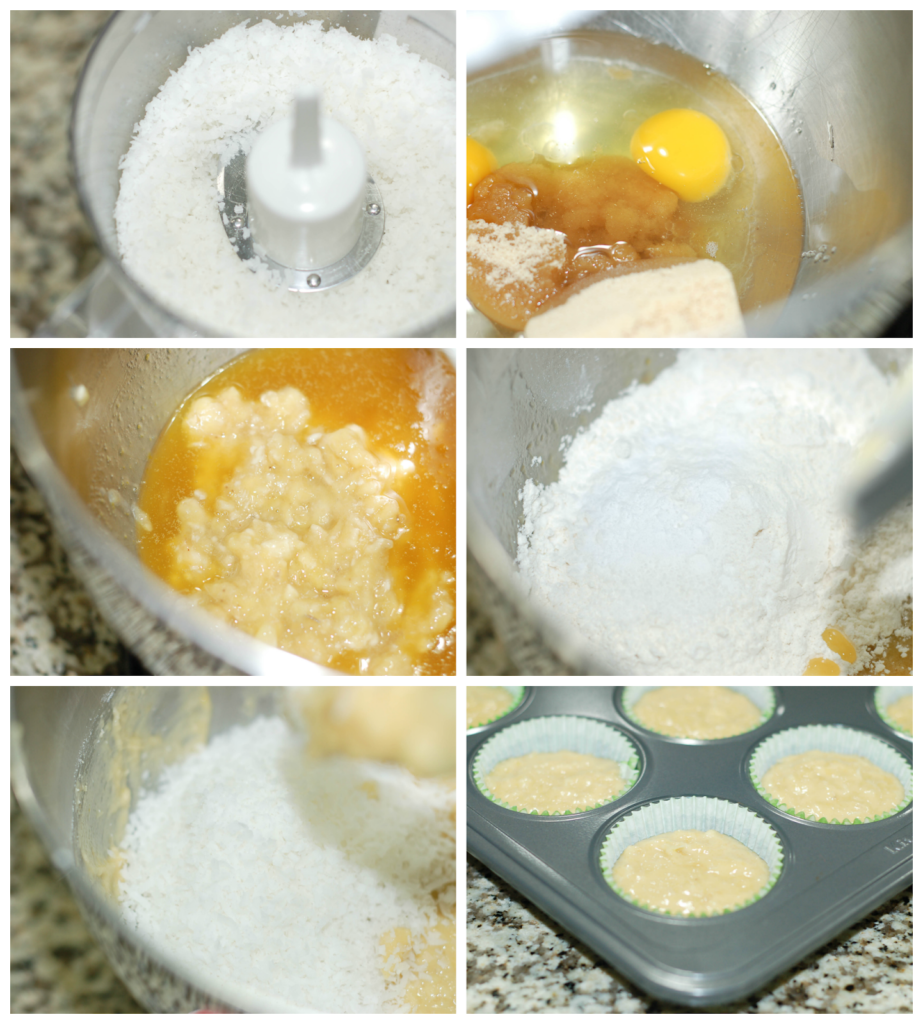
Place solid coconut oil in a microwave safe bowl and microwave for about 20 seconds until melted.
In a stand mixer bowl add sugar, oil, eggs, and coconut extract. Mix on low speed until completely blended.
Then add mashed bananas and mix until smooth.
Next add in the flour, baking soda, and salt. Mix until well blended.
Lastly, add the shredded coconut to the mixer bowl and mix on low until completely incorporated.
Spoon batter into greased/lined muffin tins until about 3/4 full.
Bake at 375ºF for 15 minutes or until toothpick inserted in center comes out clean.
Remove from oven and place on cooling rack. Cool completely before adding glaze.
For the glaze
In a small bowl, whisk together the powdered sugar, lime juice, tequila, and water until smooth.
Brush the glaze over the tops of the muffins.
Let the glaze set.
For the optional toppings
If you add sprinkles or toasted coconut flakes to the tops of the muffins, do so before the glaze sets.
Notes
To make toasted coconut flakes, lay out 1/2 – 1 cup of sweetened coconut flakes on a parchment lined cookie sheet and bake at 325°F for about 10 minutes or until golden brown, stirring them around half way through. Let the toasted coconut flakes cool before adding to the muffins. You can keep any extra flakes in an air tight container and use it over ice cream, waffles, etc.
If you do not want to add tequila to the glaze, simply replace the quantity with water.
If you want to add more glaze, let one layer of glaze set before brushing on another.
Related Posts
Subscribe for New Racipies
Get mental health tips, updates, and resources delivered to your inbox.