
Dark Chocolate Cherry Cordial Cookies

Medically reviewed by Christiana George Updated Date: December 18, 2022


I didn’t think it could get any colder down south, but I was wrong. I woke up to 14°F weather and a frozen water pipe. Not cool! I guess we didn’t move far enough south. In an effort to think happy thoughts, I am thinking of Valentine’s Day. I made some no bake dark chocolate cookies for the occasion with some Cherry Cordial Hershey Kisses I had found during the holiday season. Dark chocolate and cherries are always a good combo in my book.

Since my No Bake Mochaccino Cookies were the biggest hit last year, I thought I make them again, but with dark cocoa and dark chocolate spread. World Market sells this decadent dark chocolate spread. If you like dark chocolate, you have got to try it.

These cookies just require a little stove-top cooking. Good thing is, you only need one pot.
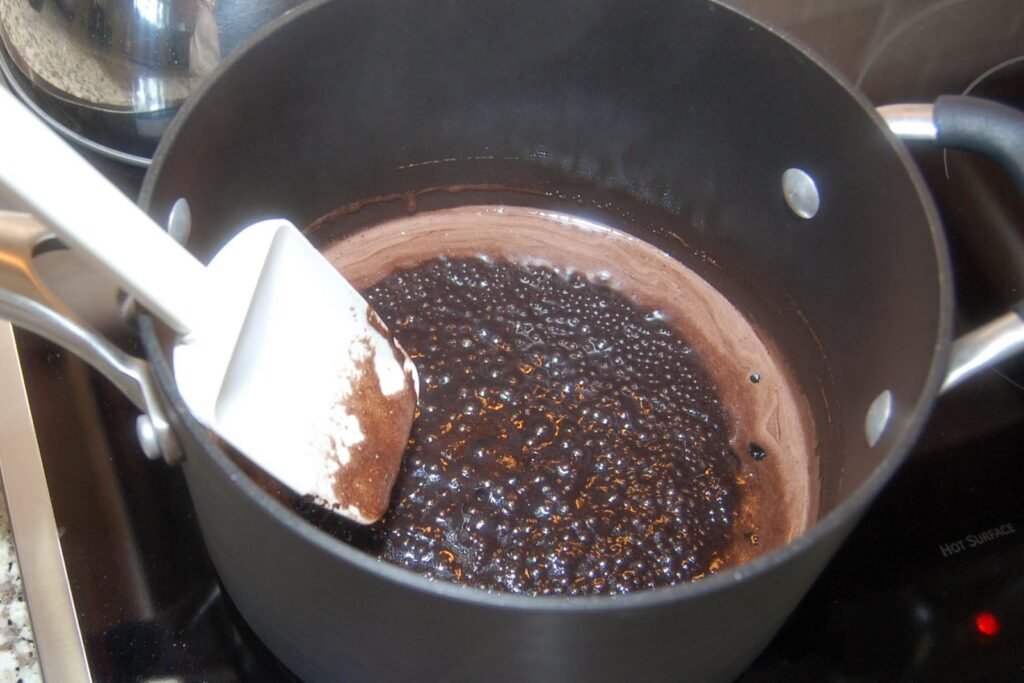
Now it’s time to add the chocolate spread and the oats. It’s dark chocolate heaven.

I did cut the original recipe in half. After all I ate during the holidays, I really didn’t need 30 cookies in my house, staring at me. I can deal with 15 cookies much better.
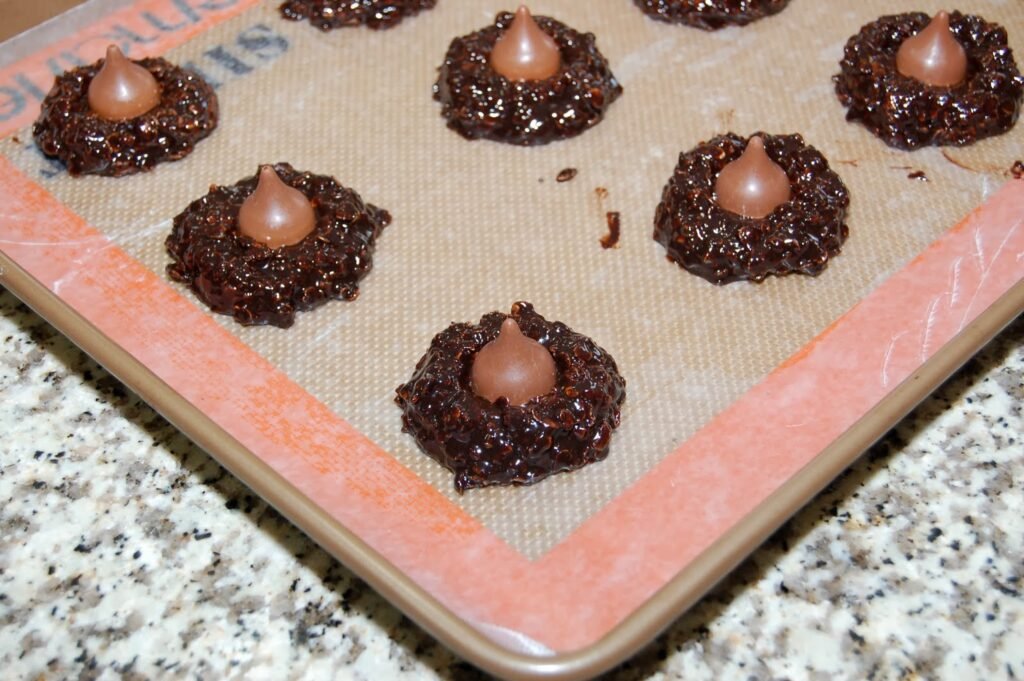
I used a regular cookie scoop to place them on the wax paper, then gently pressed a Hershey Kiss in the center of each cookie. Then I just placed them in the fridge to set.
I love the deep dark chocolate taste of these as well as the chewy, gooeyness of them. The cherry cordial créme inside the milk chocolate Kisses blends in smoothly with the dark chocolate flavors. I am not a big fan of cherry flavors, but if they are mixed with dark chocolate, I am in. I think I am going to go make myself a hot cocoa to go with these. I hope you guys all stay warm wherever you are.
Dark Chocolate Cherry Cordial Cookies
by The Sweet Chick
Prep Time: 15 minutes
Cook Time: 2 minutes
Keywords: no bake dessert snack dark chocolate dark cocoa oatmeal cookie American winter
Ingredients (15 cookies)
- 1/2 cup sugar
- 2 tablespoons Hershey’s Special Dark cocoa
- 4 tablespoons butter
- 1/4 cup milk
- 1/2 cup World Market Dark Chocolate Spread
- 1 1/2 teaspoons vanilla extract
- 1 1/12 cups quick oats
- 15 Cherry Cordial Hershey Kisses
Instructions
Place sugar, cocoa, butter and milk in a medium saucepan and bring to a boil over medium heat.
Boil for 1 minute.
Remove from stove top and add the dark chocolate spread, vanilla and oats. Mix until all incorporated.
Using a cookie scoop, drop by scoopful onto wax paper and place a Hershey Kiss in the center of each cookie pressing down gently.
Place cookies in fridge to set.
Grab a glass of milk or a mug of coffee and enjoy!
This post may be shared at these fabulous link parties.
Related Posts



Subscribe for New Racipies
Get mental health tips, updates, and resources delivered to your inbox.
Pumpkin Spice Oreo Truffles

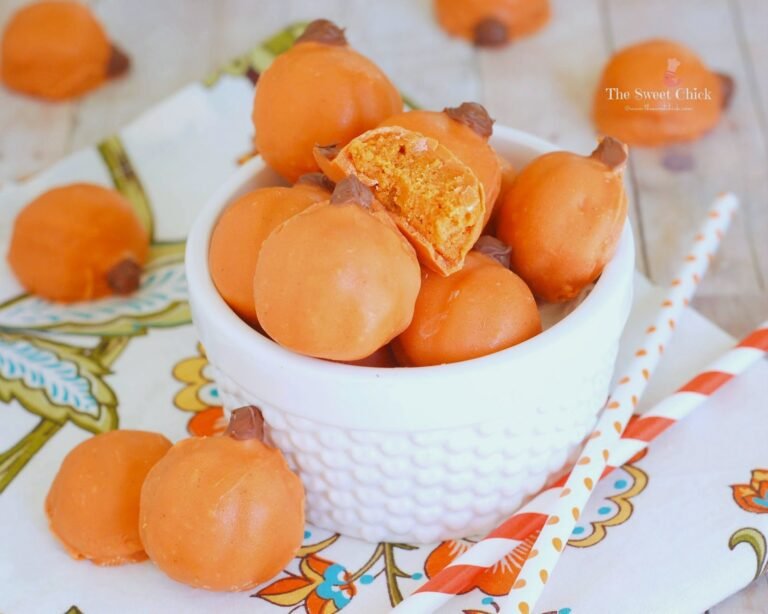
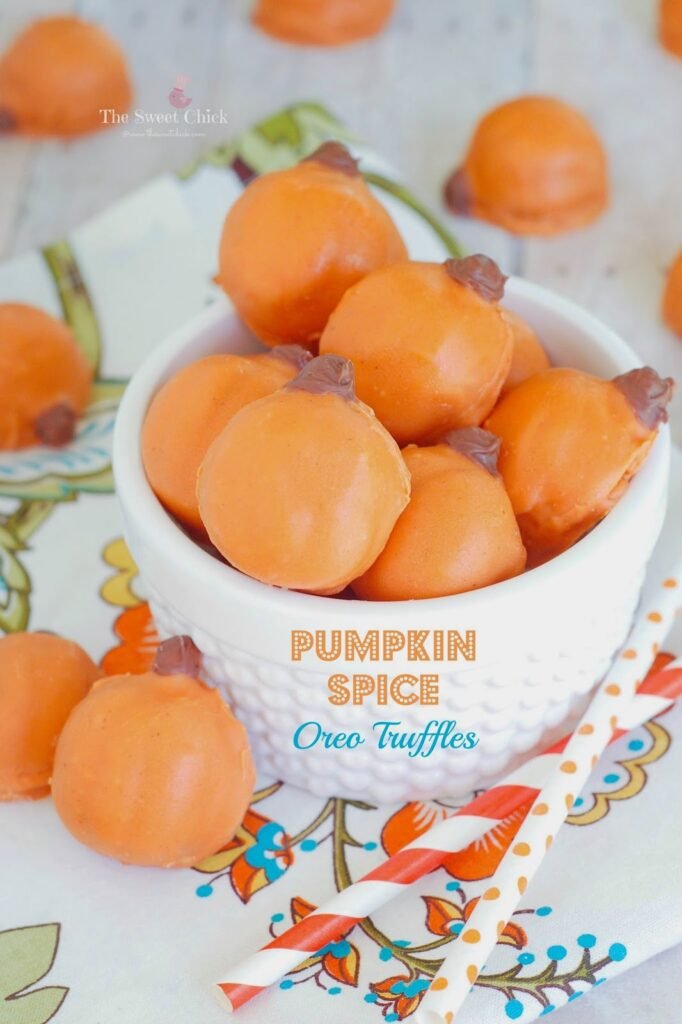
Well, I had to find something to do with the leftover Pumpkin Spice Oreos I had from last week’s Krispie Pumpkin Spice Oreo Tartlets, so I made some truffles. I love Oreo truffles. They are so easy to make and with all the different Oreos that keep coming out, there is a flavor for everyone’s liking. And you can shape the dough in a variety of ways. I used a pumpkin ice cube tray to shape these pumpkin truffles.

The Pumpkin Spice Oreos and the silicone pumpkin ice cube trays were purchased at Walmart. The Wilton’s Pumpkin Spice candy melt is from Michael’s.
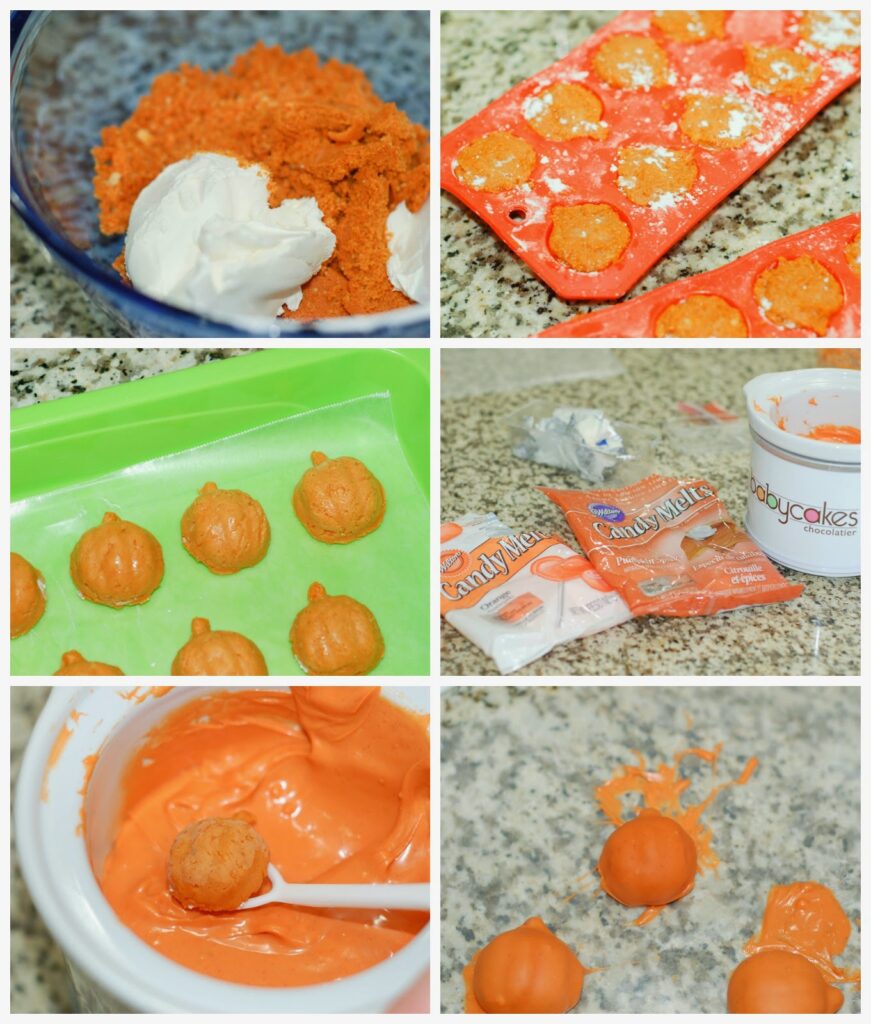
You could just go the easy route and make traditional round truffles, but I thought pumpkins would be cute. I dusted the silicone trays with some powdered sugar to keep the dough from sticking. I pressed the dough into the pumpkin cavities by hand, making sure it was pressed down firmly. Then I popped them into the freezer overnight. The pumpkins came out pretty easy from the molds. What gave me the most problems was the Pumpkin Spice candy melt. I don’t know if I got a bad batch or I had water in my container, but the candy wouldn’t melt. I tried adding vegetable shortnening and that didn’t work. So then I pulled out my Babycakes chocolatier to melt it and added some orange candy melt I had to the batch. Finally, that worked and the candy melt still had plenty of pumpkin spice flavor and came out a brighter shade of orange. So all worked out well.

For the stems, I just melted a few bits of chocolate chips in the microwave and painted the chocolate on with one of my cake decorating paint brushes. You could also use a regular clean paint brush. You could also paint on some vines and leaves with some green candy melt like I did for my Maple Pumpkin Rice Krispie Treats. Either way they taste awesome.
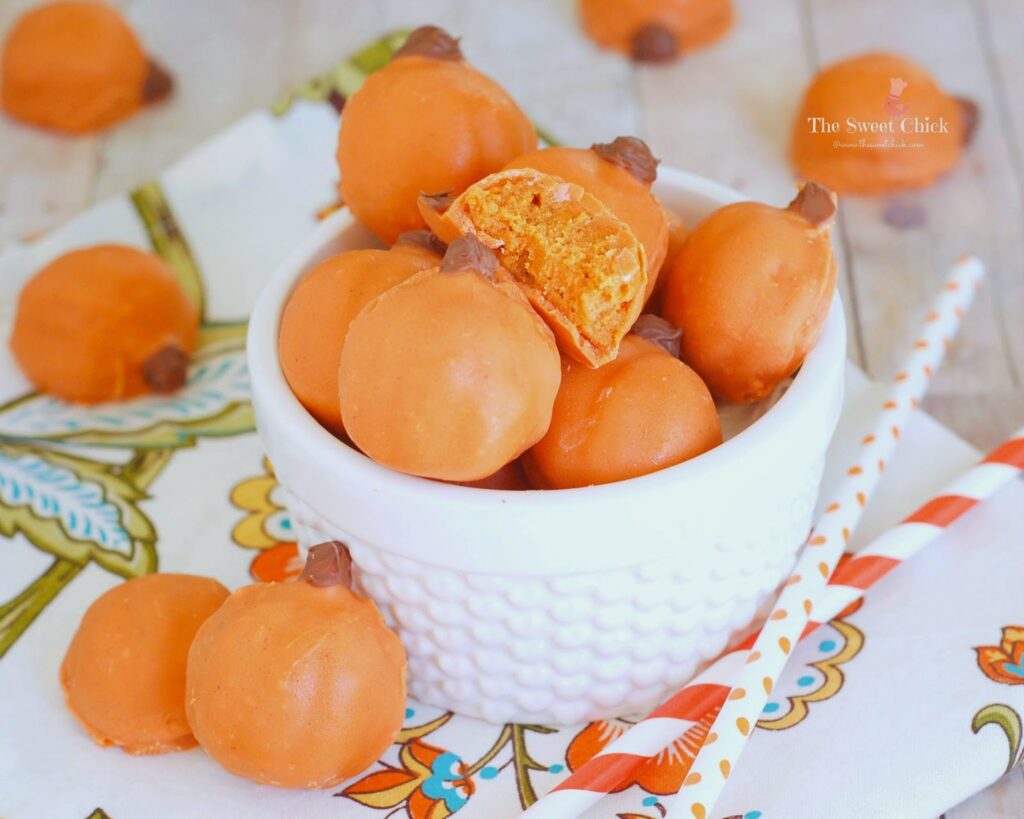
I just love a crunchy outer shell with a creamy, flavorful center. The pumpkin spice in the Oreos and in the candy melt worked really well together. And I think the little pumpkins came out cute. The kids sure did like them.
Pumpkin Spice Oreo Truffles
by The Sweet Chick
Prep Time: 1.5hs w/freezer time
Keywords: no bake dessert snack pumpkin spice oreos cream cheese candy melt Halloween truffles American fall
Ingredients (20 truffles)
For the truffles
- 12 Pumpkin Spice Oreos
- 4 oz. cream cheese, softened
For the coating
- 1/2 package (5 oz.) Wilton’s Pumpkin Spice candy melts
- 1/2 package (5 oz.) Wilton’s candy melts, orange
- 8-10 Ghirardelli milk chocolate chips
Instructions
For the truffles
Crush Oreo cookies in a food processor until they are a dirt like consistency.
In a medium bowl, mix the crushed Oreos and cream cheese until completely combined.
Lightly dust your silicone molds with powdered sugar or flour, removing any excess.
Add a small amount of Oreo dough to each cavity pressing down with your fingers until cavity is full.
Place the molds in the freezer for at least 1 hour to set. (I left mine overnight.)
For the coating
Combine and melt all the candy melt according to the instructions on the package. You may wish to place the melted candy into a warmer like the Babycakes Chocolatier to keep it from hardening up on you.
Once the candy melt is ready, remove one tray at a time from the freezer and pop out the pumpkin truffles.
With a fork or candy dipping tool, dip the truffles one at a time into candy coating mixture until all covered.
Once covered, remove and softly tap until excess candy melt falls off. Then place the truffles on wax paper until the candy melt hardens. You can place the truffles in the fridge to quicken the process.
Once the candy melt is set, you can paint on the stems. Simply place the chocolate chips in a microwave safe container and microwave for 20-30 seconds.
Using a clean paintbrush, paint the melted chocolate onto the stems of the pumpkin truffles and let it set.
Keep truffles refrigerated until ready to serve.
Notes
It is best to have the dough as frozen as possible when dipping, so that it doesn’t come apart.
If your candy melt does not melt smoothly, you can add 1/2 teaspoon of vegetable shortening at a time to it until it becomes the right consistency for dipping.
If the bottoms of the truffles don’t get fully covered with candy melt, you can always dip them again.
These truffles can be made ahead of time and refrigerated for 3-4 days.
Related Posts
Subscribe for New Racipies
Get mental health tips, updates, and resources delivered to your inbox.