Homemade Farfalle
Medically reviewed by Christiana George Updated Date: June 8, 2023
I retreated to the Wedding Cave last week. I’ve decided that this is an apt name for these all-consuming panic-driven periods in which I spend basically every free moment sitting at my desk frantically planning some aspect of the big day. (It totally doesn’t help that I’m both neurotic AND disorganized.) In last week’s case, I sat at my desk with a big blank sheet of watercolor paper before me realizing that if we don’t send out invitations soon, my nightmares will come true.
You see, I’ve been having stress dreams about the wedding. It’s kind of laughable actually, because I always thought I’d have a knack for wedding planning. I think I’ve even entertained thoughts of becoming a wedding planner. HA. It turns out, I would be terrible at that job.
In my latest dream, which is what triggered last week’s fever pitch, I thought that there were only three weeks left until the wedding. And I hadn’t yet sent out invitations. Mini heart attack! Other realizations ensued, causing me to fall into a deeper and deeper panic: my dress still needed to be altered, I hadn’t picked out bridesmaid dresses, I hadn’t contacted a florist (that much at least is taken care of), etc. etc. I woke up heart POUNDING, and it took awhile to grasp that it had all been a dream.
While I hate being out of touch with everything I hold dear, this blog for example, and all the other blogs I love to read, last week did see some progress and minor achievements. We have a DJ now, for example. And a day-of coordinator! I’m so relieved. Also, our invitations are halfway to being done and I’m gathering quotes from printers. We can get our invitations printed as soon as next Tuesday, people! Yahoo! The week also wrapped up with the completion of our Catholic counseling, a cumulative nine hours of what essentially boiled down to premarital discussions. Just to be clear, I am not Catholic and Chris isn’t a practicing Catholic. We decided to undergo these sessions because of our choice of officiant, a close friend of Chris’s parents who is also a Franciscan monk. What’s funny is that we were signed up for a special session called Inter-faith, with my religion being denoted as ‘Chinese’.
To top it all off, I also started our registry, which, it turns out, I can easily get lost in and obsessive about. There are suddenly so many things we NEED, or so I believed, until I took a step back and realized I was maybe getting a little carried away with adding to our appliance collection. I immediately removed a number of items from the list and forced myself to get off Amazon, with its million and one reviews on just about anything a person could want. I’m trying to stay grounded, if you can’t tell.
Actually, before I close the subject, I was hoping to get your opinion on the Le Creuset dutch oven I’ve been considering. I’m debating between the 5.5 qt. and 7.5 qt round sizes, or rather, I think the smaller size will work fine, but there are very compelling reasons for choosing the larger. What do you guys think? Does anyone have experience with either? And is the larger too big for two people? Three people? Four?



On to today’s post. Do you know how transcendental homemade pasta is? If not, you really ought to try making your own soon. Some of you might be aware that I made homemade pasta for the first time ever a couple weeks ago. It was amazing! I tossed the tagliatelle with homemade pesto, roasted asparagus, and white beans, and couldn’t stop crowing over how delicious it was.
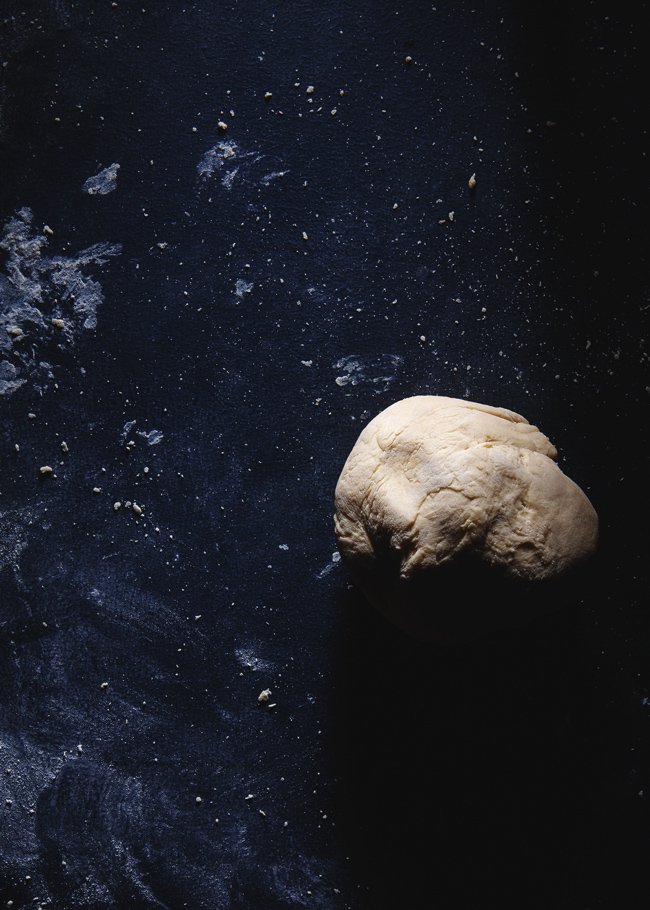
But besides the finished product being incredibly fresh and tasty, the process of making the pasta is also really rewarding. Especially when you consider that its ingredients are only flour and some kind of binder. The rest of the magic comes from sheer hard labor, the interplay between the dough and your hands. You’ll knead and knead, pounding and folding, take a break, and then knead some more. Later, you’ll roll and roll, pressing your body into the dough, trying to get it as thin as possible, and you still won’t be satisfied with how thin it is. Don’t worry. Homemade pasta doesn’t have to be perfect.
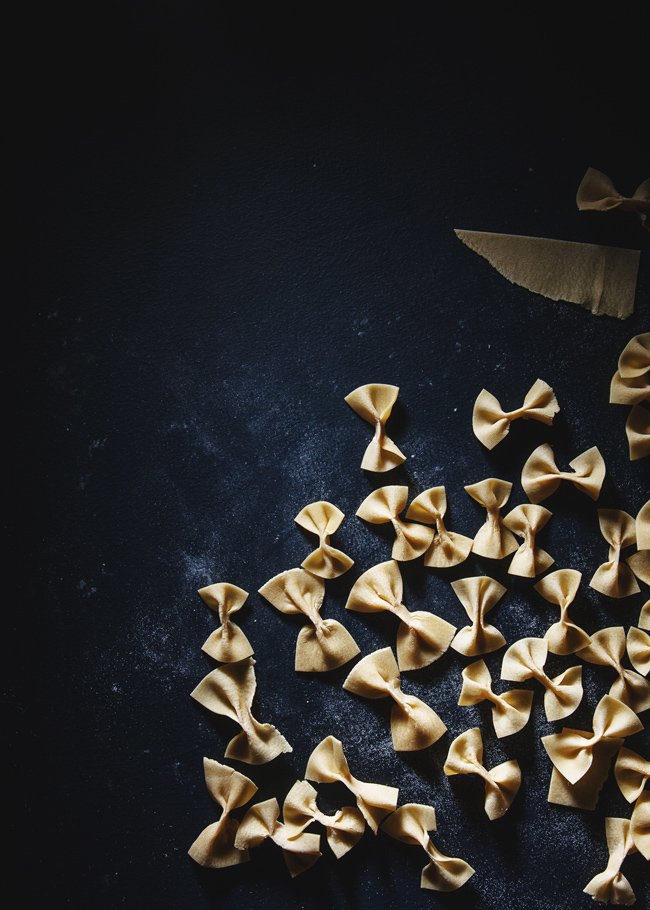
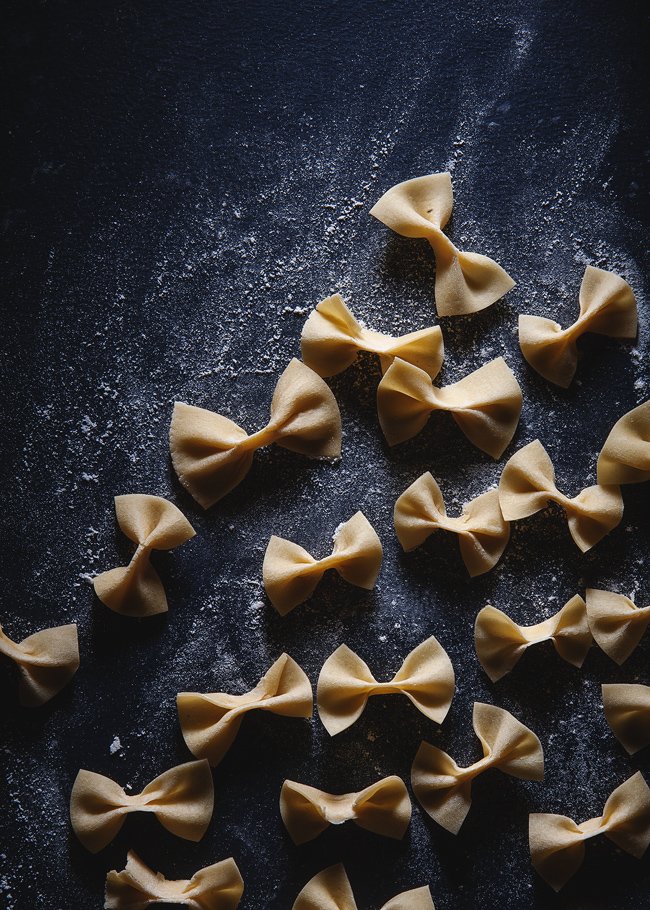
I decided to branch out to other shapes. My first experiment: farfalle, which means ‘butterfly’ in Italian. This shape needs no introduction of course, as I’m sure we’ve all eaten it many times before. What I love about making this pasta is how you make each piece individually, pleating it in the middle just so, pinching and squeezing, then laying it aside. The transformation is quite stunning: from unimpressive rectangles of pasta into a neat pile of bowties.
I’m now debating whether or not to add the Kitchenaid pasta roller attachment to our registry. Don’t give me that look!

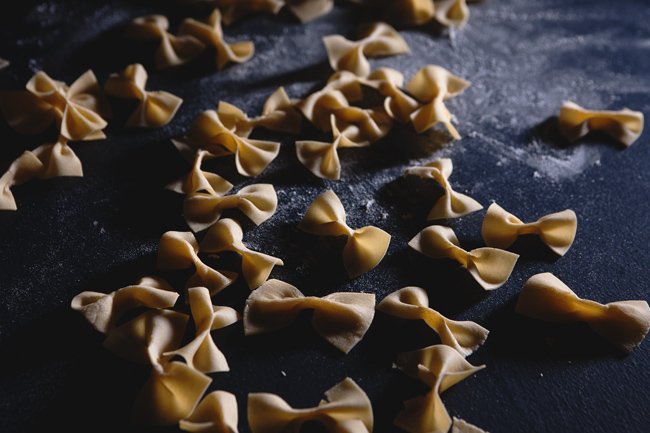
HOMEMADE FARFALLE (WITHOUT A MACHINE)
Adapted from The Kitchn
Serves 4 to 6
Note: Egg to flour proportions can range pretty dramatically. For an easier to work dough (that will be eggier), I’d go with a 1 egg to 1/2 cup ratio.
Ingredients:
1-1/2 cups all-purpose flour
2 eggs
Pinch of salt
Directions:
Make a volcano-like mound of flour on the work surface (meaning a hollow in the center). Crack the eggs into the hollow, sprinkle with salt, then, using a fork, gently start stirring the eggs, slowly incorporating the flour from the walls of the volcano.
Once the dough has become workable by hand—a fair amount of flour will have been worked in—use your hands to incorporate the rest of the loose flour. Once the dough has come together smoothly, knead the ball for about 10 minutes. If it’s a little dry, add a splash of water, but continue kneading until it’s smooth and sort of feels like clay. Cover the ball of dough with plastic wrap so it doesn’t dry out, and let it rest for about half an hour. The dough should relax and become easier to work with after this period.
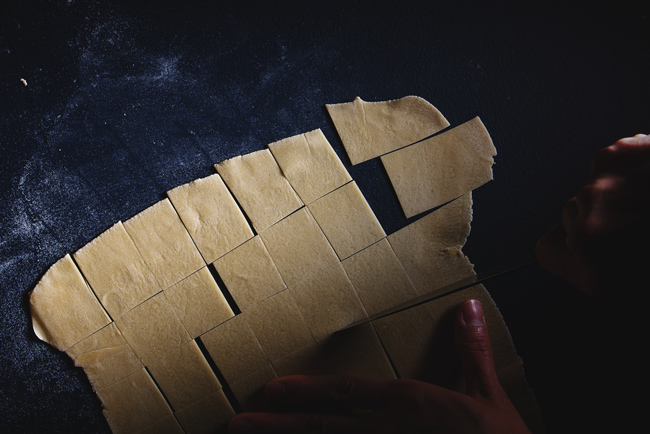
Cut the ball in halves or fourths, and begin rolling a piece out with a rolling pin, trying to keep its shape roughly rectangular. You want it to end up very thin, almost transparent. Using a sharp knife, slice the pasta into pieces that are about 1.5″ by 1″. Pinch each rectangle along the longer side really hard.
Roll out the rest of the dough in the same fashion. You’ll now have tiny little butterfly-shaped pasta. Enjoy! You can also dry them by simply leaving them out covered with a dishcloth.
Subscribe for New Racipies
Get mental health tips, updates, and resources delivered to your inbox.
Black Sesame Macarons With A ‘nutter Butter’ Filling

Well hello. Aside from the usual excuses about being busy, blah blah blah, this past week has been something else. Some of you may be aware that I was made a finalist in Saveur’s Best Food Blog Awards, then removed from the ballot, all within a few days. I thought I’d explain what happened.

I started this blog in June of 2012, and was thus surprised to see that I’d been nominated in the Best New Blog category. Finalists find out the same time as everyone else—when Saveur announces online that the ballots are officially open—so bloggers don’t get the chance for input before everything goes public. After checking the official category definitions, which states that a ‘new blog’ is one started in 2013, I emailed one of the editors to let her know of the error. A few days later, she got back to me, apologizing for their mistake and informing me that they’d had to remove me from the ballot.
I won’t pretend I wasn’t upset, mostly by the initial mistake that landed me in the situation to begin with. A simple fact-check would’ve prevented it. But, it would’ve felt wrong to keep up the misconception, so ultimately I guess I ‘did the right thing’, as cheesy as that may sound. I was a bit crushed to see the blank spot on the ballot where my blog had been listed. The finality is always a bit hard to accept, I guess.
In any case, Saveur did apologize profusely, so I can’t hold a grudge. (And I sooo wanted to. I’m a good grudge-holder—blame it on my overly-principled nature.) And my private drama doesn’t make the award any less awesome and prestigious. So guys, if you haven’t voted yet, there’s still time! Let’s honor those whose efforts liven up the food media world and make it way more exciting than it has any right to be!

Moving on now. While traditional macarons are made with almonds, you can swap out the nut for any other nut or seed without having to change up quantities or technique (although I’m wondering if macadamian nuts might behave differently because they’re so oily? Not sure.) But since macarons are a bitch to get right in the first place, don’t think these sesame seed versions were a breeze to pull off, because they weren’t.
They are, actually, the product of a year of trying, off and on, over and over. In fact, I finally had to take an official black sesame macaron hiatus after my last attempt flopped back in November. I knew it wasn’t the sesame seed part that was stumping me; I’d somehow just lost my macaron-making mojo. But something—perhaps this burgeoning feeling of fresh starts brought on by spring—reinvigorated me, so I once again picked up my floppy spatula and piping bag and got to it.
I don’t know what changed this time—maybe I picked up some common sense this winter—but I finally made the effort to get to the root of the problem. Too often in the past, I found myself simply hoping for the best as I tossed trayfuls of these liquid gremlins into the oven. That’s a pretty defeatist way of looking at a baked good. Sure, there are lots of things out of one’s control, but a composite of sugar, ground seeds, and egg white? No way. It can and must be vanquished.

In the end, getting them to come out perfectly (and I mean perfectly – not a crack in two entire trayfuls!) came down to the placement of the racks in the oven (which heats unevenly; I had to scoot the trays away from the hot corner in the back right) and my ‘macaronage’—the method of mixing together the whipped egg whites and sugar/ground nut mix. About the macaronage, I’ve said this before, but guess who doesn’t learn her own lessons? Don’t baby your batter. The egg whites need to be deflated quite a bit or you’ll get lots of little cracks on the surface of your macarons, effectively ruining an entire batch that you’ll then have to force your family to eat, because you’ll be too embarrassed to share them with anyone else. (Have you seen a cracked macaron? It is a sad sight.)
You have no idea how triumphant I felt when I peeked into the oven mid-bake to discover perfect-looking macarons. I did a little jig in the kitchen.

I’d wanted to pair the black sesame with peanut, which is a fairly common combination in Chinese desserts, but didn’t want the filling to veer in the direction of frosting-sweet. The peanut flavor had to come through. Enter Nutter Butter filling, which I always remember as being aggressively peanut-y without tasting overly-processed. Maybe I’m remembering a different version of Nutter Butters as you, but whatever the case, this Thomas Keller version (think Bouchon Bakery) tasted and looked exactly like how peanut butter filling should. The childhood version, flecked with salt and nostalgia. It’s okay if you want to eat it with your fingers. I did.
Once the macarons comes together, the presentation is very striking (if I do say so myself). But, resist eating too many! You must give them a day to ‘bloom’, let the flavors of the shells and filling meld together. Only then can you truly enjoy the essence of the so-temperamental, but so-worth-it French macaron.

BLACK SESAME MACARONS
Makes 20 macarons
Adapted from BraveTart
Sorry to confuse you, but I use weight measurements when making my macarons for the extra precision, and I highly recommend you do too if you’re not already. Also, the Nutter Butter filling makes a tad more than is needed—for me at least. Its peanut flavor is strong, so be careful not to drown out the delicate taste of the macaron shells. I’d sandwich leftover filling between Ritz crackers or something just as salty.
Ingredients:
- 58 grams black sesame seeds
- 115 grams powdered sugar
- 2 egg whites
- 36 grams granulated sugar
- 1/4 tsp salt
- A few drops gel food coloring in black
Directions:
Preheat your oven to 300 degrees F. Line two baking sheets with parchment paper.
Grind the confectioners sugar and sesame seeds in a food processor until fine (this will take awhile, about 3 minutes, as the sesame seeds are harder to grind up), then sift the mixture into a bowl. Most of it should go through, but if a lot doesn’t, toss it back in the food processor and grind for another minute or so.
In the bowl of a stand mixer with the whisk attachment affixed, add the egg whites and sugar. Turn the mixer on to power level 4 and whisk the mixture together for 3 minutes. Next, turn the power up to 7 and whisk an additional 3 minutes. Turn the power up to 8 and whisk an additional minute or two. By now, there should be a stiff meringue in the bowl. Stop the mixer and add a few drops of coloring at this point and turn the mixer back on to the highest speed, whisking for an additional minute to incorporate the color. Knock the meringue that’s trapped in the whisk back into the bowl.
Now, add the sesame seed mixture into the bowl all at once. I’ll reference Stella’s instructions again:
Use both a folding motion (to incorporate the dry ingredients) and a rubbing/smearing motion, to deflate the meringue against the side of the bowl.
The dry ingredients/meringue will look hopelessly incompatible at first. After about 25 turns (or folds or however you want to call “a single stroke of mixing”) the mixture will still have a quite lumpy and stiff texture. Another 15 strokes will see you to “just about right.” Keep in mind that macaronage is about deflating the whites, so don’t feel like you have to treat them oh-so-carefully. You want to knock the air out of them.
You don’t need to be too gentle with the batter. By the time it’s ready, its consistency will be runnier than you’d think, closer to pancake batter than cake batter.
Fill a pastry bag with the batter. You can use a pastry bag with just a coupler, or with a tip. I used an Ateco 806 tip. Pipe your shells onto the parchment-paper lined baking sheets, a little more than a quarter (US currency) in size (about 2 cm. or 1 inch), spacing them about 1 inch apart.
When you’re done piping, pick up the pan and whack it down hard against your counter. Do this another time, then rotate the pan 90 degrees and do the same thing twice. You might see tiny air bubbles appear on the top of the rounds, a good sign because they could be potentially damaging if buried within the batter. Repeat with the other pan. Now leave the pans alone for half an hour—they’ll develop armor (a skin) during this time to protect them in the oven.
Slide the pans into the oven and bake for about 15 minutes, at which point the shells should be able to be cleanly picked off the parchment paper.
Let the shells come to room temperature, then fill your macarons with the peanut butter filling (recipe below). It’s quite thick, so a spoon should work just fine.
‘NUTTER BUTTER’ FILLING
Adapted from Bouchon Bakery
Ingredients:
1/2 cup smooth salted peanut butter
roughly 3/4 cup powdered sugar
1/4 cup (1/2 stick) butter, room temperature
pinch or two of Maldon salt
Directions:
Cream together all the ingredients in a stand mixer. Taste for sweetness, and add more powdered sugar or salt as needed.
Subscribe for New Racipies
Get mental health tips, updates, and resources delivered to your inbox.