
Caramel Apple Oreo Truffles

Medically reviewed by Christiana George Updated Date: January 7, 2026

While the weather down south is a bit warmer, we have had a few chilly mornings and evenings. So I know that fall is here. What better way to celebrate than with some Caramel Apple Oreo Truffles. They have a crunchy outer layer of caramel apple candy coating, drizzled with caramel and inside is a soft, chewy filling made of Caramel Apple Oreos and cream cheese. A simple, no bake treat that you can bring to any fall party. I brought them to a neighborhood shrimp boil last weekend and they disappeared real fast. The kids and the adults loved them.

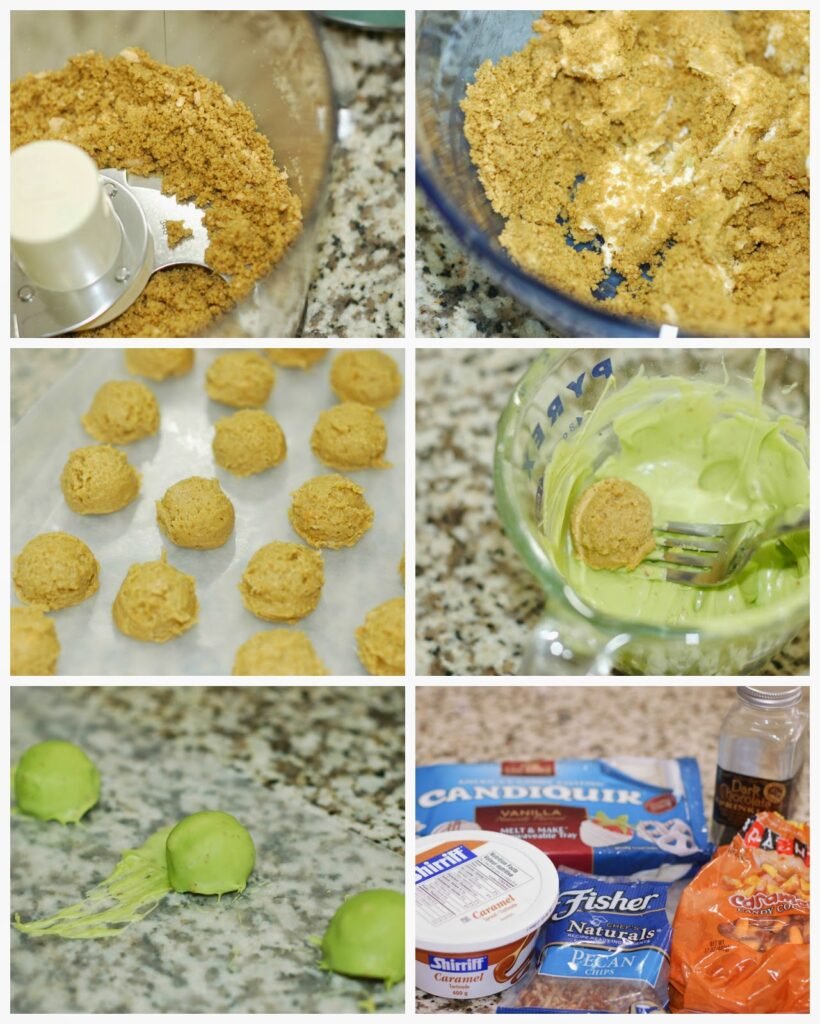
The Oreos I found at Walmart and the Wilton’s Candy Melts I found at Michael’s.
I mixed the crushed Oreos and cream cheese by hand, then used my mini scoop to make the balls. I just used a fork to dip the balls in candy melt. For toppings I mixed some caramel into some vanilla candy coating and drizzled it on top. Then I sprinkled the truffles with either chopped pecans, chocolate sprinkles, or Caramel Candy Corn.

The caramel drizzle did stay a bit tacky, but it gives the truffles a bit more caramel flavor. Overall they do taste like caramel apples. They are on the sweet side, but I made the balls bite-sized so you don’t get overwhelmed.
Like I said, these are great party treats. My neighbors big and small really enjoyed them. I hope you do too.
Caramel Apple Oreo Truffles
by The Sweet Chick
Prep Time: 1.5hs w/ freezer time
Keywords: no bake dessert snack caramel apple oreos cream cheese caramel apple candy melt caramel truffles American fall
Ingredients (26 mini truffles)
For the truffles
- 12 Caramel Apple Oreos
- 4 oz. cream cheese, room temperature
For the coating
- 1 package (10 oz.) Wilton’s Candy Apple Candy Melts
For the drizzle
- 2 oz. vanilla candy coating, melted
- 1/4 cup caramel/caramel topping
Optional toppings
- chocolate sprinkles
- chopped pecans
- Brach’s Caramel Candy Corn
Instructions
For the truffles
Crush Oreo cookies in a food processor until they are a dirt like consistency.
In a medium bowl, mix the crushed Oreos and cream cheese until completely combined.
With a mini scoop, measure out 26 mounds and place them on a wax paper lined air-tight container.
Place the container in the freezer for at least 1 hour to set.
For the coating
After the balls are set, melt candy coating in the microwave as per directions on package. I did half the bag at a time.
Remove Oreo balls from the freezer. Do a small batch at a time so they don’t fall apart. If you need to, just place them back in the freezer for a few minutes.
Feel free to reshape any balls that are not to your liking by rolling them around in your hand. Just do it quickly not to warm up the dough too much.
Dip the Oreo balls into candy coating mixture until all covered. (I use a fork.) Once covered, remove and softly tap until excess candy melt falls off. Then place the balls on wax paper until the candy melt hardens.
For the drizzle
Combine the melted candy coating and the caramel, mix well. Then place in a candy decorating bag or Ziplock bag with tip cut off and drizzle over the tops of the truffles.
Optional toppings
If you are adding sprinkles, nuts, or Candy Corn, add them to the top of the truffles before the caramel drizzle sets. The caramel will not completely harden, but will become firmer.
Notes
These truffles can be made ahead of time and refrigerated for 3-4 days.
Related Posts


Subscribe for New Racipies
Get mental health tips, updates, and resources delivered to your inbox.
Churro Puff Pastry


I am still looking for Spring. We saw it peek it’s head out a week or so ago, but not it has disappeared again. Today was windy and chilly. The skies were cloudy all day. All I want it some warm weather so we can spend some time outside for a change. I hate being trapped in the house. But I supposed the only good thing to come out of this, is more baking for me. Last week I made six jars of dulce de leche. I had some recipe testing to do. The first two recipes didn’t go so well, but this one came out just right.
I had never used puff pastry before, so I thought I would try something new. The instructions on the box seemed fairly easy. Just unfold the dough, thaw it for 40 minutes at room temperature, then bake and decorate.

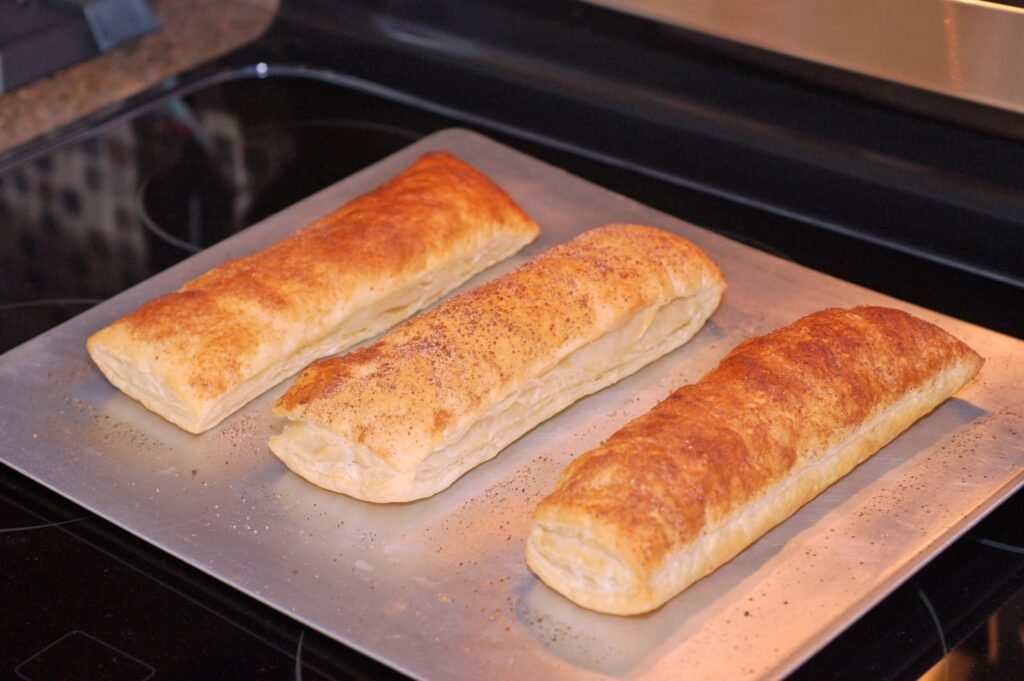
I sprinkled some cinnamon sugar on the dough before baking. I always keep a jar on hand. It’s great to sprinkle on french toast, crepes, waffles, cupcakes, etc.
The dough only takes 15 minutes to bake. You can whip up your cream for the filling while the dough cools.

Then comes the best part, the filling. I used my homemade dulce de leche (but you can use store bought) and made some whipped cinnamon mascarpone frosting that I also used for my Churro Cupcakes, Cinnamon Chocolate Cake, and my Pumpkin Spice Crepes. It’s great as a frosting or filling. I love it!
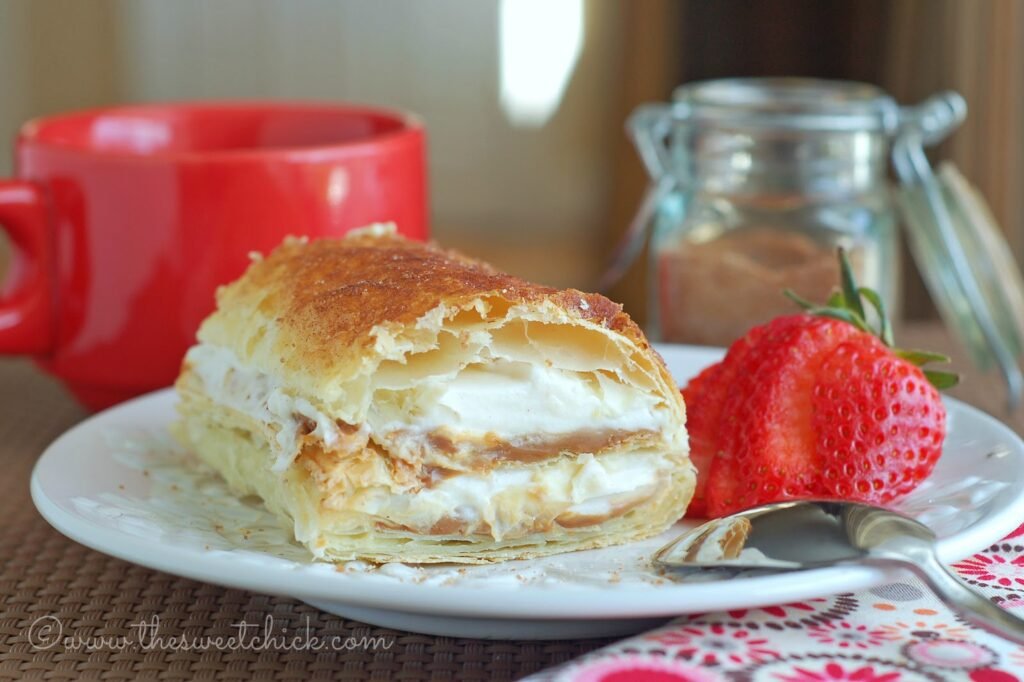
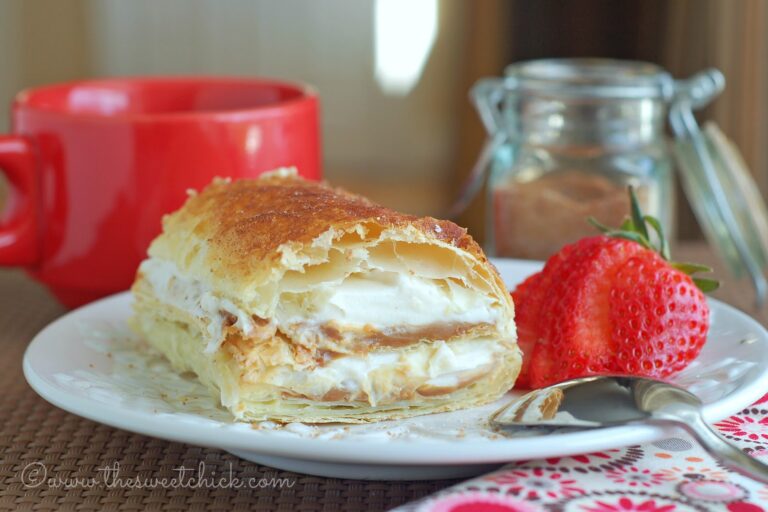
The pastry dough it so light and flaky. The mix of the dulce the leche with the cinnamon mascarpone frosting tones down the sweetness of the dulce de leche. Overall, it’s like eating a cloud. A soft, fluffy, sweet cloud. You don’t feel heavy or guilty after eating this. But it tastes superb. I am going to have to make some more desserts with puff pastry now.
Churro Puff Pastry
by The Sweet Chick
Prep Time: 1 1/2 hours
Cook Time: 15 minutes
Keywords: bake dessert snack dulce de leche mascarpone cheese puff pastry cinnamon Cinco de Mayo puff pastry
Ingredients (6 servings)
For the puff pastry
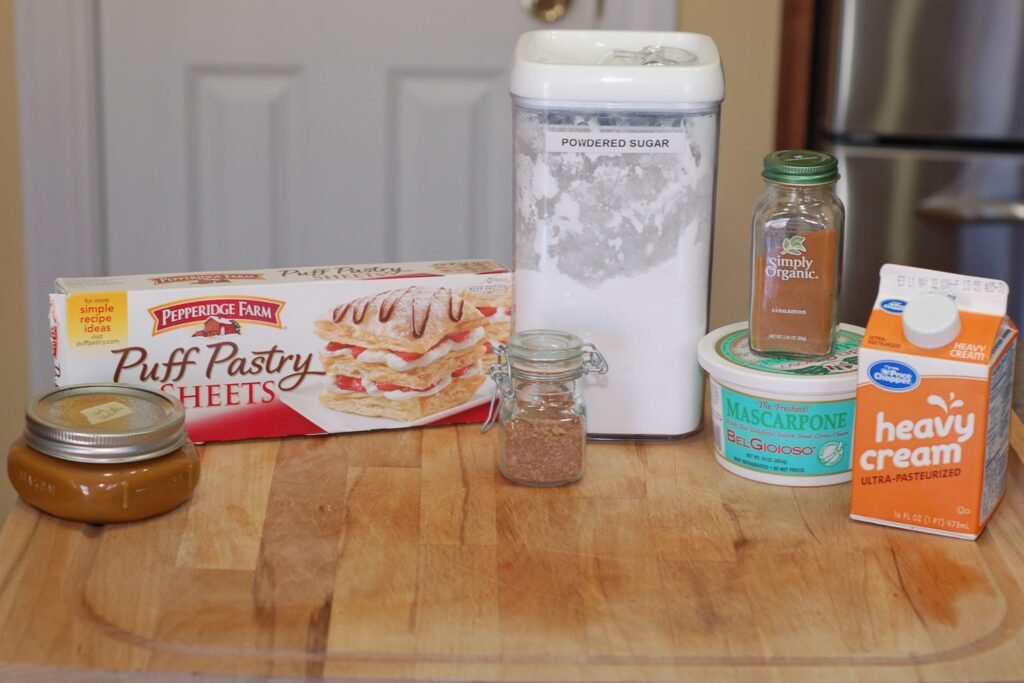
- 1 box ready to bake puff pastry sheets
- 8 tablespoons dulce de leche, divided
- 1 1/2 teaspoons cinnamon sugar (see recipe below)
- 1/2 cup heavy cream
- 4 ounces mascarpone cheese, room temperature
- 1/4 cup confectioners’ sugar, sifted
- 1/8 tsp. cinnamon
For the cinnamon sugar
- 1/2 cup sugar
- 1 tablespoon cinnamon
Instructions
For the puff pastry
Preheat oven to 400ºF.
Remove 1 sheet of puff pastry and place on a plate. Thaw at room temperature for about 30-40 minutes, or until it is pliable.
Unfold pastry sheet on a lightly floured surface and cut into 3 strips at the folds. Sprinkle the strips evenly with 1 teaspoon cinnamon sugar.
Place the strips on a greased baking sheet. Bake for 15 minutes, or until the tops are golden brown.
Carefully remove the puff pastry from the baking sheet and place on a cooling rack and prepare cream filling.
With an electric mixer or stand mixer on medium speed, whisk heavy cream until stiff peaks form (be careful not to overbeat, or cream will be grainy).
In another bowl, whisk together mascarpone, cinnamon and confectioners’ sugar until smooth. Gently fold whipped cream into mascarpone mixture until completely incorporated.
Now that the puff pastry has cooled, cut each into 2 layers lengthwise, for a total of 6 layers.
Sprinkle the remaining 1/2 teaspoon cinnamon sugar onto the three bottom layers.
Then spread 2 tablespoons of dulce de leche on four of the layers (keep 2 nice looking pieces for the tops). And spread the mascarpone filling evenly over the dulce de leche.
Next begin layering. You are making two “sandwiches”, so each “sandwich” should have a bottom puff pastry and a middle one with filling, and the top one which is bare.
Place the two desserts in the fridge for a 1/2 hour to an hour to set before cutting.
Once set, cut each dessert into three squares with a wet serrated knife, for easier slicing. Top with strawberries or fresh whipped cream. Enjoy!
For the cinnamon sugar
Mix together the sugar and cinnamon until well blended. Keep remaining mixture in an airtight container and use to sprinkle on french toast, oatmeal, yogurt, waffles, crepes, etc.
Related Posts
Subscribe for New Racipies
Get mental health tips, updates, and resources delivered to your inbox.