
Ramps and Ricotta Gnocchi

Medically reviewed by Christiana George Updated Date: June 8, 2023

I haven’t eaten enough gnocchi in my life to be on the fence about it, but I am. I don’t think I’ve given it a fair chance though. My mind conjures up images of heavy balls of dough, not helped by the fact that the one and only time I tried gnocchi, it was doused in a heavy gorgonzola sauce, so uniform in cheesiness that it tasted positively… bland? What I mean is, the sauce was a homogeneous goop-soup of melted cheese and heavy cream. So while the gnocchi itself probably tasted amazing, I could barely eat beyond a bite.
Luckily (for me), I was only sampling what my friend had ordered. We were in southern France, Nice to be exact, and I’d ordered a niçoise salad that was absolutely delectable. Earlier in the day, we’d consumed massive amounts of socca and pissaladière and gorgeous ripe cherries procured from the produce market and I was starting to feel really good about French Riviera cuisine – until the gnocchi bombs dropped.
Ever since, I’ve avoided the stuff. Knowing that potato is one of its primary ingredients certainly doesn’t help. (I’ve never been fond of potatoes.) Like I said, totally unfair right?
Well, let me tell you, these little guys are almost completely potato- and flour-free! In fact, aside from the flour used for dusting, these gnocchi are gluten-free. As a result, they have a texture that goes poof, a mouthfeel as light as a cloud; the gnocchi disintegrates as softly in the mouth as a silk slip. And the single note of ramps is a more winsome version, its garlicky edge dampened discreetly by parmesan. All in all, these are things of beauty.
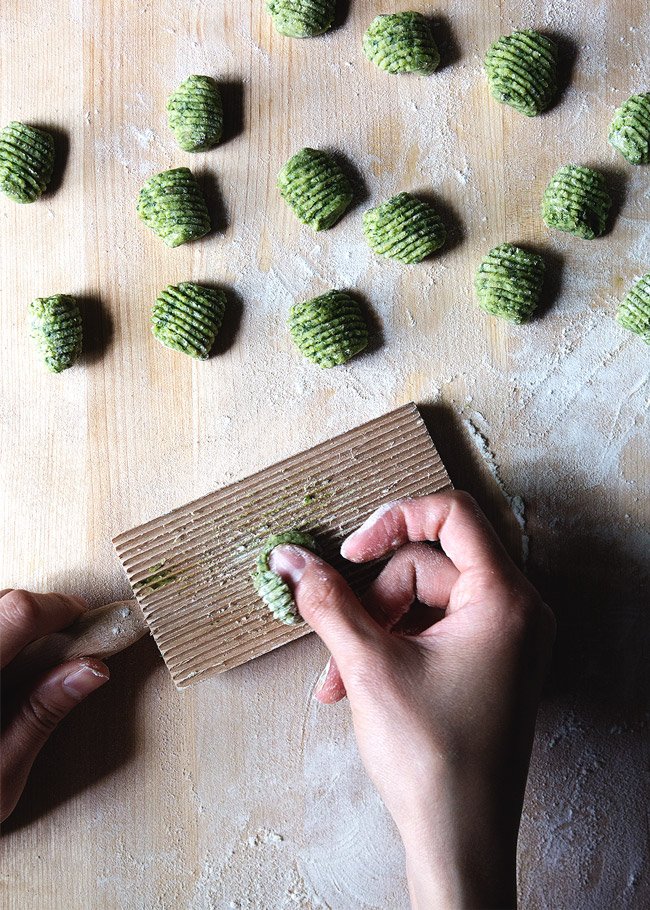
Of course, I’m aware of the fact that ramps season is hurtling to its end. For some of you (and me), it’s just about finished, which makes this dish a bit irrelevant in a sense. But ramps, which you all know by now are kind of faddish anyway (though they really are good!), can be replaced with Chinese leeks, which smell so similar that I wouldn’t be able to tell them apart in a blind (what’s the olfactory equivalent? Stuffed-up?) smell test.
To be honest, I’ve actually made these gnocchi multiple times since ramp season began (and even posted them on Instagram a few weeks ago). I’d intended on sharing them much, much sooner. So now you know about my laggard ways. Anyone who knows me in person knows about my laggard ways, so I guess the secret is out.
Anyway, better late than never, right? I know there are still ramps floating out there, somewhere. Make this, and be prepared for the lightest “pasta” you’ve ever tasted.

RAMPS AND RICOTTA GNOCCHI
Adapted from Rachel Eats
Serves 3 to 4 (makes around 50 pieces)
This recipe is almost gluten-free. Feel free to sub the AP flour with rice or oat flour to make truly gluten-free gnocchi. Also, rolling the gnocchi with a gnocchi paddle is a completely gratuitous touch, and in fact, can get messy very quickly (as is evidenced by the state of my paddle in the images above), so I didn’t include the step in the directions below.
Ingredients:
8 oz. (225 grams) ramps, about 30 to 40 stalks
1 Tbsp butter
2.5 oz. (75 grams) ricotta, drained of as much liquid as possible
1 egg yolk
2 oz. (60 grams) parmesan (can sub half the cheese with pecorino, but not much more than that!)
salt and pepper to taste
AP flour for dusting
For the sauce: 1 Tbsp butter per serving
For serving: salt, pepper, and parmesan cheese
Directions:
Separate the ramps into leaves and roots. Slice the roots into small pieces, and roughly chop the leaves. In a medium skillet on medium heat, melt the butter. Add the ramp roots and cook for a few minutes until softened. Add the leaves and cook another few minutes. Season with salt and pepper to taste and let cool. Once cool enough to handle, squeeze the ramps until drained of any excess liquid. Empty into a food processor. Add the ricotta, egg yolk, and parmesan, and process for about a minute until completely combined. Store the mixture in a bowl in the fridge for a couple hours.
Alternatively, if you don’t want to use a food processor (like me—raise your hand if you hate the clean up!), mince the ramps and toss them into a bowl. Add the ricotta, egg yolk, and parmesan, and stir vigorously until the mixture is well-combined. Store in the fridge for a couple hours.
Dust a clean work surface liberally with flour. Working quickly, take a portion of the ricotta dough and roll it into a log. It should be much easier to handle once coated with flour. Cut it into pieces (size is your preference) and rest them in a pan dusted with flour. Continue with the rest of the dough, re-dusting the surface with flour as needed. Keep in mind, the more flour you use, the heavier the gnocchi will be, so only use as much flour as necessary.
At this point, you can store the gnocchi in the fridge, covered, for up to two days. I found that they dry out a bit this way, which actually makes handling them a bit easier.
To cook, bring a pot of water to a boil, then reduce the heat to barely a simmer. Drop the gnocchi in a few pieces at a time, cooking for 30 to 60 seconds, then gently removing them with a slotted spoon into bowls for serving. They’re very delicate!
In the meantime, brown some butter for the sauce. In another pan, heat the butter on medium heat until it turns a medium brown and smells nutty and delicious, about 2 minutes. Spoon the browned butter onto the gnocchi, and season with salt, pepper, and extra parmesan.
Related Posts




Subscribe for New Racipies
Get mental health tips, updates, and resources delivered to your inbox.
Caponata, And the Rainstorm of Rainstorms


Remember how I said that I’d rekindled my love for eggplant? Well, part of that was helped along by some amazing caponata—an Italian eggplant appetizer—I had one tempestuous evening at a little Italian restaurant close to Lincoln Center.
There’s something so glamorous about dining al fresco during a storm. While many restaurant patrons made for drier parts, namely indoors, our table staunchly remained, seated at the threshold of getting absolutely drenched. Lightning streaked spectacularly across the sky, sideways(!), followed by the low rumbling of thunder. And the light of passing cars, refracted by the rain, shimmered like mirages, except their honking sounded all too real. I will never tire of these dramatic shows.
But back to that caponata. There we were, seated outside during a thrilling thunderstorm, sheets of rain spraying at us at oblique angles, and I was downing eggplant like there was no tomorrow. It was so flavorful, so moist! I forgot my manners. I was the only un-glamorous element of the whole setup. At least everyone was distracted by the lightning around us and a leak above one of our heads.
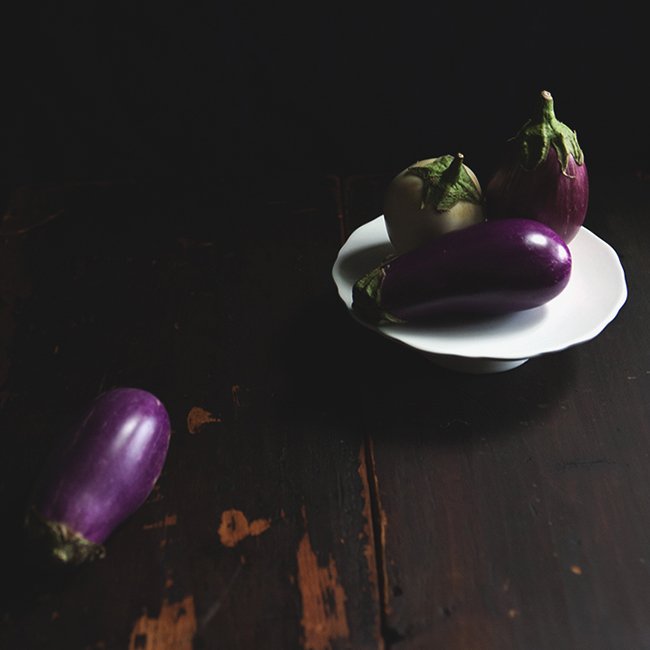
Back at home, I tried to replicate the dish, starting with choice eggplant from the Union Square Greenmarket. I will never tire of the Greenmarket. (But I can’t wait for the damn F train to get fixed so I’m not trudging 12 blocks back to the subway with quickly-wilting plant matter.)

It turns out, there’s no one recipe for caponata. At its base, it’s eggplant cooked until it’s really soft, in a tomato-y sauce. But beyond that, well, just as there are thousands of regional cuisines in Italy, there are endless variations of this classic antipasto.
I stuck with good old pantry staples.

I realize it doesn’t appear wholly appetizing, but please try not to judge it harshly. It does its best. Eggplant just sort of, well, does that wilting thing, where it turns grayish-brown and flaccid, but that doesn’t make it any less lovable. Not to me at least.
And its taste? Well, it’s not the same as what I remember. This caponata didn’t turn out as flavorful or as moist. It’s kind of a different food altogether. Less tang, more… something. I wasn’t sure what to think. But then my friend came over the other night, and we shoveled most of it down. As if there was no tomorrow. I forgot my manners. And I must’ve looked so un-glamorous. But I looked up and saw that she wasn’t noticing, because she was doing the same.

CAPONATA
Serves 6 to 8
From Bon Appetit
Ingredients:
5 Tbsp olive oil
1-1/2 pound eggplant, unpeeled, cut into 1/2 inch cubes
1 medium onion, cubed
4 large garlic cloves, chopped
1 14-1/2 ounce can diced tomatoes with Italian seasonings in juice
3 Tbsp red wine vinegar
2 Tbsp drained capers
1/3 cup chopped fresh basil
Toasted pine nuts
Directions:
Heat oil in heavy large pot over medium heat. Add eggplant, onion, and garlic cloves. Saute until eggplant is soft and brown, about 15 minutes. Add diced tomatoes with juice, then red wine vinegar and capers. Cover and simmer until eggplant and onion are very tender, stirring occasionally, about 12 minutes. Season caponata to taste with salt and pepper. Mix in fresh basil. Transfer caponata to serving bowl. Sprinkle with toasted pine nuts.
Related Posts

Subscribe for New Racipies
Get mental health tips, updates, and resources delivered to your inbox.