
Upside-Down Pear Cake and Second Chances

Medically reviewed by Christiana George Updated Date: June 8, 2023
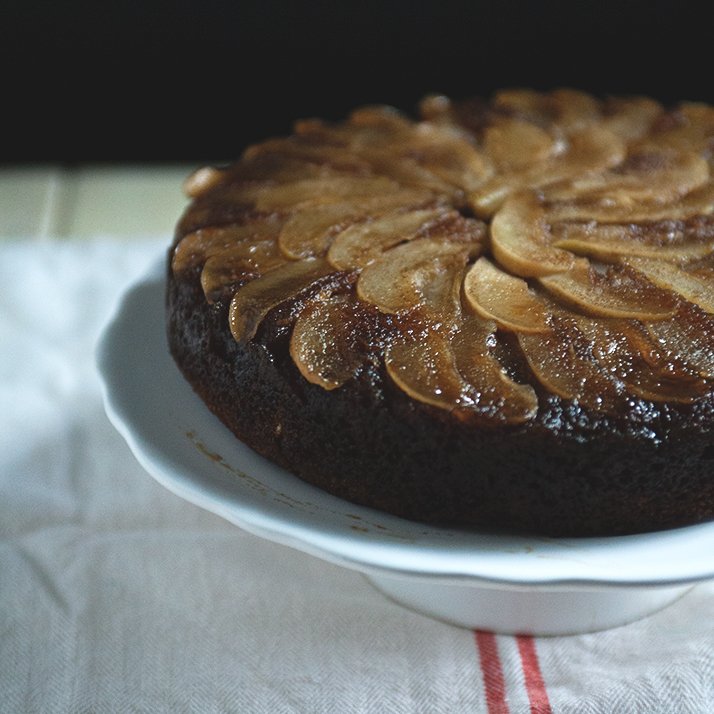
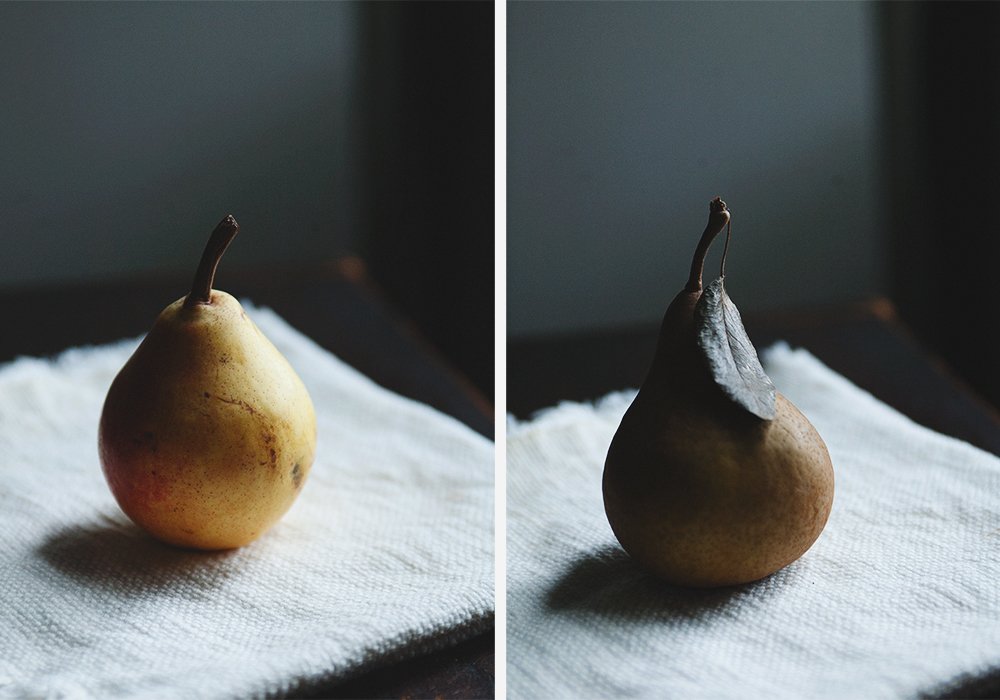
Maybe it was because I felt like jumping ahead into fall when I picked up a couple pounds of Clapp and Bosc pears at the farmer’s market last weekend. Or maybe I found myself suddenly taken by their ladylike curves and freckled complexions. Charming and modest, and so delicately scented, pears are a graceful fruit, are they not?
Of course, once I got home, I realized I had absolutely no idea what to do with them. The thing is, I’ve never actually liked pears. I’ve never really even eaten one except for Asian pears which, as I understand, are completely different from all other varieties. My one encounter with a non-Asian pear was in college and it turned me off from eating them ever again. It had been a Bartlett—they were always available in the cafeteria—and its texture was strange and mushy and so different from the crispness and juiciness I was used to.
This recipe has restored my belief in pears. And apparently all I had to do was bake the fruit into a cake as beautiful-tasting as it smells. Also, I think I’ve found a variety that I like! For all of you who feel the same about pears as me, try a Bosc, which is pleasingly crisp. They’re the slender and tall ones the color of… well, autumn.
This cake is moist and tender, so moist and tender that parts of it melt in the mouth. I kind of love it. And I keep cutting off slices, teeny slices sure, but slices nonetheless. (I’m worried that unless some higher power intervenes, I’m going to eat most of it by myself.) And as my first upside-down cake, there was a certain giddiness that overcame me when it plopped out, perfectly.
I see this cake as a precursor for what’s to come in the next few months: lots of cinnamon-y ginger-y baked goods greedily consumed piping hot from the oven. And chai tea, and the pleasant crunching of leaves, and the crispness to the air. I am looking forward to the upcoming season.
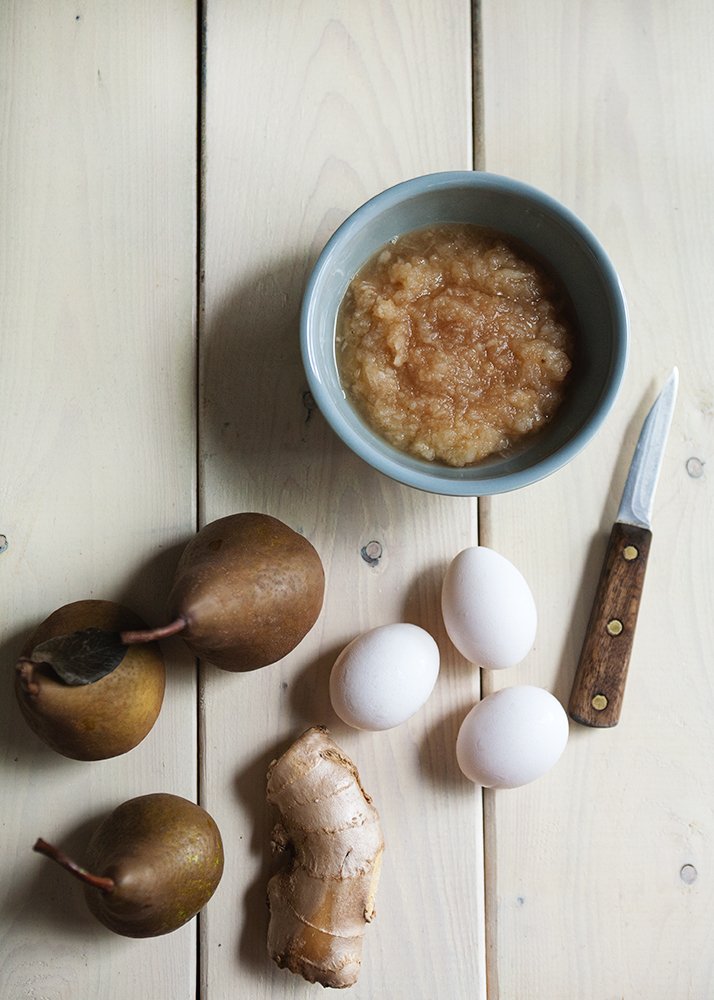
As far as what varieties of pears to use, the recipe recommends Bosc all the way, but I thought the very ripe Clapp pears I used worked really well for the cake batter, mostly because they were so ripe and soft and juicy.
The recipe actually also called for baking the cake in an oven-proof skillet, but I opted for a regular 9″ cake pan and it was spectacular! I also ended up using only about 1-2/3 pounds of pears, I omitted the orange zest, and finally, I made my own crystallized ginger by cooking fresh minced ginger and sugar together for a couple minutes. The process caramelizes the sugar, which tastes wonderful, but hardens quickly, so you either need to mix the stuff into the batter quickly or, like me, pull out your mortar and pestle and grind up the hardened mixture.
Enjoy! I promise it makes a fantastic breakfast as well (if eating sugary baked goods first thing in the morning is your kind of thing, which it is for me!).

UPSIDE-DOWN PEAR CAKE
Adapted from Bi-Rite Market
Makes one 9-inch cake
Ingredients:
6 tablespoons (3/4 stick) unsalted butter
3/4 cup (packed) golden brown sugar
2 Bosc pears, peeled, cored, and thinly sliced
2/3 cup sugar + 1/4 cup for making crystallized ginger
1 1/3 cups all purpose flour
1 1/2 teaspoons ground cinnamon
1 teaspoon baking soda
1/2 teaspoon salt
3 large eggs
1/2 cup vegetable oil
1 teaspoon vanilla extract
1/4 cup fresh ginger, minced
1 T water
1 cup grated peeled pears, about 2 medium (I used Clapp pears)
Directions:
Preheat oven to 350°F. Melt butter and pour evenly into pan. Sprinkle with brown sugar. Arrange pear slices in flower design atop sugar.
Whisk flour, 2/3 cup sugar, cinnamon, baking soda, and salt in medium bowl to blend. Whisk eggs, oil, vanilla and ginger mixture in large bowl to blend. In a small saucepan, combine the ginger, sugar, and water. Turn heat onto medium-low and begin stirring the mixture. It should start bubbling and reducing, and after about 2 minutes, turn the heat off and immediately pour the mixture into the egg mixture. Mix in grated pears. Mix dry ingredients into egg mixture.
Carefully pour batter over pears in pan. Bake cake until tester inserted into center comes out clean, about 40 minutes. Cool cake still in pan on rack 20 minutes (very important! The top of cake needs to set). Run knife around pan to loosen. Place plate on pan over cake. Invert cake onto plate. Serve warm, with vanilla ice cream if it pleases you.
Related Posts



Subscribe for New Racipies
Get mental health tips, updates, and resources delivered to your inbox.
Firecracker Rice Krispie Treats

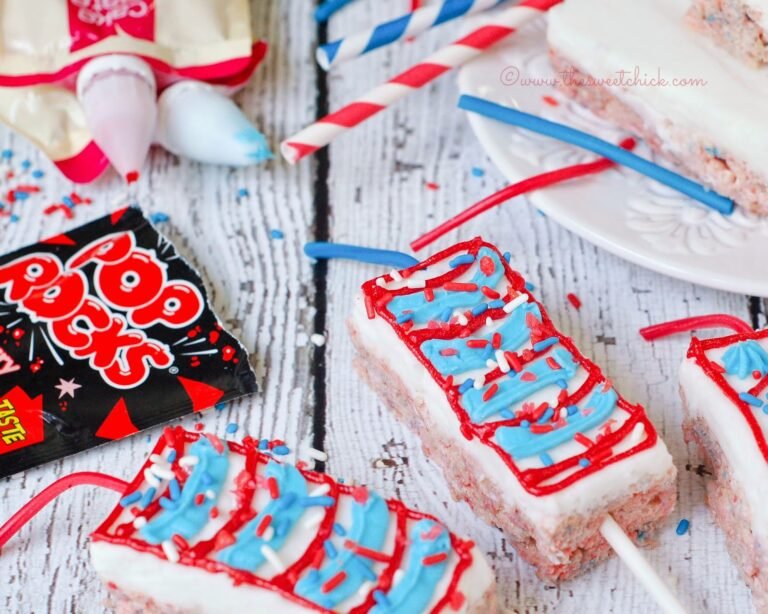
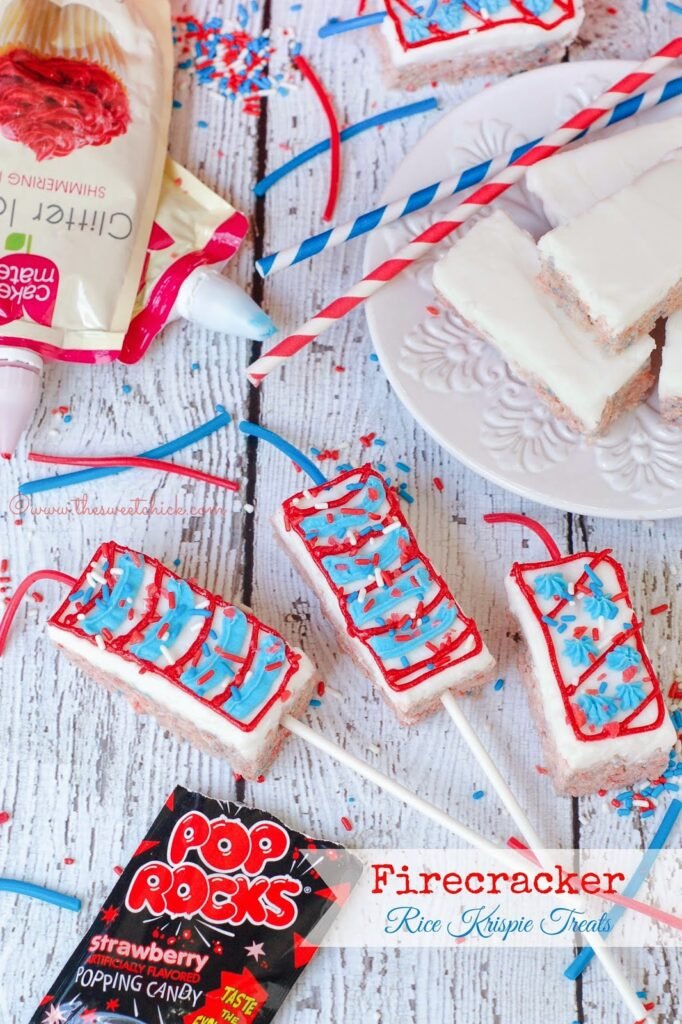
It’s almost time for the 4th of July. Time for picnics, cookouts, parades, and fireworks. Why not make some cute treats with the kids to celebrate. There is lots of fun packed into these Firecracker Rice Krispie Treats. They are full of strawberry marshmallows, sprinkles, colored frosting, blue and red Twizzlers, and Pop Rocks. Kids will enjoy decorating and eating these.
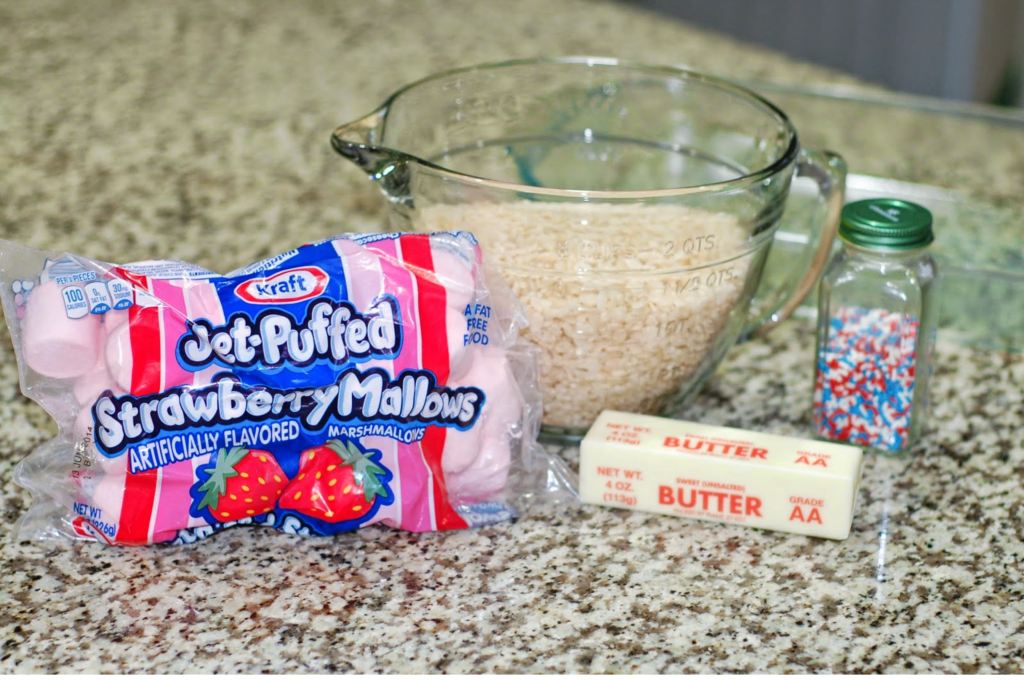
I used strawberry flavored marshmallows for these treats because that’s what I had on hand and I like the pick color it gives the Rice Krispies. For the sprinkles, I didn’t add them directly into the hot marshmallows because I didn’t want them to melt into one color. They did melt a little, but you can still distinguish the reds and blues.

For the frosting I used Wilton’s Buttercream in a stiff consistency. I used Wilton’s clear vanilla to keep the color bright white. Feel free to save yourself some time and buy a can of ready made white frosting if you like.
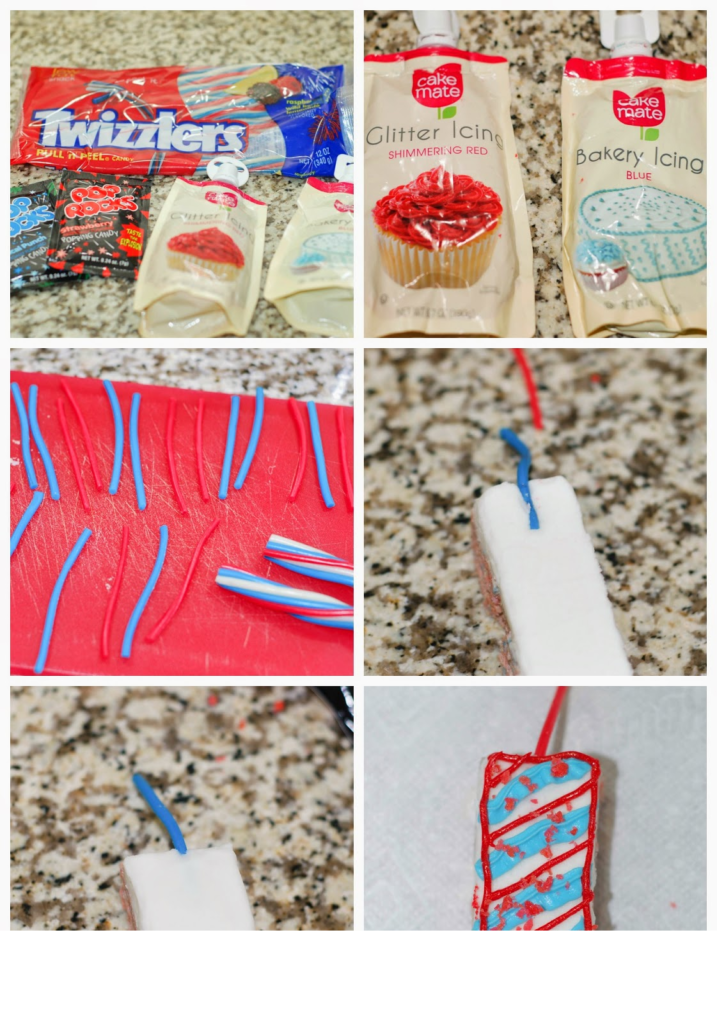
I found red, white and blue Twizzlers Pull n’ Peel. I separated out the colors and only used blue and red. I used Cake Mate decorating icing in shimmering red and blue (don’t forget to buy the screw on tips). You can also use gel icing or cookie icing. I only ended up using the red Pop Rocks because the blue ones were more of a light green. Once the frosting was set and the treats were cut into rectangles, I pressed the piece of Twizzlers into the icing and covered it back up with my fingers. The frosting is pretty malleable at this point.
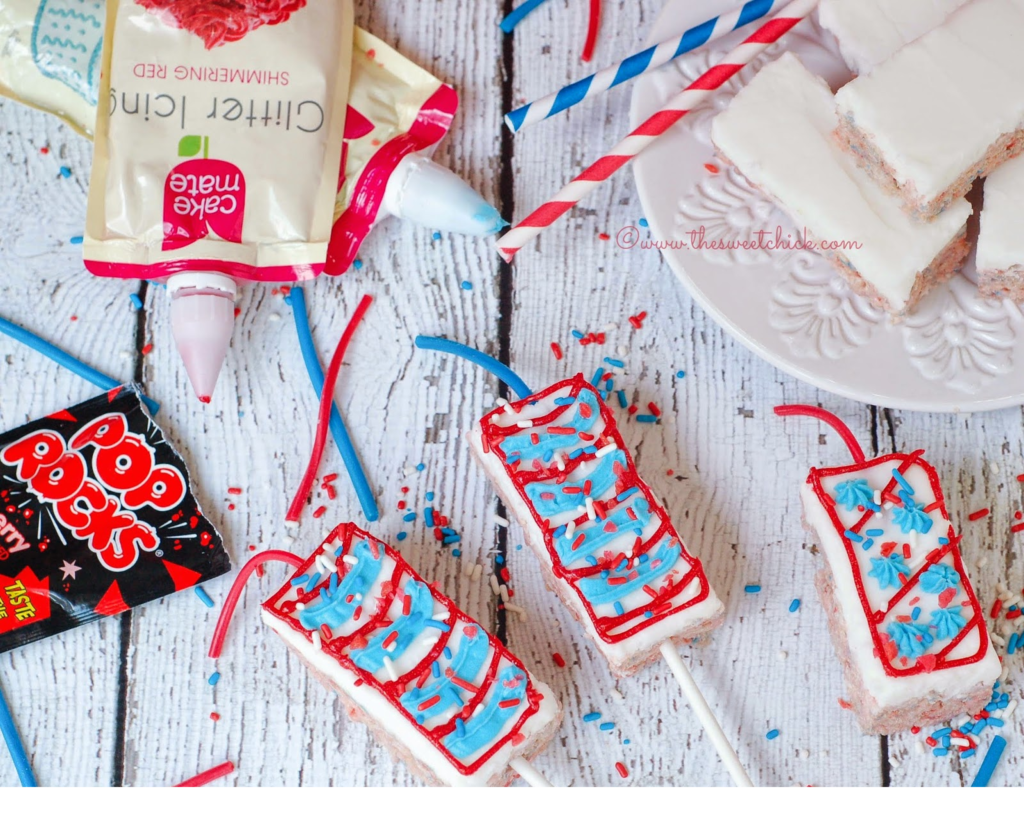
Then decorate however you like and sprinkle with Pop Rocks at the end. You can add more sprinkles too. If you are making these ahead of time don’t add the Pop Rocks until you are ready to serve because they do react with the frosting and end up melting. You want to make sure they keep their POP. You can add as little or as much as you want.
You don’t have to add the lollipop sticks, but if you do, you want to do it before you start decorating. And you are going to want to dip the tip of the stick into some melted candy coating before inserting it into the Rice Krispie treat. This will help make it more secure. You can use paper straws the same way. Come on, it’s time to get creative!
Firecracker Rice Krispie Treats
by The Sweet Chick
Prep Time: 30 minutes
Cook Time: 5 minutes
Keywords: no bake snack dessert rice krispies marshmallows frosting Twizzlers July 4th rice krispie treats American summer
Ingredients (27 treats)
For the treats
- 3 tablespoons butter
- 1 bag (8 oz.) Jet-Puffed Strawberry Mallows
- 5 cups Rice Krispies cereal
- 1/4 cup red, white, and blue sprinkles
For the frosting
- 1 cup vegetable shortening
- 1 teaspoon clear vanilla extract
- 2-3 tablespoons milk or water
- 4 cups confectioner’s sugar
- 1 tablespoon meringue powder.
For the toppings
- 1 package (12 oz.) Twizzlers Pull ‘n’ Peel candy in red, white, and blue
- 1 package (6 oz.) Cake Mate Glitter Icing in Shimmering Red
- 1 package (6 oz.) Cake Mate Bakery Icing in blue
- 1 package Cake Mate decorating tips
- 2-3 packages (0.24 oz. each) Pop Rocks in red
- 1/4 cup red. white, and blue sprinkles
Instructions
For the treats
In a large sauce pan, melt butter and marshmallows over low heat. Stir until completely melted.
Remove from heat , add the Rice Krispies and the sprinkles. Mix until all is well incorporated.
Then pour the mixture into a greased 9 x 13 pan or a cookie sheet and spread it evenly with a piece of waxed paper.
Place in fridge to cool and set.
For the frosting
In a stand mixer, cream together the vegetable shortening, vanilla, and 2 tablespoons milk/water.
Add the sugar and meringue powder and mix on low until the frosting comes together. If the frosting is too dry, add another tablespoon of milk/water. You want the consistency to be smooth and spreadable, but not too thin.
With a spatula, spread the frosting evenly over the cooled treats and place back in the fridge to set.
Once the frosting is set, cut into 27 rectangles with a sharp knife and remove from the pan/cookie sheet.
For the toppings
Take one rope of Twizzlers and cut it evenly in three parts, then take all the strands apart. Separate out the different colors.
Take a cut strand and push about a one inch length into the frosting at the top of the rectangular treat and with your fingers, gently push the frosting back over the strand to cover it. Repeat for all treats.
Then, using the different colored icing, decorate your treats as you wish with the different decorating tips.
Add sprinkles if you wish, then add the bits of red Pop Rocks.
Voila! Done.
Notes
If you wish to put these on lollipop sticks, do so before you decorate and dip the tips of the sticks in melted candy coating before inserting them in the treats. This will keep them secure.
These do not have to be kept refrigerated, but do keep them in an airtight container.
If you are making these ahead of time, don’t add the Pop Rocks until you are ready to serve.
Frosting Recipe from Wilton’s Class Buttercream Icing.
This recipe may be shared at these fabulous parties.
Related Posts





Subscribe for New Racipies
Get mental health tips, updates, and resources delivered to your inbox.