
Happy New Year! And A Cocktail

Medically reviewed by Christiana George Updated Date: June 8, 2023

Hello friends! How was your last week? I just wanted to check in here briefly to let you know that I’m still alive, and well, and enjoying California immensely. Though, by the end of this trip, I’m going to need another vacation so I can unwind from this one. I’m sure many of you can relate.
We’ve been doing a lot of coastal driving, my favorite kind of all. It makes me miss having a car, and the mobility and carefreeness it affords. The photo above (yup, Instagram, because sometimes I just don’t want to lug my camera around) was taken in Fort Bragg, about three-and-a-half hours north of San Francisco. The trees here are shaped by the wind, which is relentless all times of the year, but especially so in the winter. It’s something I’ve missed, the coast, the wind, the ocean, the wildness of it all. I imagine the first settlers to this area trying to make sense of it all, constructing their neat little houses and churches to emulate those places from which they came. I wonder how successful they were.


I’ve also missed the trees. Redwoods are my favorite because they shoot into the sky straight and proud. Can’t get enough of them.

And the reason behind all the driving: we’re trying to find the perfect wedding venue. Apparently we’re kind of picky. Thank god our families love us.
Before I leave, I wanted to share a festive cocktail recipe I shot for Serious Eats that would be great to make tomorrow night. It’s from PDT, a bar whose appeal is heightened by the fact that it’s only accessible through a phone booth in the corner of a hot dog shop in the East Village. I’ve got to admit, there’s something kind of fun about slinking in to a hidden back room, even if the secret’s out. Anyway, they call this the Cranberry Cobbler, and you’ve got to make it with the ice pebbles. Then drink it, quick!

Get the recipe here.
My other favorite drink was the Winter Wassail, an ode to cider. It’s something you would savor, beside a blazing fire maybe. Or radiator. Or whatever.
And finally, dear readers, I just want to thank you all for a great year. This blog has definitely been a defining event of 2012, and I’ve loved all of it.
Happy New Year! See you in 2013.
Related Posts


Subscribe for New Racipies
Get mental health tips, updates, and resources delivered to your inbox.
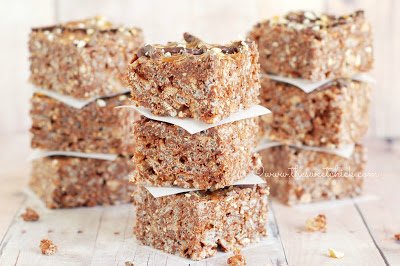
Chocolate Caramel Pretzel Rice Krispie Treats


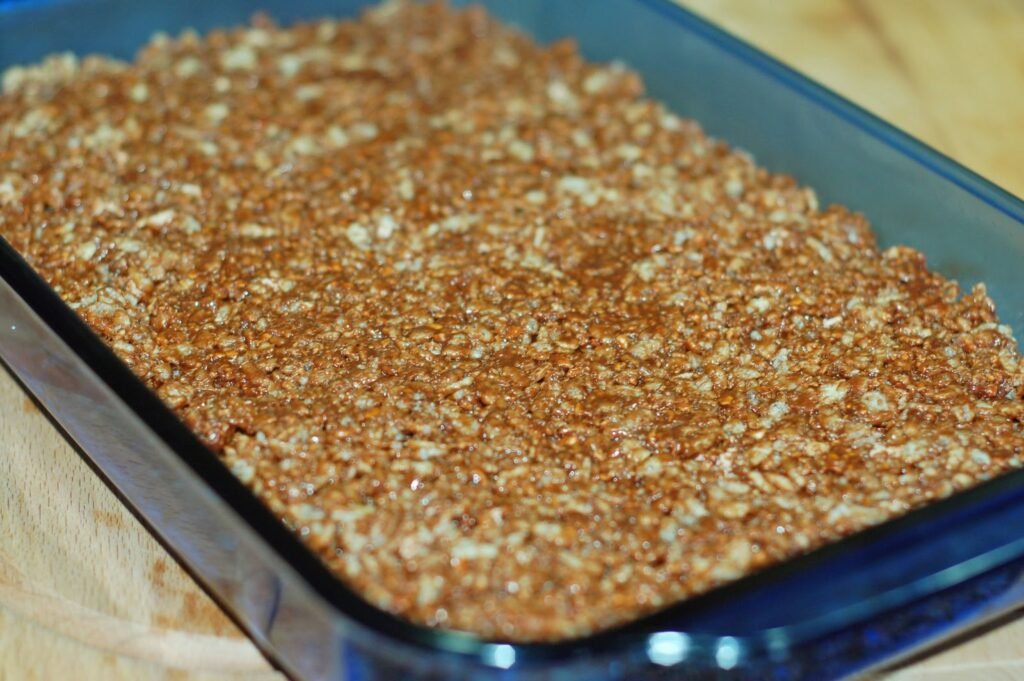
Well, we are still trying to sell our house. That meant another open house this past weekend. So I had a lot of cleaning to do, not much time for baking. But I still needed some pick-me-up treats to keep me going. Rice Krispies are always the easiest way to go. And you can customize them to almost any flavor. I have not yet run out of ideas of what to put in mine. This week’s flavor is Chocolate Caramel Pretzel. I already had all the ingredients in the house, so it was a breeze to whip up and it made all my little taste testers happy.

I used Baker’s chocolate because it was what I had in the house, but feel free to use semi-sweet chocolate chips.
I also chopped my pretzels very finely in the food processor, but if you want a more crunchy bar, you can chop them more coarsely.
Due to the chocolate, you don’t need to place these in the fridge to set. They will set just fine at room temperature. If you put them in the fridge they will harden too much and you won’t be able to cut them or bite into them. At room temperature, they are perfect.

In case you didn’t know me by now, I always have to add a topping to my Rice Krispie treats. In keeping with the theme, I added more caramel, dark chocolate candy melt, and little bits of pretzels.
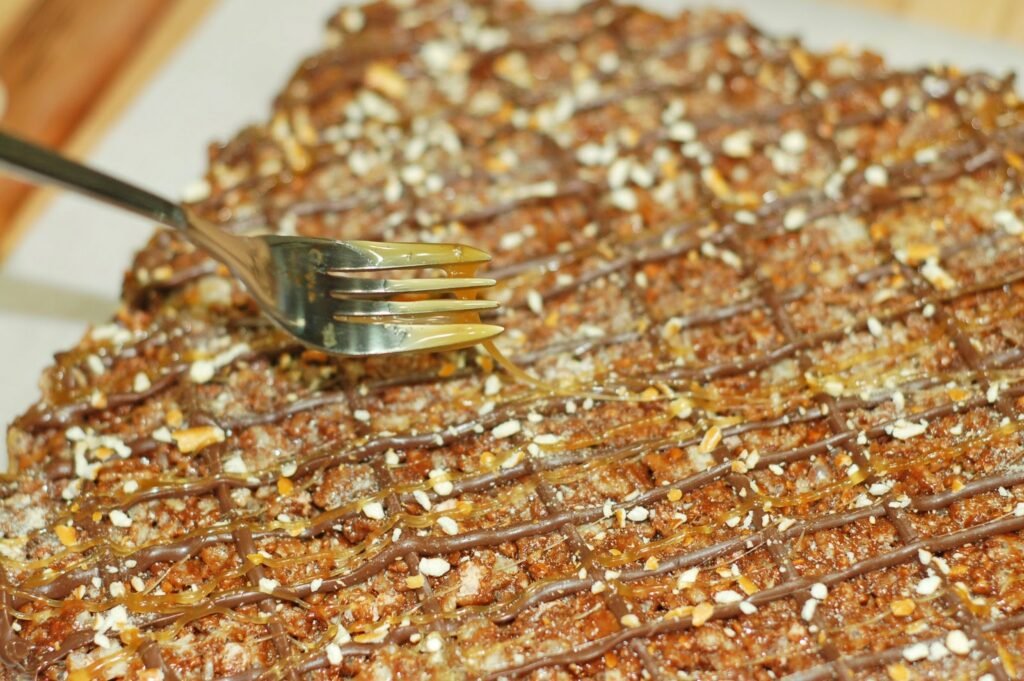
I used a Ziplock bag to drizzle the candy melt, but due to the stickiness of the caramel, I just drizzled it on with a fork.

Then I added some sprinkles of pretzel bits for the finishing touch. I really love the sweet and salty taste of these bars. I bet you can’t eat just one!
Chocolate Caramel Pretzel Rice Krispie Treats
by The Sweet Chick
Prep Time: 15 minutes
Cook Time: 5 minutes
Keywords: no bake snack dessert caramel chocolate pretzels marshmallow bits rice krispie treats bars American
Ingredients (35 bars)
For the Rice Krispies
- 3 tablespoons butter
- 5 cups mini marshmallows
- 5 cups Rice Krispies cereal
- 5 oz. semi-sweet chocolate
- 1/4 cup caramel
- 1/2 cup chocolate Jet Puffed Mallow Bits (optional)
- 1 cup crushed pretzels
For the topping
- 1/2 cup dark chocolate candy melt, melted
- 1 tablespoon caramel
- 1 tablespoon pretzel bits
Instructions
For the Rice Krispies
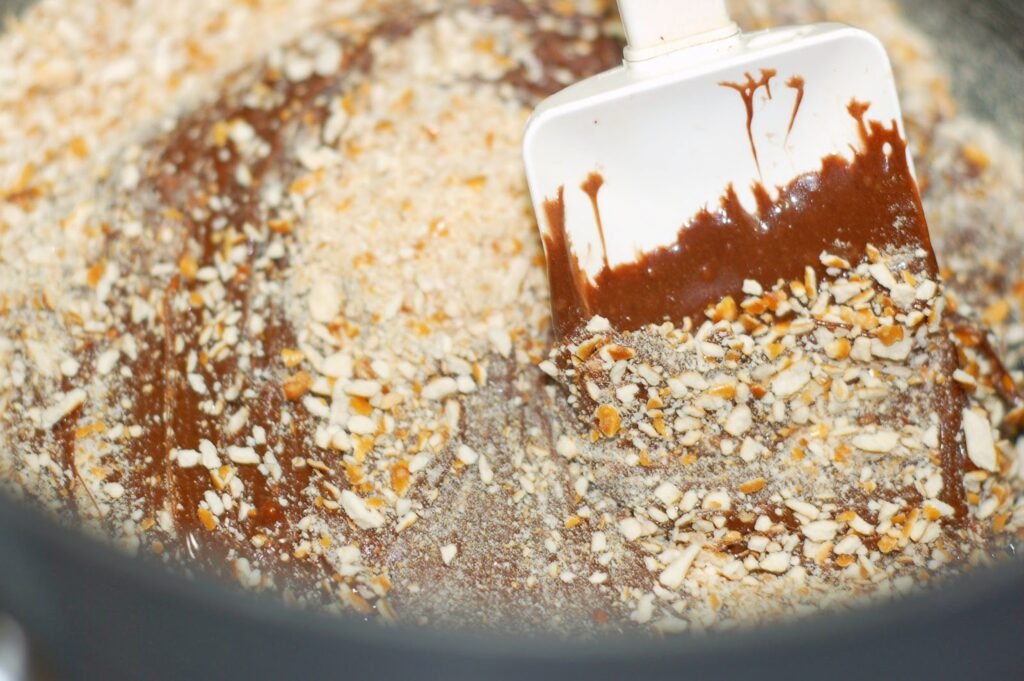
In a large sauce pan, melt butter and marshmallows over low heat. Stir until completely melted.
Remove from heat and add chocolate and caramel. Stir until completely mixed and chocolate is melted.
Then add the crushed pretzels, Mallow Bits and the Rice Krispie cereal. Mix until all is well incorporated.
Then pour the mixture into a greased 9 x 13 pan or a cookie sheet and spread it evenly with a piece of waxed paper.
Put aside for about a 1/2 hour to set at room temperature.
For the toppings
When the treats have set, melt the candy melt wafers per directions on package and place in a piping bag or Ziplock bag with tip snipped off. Drizzle the melted chocolate in diagonal pattern across the Rice Krispie treats.
Then with a fork drizzle the caramel in thin lines over the chocolate. And sprinkle with pretzel bits.
Let the candy melt harden at room temperature for about 15 minutes, then cut and serve.
Related Posts


Subscribe for New Racipies
Get mental health tips, updates, and resources delivered to your inbox.