
Late Summer Update

Medically reviewed by Christiana George Updated Date: September 8, 2021
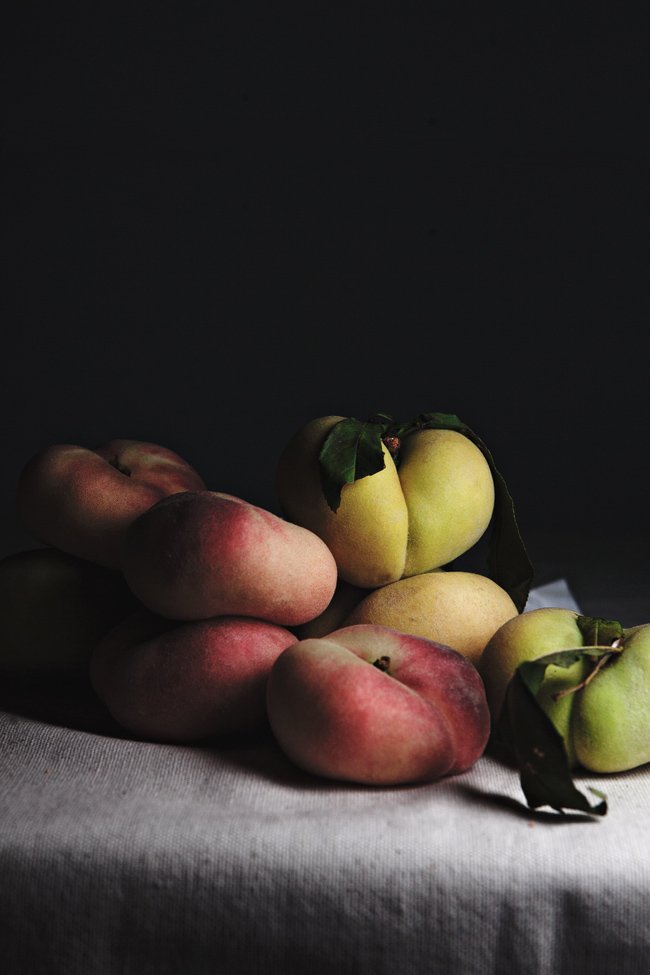
I really dropped the ball, didn’t I? I swore I would never turn into one of those crazy wedding ladies, and here I am, unable to think about anything else, actualizing extensive DIY projects that may or may not look good. I guess I’m just really bad at multi-tasking. Actually, I know I’m really bad at multi-tasking; my mind is only able to focus on topics one at a time, wholly, obsessively. I thought it would be nice to let you in on this, mostly to explain my seeming absence of signs of life (a.k.a. virtual activity) on all fronts (blog/Instagram/Pinterest/etc.). I also thought it’d be nice to pop in and say hi, even though I don’t have a recipe to share.
With not enough creative juices and energy to go around, at least to extend to cooking, Chris and I have been subsisting on possibly the most boring diet ever. Cereal. Trader Joe’s Frosted Maple and Brown Sugar Shredded Bite Size Wheats never seems to get old. That, along with the occasional ground turkey taco (seasoned with a powdered mix, I’m not ashamed to admit) thrown in, means we’re skating dangerously close to scurvy territory. But don’t worry! Fruit saves the day, as usual.
I’ve waxed poetic on this food group before, so I’ll refrain in this instance. Instead, I urge you to get your fill of saturn peaches before the summer’s out, especially if you can get your hands on the yellow variety in the picture above. They’re extraordinary. Firm when ripe, not too sweet, and taste made complex by floral notes. (Not helpfully, I’m not sure what they’re called, but I believe them to be a relatively new variety patented only within the last few years. I’ll try verifying this over the weekend.) Another Union Square Greenmarket discovery that made my day.
I can’t say whether or not you’ll hear much from me for the rest of this month and most of the next, but until we meet again, stay well and enjoy the rest of your summers!
Related Posts






Subscribe for New Racipies
Get mental health tips, updates, and resources delivered to your inbox.
Are Cherries Acidic? Cherries and GERD: Good or bad?


Putting the cherry on top makes any dessert or cake look more delicious.
Do cherries only add sweetness? Or do they add some acidic tanginess as well? This question leads to another common question – are cherries acidic?
Cherries have a pH in the range of 3.2 to 4.5, which means they are pretty acidic. Anything with a pH under 7.0 is acidic, so cherries definitely qualify. Cherries contain both vitamin C, also known as ascorbic acid, and pantothenic acid. These compounds are responsible for cherries’ acidity.
Does this acidity affect gastroesophageal reflux disease (GERD) in any way? You will find the answer shortly in this article.
In addition, I will soon disclose everything about the tangy taste, acidic nature, and impact of cherries on your gut.
The pH of Cherries and They Are Acidic
The cherries are acidic, with a pH of around 3.2 to 4.5.
This means that they are one of the most acidic fruits, along with lemons, limes, pineapples, and grapefruits.
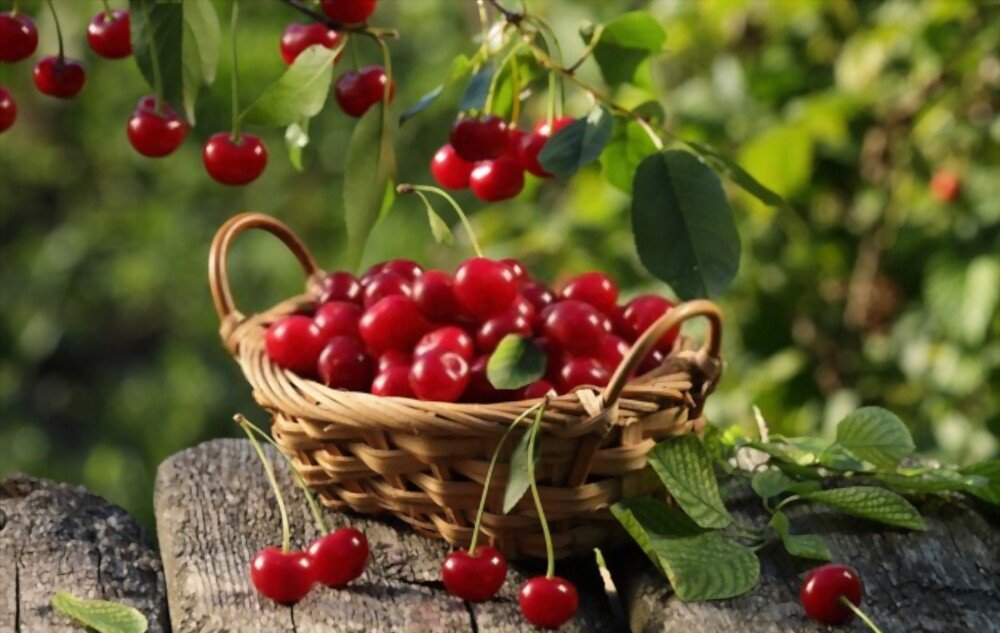
While cherries are acidic, they are also relatively sweet, which makes them a popular fruit to eat on their own or to use in recipes.
If you are looking for a more acidic fruit, you may want to try one of the other options on this list. However, you may want to try bananas, melons, or grapes if you are looking for less acidic options.
Is Cherry Juice Acidic?
Cherry juice is fairly acidic, with a pH between 3.2 and 3.4. This means it is definitely below neutral on the pH scale, which runs from 0 (most acidic) to 14 (most basic or alkaline). 7.0 on the pH scale is exactly neutral.
The acidity of cherry juice is due to its tartaric acid and citric acid content. This is a natural acid in many fruits, including grapes, bananas, and tamarinds. Whereas citric acid is found in citrus fruits like lemons and limes.
Related Article: 7 Kinds of Foods to Avoid with Gerd: A Complete Guide!
Cherries and GERD: Are Cherries Good or Bad?
Cherries are generally considered a “safe” food for people with GERD, which means they are unlikely to cause or worsen symptoms.
However, as with all foods, some people with GERD may experience discomfort after eating cherries. If you have GERD, you should eat cherries in moderation and listen to your body to see if they trigger your symptoms.
Some say tart or sour cherries can worsen GERD symptoms, whereas sweet cherries are beneficial. You should probably test out a small number of sweet cherries to see how your body reacts if you have GERD and wish to consume cherries.
Moreover, there is a difference between raw and cooked or otherwise processed fruit; for example, some people can only consume cherries if they are cooked, simply (boiled, as a jam, or canned), but never raw.
If cherries worsen your gastroesophageal reflux disease symptoms, you may wish to limit or eliminate their consumption. Instead, you may want to experiment with other “safe” foods like bananas, melons, and pears, which are less likely to trigger stomach upset.

Are Cherries Good For Acid Reflux?
Cherries are one of the foods that can aggravate GERD. It can be simply the juice without the fruit, both the juice and the fruit, only sour or tart cherry varieties but not the sweet varieties, fresh fruit only, or cherries in all forms and preparations.
Cherries are rich in antioxidants, including anthocyanins. An animal study published in the World Journal of Gastroenterology in September 2009 found that anthocyanins may help reduce or prevent ulcers and the inflammation associated with ulcers.
Type of Cherries and Acidity Level
| Type of Cherries | pH |
| Kordia | 3.10 |
| Rivan | 3.20 |
| Johanna 1 | 3.25 |
| Johanna 2 | 3.20 |
| Kunzes Kirsche | 3.25 |
| Napoleon | 3.46 |
| Schneiders Spate | 3.92 |
| Summit | 3.45 |
| Merton Premier | 3.25 |
| Bianca | 3.30 |
| Burlat | 3.30 |
Are Black Cherries Acidic?
Yes, black cherries are acidic, with a pH level of 3.3 to 3.5. Until they’re fully ripe, the fruits have a bitter flavor, but upon ripening, their flavor becomes mild and sweet.
Raw black cherries aren’t as popular as sweet (prunus avium) cherries. Jams, jellies, and juices are the most common uses for these fruits, rather than being eaten raw.
Are Blueberries Acidic?
Yes, blueberries are acidic. Their pH measurements are between 3.11 and 3.35. For this reason, we classify blueberries as acidic.
In moderation, blueberries pose no health risks. This way, you can avoid aggravating any preexisting conditions while maintaining a balanced, healthy diet.
Blueberries are a satisfyingly filling fruit.
Do Cherries Increase Stomach Acid?
There is no definitive answer to this question as it depends on the individual. Some people may find that cherries do seem to worsen problems with acid reflux, while others may not.
It is best to speak to a healthcare professional or registered dietitian to determine if cherries seem to be problematic for you.
Are Tart Cherries Acidic?
Yes, tart cherries are significantly more acidic than regular cherries. According to a 2011 study, tart cherries contain more anthocyanins and gallic acid than sweet cherries. These components make tart cherries more acidic than regular cherries.
Are Dark Sweet Cherries Acidic?
Yes, dark sweet cherries are acidic, but not as acidic as sour cherries. Sweet cherries have less malic acid, gallic acid, and anthocyanins than tart cherries. Thus, you will find sweet cherries sweeter and less tangy.
Are Fresh Cherries Acidic?
Yes, fresh cherries are acidic, with pH levels between 3.5 to 4.5. Storing and drying fresh cherries will not affect their acidity. However, cooking or using cherries with other ingredients may impact the acidic nature and sweetness.
Are Bing Cherries Acidic?
Bing cherries are a sweet hybrid type variety. You will find them acidic but less acidic than any sour cherries. For those in the know, Bing cherries are among the most popular in the States.
They are the most widely grown variety in many states and provinces, including British Columbia, California, Washington, Oregon, Wisconsin, and Oregon.
Related:
Are Strawberries Acidic? Do They Cause Acid Reflux?
Nutrition information about Cherries – Raw Sweet Cherries
Cherries are packed with vital nutrients that can keep you healthy. According to the USDA, 100 grams of cherries contains.
| Nutrients Name | Amount per 100 grams of cherries |
| Vitamin C | 7 mg |
| Vitamin K | 2.1 μg |
| Calcium | 13 mg |
| Protein | 1.06 g |
| Carbohydrates | 16 g |
| Magnesium | 11 mg |
| Iron, Fe | 0.36 mg |
| Potassium, K | 222 mg |
| Folate, DFE | 4 µg |
| Copper | 0.06 mg |
| Calories | 63 kcal |
| Fiber, total dietary | 2.1 g |
| Fatty acids, total saturated | 0.038 g |
| Total lipid (fat) | 0.2 g |
Regular consumption of cherries will give you the following health benefits.

Antioxidant and anti-inflammatory
All cherries contain powerful antioxidants and anti-inflammatory compounds, though the precise amounts and types may vary between cherry varieties.
This high antioxidant content may aid in the fight against oxidative stress, which has been linked to numerous degenerative diseases and the acceleration of the aging process.
Cherries have some of the highest concentrations of Polyphenols, which have been shown to protect cells from damage, lower inflammation, and improve health.
Helps With Better Sleep
Melatonin, found in cherries, is a hormone that acts as an antioxidant and helps people get to sleep.
Plants like cherries, which contain phytomelatonin, may be used to help regulate circadian rhythms and promote sleep. This could be useful for treating sleep problems associated with aging.
Supports Heart Health
In this regard, cherries are beneficial because they contain many compounds and nutrients that are good for your heart, such as potassium and polyphenol antioxidants.
Potassium aids in the elimination of sodium from the body, which controls blood pressure, and is essential for a regular heartbeat.
Cherries are a great source of the powerful polyphenol antioxidants anthocyanins, flavonols, and catechins. These antioxidants may benefit cardiovascular health by preventing cell damage and lowering inflammation.
Alleviates Gout
Pain and inflammation are brought on by the formation of urate crystals in the joints of people suffering from gout, a type of arthritis.
A study suggests that cherry consumption can reduce the inflammatory response to urate crystals in gout.
Researchers have found that cherry consumption lowers uric acid levels and the frequency of gout attacks, though they note that more research is needed to confirm these findings.
FAQs
Are cherries OK with acid reflux?
There is no definitive answer to this question since everyone’s experience with acid reflux is unique. Cherries are considered to be a safe food to eat for people with acid reflux.
This is because they are moderately acidic, but generally not thought to trigger reflux symptoms.
If you are concerned about how cherries affect your acid reflux, you may want to speak with your doctor or dietitian for more specific advice.
Do cherries have acid?
Cherries have organic acids like malic acid, gallic acid, and ascorbic acid (Vitamin C). Due to the low pH of these compounds, cherries are acidic in nature. The pH value ranges from 3.2 to 4.5 in sweet and tart cherries.
What fruit is high in acidity?
Lemon, lime, blue plums, grapes, and pomegranate are the highest acidity fruits. Their pH value ranges from 2.00 to 3.20. The values fall in the highly acidic range with a bitter to tangy taste. High acidity fruit can impact your teeth and trigger GERD symptoms.
What fruit is low in acid?
Avocado, persimmon, cantaloupe, black olives, and honeydew melons are the lowest acidity fruits. Their pH value ranges from 6.00 to 6.58, which is almost neutral. These foods are very unlikely to trigger reflux symptoms. However, one should note that some of these may be high in sugar.
Do cherries cause acid reflux?
Typically cherries do not cause acid reflux. However, if you have a chronic ulcer or GERD, it is best to consume foods in moderation, and decrease consumption if you note a worsening of your symptoms.
Final Words
There is no doubt that cherries are acidic. But their sweet taste and variety of uses make them one of the most desired fruits for both food and beverages.
However, you may still ask how are cherries acidic if they are sweet? Since they contain both acids and sugars, they have both tangy and sweet properties. I hope you will top your favorite dishes with cherry or cherry juices. Have a happy meal prep time!
Related Posts



Subscribe for New Racipies
Get mental health tips, updates, and resources delivered to your inbox.