
Apricot Raspberry Galette, Or Look What I Made!

Medically reviewed by Christiana George Updated Date: January 7, 2026
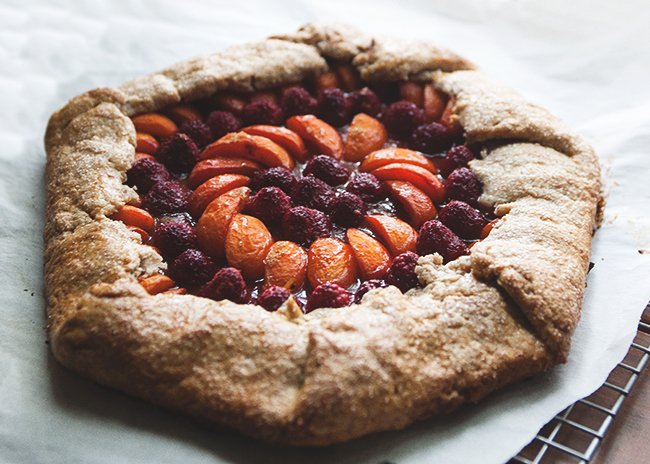
Under Elisabeth Prueitt’s tutelage, I feel invincible.
She’s the co-founder of Tartine Bakery in San Francisco, head pastry chef, and, purveyor of all things baked and sweet and wonderful. Along with her husband Chad Robertson, they’ve turned Tartine into something of an institution. This is a widely-acknowledged fact. Even if institutions are generally quite a bit older than the 10 years that this bakery’s been around. Anyway, I’m sure many of you savvy cooks and bakers have heard of it, so I won’t wax any more poetic except to say that the almond croissants are SO SO good.
Instead, I meant to give you a recipe for an apricot raspberry galette.
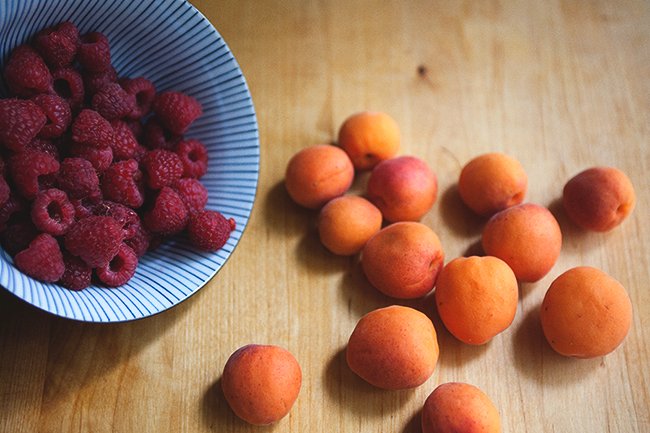
I’ve always been charmed by galettes; they’re so endearing and sweet, homely little things brimming with the fresh and organic. At the same time, I’ve always been intimidated by the idea of making the crust—tart doughs seem such fickle things. So in undertaking this recipe, I knew that I wanted to turn to Prueitt’s cookbook Tartine… she’s never led me astray, you see.
She describes galettes as “quintessentially beautiful rustic tarts… they are very satisfying to make.” I wanted to grasp satisfying! More than that, I wanted to feel the gratification that comes from sinking my teeth into something substantial. I wanted to feel the flour and butter between my fingers, build something lovely and wholesome completely out of scratch. The process of baking, of creating really, is never as palpable as when you’re getting your hands (and in my case, feet) dirty, smearing butter everywhere, flexing those arm muscles rolling and lifting and pleating. It’s a rewarding feeling.
So I took out the rolling pin—we don’t see much of it these days—and began the painstaking process of flattening frozen butter into long thin strips in flour. Which came together into something that resembled dough. Which came together into something that resembled a free-formed tart. And when it came out of the oven, I was astonished to find a galette. It came out rustic indeed. Seven-sided, lopsided, shriveled fruit and all, I loved it upon sight. Because I’d made it from scratch.


APRICOT RASPBERRY GALETTE
Fruit Galette recipe in Tartine by Elisabeth Prueitt & Chad Robertson
Makes 1 large galette or 6 mini galettes
Ingredients:
For dough:
1 cup (2 sticks) unsalted butter, very cold
1/2 cup water
3/4 tsp salt
1 cup rye flour
1-1/2 cups all-purpose flour (or use all all-purpose if you’d like)
For filling:
3 cups fruit (berries, stone fruit, sauteed apples or pears, etc.)
2 to 4 Tbsp brown or granulated sugar
Lemon juice if needed
Egg wash:
1 large egg yolk
1 Tbsp heavy cream
Granulated sugar for sprinkling
Directions:
Cut the butter into 1-inch cubes and put them in the freezer. Measure the water, dissolve the salt into it, and put it into the freezer. Chill both the butter and the water for about 10 minutes.
Measure the flour onto your work surface and spread it into a rectangle about 1/3 inch deep. Don’t worry about mixing it, as it’ll get mixed in the process. Scatter the butter cubes over the flour and toss some flour over them so they don’t stick to your rolling pin. Begin rolling. When the butter starts flattening into long, thin strips, use a bench scraper to scoop up the sides so it’s about the same size as when you started. Repeat this rolling and scraping 3 to 4 more times.
Make a well in the center and pour in the cold water. With the bench scraper, scoop the sides of the dough into the center, mixing the water and flour in a cutting motion. Keep scraping and cutting until the dough is shaggy, then shape it into a rectangle about 10 by 7 inches. Dust the top lightly with flour. Roll out the flour until it’s about half as thin, then scrape all four sides back to its original shape and reroll. Repeat this a few more times until your dough is smooth, cohesive. You should end up with a 10 by 7 inch rectangle.
Transfer the dough to a large baking sheet, cover it with plastic wrap, and chill for about 1 hour.
While the dough is chilling, prepare your fruit. Peaches can be sliced into eighths, apricots quartered.
When the dough is chilled, you can divide it into six equal parts at this point. Roll the dough into a rough circle of about 14 inches in diameter if making a single galette or 6 to 7 inches if making mini galettes. (Prueitt gives lengthy instructions on how to do this, but for the sake of not being too fussy, I won’t go into details) Transfer the circle/s to a baking sheet and chill about 10 minutes.
Fill the center of each circle with fruit, leaving a 2-inch border if making a large galette, or a 1-inch border if making small. At this point, taste the fruit to decide how much sugar you want to sprinkle on top, anywhere from 2 to 4 Tbsp on the large galette or 1 to 2 tsp on each small galette. If you want, squeeze some lemon juice on top. Fold in the sides into that classically gorgeous galette shape, making sure to seal crevices where the juice can leak out. Chill for about 10 minutes, and start preheating the oven at 375 degrees F.
At this point, Prueitt says you can store them in the fridge, unwrapped, for a few hours or wrap them airtight and store them in the freezer for up to 2 weeks. Otherwise, make your egg wash by whisking together the cream and egg yolks. Brush the egg wash on the pastry edges and sprinkle them with granulated sugar.
Bake the galettes until the crust has visibly puffed and baked to a dark brown and the fruit juices are bubbling, 45 to 60 minutes for the large galette and 40 to 50 minutes for the small. Rotate halfway through for even browning. (If baking them straight from the freezer, tack on about 10 minutes to the baking time.) Remove from the oven and serve immediately, or let it cool and serve warm or at room temperature.
Related Posts


Subscribe for New Racipies
Get mental health tips, updates, and resources delivered to your inbox.
Korean Fried Chicken

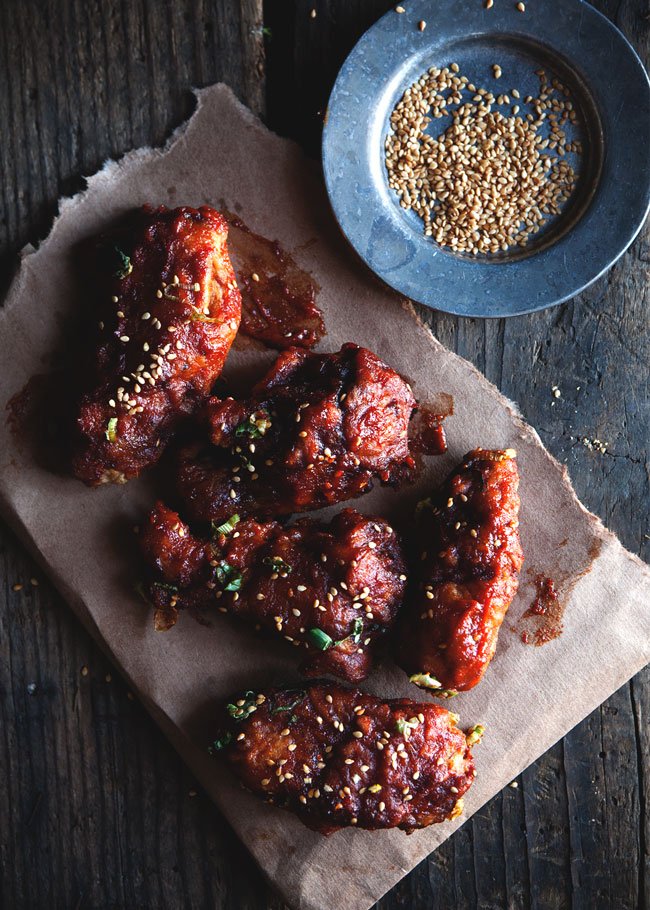
I have had the most incredible hankering for Korean food recently. I can’t explain it, except that this current weather makes me want to cuddle up with a bowl of soondubu and freshly cooked rice, made in a stone pot of course. I also just recently discovered Maangchi, who is just about the cutest woman alive other than my mom. They remind me an awful lot of each other actually.
Maangchi doesn’t do anything in half measures, meaning everything she cooks is in huge quantities. She whips out 10 pounds of kimchi at a time, fries huge basins of japchae. I can’t imagine the number of people she cooks for, but in the case of the recipe I’m sharing today, she deep-fried three pounds of chicken wings. For Chris and me, two to three wings/drumettes each, so maybe half a pound of chicken total, is sufficient. Although maybe we’re just light eaters. It’s hard to say.
But hold it! I’m misleading you, aren’t I? I actually didn’t end up following Maangchi’s recipe. It was pretty good, but I found that I preferred Saveur’s version better. The two taste totally different; I just found her version to be a bit cloying. (Also, I don’t understand why corn syrup seems to end up in a lot of Korean dishes—is it a common ingredient? And why?)

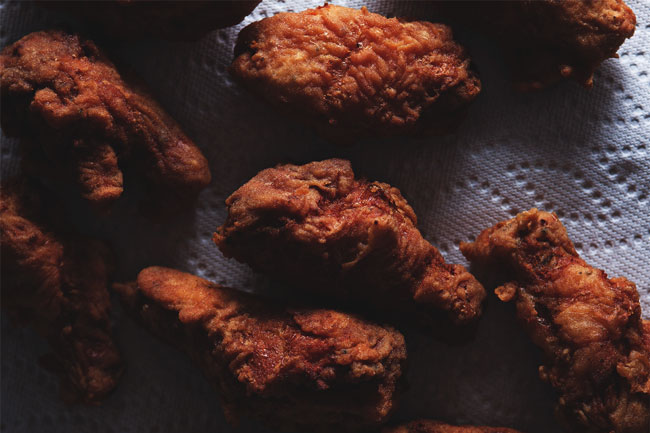
What the two versions have in common—and what makes Korean fried chicken so dang addictive—is that the chicken is fried twice. This results in a Seriously Crispy Crust. It’s the difference between a weak handshake and a firm one, sallow and sturdy. A robust crust, if you will. I think it’s dead simple and pretty genius. (The only downside is that you have to withstand being barraged by oil twice as long. Actually, come to think of it, that’s a pretty big downside. Deep-frying is freaky. Make sure you wear long sleeves. And gloves. And clear everything away around the perimeter of the pot because it’s going to get dirty.) And then you smother it in a hot-garlicky-mouth-puckering sauce and away you go!
(On an unrelated note, if you follow me on Instagram, you might know that I was in California last week, where I got to meet the newest generation of the Anderson clan, aka Chris’s brother’s four-and-a-half month old son and our nephew! I get a little giddy calling him this, because it didn’t really occur to me that he WAS related to me until Chris’s sister-in-law [which makes her my sister-in-law?] called me Aunt Linda. Aunt Linda! That’s so exciting! And now that I’ve seen him and fallen in love, I want to buy him things like this onesie. What do you think? Isn’t it adorable?? [Now my mom thinks I want to start popping them out. Ha. Ha ha ha. Sorry Mom. You’ll have to give me time.])

KOREAN FRIED CHICKEN (aka KFC)
From Saveur
Makes 16 pieces
Ingredients:
- 5 cloves garlic, chopped
- 1 (1.5″) piece peeled ginger, chopped
- 3 Tbsp soy sauce
- 3 Tbsp gochujang
- 1.5 Tbsp rice vinegar
- 1 Tbsp Asian sesame oil
- 1 Tbsp honey
- 2/3 cup flour
- 1 Tbsp cornstarch
- 2/3 cup water
- 16 chicken wingettes/drumettes (from 8 chicken wings)
- Canola oil, for frying
- Sesame seeds and chopped green onions for topping
Directions:
Make the sauce: process the garlic, ginger, soy sauce, gochujang, rice vinegar, sesame oil, and honey with a food processor/immesion blender until blended (or mince the garlic and ginger and whisk the ingredients together by hand).
For the chicken: in a bowl, whisk the flour, corn starch, and water. Add the chicken and toss. In a medium-sized heavy-bottomed pot, pour about 2 inches of oil. Clip a candy thermometer onto the side of the pot and heat the oil until it reaches a temperature of 350 degrees F. Add the chicken pieces gently, but don’t crowd the pot; you’ll have to work in two or three batches. Fry chicken until golden, about 6 to 8 minutes. Drain on paper towels. Reheat the oil to 350 degrees and fry chicken again until crisp and medium brown, 6 to 8 minutes. Drain.
In a large bowl, toss the chicken pieces with the sauce, top with sesame seeds and green onions if using, and serve. With lots of napkins.
Related Posts


Subscribe for New Racipies
Get mental health tips, updates, and resources delivered to your inbox.