
Chocolate Coffee Bundt Cake

Medically reviewed by Christiana George Updated Date: June 8, 2023
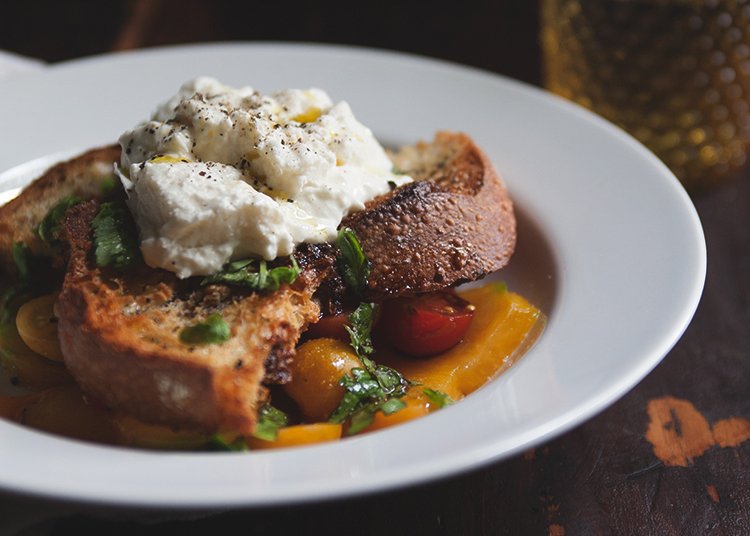
What kind of cake do you bake for a friend who doesn’t like cake? Or dessert for that matter? She’s a girl (aww, woman now!) with peculiar tastes. She’ll buy half a watermelon and a pack of deli meat for dinner, and eat it all with generous scoops of chili garlic sauce. She hates eating fruit in any form except raw. She doesn’t like her veggies. She used to buy a stick of salami everyday after school.
Her one weakness is coffee ice cream, which I took advantage of. Or tried to, rather. I had lofty plans. I was going to make a coffee ice cream cake, with six alternating layers of brownie in between. But then I failed, TWICE, at making the ice cream. So I plowed forward instead with this chocolate coffee bundt cake, courtesy of Big Sur Bakery, via Miss Joy. And I decided to freeze the ice cream anyway—it was a Jeni’s Splendid recipe, and looked absolutely amazing on Megan’s blog. It doesn’t taste quite right, more toffee-flavored than coffee-flavored, but maybe people will believe me if I tell them it’s toffee ice cream?

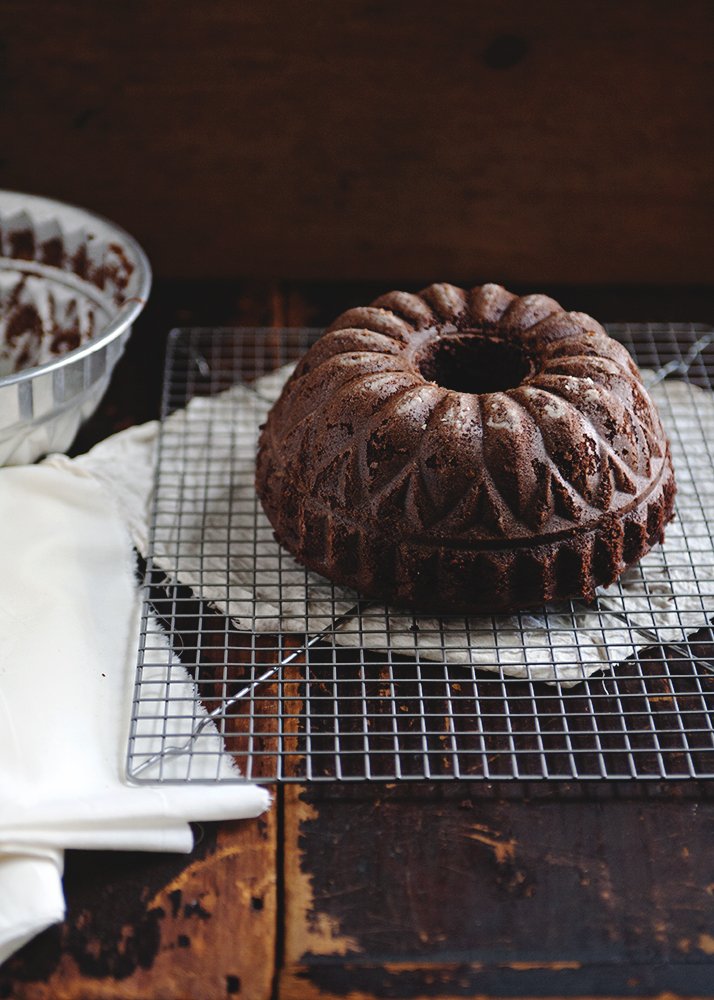

Anyway, you’ll notice there are no pictures of cake slices. I couldn’t cut it open; I mean, wouldn’t that be wrong? A violation of some basic human right to receive an intact cake on one’s birthday? Chris asked if there was any way to cut a slice and weld the piece back in—what misconceptions there exist about baking—but I’m not aware of this being possible. (Is it possible?)
So, a happy happy birthday to one of my best friends in the world! She turns 26 today, and I’ve officially known her for half my life. Whew! Although by the time you read this, her birthday will have passed. Now off to celebrate. A cake report to follow.
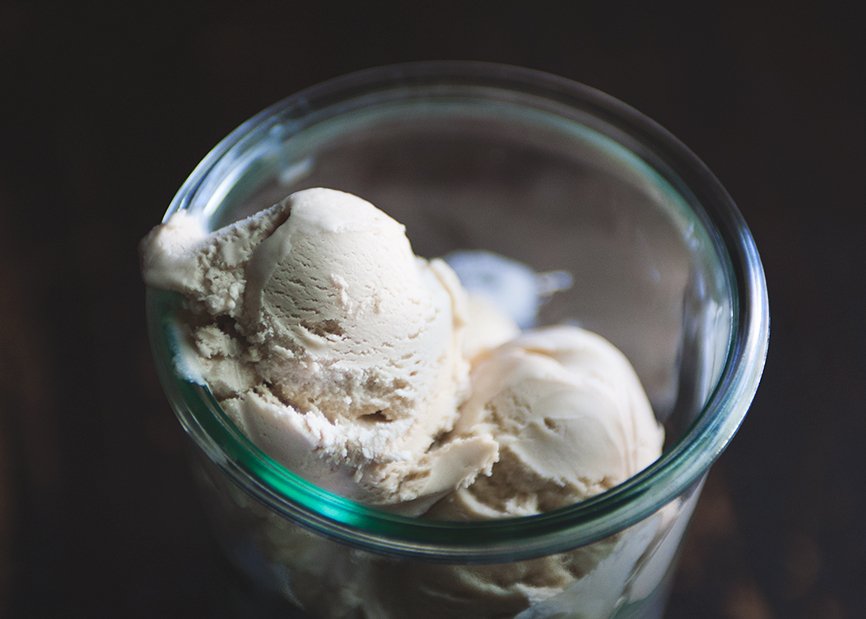


The next day: Good cake, great ice cream, and perfect company! I won’t post the ice cream recipe for the reason mentioned above, but the cake, now the cake, is one I should spread the word about.
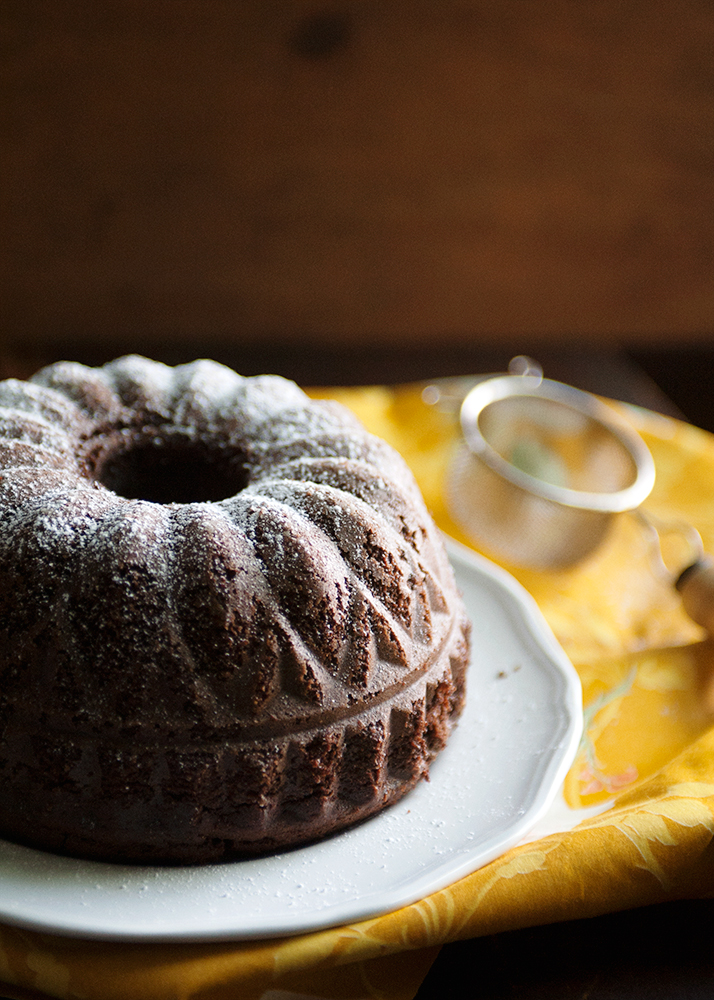
CHOCOLATE COFFEE BUNDT CAKE
Recipe from Big Sur Bakery via Joy the Baker
Makes one 10-inch bundt cake
Ingredients:
- 1-1/4 cups plus 1 Tbsp brewed coffee
- 3/4 cup Dutch process cocoa powder (Note: I used regular)
- 2-1/4 cups sugar
- 1-1/4 tsp kosher salt
- 2-1/2 tsp baking soda
- 2 whole eggs
- 1 egg yolk
- 1-1/4 cups plus 1 Tbsp buttermilk
- 1 cup plus 2 Tbsp canola oil
- 1-1/2 tsp vanilla extract
- 2-1/2 cups, plus 2 Tbsp all-purpose flour, sifted
Directions:
Place an oven rack in the center of the oven and preheat to 350 degrees F.
Well grease and flour a 10-inch bundt pan and set aside (Note: I used a 9-inch Bundt pan and there was definitely too much batter. Go with the 10″).
Put brewed coffee and cocoa powder in a small saucepan and bring to a boil, whisking frequently. Remove from the heat and let come to room temperature.
In the bowl of a stand mixer fit with a whisk attachment, mix together sugar, salt, baking soda, eggs and egg yolk on low speed for about 1 minute. Add the buttermilk, oil and vanilla extract and mix on low again for another minute. Add the flour and mix on medium speed for 2 minutes. Add the cooled cocoa mixture and mix on medium speed for 3 minutes. The batter will be very loose.
Pour into the prepared cake pan and bake for 1 hour, or until a cake tester inserted in the cake comes out clean (Note: I baked it for 70 minutes). Let the cake cool completely in the pan and then invert onto a cooling rack. Decorate with powdered sugar and serve with ice cream.
Related Posts


Subscribe for New Racipies
Get mental health tips, updates, and resources delivered to your inbox.
Is Basmati Rice Acidic? Its Role in Acid Reflux Management


When dealing with acid reflux or gastroesophageal reflux disease (GERD), making informed choices about the foods you eat becomes essential. Rice, particularly basmati rice, is a popular choice for many meals due to its light texture, aromatic flavor, and ease of digestion. However, for those managing acid reflux, it’s important to understand how different types of rice, including basmati, impact the digestive system. So, is basmati rice acidic? Let’s explore this question and discover how basmati rice can fit into a heartburn-friendly diet, its potential benefits, and tips on how to consume it safely to avoid triggering reflux symptoms.
Basmati Rice and Its pH: Is It Acidic or Alkaline?
Basmati rice, like most grains, is considered a low-acid food with a neutral pH. The pH level of basmati rice typically ranges between 6.0 and 7.0, placing it right in the middle of the acidic vs. alkaline scale. This makes it a gentle food choice for those suffering from acid reflux. Unlike acidic foods, which can trigger the production of stomach acid and lead to heartburn, basmati rice is unlikely to irritate the esophagus or stomach lining when consumed in moderation.
Additionally, basmati rice is a carbohydrate, and carbohydrates are usually easy to digest and less likely to cause discomfort compared to high-fat or high-protein foods. However, just because basmati rice itself is neutral doesn’t mean it’s completely free of potential reflux triggers. It’s important to consider how the rice is prepared and what it’s paired with to ensure that it remains gentle on the digestive system.
Author Tip: Are Rice Cakes Healthy?
How Basmati Rice Affects Digestion for Acid Reflux Sufferers
When managing acid reflux, it’s essential to pay attention not only to the pH of foods but also to how they interact with your digestive system. According to health experts, basmati rice is a complex carbohydrate that provides a steady source of energy without spiking blood sugar levels. Its low glycemic index makes it a good choice for those looking to maintain stable energy levels throughout the day.
For acid reflux sufferers, the body’s ability to digest food without excess acid production is crucial. Basmati rice is known for being relatively easier on the stomach compared to other grains like white rice or oats. The digestion process involves breaking down the food into simpler components, and basmati rice does this efficiently. Additionally, the rice’s low fat content means it’s less likely to irritate the stomach, which could lead to reflux.
However, it’s important to note that portion control is key. Eating large quantities of basmati rice can lead to overloading the digestive system, potentially causing reflux symptoms in some individuals. Eating in moderation and ensuring that rice is paired with reflux-friendly foods can help prevent discomfort.
Is Basmati Rice a Good Choice for Acid Reflux Diets?
Many people with acid reflux struggle with finding foods that are both nutritious and gentle on the digestive system. Basmati rice can be an excellent addition to a reflux-friendly diet, thanks to its low-fat content and low-acidic properties. It provides an easy-to-digest source of carbohydrates that can be paired with vegetables, lean proteins, and other heartburn-friendly ingredients.
For acid reflux sufferers, a diet rich in whole grains and low-acid foods is often recommended. Basmati rice, being a whole grain when purchased in its brown form, offers significant nutritional benefits, including fiber, which promotes healthy digestion. The fiber content in basmati rice helps absorb stomach acid and can reduce the risk of reflux by keeping the digestive process smooth. Brown basmati rice also provides vitamins like B-complex, which support metabolic processes and contribute to overall health.
Another advantage of basmati rice is that it does not stimulate acid production in the stomach, unlike some foods with higher protein or fat content, which may increase the likelihood of acid reflux. By incorporating basmati rice into meals, individuals with acid reflux can enjoy satisfying, nutritious meals without the worry of aggravating their symptoms.
How to Cook Basmati Rice for Acid Reflux Relief?
While basmati rice itself is considered reflux-friendly, the method of preparation plays a significant role in determining its impact on acid reflux. How you cook basmati rice and what you pair it with can either help soothe or irritate the digestive system. Here are some tips for preparing basmati rice in a way that minimizes the risk of acid reflux:
- Soaking the Rice: Soaking basmati rice before cooking it can help reduce the starch content, making it easier to digest. This process also helps soften the rice and may improve its overall texture, which is beneficial for sensitive stomachs.
- Avoid Excessive Fats: When cooking basmati rice, avoid adding heavy fats or oils, such as butter or cream, which can aggravate acid reflux. Instead, opt for healthier fats like olive oil, which is gentle on the stomach and has anti-inflammatory properties.
- Pairing with Reflux-Friendly Foods: To ensure that your meal remains heartburn-friendly, pair basmati rice with vegetables like zucchini, spinach, or sweet potatoes, and lean proteins such as chicken or fish. These foods are low in acidity and won’t trigger reflux when consumed with rice.
- Avoid Spicy Additions: While basmati rice can be flavorful on its own, it’s important to avoid pairing it with spicy or heavily seasoned ingredients that can irritate the stomach. Opt for milder herbs and spices like parsley or ginger, which are known to have soothing effects on the digestive system.
By following these simple cooking tips, you can ensure that basmati rice remains a safe and satisfying option for managing acid reflux.
Other Considerations: Is Basmati Rice the Best Rice for Acid Reflux?
While basmati rice is an excellent choice for acid reflux sufferers, it’s important to consider other types of rice and grains that may also fit into a reflux-friendly diet. Brown rice and wild rice are also low-acid options that can offer similar digestive benefits. However, basmati rice, particularly in its brown form, stands out due to its aromatic flavor, texture, and the fact that it’s often considered easier to digest than other varieties.
For individuals who are particularly sensitive to starches or carbohydrates, it may be worth experimenting with other grains such as quinoa or oats, which are also generally gentle on the digestive system. Ultimately, the key to managing acid reflux is to choose a variety of foods that work well with your body, paying attention to your symptoms and making adjustments based on your tolerance.
Frequently Asked Questions (FAQs)
1. Is basmati rice acidic?
Basmati rice is considered a neutral food, with a pH range of 6.0 to 7.0, making it non-acidic. This makes it a safe option for individuals managing acid reflux or heartburn, as it does not trigger excess acid production in the stomach.
2. Can I eat basmati rice if I have acid reflux?
Yes, basmati rice is a great option for acid reflux sufferers. Due to its low acidity and easy digestibility, it is gentle on the stomach and unlikely to trigger reflux symptoms when eaten in moderation and paired with other heartburn-friendly foods.
3. Does basmati rice cause heartburn?
Basmati rice itself is unlikely to cause heartburn, as it has a low acid content. However, portion control and preparation are important. Avoid cooking it with heavy fats or spicy ingredients, as these can contribute to heartburn in sensitive individuals.
4. Is brown basmati rice better than white basmati rice for acid reflux?
Both brown and white basmati rice are reflux-friendly options, but brown basmati rice offers higher fiber content, which may help with digestion and reduce the likelihood of reflux. However, both types are generally safe for acid reflux when consumed in moderation.
5. How should I cook basmati rice to prevent acid reflux?
To make basmati rice more reflux-friendly, soak it before cooking to reduce starch content and make it easier to digest. Avoid adding spices, heavy fats, or acidic ingredients. Pair it with vegetables like zucchini or sweet potatoes and lean proteins for a heartburn-safe meal.
6. Can basmati rice help with digestion?
Yes, basmati rice is a digestive-friendly food, especially when consumed in its whole grain (brown) form. The fiber in brown basmati rice promotes healthy digestion and helps absorb stomach acid, reducing the chances of reflux.
7. Is basmati rice a good choice for a low-acid diet?
Basmati rice is an excellent choice for a low-acid diet. Its neutral pH and low-fat content make it an ideal base for meals that do not trigger acid reflux. Pair it with non-acidic foods like leafy greens and lean meats for a balanced meal.
8. Can I eat basmati rice every day on a reflux diet?
While basmati rice is generally safe for acid reflux sufferers, it’s important to practice moderation and variety in your diet. Eating too much of any food, even a gentle one like basmati rice, can lead to digestive issues. Balance it with other low-acid, nutritious foods.
Conclusion: Enjoying Basmati Rice Without Worrying About Heartburn
Basmati rice, with its mild pH, low fat content, and easy digestibility, is a safe food choice for those dealing with acid reflux. Whether you choose white or brown basmati rice, it provides nutritional benefits, supports healthy digestion, and can be included in a reflux-friendly diet when prepared properly. Remember to soak or rinse the rice before cooking, avoid excessive fats, and pair it with low-acid foods for the best results. By following these guidelines, you can enjoy this flavorful grain without the worry of triggering heartburn.
Related Posts


Subscribe for New Racipies
Get mental health tips, updates, and resources delivered to your inbox.