
Spicy Steamed Mussels

Medically reviewed by Christiana George Updated Date: June 8, 2023

Handling mussels, like handling all seafood, is kind of freaky. You wonder what they’re thinking the entire time you’re walking home from the fishmonger. Shell-shocked? Absolutely panic-stricken? After all, the last week or so had to have been the most harried of their lives—being forcibly removed from their homes, plunked onto a bed of ice, removed from the bed of ice, and tossed carelessly into a plastic bag.
I guess I have the tendency to personify bivalves, crustaceans, and all gill-bearing creatures. In one instance, they’re the weird creepy-crawly organisms you study in biology class, living in their watery ecosystems like citizens of another planet. In another, they’re dinner. On your plate, deveined, cracked, peeled, sometimes deep-fried (if you’re lucky!), and dispersed among plates. And somewhere along the way, you’re responsible for this transformation.
Can you tell I’m not used to handling seafood?
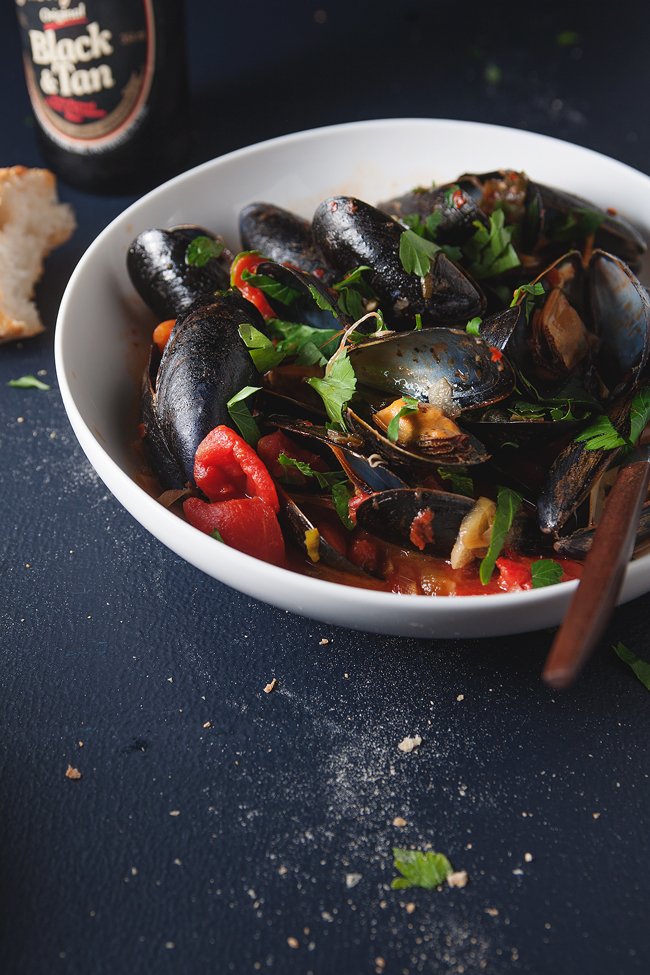
I feel like I should apologize. I’m the worst marketing writer ever. Because how am I supposed to convince you to make this recipe when you’ve now got the image of death-by-steaming on your mind?
Because seafood is delectable, that’s why. And I was quickly able to overcome lay aside my misgivings once the sauce was heartily boiling away, and again later upon uncovering the pot and being smacked in the face by the briny, wine-y aroma of fresh-steamed mussels.
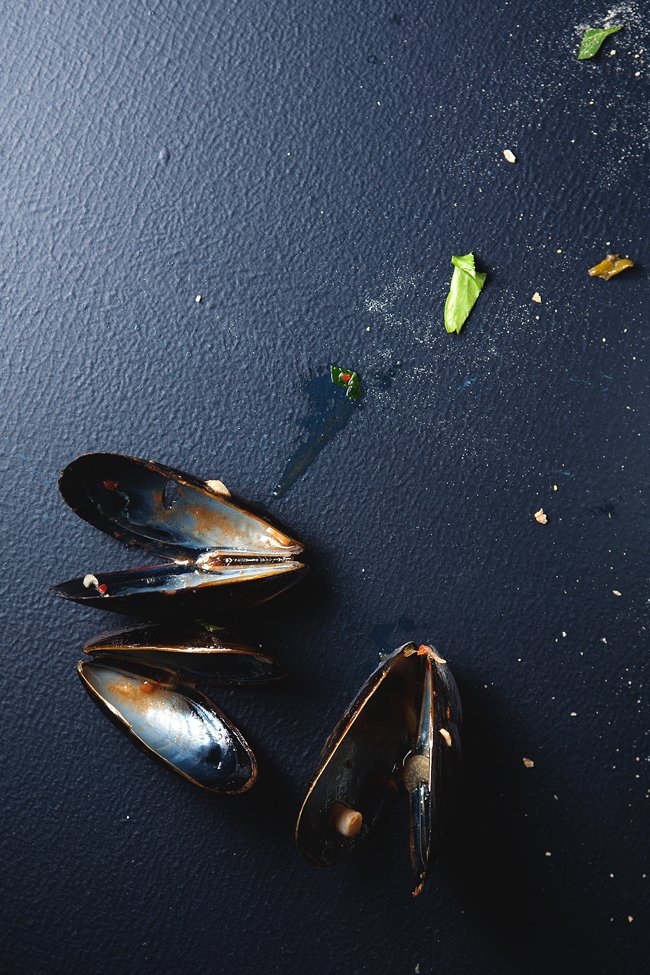
So here’s what, people: steaming your own mussels is not only incredibly easy, but also wonderful in the way only home-cooked meals can be.
For our last lunch in Montauk, we decided to order a heaping plate of steamed mussels served in an uber-creamy, uber-buttery sauce that was so delicious, we ate way more bread than we intended and ended up spoiling our appetites for dinner. With that meal in mind, I decided to try reproducing its decadence a few days later. I steamed three pounds of mussels in a creamy white wine sauce that was simultaneously soul-satisfying but also heavy beyond belief. So, because I wanted more mussels but less cream, I decided to veer in a lighter direction, and go with a spicy tomato-based sauce full of flavor but not fat.
I hate to make it sound like diet food. It’s not. Because you have to serve the mussels with lots of crusty bread to sop up the sauce. Or you could serve it atop pasta and feel a very balanced meal taking shape.
First, though, overcome your mussel-handling fears. At least it’s not a lobster.


SPICY STEAMED MUSSELS IN TOMATO SAUCE
Adapted from SELF
Serves 2 to 3
Ingredients:
2 Tbsp EVOO
15 cloves garlic, thinly sliced
4 scallions, thinly sliced on a diagonal
2 teaspoons salt
2 pounds mussels
2-1/2 cups canned diced tomatoes
1 cup dry white wine
2 tsp red pepper flakes
1 handful fresh flat-leaf parsley
Directions:
Clean mussels thoroughly and remove beards (but only right before cooking). Discard any mussels with broken shells or ones that won’t close if you push the shell down for a few seconds.
Heat the oil in a large skillet over medium-high heat. Cook sliced garlic, scallions and salt, stirring occasionally, until scallions and garlic color slightly, about 5 minutes. Add tomatoes and pepper flakes, and use your spatula to break up the tomatoes a little. Add the wine and mussels. Bring to a boil. Reduce heat to medium, cover and cook until mussels open, 2 to 3 minutes. Discard any mussels that don’t open. Uncover pan and add parsley; toss to combine. Divide mussels evenly among 4 bowls and spoon broth over them. Serve with bread.
Related Posts






Subscribe for New Racipies
Get mental health tips, updates, and resources delivered to your inbox.
Are Toasts Acidic? Understanding Toasts and Acid Reflux


For individuals managing acid reflux or heartburn, it’s crucial to be mindful of the foods consumed. While many may assume bread and toast are neutral or safe, it’s important to understand how toasts impact acid reflux. Are toasts acidic? In this article, we will explore the relationship between toasts and acid reflux, their pH levels, and how to make toast a more reflux-friendly food.
The Acidity of Toasts: How Bread Affects pH Levels
The acidity of foods can play a significant role in managing acid reflux. Bread, including toasts, is often considered a low-acid food. The pH of toast typically ranges between 5.0 and 6.0, which makes it more on the neutral to slightly alkaline side. Toast, as a form of bread, doesn’t generally contribute to stomach acid production, and it’s unlikely to trigger heartburn for most individuals.
However, the way toast is prepared can influence its potential to cause reflux symptoms. For instance, when bread is toasted, the process removes moisture, which can change its texture but not significantly affect its acidity. It’s important to understand that while bread itself is low-acid, its toppings or what you pair it with can make a big difference. Butter, oil, or acidic spreads like ketchup can potentially aggravate acid reflux symptoms.
Author Tip: 7 Kinds of Foods to Avoid with GERD
How Toasts Interact with the Digestive System?
When you consume toast, it enters the digestive system as a carbohydrate, which is easy for the stomach to process. Toast, especially when made from whole-grain bread, provides a good amount of fiber. Fiber is beneficial for digestion, as it helps move food through the gastrointestinal system and prevents constipation, which is often linked to acid reflux flare-ups.
Toast is not known to relax the lower esophageal sphincter (LES), which is the muscle that prevents stomach acid from entering the esophagus. Foods that relax the LES, such as high-fat or spicy foods, can worsen reflux symptoms. Fortunately, toast doesn’t have this effect and can be part of a heartburn-friendly diet when consumed with care.
Do Toasts Trigger Acid Reflux?
While toast itself is generally considered safe for those with acid reflux, certain factors can contribute to discomfort. The biggest concern with toast for acid reflux sufferers is the toppings and accompaniments. Butter, jam, peanut butter, or even cheese can all potentially contribute to acid reflux by increasing fat intake or causing irritation. Additionally, white bread toast, although still low in acid, may cause some people to experience bloating or indigestion due to its higher glycemic index and refined carbohydrates.
However, whole-grain toast tends to be a better option for those with acid reflux, as it contains more fiber and nutrients, which help support digestion and reduce the risk of reflux. As long as you avoid acidic or fatty toppings, toast can be a gentle option for breakfast or as a snack.
How to Make Toast More Reflux-Friendly?
To make toast a part of a reflux-safe diet, it’s important to pay attention to how it’s prepared. Here are some tips to help you enjoy toast without the risk of acid reflux:
- Choose Whole-Grain Bread: Opt for whole-grain or sourdough bread rather than refined white bread, which can cause bloating or indigestion. Whole grains provide more fiber and have a lower glycemic index, making them easier to digest.
- Avoid Acidic or Spicy Toppings: Be cautious with spreads like tomato-based sauces, mustard, or vinegar, as they can trigger heartburn. Instead, use mild, heartburn-friendly spreads such as almond butter, avocado, or a light drizzle of olive oil.
- Limit High-Fat Toppings: Fatty spreads like butter or margarine can relax the LES, increasing the chances of acid reflux. Opt for lighter alternatives or simply enjoy toast plain.
- Pair with Non-Acidic Foods: Combine toast with non-acidic foods like bananas, leafy greens, or low-fat yogurt to create a more balanced, reflux-safe meal.
By making these simple modifications, you can enjoy toast without worrying about triggering acid reflux.
Author Tip: Are Avocado Toasts Acidic?
Are Toasts Safe for a Low-Acid Diet?
Toast can be a safe and comfortable food for those following a low-acid diet. Since it has a neutral pH, it doesn’t contribute to acid buildup in the stomach or irritate the esophagus. Additionally, toast can serve as a good base for meals, allowing you to pair it with digestive-friendly foods such as lean proteins, vegetables, or smooth nut butters.
For those on a GERD (gastroesophageal reflux disease) diet, toast can be part of a balanced meal, especially when paired with foods that are known to reduce reflux symptoms. Whole-grain toast can be more beneficial than white bread toast because of its additional fiber and nutritional content, which can help keep the digestive system functioning properly.
Frequently Asked Questions (FAQs)
1. Are toasts acidic?
Toasts are generally low-acid foods, with a pH range of 5.0 to 6.0, making them neutral to slightly alkaline. This means they are typically safe for those managing acid reflux.
2. Can I eat toasts if I have acid reflux?
Yes, toast is usually safe for acid reflux sufferers, especially when made from whole-grain bread. However, be mindful of the toppings you choose to avoid triggering symptoms.
3. Does toast cause heartburn?
Toast itself does not typically cause heartburn, as it has a neutral pH. However, fatty or acidic toppings like butter, jam, or ketchup can potentially trigger heartburn or reflux symptoms.
4. Is whole-grain toast better than white toast for acid reflux?
Yes, whole-grain toast is often a better choice for acid reflux sufferers. It contains more fiber and nutrients, which help with digestion and may reduce the risk of reflux compared to white bread.
5. How should I prepare toast to avoid acid reflux?
To avoid acid reflux, choose whole-grain bread, avoid acidic toppings like tomato or vinegar, and limit high-fat spreads like butter. Pair with non-acidic foods like avocado or almond butter.
6. Is toast good for a low-acid diet?
Yes, toast is a good option for a low-acid diet. It has a neutral pH, making it unlikely to cause discomfort for those managing acid reflux.
7. Can I eat toast every day if I have acid reflux?
Toast can be part of your daily diet, but it’s important to keep variety in your meals. Choose whole-grain bread, avoid fatty or acidic toppings, and pair it with digestive-friendly foods.
8. Can toast help with digestion?
Toast, especially whole-grain bread, is digestive-friendly because of its fiber content. Fiber helps with digestion by promoting regular bowel movements and reducing constipation, which can exacerbate acid reflux.
Conclusion: Can You Enjoy Toast with Acid Reflux?
Toasts, particularly when made from whole-grain bread, are generally safe for acid reflux sufferers due to their neutral pH and easy digestibility. The main concern for those managing acid reflux lies in the toppings and the types of bread used. By making mindful choices, such as opting for whole-grain bread, avoiding acidic or fatty spreads, and pairing your toast with reflux-safe ingredients, you can enjoy toast without the worry of triggering heartburn.
Related Posts


Subscribe for New Racipies
Get mental health tips, updates, and resources delivered to your inbox.