
Are Chickpeas Safe for Acid Reflux?

Medically reviewed by Aneeza Pervez Updated Date: January 5, 2026

Acid reflux, commonly referred to as heartburn, occurs when stomach acid flows back into the esophagus, causing irritation and discomfort. For individuals managing this condition, dietary choices play a pivotal role in reducing symptoms.
One frequently asked question is whether chickpeas—a popular legume—are safe to consume for those suffering from acid reflux. Let’s dive deep into the topic to uncover the facts.
Nutritional Profile of Chickpeas
Chickpeas, also known as garbanzo beans, are nutrient-dense and offer several health benefits. Here’s a breakdown of their nutritional content per 100 grams (cooked):
| Nutrient | Amount | % Daily Value (DV) |
| Calories | 164 kcal | 8% |
| Protein | 8.9 g | 18% |
| Dietary Fiber | 7.6 g | 30% |
| Carbohydrates | 27.4 g | 9% |
| Fat | 2.6 g | 4% |
| Potassium | 291 mg | 8% |
| Magnesium | 48 mg | 12% |
| Iron | 2.9 mg | 16% |
Chickpeas are a rich source of fiber, plant-based protein, and essential nutrients such as magnesium, potassium, and iron.
These attributes make them a healthy addition to many diets, including those focused on weight loss, heart health, and diabetes management. But how do they fare for acid reflux sufferers?
Chickpeas and Acid Reflux: The Connection
1. Acidic vs. Alkaline Nature
Chickpeas are mildly alkaline, with a pH level ranging from 6 to 7. This makes them less likely to trigger acid reflux compared to highly acidic foods like citrus fruits or tomatoes.
2. High Fiber Content
The high fiber content in chickpeas aids in digestion by promoting regular bowel movements. This can prevent constipation, which is often linked to increased abdominal pressure and exacerbation of acid reflux symptoms.
3. Low Fat Content
Fatty foods relax the lower esophageal sphincter (LES), a muscle that prevents stomach acid from entering the esophagus. Chickpeas are low in fat, reducing the risk of LES relaxation and subsequent acid reflux episodes.
4. Potential Triggers for Some Individuals
Despite their benefits, chickpeas can sometimes cause bloating and gas in sensitive individuals. These symptoms can increase abdominal pressure, potentially worsening acid reflux. Cooking chickpeas thoroughly and consuming them in moderation may help mitigate this.
Author Tip: 7 Kinds of Foods to Avoid with GERD
Benefits of Chickpeas for Acid Reflux
1. Rich in Alkaline Minerals
Chickpeas contain magnesium and potassium, which are known to reduce acidity in the stomach. These minerals can provide relief from acid reflux symptoms by neutralizing excess stomach acid.
2. Supports Gut Health
The soluble fiber in chickpeas acts as a prebiotic, feeding beneficial gut bacteria. A healthy gut microbiome has been associated with reduced inflammation and improved digestion, which can indirectly benefit those with acid reflux.
3. Weight Management
Maintaining a healthy weight is crucial for managing acid reflux, as excess weight can put pressure on the stomach and LES. Chickpeas are filling yet low in calories, making them an excellent choice for weight-conscious individuals.
How to Safely Include Chickpeas in an Acid Reflux Diet?
Here are some practical tips to enjoy chickpeas without triggering acid reflux:
- Cook Thoroughly: Ensure chickpeas are well-cooked to reduce their gas-producing potential. Use a pressure cooker or soak them overnight before cooking.
- Avoid Spices and Fats: When preparing chickpeas, avoid adding spicy or fatty ingredients, as these can trigger acid reflux. Opt for mild seasonings like turmeric, cumin, or parsley.
- Portion Control: Start with small portions and monitor your body’s response. Overeating can lead to discomfort and exacerbate reflux symptoms.
- Combine with Alkaline Foods: Pair chickpeas with alkaline foods like leafy greens or cucumbers to create a reflux-friendly meal.
Chickpea-Based Recipes for Acid Reflux
1. Chickpea and Vegetable Salad
Ingredients:
- 1 cup cooked chickpeas
- 1 cup chopped cucumbers
- 1 cup diced bell peppers
- 1 tbsp olive oil
- 1 tsp lemon juice (optional, depending on tolerance)
- Fresh parsley
Instructions: Mix all ingredients in a bowl, and season with a pinch of salt and cumin. This refreshing salad is light and gentle on the stomach.
2. Creamy Chickpea Soup
Ingredients:
- 2 cups cooked chickpeas
- 4 cups low-sodium vegetable broth
- 1/2 cup diced carrots
- 1/2 cup diced celery
- 1 tbsp olive oil
- A pinch of turmeric
Instructions: Sauté carrots and celery in olive oil until tender. Add chickpeas, broth, and turmeric. Simmer for 20 minutes, then blend until creamy.
Author Tip: 7-Day Meal Plan For Gastritis
Scientific References Supporting Chickpea Benefits
Several studies highlight the benefits of chickpeas for digestive health:
- Fiber and Gut Health: A 2017 study published in Nutrients emphasized the role of dietary fiber in promoting gut health and preventing digestive disorders.
- Alkaline Foods and Acid Reflux: Research in the World Journal of Gastroenterology (2018) found that a diet rich in alkaline foods can reduce GERD symptoms.
- Weight Loss and GERD: A study in Obesity Reviews (2020) concluded that weight loss significantly reduces GERD symptoms, underscoring the importance of calorie-conscious foods like chickpeas.
Final Verdict
Are chickpeas safe for acid reflux? For most individuals, the answer is yes. Their alkaline nature, high fiber content, and low fat make them a reflux-friendly food. However, individual tolerance varies, and it’s essential to monitor how your body responds.
By preparing chickpeas mindfully and incorporating them into a balanced diet, you can enjoy their numerous health benefits without aggravating acid reflux.
If you’re new to chickpeas or managing acid reflux, consult a healthcare provider or dietitian for personalized advice. With the right approach, chickpeas can be a nutritious and delicious addition to your diet.
Related Posts


Subscribe for New Racipies
Get mental health tips, updates, and resources delivered to your inbox.
Cranberry Ginger Scones

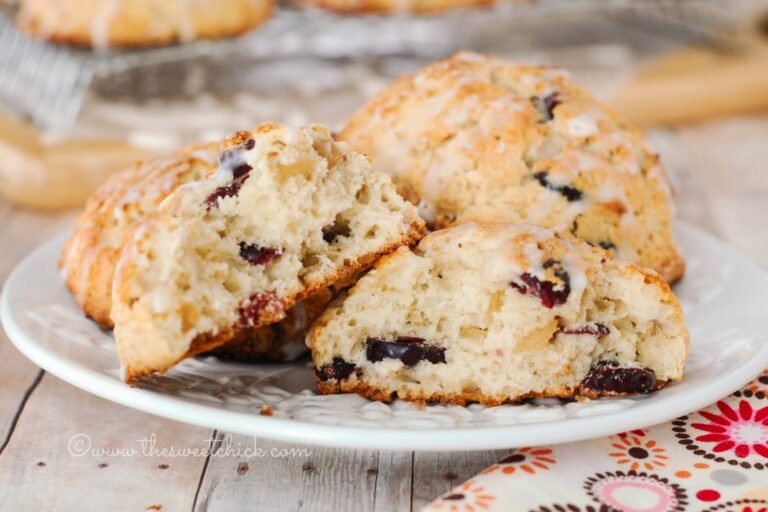
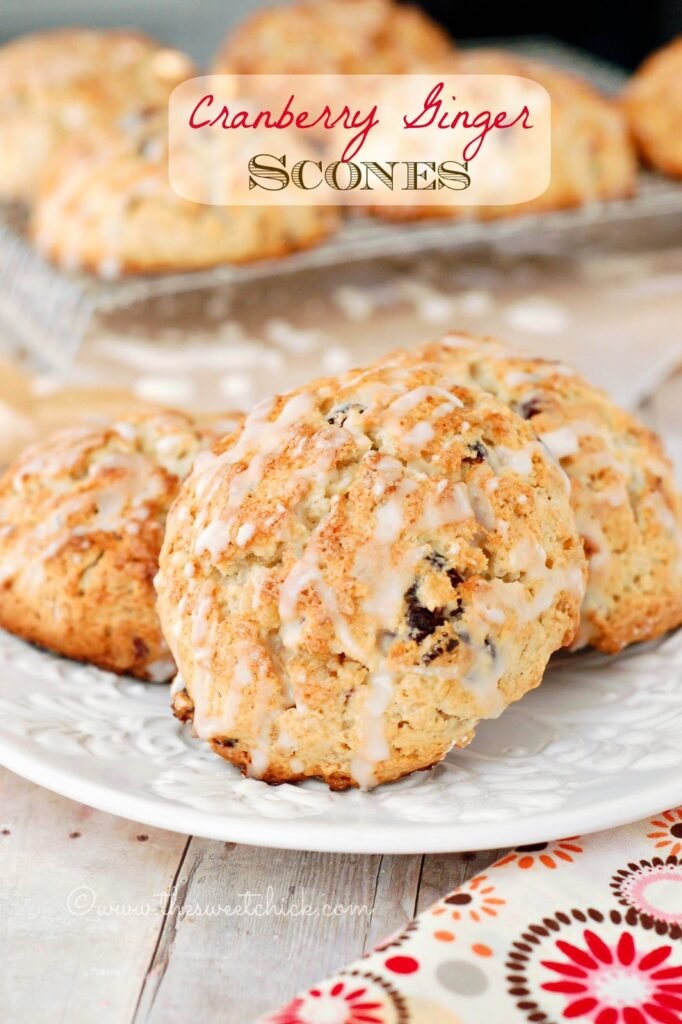
I was so upset this morning when my donut recipe failed. I had to make something to cheer myself up. Scones are so easy to make, they seemed like a reasonable solution. I scoured the pantry for what to put in them. I have made a variety of scones in the past, Maple Bacon Scones, Lemon Cranberry Scones, Biscoff Chocolate Chip Scones, Mini Maple Strawberry Chocolate Chip Scones, Dulce de Leche Stuffed Scones, etc. The flavor combinations are endless.
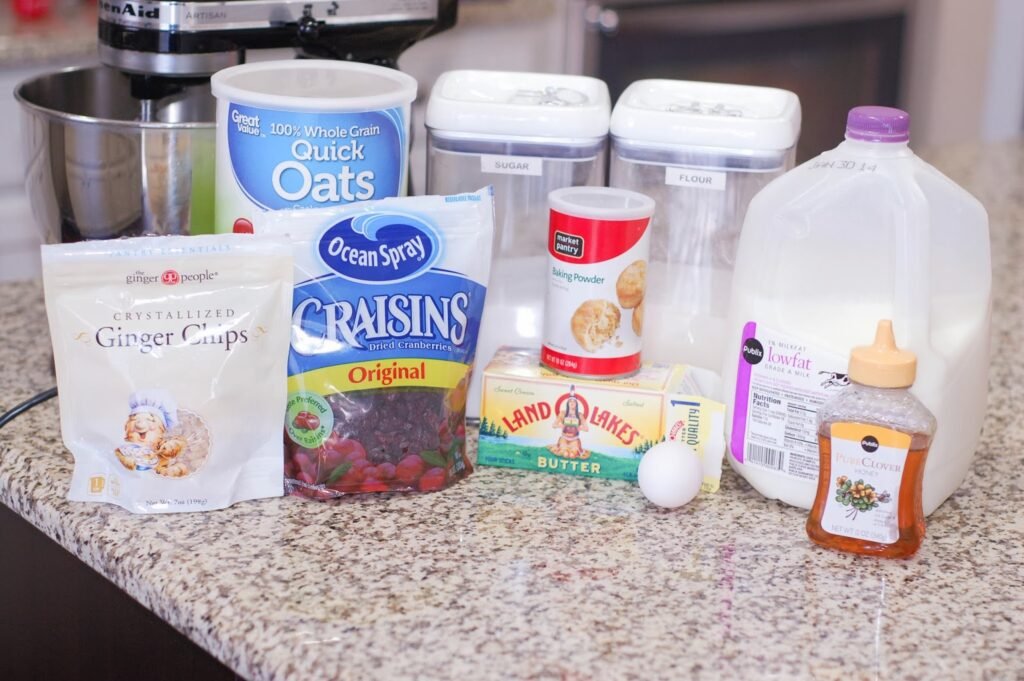
I had some leftover crystallized ginger chips that I used in my Pumpkin Gingerbread Cupcakes. These chips have a little bit of sweetness and a lot of ginger sassiness. They add so much flavor to baked goods. I have never mixed ginger and cranberry before, but I like to take risks. I also added some honey for extra sweetness. For a little texture, I threw in some quick oats.
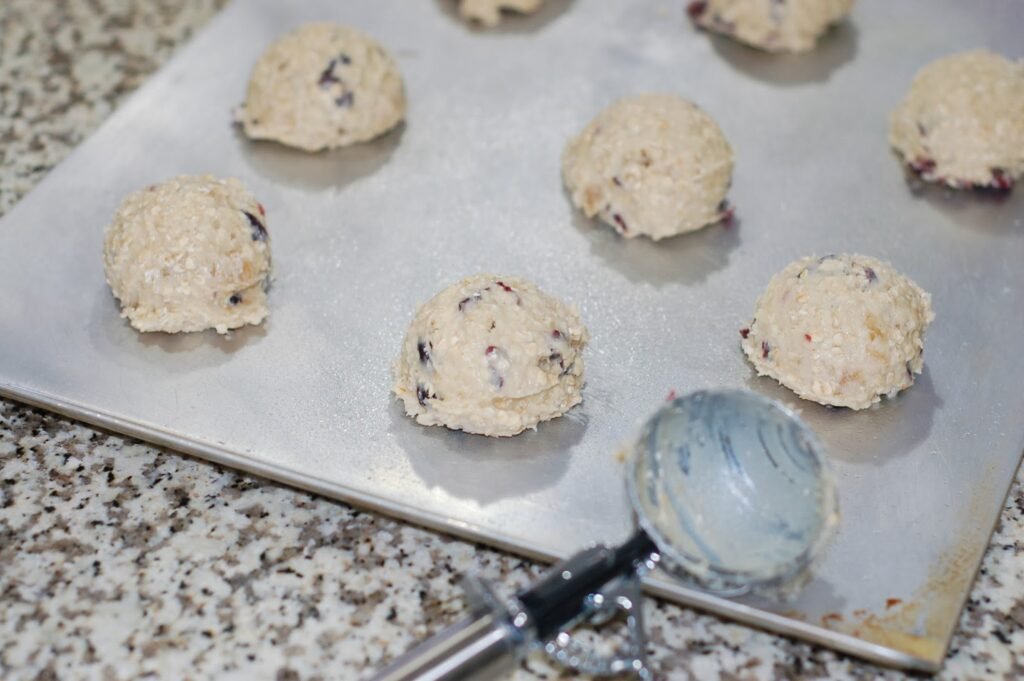
Sometimes I roll out the dough to make triangles, but today I was already frustrated, so I kept it simple. I grabbed the biggest scoop I had and just placed the scoops onto a cookie sheet.
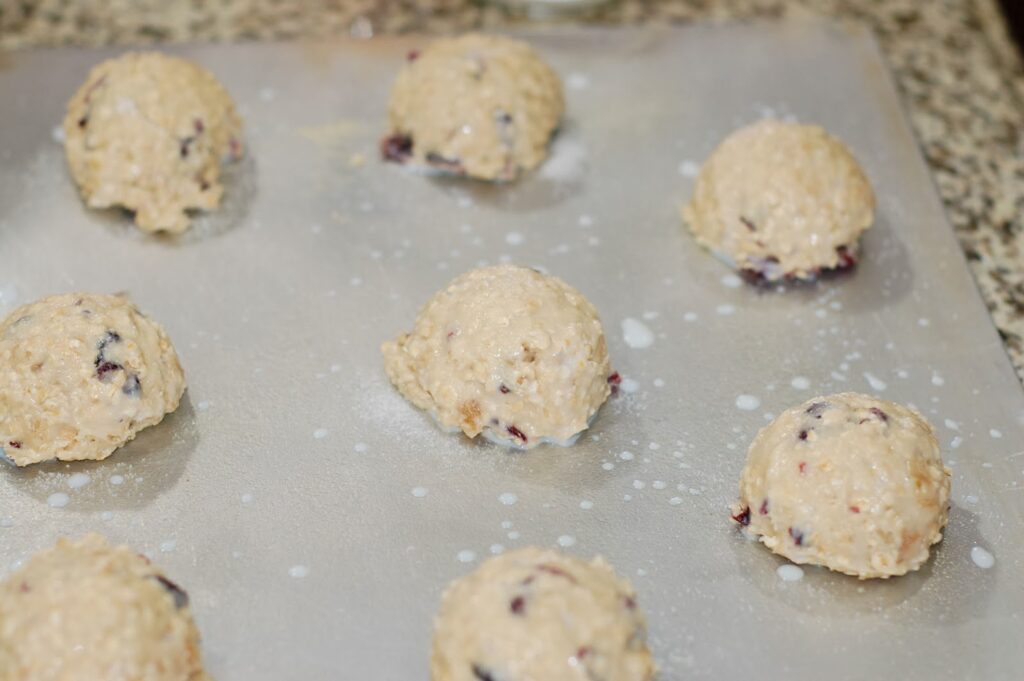
I wanted to add a little sugar coating to these, so I brushed the dough with milk and sprinkled them generously with sugar.
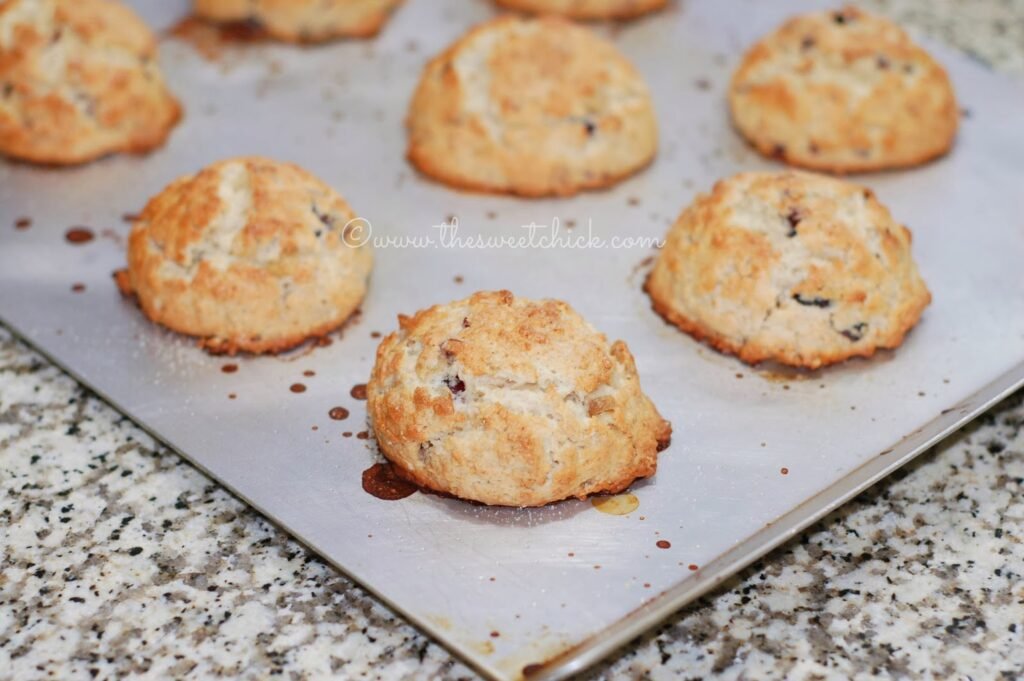
These scones came out looking perfect. The were a nice golden color. (Be careful not to burn yourself on the hot sugar.) I love the way they cracked. You can see all the nooks and crannies. I couldn’t wait to try one.

But I had to add just one more thing. A little bit of glaze. I didn’t want a heavy glaze, just a drizzle to finish off these beauties.
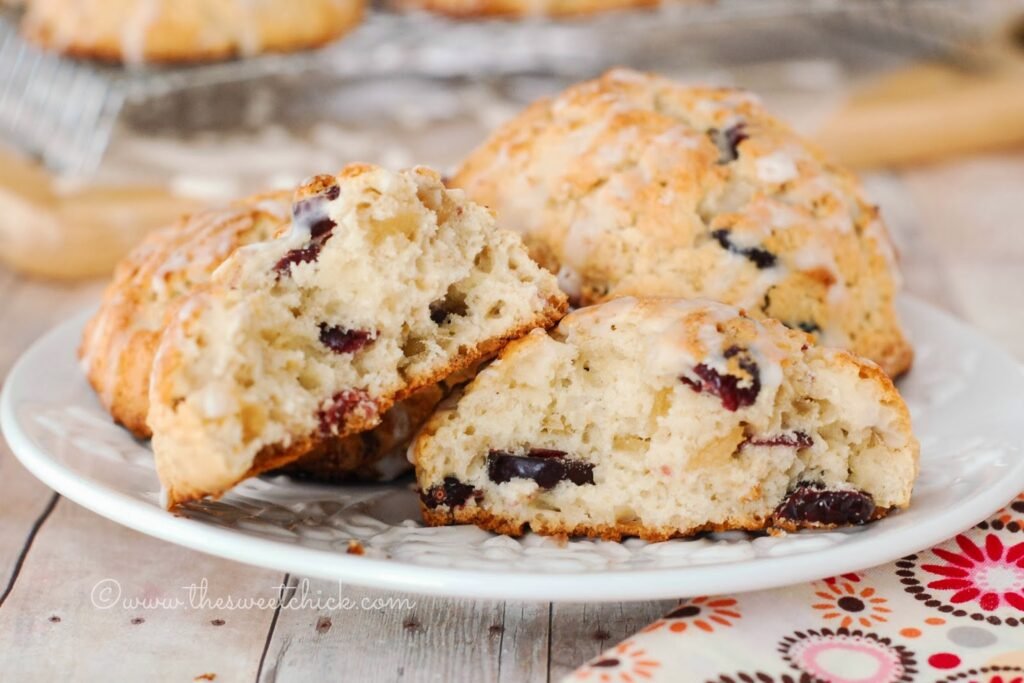
I love how the outside is a little crispy from the sugar, but the inside is soft and fluffy. The ginger and cranberry DO taste amazing together. And the honey was the perfect choice for that added sweetness and it doesn’t compete with the other flavors. I am definitely using honey again in my scones.

These Cranberry Ginger Scones just made my day. I can now forget about my dry donuts that stuck to the pan and took forever to clean. I am going to go dip my scone in my coffee now and think happy thoughts!
Cranberry Ginger Scones
by The Sweet Chick
Prep Time: 10-15 minutes
Cook Time: 13-15 minutes
Keywords: bake breakfast dessert snack cranberries quick oats ginger chips honey scones American
Ingredients (12 scones)
For the scones
- 2 cups flour
- 1/3 cup sugar
- 2 teaspoons baking powder
- 1 cup quick oats
- 1/2 cup dried sweetened cranberries
- 1/2 cup crystallized ginger chips
- 6 tablespoons cold butter
- 1/2 cup milk
- 1 egg
- 1/3 cup honey
For the topping
- 2 tablespoons milk
- 1-2 teaspoons sugar
For the glaze
- 1 cup powdered sugar
- 3 tablespoons milk
- 1/2 teaspoon vanilla extract
Instructions
For the scones
Preheat oven to 425° F.
In a stand mixer, mix flour, sugar, baking powder, oats, cranberries, and ginger chips.
Cut up butter and add to flour mixture, mixing on low speed for 1 minute.
In a small bowl mix egg and milk until blended and add to the flour mixture.
Then add honey and mix on low speed until fully incorporated. The batter will be a dough like consistency.
With a large scoop, place dough onto a greased cookie sheet. Do not flatten.
For the topping
Brush the tops and sides of each scone with milk and sprinkle with about 1/4 teaspoon or less of sugar.
Bake for 13-15 minutes or until toothpick inserted in middle comes out clean.
Remove from oven and carefully place scones on cooling rack with wax paper underneath. (Scones will be extra hot due to the sugar.)
For the glaze
In a small bowl whisk together powdered sugar, milk, and vanilla until smooth.
Using the whisk, drizzle the scones with as much or as little glaze as you prefer.
You can wait for the glaze to set or go ahead and eat one!
Related Posts






Subscribe for New Racipies
Get mental health tips, updates, and resources delivered to your inbox.