
Japanese Strawberry Shortcake

Medically reviewed by Christiana George Updated Date: January 6, 2026
The four weeks of intense preparation leading up to the wedding involved: more hours than I’ve ever before spent on Pinterest combing through ideas, freaking out about said ideas because Pinterest has a way of making you feel inadequate ya know?, ten trips to Papersource, two kinds of embossing powder, a heat gun, nine rolls of washi tape, 50 yards of ribbon, calligraphy nibs, ink, kraft paper, vellum paper, four kinds of caramel, ‘harvesting’ the rosemary bush in my parent’s backyard (thanks Dad!), multiple trips to the nursery for lavender plants (thanks Jean!), sorting through busted window frames to find the one perfectly chipped and worn-out specimen that would serve as our rustic-chic escort card holder, dozens of email exchanges between my vendors and me, and too many heated arguments with my soon-to-be-husband to count.
Not that I’m complaining. The day of our wedding was pretty rad, as far as single days go. I got to see friends and family and family friends who I haven’t seen in ages, spend time in home-sweet-home California (in a beach town, no less), and, well, MARRY MY SOULMATE! So, ya know, as far as effort versus outcome goes, I’d say it was all worth it. I’ll share photos when they’re available.
I have an admission though: I didn’t make my own wedding cake like I said I would. I know, I know. What good are my words? But, I don’t think anyone in real life was in support of this idea, although my sister kept bravely persisting until the very end. I called it off after realizing how much a logistical pain-in-the-butt it would be, and you know what? Our caterers made us a double-tier devil’s food cake with espresso buttercream, and it was moist and delicious and decked out with flowers and I couldn’t have done a better job myself. Not even close.
In any case, after all the excitement, it was nice to take a few more weeks off to recover. It’s an ongoing process, but I’ve brought us up to speed.

I’ve been obsessed with the idea of Japanese-style spongecake ever since my self-prescribed sugar break and I vowed to make one after the wedding. It’s not strictly Japanese though, as you’ll find cakes like this in lots of Asian bakeries. You’ll know what I mean if you’ve ever been to one.
There are three factors that distinguish them from their Western counterparts–
A light, weightless even, cake that’s slightly eggy and not too sweet. I guess it’s similar to angel food cake—heck, it might be the same thing as angel food cake, except the batter in this case consists primarily of beaten eggs with just the bare minimum of sugar and flour added to give it structure. My mom used to make something very similar when my sister and I were growing up, except I remember cream of tartar being a key component to assist in the weightlessness, the lift, so she was probably baking angel’s food cake instead.
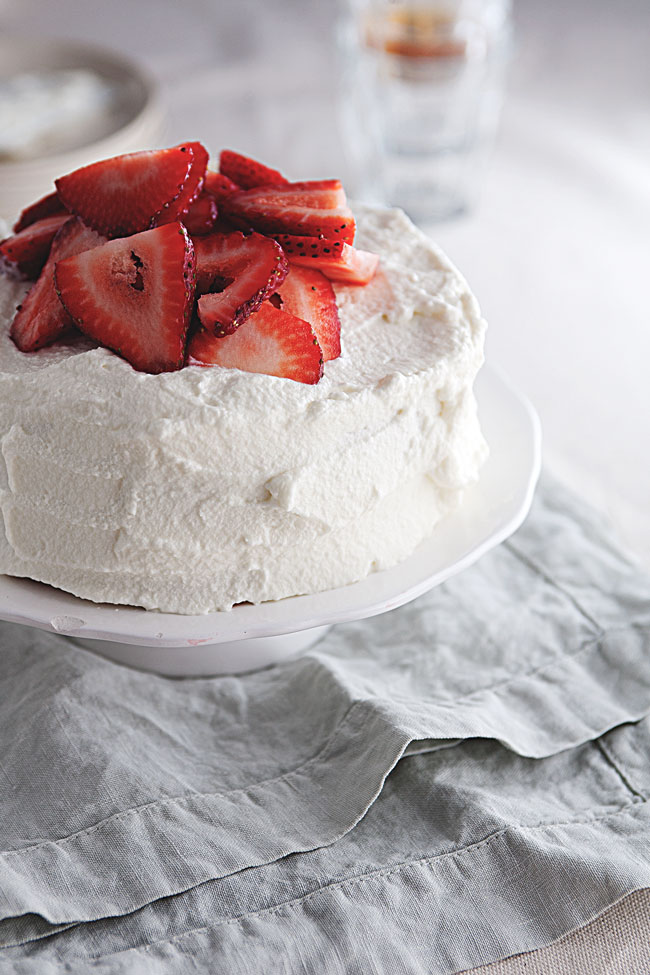
The frosting. Asian frosting is the lightest stuff, buoyant wisps of barely-there sweetness. In fact, for the longest time, I couldn’t stand American-style frostings—the buttercreams and ganaches and all the other yada-yadas stuffed to their saturation point with sugar. To this day, I tend to scrape off most of the frosting on a slice of cake, preferring the interior cake-y goodness (speaking of which, what do you call the interior when you’re trying to differentiate it from the frosting?). But I’m quite defenseless against the summons of vanilla whipped cream. In this case, I slathered it in between the layers and all over the exterior of the cake, thick clouds of fluff. I suspect Asian bakeries use stabilized whipped cream.

And finally, the fruit. The fruit is the pièce de resistance. There’s nothing Asian people (well, I can actually only speak for the Chinese) love more than fresh fruit, so they go a little crazy when they get to use it to embellish their cakes. Strawberries, grapes, kiwi, mango, it’s all arranged orderly, concentrically… and to quite cheesy effect, in my opinion, which is why I decided to just pile mine on and hope for the best. It does make slicing kind of annoying, but fresh strawberries are a must for that Pocky effect.
This recipe produces a spot-on cake. That’s all I can say. I was brought back to all those birthdays and other special occasions of my youth which always produced one of these lovelies by the end of the evening. Also, watch the video because the woman who runs the channel is really (really really) cute.
JAPANESE STRAWBERRY SHORTCAKE
Adapted from The Little Teochow, originally from Ochikeron (Youtube)
Ingredients: (take note, I’ve officially switched over to weight measurements!)
For the cake:
2 large eggs
60 grams sugar
60 grams cake flour (or, the same amount of all-purpose flour with 1 T replaced with corn starch), sifted a few times
20 grams butter, melted
For the simple syrup:
1.5 T hot water
1/2 T sugar
For the vanilla whipped cream:
1-1/4 cup heavy cream, cold
1 to 2 T sugar
1/4 t vanilla extract
1 lb. strawberries
Directions:
For the cake:
Butter a 6-inch baking pan and cut out a round sheet of parchment paper to fit on the bottom. Preheat the oven to 325 degrees F.
Beat the eggs and sugar over a bain marie (hot water bath) until the sugar melts and the mixture is warm, about room temperature. Remove the bowl from the water bath and beat the mixture on high until it triples in volume. (I used the bowl of my mixer, so I could transfer it easily to my stand mixer.) It will become very light and foamy and form a ribbon of batter when you take the whisk out. This should take about 5 minutes at speed 8 using my stand mixer. Reduce the speed to low for a minute or so to set the mixture.
Sift in the cake flour in three additions, each time gently cutting through the mixture with a whisk to mix the flour in. Sprinkle the butter into the bowl, and gently fold it in with a spatula. The batter should still be reasonably foamy.
Pour the batter into the baking pan, taking care to distribute it as evenly as you can. Rap the pan a couple times against your counter to eliminate any big air bubbles.
Bake 25 to 28 minutes until the center is set. Cool the cake upside down still in its pan on a baking sheet. Once it’s cool, slice it into two equal-sized rounds. Feel free to wrap it tight and store it at this point.
Assembling the cake:
Wash and prepare your strawberries. I sliced mine lengthwise, but you can also halve them, or whatever you’d like. Some of the strawberries will go in the inner layer of the cake, but the rest will top the cake decoratively, so keep that in mind.
Make the whipped cream by mixing the heavy cream, sugar, and vanilla extract and beating it until it forms soft peaks. (A few minutes on medium-high speed on my stand mixer. Take care not to overmix!)
Make the simple syrup by stirring together the sugar and hot water until the sugar has melted. Brush the syrup on the sliced side of one of the cake rounds. Spread a few dollops of whipped cream evenly on top, then place on top of that the sliced strawberries. Add another layer of whipped cream. Brush the rest of the syrup onto the sliced side of the remaining cake round, and place it over the whipped cream layer. Now you can “frost” the cake however you like, but since the whipped cream is pretty flimsy, don’t obsess over making the cake look perfect. I just spread it all over the surface of the cake and did my best not to get crumbs everywhere. Top with the remaining strawberries.
Serve and enjoy! I would recommend eating the whole thing right away, since it doesn’t save well in the fridge.
Related Posts
Subscribe for New Racipies
Get mental health tips, updates, and resources delivered to your inbox.
Dark Chocolate Guinness Rice Krispie Treats

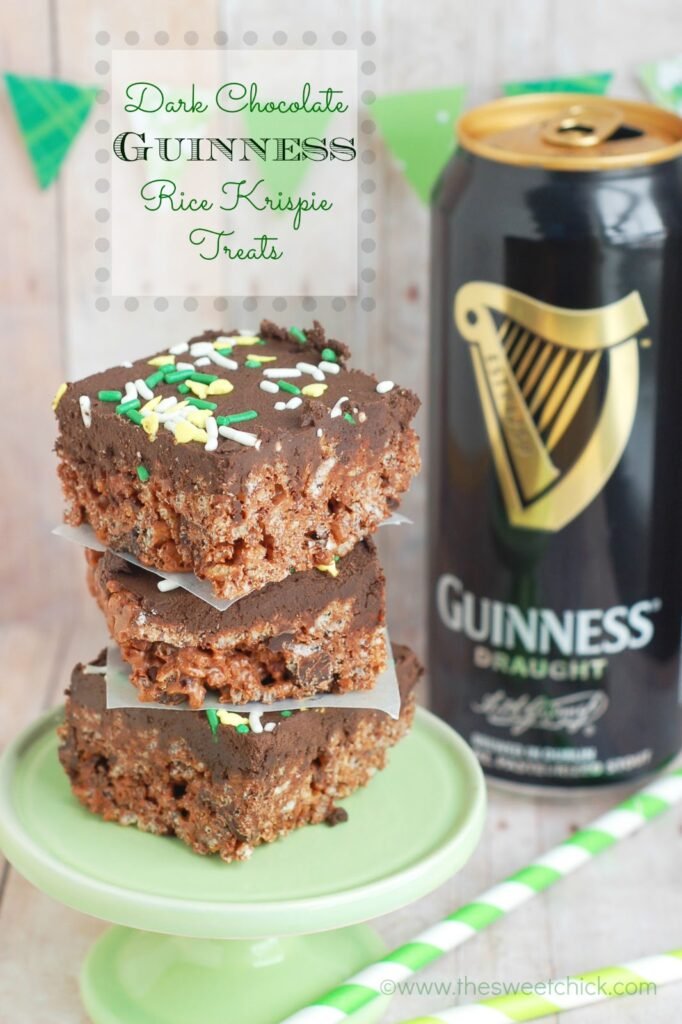
Funny thing…I actually didn’t acquire a taste for beer till the last two months of pregnancy with my son. Now don’t get any silly ideas in your head that I was pounding back beers while carrying precious cargo. It was summer time, my husband had just brewed a nice light cerveza and I took a few sips and enjoyed the taste for a change. So after I gave birth and was done breast-feeding, my husband, the beer connoisseur, started bringing home different beers every week for me to try. He was all excited to have a new beer partner and eager student.

When he brought home some Guinness one night for me to try, he didn’t have any high hopes that I would like it. But surprisingly, that was one of my favorites. I liked the smooth dark, slightly bitter taste. Well, that just started the ball rolling. Next thing I knew, he and I were boarding a plane headed to the lush emerald green island of Ireland. It was an incredible trip of pub-hopping in downtown Dublin, touring the Guinness factory, taking a train ride out into the country passing by beautiful farms, cozy little towns, and seeing lots of ruins of ancient castles. And of course, eating some spectacular food. If you ever get a chance to go to Ireland, do it. All the locals were extremely friendly and there is so much to see and do.

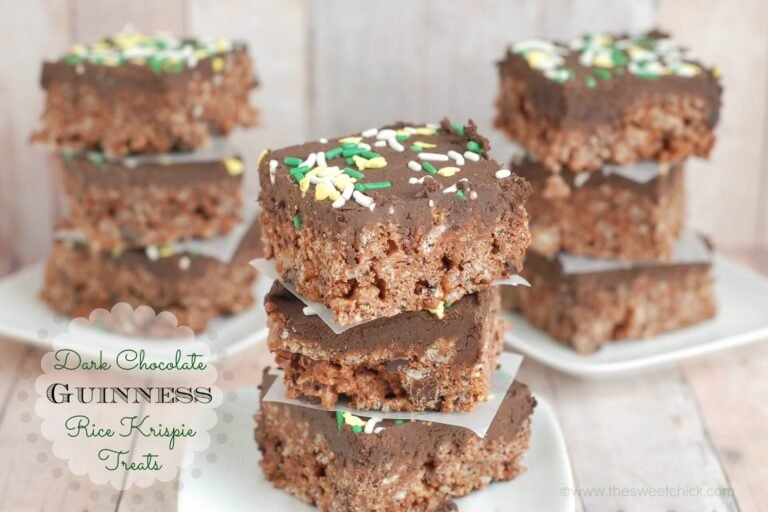
Anyways, I digress. Back to the recipe. I have used Guinness in baking before in cupcakes and brownies. But I was looking for something different. How about a crunchy Guinness treat? Yeah, that’s the ticket. Guinness goes great with chocolate, so I paired it up with dark chocolate. I boiled down a cup of Guinness to less than 1/4 cup, then mixed it with Ghirardelli bittersweet baking chips before adding it to the marshmallows and Rice Krispies. And on top of that , mixed in some Hershey’s Dark Chocolate Chips.

As if that wasn’t enough dark chocolate for you, I topped it off with some Guinness dark chocolate frosting that is to die for. I boiled down another cup of beer and again mixed it with some bittersweet chocolate before adding it to a dark chocolate frosting. Oh. Em. Gee. I was eating the frosting by the spoonful. You really don’t taste any beer in either the treats or the frosting, but the boiled down syrup does bring out all the goodness of the dark chocolate.

The frosting is light, fluffy and not overly sweet. It is a perfect pairing for the treats, but I think it would be great for cakes and cupcakes as well. If you don’t want to make the Rice Krispie squares with frosting, you can cut them out into shamrock shapes and cover them with some almond bark or candy melt and decorate. I even got a little silly and traced out a pint glass shape and decorated it with white almond bark and chocolate candy melts.

You can have as much fun as you like, but for the love of Guinness, don’t waste any beer while making these. You will need to open two cans of beer, just make sure there is someone there to drink the rest. And in case you didn’t figure it out already, these are NOT for children. Although I did burn off most of the alcohol, I still made sure to keep these far away from my children. They can wait till they are 21 years old to eat them.
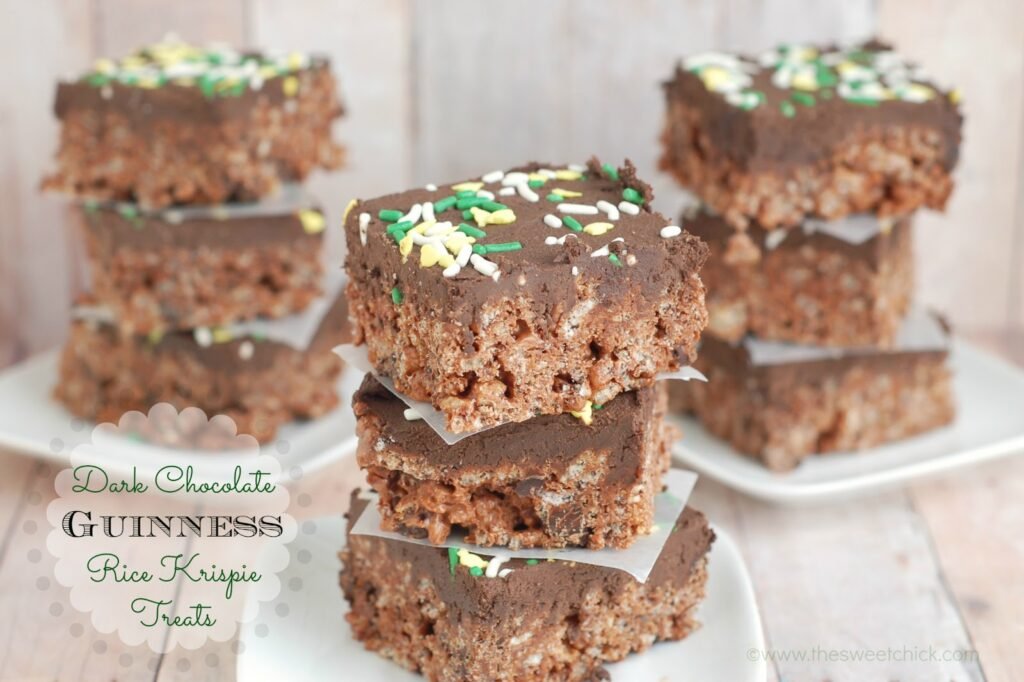
Dark Chocolate Guinness Rice Krispie Treats
by The Sweet Chick
Prep Time: 15-20 minutes
Cook Time: 20 minutes
Keywords: stove top dessert snack rice krispies dark chocolate dark chocolate chips marshmallows St. Patrick’s Day bars rice krispie treats American
Ingredients (24 bars)
For the bars
- 1 cup Guinness beer
- 1/3 cup Ghirardelli 60% Cocoa baking chips
- 3 tablespoons butter
- 4 cups mini marshmallows
- 6 cups Cocoa Krispies
- 1 cup Hershey’s Dark chocolate chips
For the frosting
- 1 cup Guinness beer
- 1/3 cup Ghirardelli 60% Cocoa baking chips
- 2 cups powdered sugar
- 1/4 cup Hershey’s Dark cocoa
- 1/2 cup vegetable shortening
- 1/2 teaspoon vanilla
- 3-4 tablespoons milk
Optional toppings
- sprinkles
Instructions
For the bars
Place beer in a small saucepan and bring to a boil over medium heat. Boil for 15 minutes, until beer is reduced to a little less than a 1/4 cup of liquid.
Remove from heat and add the Ghirardelli baking chips. Stir until all the chocolate is melted. Then put it aside to cool off a little and thicken.
In a large sauce pan, melt butter and marshmallows over low heat. Stir until completely melted.
Remove from heat and add the beer/chocolate mix. Stir until completely mixed.
Then add the Rice Krispie cereal and the Hershey’s chocolate chips. Mix until all is well incorporated.
Then pour the mixture into a greased 9 x 13 pan or a cookie sheet and spread it evenly with a piece of waxed paper.
Place in fridge to cool and set.
For the frosting
Place beer in a small saucepan and bring to a boil over medium heat. Boil for 15 minutes, until beer is reduced to a little less than a 1/4 cup of liquid.
Remove from heat and add the Ghirardelli baking chips. Stir until all the chocolate is melted. Then put it aside to cool off a little and thicken.
In a stand mixer, place the powdered sugar and cocoa. Mix on low until well blended.
Then add the shortening, vanilla, and beer/chocolate mixture. Mix on medium speed until frosting starts to come together.
Add milk 1 tablespoon at a time until frosting becomes light and fluffy.
Spread the frosting evenly over the chilled Rice Krispie Treats with a spatula and add sprinkles if desired.
You can keep the treats refrigerated if you are not eating them right away. However, they can be left out at room temperature.
Related Posts






Subscribe for New Racipies
Get mental health tips, updates, and resources delivered to your inbox.