
Are Tuna Sandwiches Acidic? Tuna Sandwich and Acid Reflux

Medically reviewed by Aneeza Pervez Updated Date: January 7, 2026
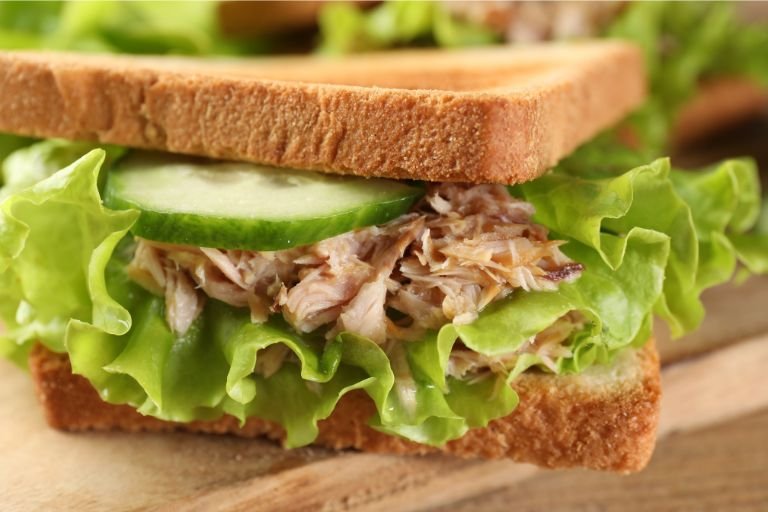
Tuna sandwiches are a classic and versatile meal loved for their simplicity, flavor, and nutritional benefits. Whether packed as a quick lunch or enjoyed as a light dinner, this sandwich is a go-to for many.
However, if you’re someone who experiences acid reflux or is cautious about consuming acidic foods, you may find yourself wondering: Are tuna sandwiches acidic? And if so, can they aggravate acid reflux symptoms?
The relationship between food acidity and digestive health is crucial, particularly for individuals with GERD (gastroesophageal reflux disease) or recurring heartburn. Certain foods can trigger acid reflux, and understanding how your favorite meals affect your body is the first step toward managing symptoms.
In this article, we’ll explore the acidity of tuna sandwiches, their potential impact on acid reflux, and provide practical tips to enjoy them without discomfort. Whether you’re looking for dietary guidance or a low-acid tuna sandwich recipe, we’ve got you covered!
Are Tuna Sandwiches Acidic?
To determine whether tuna sandwiches are acidic, we need to examine their core ingredients, as the acidity of the sandwich largely depends on the combination of foods used. Here’s a breakdown:
- Tuna:
Research provides that tuna, whether fresh or canned, is mildly acidic with a pH level of 5.2 to 6.1. While it’s not highly acidic, it leans more towards the acidic side of the pH scale. - Bread:
The bread you use plays a significant role in determining the overall acidity of your sandwich. Most bread varieties, including white and whole wheat, have a pH range of 5.0 to 6.0. However, sourdough bread is more acidic due to its fermentation process. - Mayonnaise:
A common spread for tuna sandwiches, mayonnaise contains acidic ingredients like vinegar or lemon juice, giving it a pH level of around 3.5 to 4.0. This makes it one of the more acidic components of a typical tuna sandwich. - Toppings:
- Tomatoes: With a pH of 4.0 to 4.5, tomatoes are highly acidic and can increase the overall acidity of your sandwich.
- pickles: Due to their vinegar content, pickles are very acidic, with a pH of 3.2 to 3.5.
- Lettuce: Lettuce, on the other hand, is neutral to slightly alkaline, with a pH of 6.0 to 7.0.
When combined, these ingredients make tuna sandwiches slightly acidic. However, the degree of acidity depends on the specific ingredients used and their proportions.
Tuna Sandwiches and Acid Reflux
Acid reflux is a condition where stomach acid flows back into the esophagus, causing symptoms like heartburn, indigestion, and chest discomfort.
Certain foods are known to exacerbate acid reflux, particularly those that are acidic, fatty, or spicy. So, how do tuna sandwiches fit into this picture?
How Tuna Sandwiches May Trigger Acid Reflux?
- Acidic Ingredients: Components like mayonnaise, tomatoes, and pickles are highly acidic and can irritate the esophagus, especially for individuals prone to acid reflux.
- Fatty Additions: Mayonnaise is not only acidic but also high in fat, which can relax the lower esophageal sphincter (LES) and allow stomach acid to escape into the esophagus.
- Bread and Bloating: Bread, particularly when consumed in large quantities, can contribute to bloating, which increases pressure on the LES and exacerbates reflux symptoms.
Individual Variations
Not everyone will experience acid reflux from eating tuna sandwiches. Factors such as portion size, ingredient choices, and individual sensitivity play a significant role in how this dish affects your digestive system.
Related To Read: Can You Eat Triggerfish? Exploring Safe and Delicious Options
How to Make a Low-Acid Tuna Sandwich?
If you enjoy tuna sandwiches but want to avoid triggering acid reflux, here are some effective tips for creating a low-acid version:
1. Choose Low-Acid Bread
- Opt for whole-grain bread with no added sugars.
- Consider sprouted grain bread, which is less acidic and more nutrient-dense.
- Avoid sourdough bread, as it tends to be more acidic.
2. Replace Acidic Ingredients
- Mayonnaise Substitute: Use Greek yogurt, mashed avocado, or hummus as a lower-acid alternative.
- Tomatoes: Replace with cucumber slices or bell peppers for a similar crunch and freshness without acidity.
- Pickles: Swap pickles with fresh dill or parsley for flavor without the acid.
3. Add Alkaline Ingredients
Incorporate ingredients that help neutralize acidity, such as:
- Leafy greens like spinach or kale.
- Alkaline vegetables like shredded carrots or zucchini.
Example Recipe for a Low-Acid Tuna Sandwich
- Ingredients: Canned tuna, sprouted grain bread, mashed avocado, spinach, and cucumber slices.
- Directions: Mix tuna with mashed avocado, spread onto the bread, and top with spinach and cucumber slices for a fresh, low-acid sandwich.
Are Tuna Sandwiches Healthy for People with Acid Reflux?
Tuna sandwiches, when prepared carefully, can still be a healthy and satisfying meal option for individuals with acid reflux.
- Nutritional Benefits of Tuna:
- Rich in protein, which supports muscle repair and maintenance.
- A great source of omega-3 fatty acids, which promote heart health and reduce inflammation.
- Balancing Nutrition and Acid Reflux:
- Keep portions moderate to avoid overeating, which can worsen reflux symptoms.
- Choose healthier ingredients that balance flavor with acidity to enjoy the sandwich without discomfort.
Related To Read: Are Fish Sticks Healthy – 10 Healthy And Unhealthy Facts
Tips for Managing Acid Reflux While Eating Tuna Sandwiches
- Eat Smaller Portions:
Large meals can increase pressure on the LES, leading to acid reflux. Opt for smaller, more frequent meals instead. - Avoid Spicy or Fatty Additions:
Ingredients like hot sauce or large amounts of mayonnaise can aggravate reflux symptoms. - Pair with Alkaline Foods:
Serve your tuna sandwich with a side of alkaline-rich foods like green beans, broccoli, or a banana. - Time Your Meals Wisely:
- Avoid lying down immediately after eating.
- Wait at least 2-3 hours before bedtime to reduce nighttime reflux.
- Stay Hydrated:
Drink water before or after your meal rather than during, as this can help improve digestion and reduce pressure on your stomach.
FAQs About Tuna Sandwiches and Acid Reflux
1. Can I eat tuna sandwiches if I have GERD?
Yes, but choose a low-acid version by swapping mayonnaise and acidic toppings with milder alternatives like avocado or cucumbers.
2. Is fresh tuna less acidic than canned tuna?
Fresh tuna tends to be slightly less acidic than canned tuna, but the difference is minimal.
3. What bread is best for acid reflux?
Sprouted-grain bread or whole-grain bread without added sugar is the best choice for individuals with acid reflux.
4. Can tuna sandwiches trigger heartburn?
Yes, they can if they include acidic or fatty ingredients like mayonnaise, pickles, or tomatoes. Opting for low-acid substitutes can help prevent heartburn.
5. Are there any herbs or spices I can add for flavor without increasing acidity?
Yes, use mild herbs like parsley, dill, or basil, which enhance flavor without adding acidity.
6. Can I eat tuna sandwiches on a low-acid diet?
Absolutely! Just make the necessary adjustments, such as replacing acidic ingredients with low-acid alternatives.
Conclusion
Tuna sandwiches are mildly acidic, but their overall impact on acid reflux depends on how they’re prepared. By making simple swaps, such as using low-acid bread and avoiding acidic toppings, you can enjoy this delicious and nutritious meal without triggering discomfort. Remember, moderation is key, and always listen to your body to determine what works best for you.
If this guide was helpful, share it with friends or explore our other resources for more acid reflux-friendly recipes and tips!
Related Posts



Subscribe for New Racipies
Get mental health tips, updates, and resources delivered to your inbox.
Is Potato Salad Healthy? [ 3 Best Potatoes for Potato Salad]

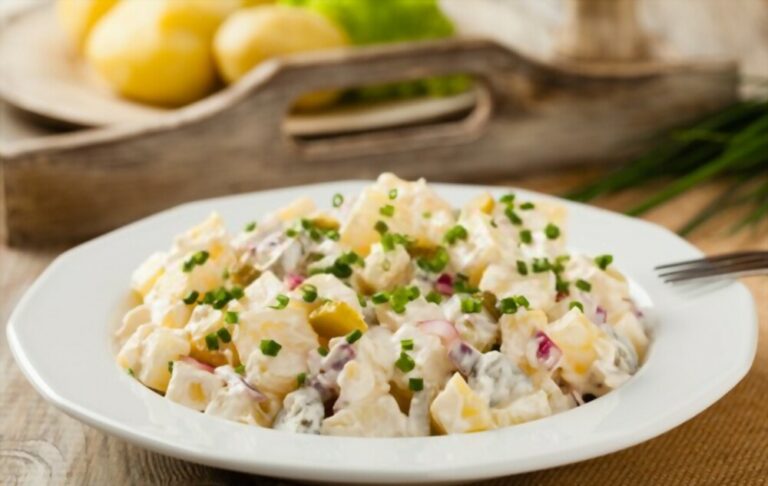
Getting sick of boring tasteless diet recipes but don’t want to compromise with your diet? Then try potato salad!
Potato salad is healthy, especially a good choice for you in the summer for short runs, as it helps to improve the immune system and bowel health. In the process, it also helps you to lose weight. But if you eat potato salad continuously, it may bring out some negative impacts.
Nutrition is good, but overnutrition is not good at all. As you know, a cup of potato salad contains more than 357 calories and 20.5 gm fat. Additionally, it slows down the metabolism a little bit.
So, if you want a healthy diet for a short run, try potato salad!
5 Ways Potato Salad Healthy for You
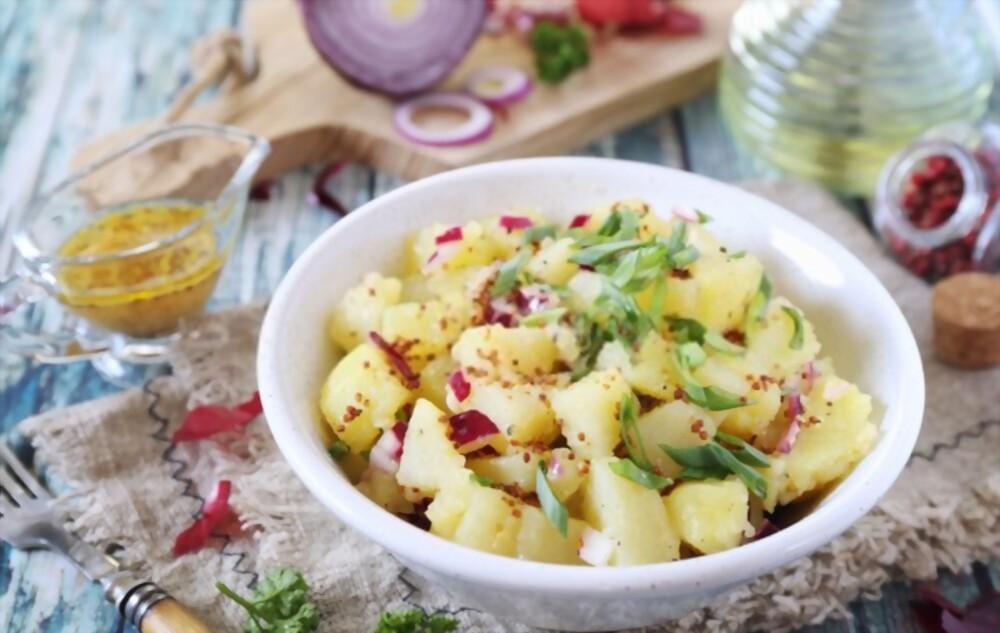
If you are looking for a heart healthy diet, then you are in the right place! Potato salad can be healthy for you in many aspects. How?
Well, let’s get into more details then.
Rich in Vitamins
Potatoes are not only rich in potassium and fiber but also packed with lots of healthy vitamins and minerals such as fiber, folate, vitamin B, vitamin C, and so on.
So, basically potassium helps to regulate fluid balance, nerve signals, and muscle contractions. Not only that but also it protects you against stroke and prevents kidney stones.
In addition, folate helps in metabolism where Vitamin C is responsible for growth and repairing of the body tissues.
On top of that, Vitamin B is needed in cellular functions of your body such as breaking down the carbohydrates and transporting the required nutrients throughout your body.
Not only that but also it keeps your brain running properly without any issues!
Controls Blood Pressure and Lowers Cholesterol
The potassium of potatoes especially helps you to control your blood pressure and the fiber can help to lower your cholesterol.
For example, fiber helps to digest food and keeps blood cholesterol levels in check. Potassium helps your heartbeat to stay regular. Not only that but also it moves nutrients into cells and water out of cells.
On top of that, if you want to reduce the harmful effects of sodium on your body, then potassium can help too!
So, if you are suffering from a high cholesterol issue, then it can be a great solution for you!
Improves Blood Circulation
Not only that, but also potatoes have niacin that can convert your consumed food into fuel and improves your overall blood circulation.
On top of that, niacin helps to lower cholesterol and boosts brain function.
If you are lethargic and always worried about your tiredness, then try eating potato salad to keep yourself energized the whole day long!
A Great Source of Energy
In addition, carbohydrates are a great source of energy to keep you going for the day long. If you eat a salad of small potatoes, then you can get around 110 calories.
Basically you need carbohydrates as a main source of energy that helps to fuel your brain, heart muscles, central nervous system, and kidneys.
On top of that, from each gram of carbohydrates, you can get around 4 calories. Cool, right?
When your body gets carbohydrates from any food, it breaks down into glucose. You mainly get the energy for your brain and muscles from glucose.
Provides Extra Calories
If you use any other condiments like cheese, sour cream, butter, salt, then the calories will increase and you will get extra fat and sodium.
For your body to function properly, you must need calories that can absorb energy from your consumed food and drink.
When you eat and drink, your body stores the excess calories as body fat. So, if you are looking for extra calories or want to gain weight, then it might be a good choice for you!
However, if you want to maintain an average calorie a day (2500 kcal), then be careful on your diet!
Now, let’s show how much nutrition a cup of potato salad (250 gm) contains!
| Nutritional Components | Amounts |
| Calories | 358 kcal |
| Fat | 12 gm |
| Saturated Fat | 3.6 gm |
| Polyunsaturated Fat | 9.3 gm |
| Monounsaturated Fat | 6.2 gm |
| Cholesterol | 170 mg |
| Sodium | 1323 mg |
| Potassium | 635 mg |
| Carbohydrates | 28 gm |
| Dietary Fiber | 3.3 gm |
| Protein | 6.7 gm |
| Vitamin A | 392.5 IU |
| Vitamin C | 25 mg |
| Calcium | 47.5 mg |
| Iron | 1.62 mg |
| Magnesium | 37.5 mg |
| Folate | 17.5 mcg |
| Phosphorus | 130 mg |
| Zinc | 0.78 mg |
| Copper | 0.3 mg |
| Manganese | 0.25 mg |
| Selenium | 10.25 mcg |
| Retinol | 72.5 mcg |
| Beta-Carotene | 90 mcg |
| Thiamin | 0.19 mg |
| Riboflavin | 0.15 mg |
| Niacin | 2.22 mg |
| Pantothenic Acid | 1.34 mg |
| Vitamin B-6 | 0.35 mg |
| Vitamin B-12 | 0 mcg |
Also read:
Is Mac and Cheese Healthy? Calories, Nutrition, and a Awesome Recipe
What Potatoes are Best for Potato Salad?
As you already know, potato salad tends to get mushy. So, if you want your salad from falling apart, then use the best potatoes. Now you might be wondering which are the best ones for Potato Salad?
Well, let me tell you then!
Waxy Potatoes
In the case of avoiding mushy potato salad and experiencing a classic potato salad, avoid russet potatoes and use waxy textured potato instead, like the fingerlings, Yukon gold, red potatoes or new potatoes.
They will not only offer a creamy texture in the salad, but also provide low starch and high moisture.
Now, make sure that you are buying the ripe ones because they are going to give you a smooth, firm texture. So, ensure that you are not buying the sprouted ones!
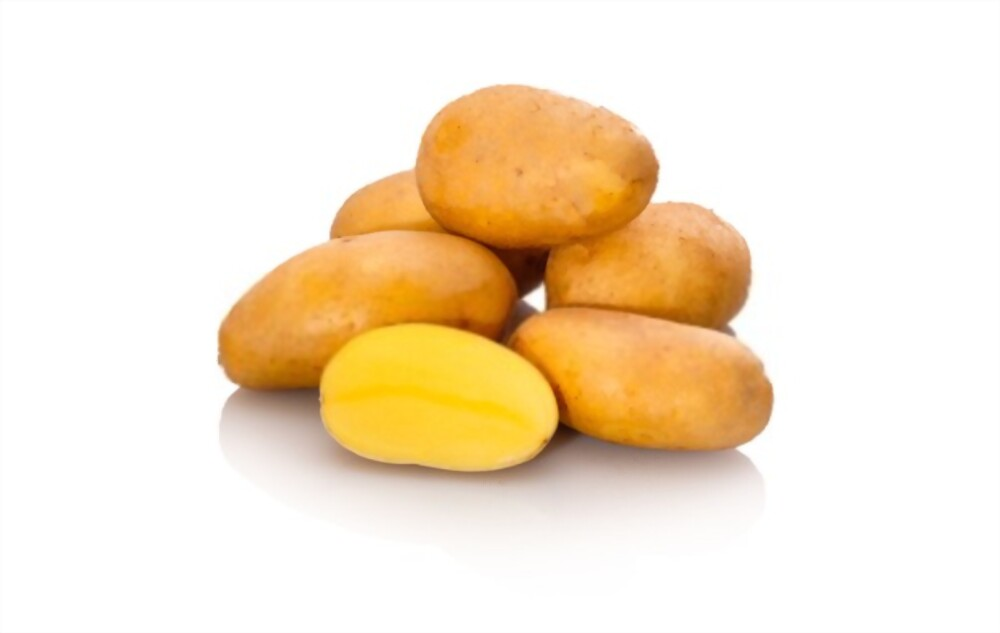
By using waxy potatoes, you will be able to experience the taste of a classic potato salad. But do use the potatoes without peeling to have the smooth texture and shape.
When you are making a classic potato salad, don’t cook for a longer period. After that, you will get firm and crunchy potatoes.
However, if you cook for too long, then you will get the mushy ones which might not be a classic combination.
So, make sure your potatoes are soft, tender and creamy if you want to have a classic potato salad.
All-Purpose Potatoes
If you are looking for a potato with medium starch and moisture, then ‘Goldilocks’ might be one of the good choices!
This type of potato provides a perfect balance of texture that can go along with any potato dish.
Basically, if you are craving potato salad but only have simple potatoes at home, then you can still make a simple yet delicious combination of potato salad.

In this case, Yukon Gold, Purple Majesty, and All Blue might be perfect!
Starchy Potatoes
Potatoes with high starch content and low in moisture will give you a super absorbent taste in salad. They tend to soak up the other ingredients and fall apart while you are cooking them. So, if you are looking for a mushy potato salad, then this is it!
Apart from that, you can use it for mashing and creamy potato salad as well. So, if you are making salad for your babies or your aged parents, then this might be a good choice!

In this case, Russet potatoes, Idaho potatoes, and sweet potatoes variations will do the trick!
Now let’s see the nutritional components of some of the classic variations of potatoes for a perfect potato salad recipe!
| Nutritional Components | Red Potato | Yukon Gold | Fingerlings |
| Calories | 70 kcal | 74 kcal | 110 kcal |
| Protein | 1.89 gm | 2.03 gm | 3 gm |
| Carbohydrates | 15.9 gm | 17.5 gm | 26 gm |
| Fiber | 1.7 gm | 1.4 gm | 2 gm |
| Fat | 0.14 gm | 0.05 gm | 0 gm |
| Sugar | 1.29 gm | 0.68 gm | 1 gm |
| Vitamin A | 0 IU | 0 IU | 0 mcg |
| Beta-Carotene | 0 mcg | 0 mcg | – |
| Vitamin C | 8.6 mg | 18.2 mg | 27 mg |
| Vitamin B6 | 0.17 mg | 0.13 mg | 0.2 mg |
| Vitamin B9 (Folate) | 18 mcg | 11 mcg | 24 mcg |
| Vitamin B1 (Thiamin) | 0.08 mg | 0.07 mg | 0.1 mg |
| Vitamin B2 (Riboflavin) | 0.03 mg | 0.02 mg | 0 mg |
| Vitamin B3 (Niacin) | 1.15 mg | 1.08 mg | 1.6 mg |
| Vitamin B5 (Pantothenic Acid) | 0.3 mg | 0.3 mg | – |
| Magnesium | 22 mg | 16 mg | 24 mg |
| Phosphorus | 61 mg | 41 mg | 60 mg |
| Potassium | 455 mg | 419 mg | 620 mg |
| Iron | 0.73 mg | 0.73 mg | 1.1 mg |
| Copper | 0.13 mg | 0.05 mg | 0.1 mg |
| Calcium | 10 mg | 14 mg | 20 mg |
| Zinc | 0.3 mg | 0.2 mg | 0.3 mg |
Related Post:
Are Lean Cuisines Healthy? Secrets Revealed!
3 Easiest and Healthy Potato Salads You Can Make At Home
At this stage, let me show you how you can make 3 healthy and easiest potato salads at home!
Classic Potato Salad
Having a party next weekend? Then let me tell you first how you can ace your party easily without any hassle.
Classic potato salad is always a crowd pleaser. No matter what occasion, it never dissatisfies anyone!
You will need around 10 mins for prep, 25 mins for cooking, and need to keep the salad in the refrigerator for 2 hours. So altogether you will need 35 minutes.
Ingredients
- Yukon Gold or Red Potatoes (3 Pounds)
- 4 Hard Boiled Eggs
- Mayonnaise (1 Cup)
- Buttermilk (¼ Cup)
- Yellow Mustard (2 tsp) or ½ Dijon
- Minced Dill Pickles (2)
- Splash of Pickle Juice
- Salt
- Pepper
- Chopped Celery (2 Ribs)
- Chopped Red Onion (¼ Cups)
Instructions
- Boil the unpeeled potatoes in a pot. When the water is boiled, lower the heat and simmer for at least 10 to 15 mins.
- Check if the potatoes are fork tender. Then drain the water and cover with a lid to steam the potatoes for another 5 to 10 mins.
- Now, peel the potatoes or cut into ½ inch chunks as you want.
- At this stage, you have to separate the egg yolks and place them in a bowl.
- Now, use a fork and mash the yolks. After that, stir in the buttermilk, pickle juice, salt, pepper, mayonnaise, and mustard.
- Put the dressing over the potatoes and now add the chopped egg whites, pickles, onion, and celery.
- Stir gently and store in the refrigerator for at least a few hours to get the best flavors of classic potato salad!
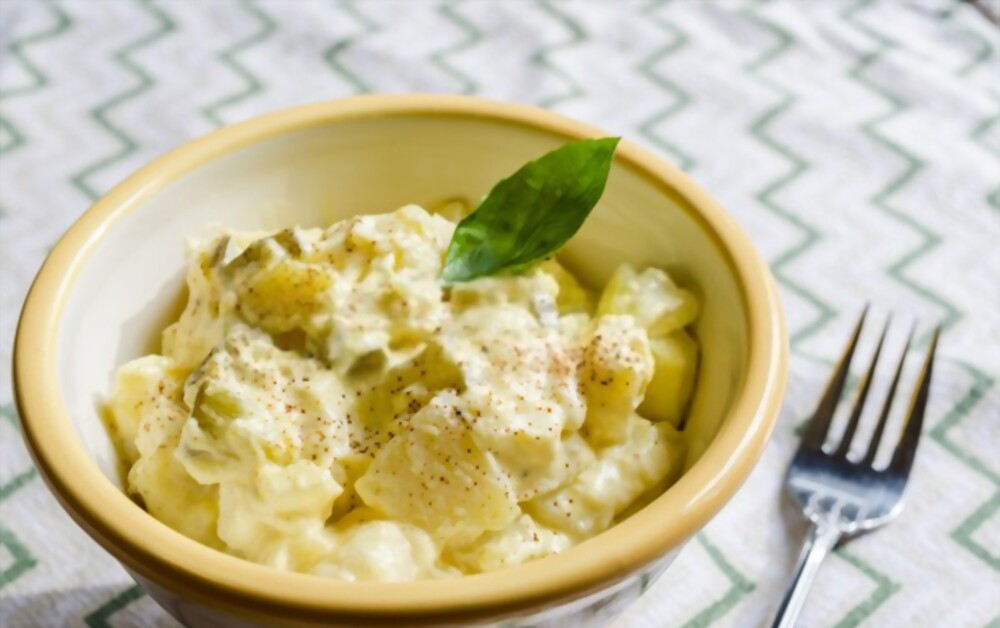
Potato Egg Salad
Looking for a tasty and healthy combination of salad? Then this potato egg salad might be just for you!
To make this salad, you will need about 10 minutes for prep and 20 minutes to cook. While cooling the potatoes, you will need around 4 hours. So, altogether you will need 4 hours 30 minutes.
Now, let’s move onto more details!
Ingredients
- Any Potato (3 Pounds)
- Water
- Yogurt (1 Cup)
- Mustard (2 tsp)
- Sweet Pickle Relish (2)
- Vinegar
- Salt
- Dill
- Paprika
- Pepper
- Onion (¼ Cup)
- Celery (2 Ribs)
- 4 Hard Boiled Eggs
Instructions
- First, add the potatoes in a pot and boil them on high heat until they are tender. Then drain the waiter and set them aside.
- In the meantime, add yogurt, mustard, sweet pickle relish, vinegar, salt, dill, paprika, and pepper in a large bowl and mix after adding 2 tsp of cold water.
- In the dressing, add onion, celery, potatoes, and 4 hard boiled eggs (peeled and chopped finely) in the dressing. Gently mix them.
- Now, cover the salad and refrigerator for at least 4 hours. If you can keep them for 8-12, then it is even better. Then, serve and enjoy!
- You can even store this salad for up to 5 days without any worries.

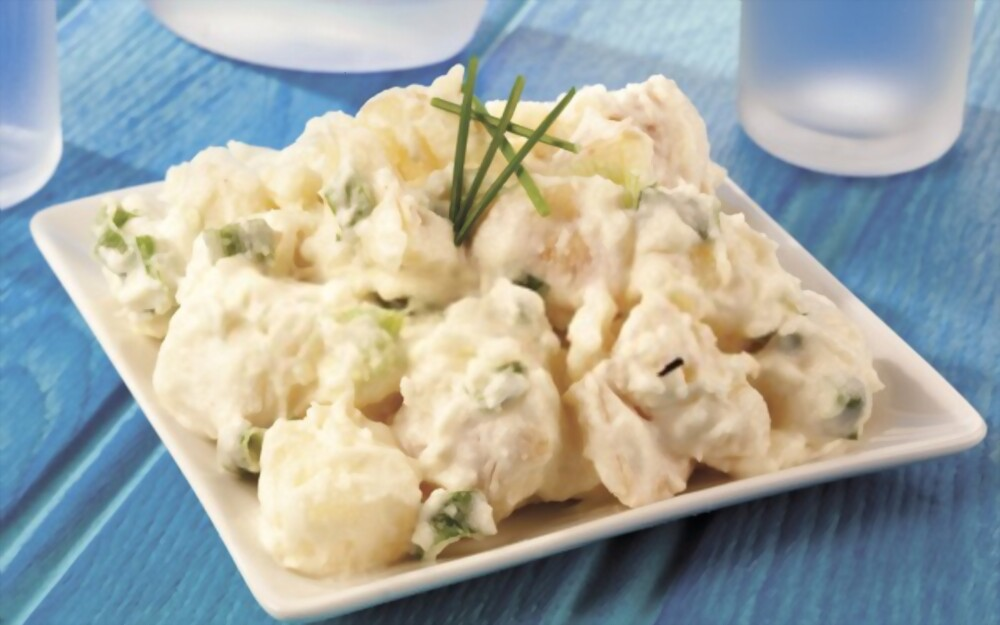
Creamy Potato Salad
Want to cook a potato salad for a family gathering? Then why not try creamy potato salad?
Creamy potato salad is not only creamy in texture but also healthy. So, altogether a perfect combination for any family occasion!
Now let’s get into more details!
You will need 15 mins for prep, 20 mins for cooking. Overall, you will need 35 minutes.
Ingredients
- Yellow, red or white potatoes (2 Pounds)
- Apple Cider or wine or rice wine vinegar (1 tsp)
- Sour Cream (½ Cup)
- Mayonnaise (¼ Cup) [You can even try the homemade one]
- Yellow Mustard or Dijon or Whole Grain Mustard (1 tsp)
- Finely Chopped Red Onion (½ Cup)
- Celery (½ Cup)
- Chopped Dill Pickle (⅓ Cup)
- 2 Chopped Hard Boiled Eggs (Optional)
- Chopped Parsley or Dill or Chives or Tarragon or Cilantro (¼ Cup)
- Salt
- Fresh Ground Black Pepper
Instructions
- Boil potatoes in a pot after seasoning with salt.
- After boiling, simmer. Cook for another 15 to 20 minutes until they are fork tender.
- Prepare an ice bath. Drain the potatoes and place them in the bath.
- When they are cold, peel them and gently chop them into bite-sized chunks.
- Add to a large bowl and put vinegar and salt to taste.
- Meanwhile, add the onions in a bowl and cover with cold water for at least 10 minutes to tone down the raw flavor. Then rinse properly.
- Now, at this stage, stir the mayonnaise, mustard, and sour cream in a bowl.
- Add the mixture, onions, pickles, eggs, celery, and herbs to the potatoes.
- Gently stir and don’t mash too much.
- You can also season it with salt and pepper.
- Store in the refrigerator for at least 30 minutes to get the best taste.
Potato Salad Nutrition Facts [1 Cup]
Now you know all about how to make a cup of healthy potato salad without any unhealthy dressing like mayo, cheese or something like that.
So you might be wondering will this salad contain those healthy nutrients that you are looking for? See it for yourself!
| Nutritional Components | Amounts |
| Serving Size | 1 cup |
| Protein | 12.4 gm |
| Cholesterol | 41 mg |
| Fiber | 2.3 mg |
| Iron | 1 mg |
| Calories | 180 kcal |
| Fat | 1.4 gm |
| Sodium | 203 gm |
| Sugar | 9.2 gm |
| Carbohydrates | 30.6 gm |
| Saturated Fat | 0.4 gm |
| Potassium | 507 mg |
| Calcium | 122 mg |
Other Health Benefits of Potato Salad
As I have already told you that potato salads are packed with so many healthy nutrients, they are a great source of energy for you.
Apart from that, they keep you full for longer and also naturally gluten free. Therefore, reduces joint pain, depression, and improves bone health.
The antioxidants in potato salads help to lower the risk of heart disease and cancer. Not only that but it also improves blood sugar control.
So, considering all of these, if you are eating potato salad, then you are getting a versatile combination of deliciousness and improving your health. Awesome, right?
Is Potato Salad Healthy for Weight Loss?
Now you know what type of potato you should choose for your potato salad.
So you might be thinking which type of potato salad is gonna be healthy for you or going to help you to lose some weight!
Well, you can try lots of different potato salad recipes but will those be healthy?
On that point, let me tell you that, if you want a healthy weight-loss potato salad, you must remember not to add any unhealthy condiments in it! Confused?
In this stage, I am going to share with you a healthy weight-loss potato salad recipe that is low in fat and also packed with protein.
This will also help you to boost your metabolism in the process. One cup of this will give you 180 calories and 12.4 gm protein!
Potato Salad Ingredients
Before buying the required ingredients, make sure to buy them fresh without any dilly-dallying!
Because what makes this potato salad different from others is the flavorful packed dressing. The added flavor punches up the amazing combination of ingredients into this salad and provides low calories, low fat and high protein.
Now, let’s move onto the ingredients for a cup of potato salad (180 calories)!
- Potatoes (5 pounds, bite-sized)
- Greek Yogurt (2 cups)
- Yellow Mustard (2 tsp)
- Sweet Pickle Relish (1 cup)
- Salt (1 tsp)
- Apple Cider Vinegar (1 tsp)
- Dill (1 tsp)
- Paprika (½ tsp)
- Pepper (½ tsp)
- Celery (3 sticks, diced)
- Red Onion (½ , diced)
FAQs
What’s a good substitute for Potato Salad?
If you are looking for an alternative to potato salad, then try vegetable salad!
You can try lots of seasonal vegetables to make your own healthy recipe. For example, you can use cauliflower that has low carbs and you can easily use it as a substitute for potatoes.
Does potato salad raise your blood sugar?
Potatoes tend to raise your blood sugar level.
When you potato salad, then it breaks down the carbs into simple sugars and those flow into your bloodstream freely.
So, if you want to avoid this type of spike in blood sugar level, do avoid eating potato salads.
Can my baby eat potato salad?
If your baby is over 9 months, then you can feed your baby potato salad without any worries!
However, do remember to avoid any unhealthy stuff while making potato salad for babies like extra mayonnaise, sour cream, or cheese. They might not be able to digest it then.
Is Potato Salad Healthy for Diabetics?
If you are a diabetic patient, then you can eat potato salad but do remember to avoid mayonnaise or to add toppings that are low fat and low sugar. Apart from that, eat any salad in moderation to maintain your daily diet.
Is Potato Salad Healthy During Pregnancy?
If you are pregnant, then I suggest you not eat potato salad, be it cold or ready made, bought from the store as you may face the risk of listeria contamination.
However, if you are still craving for potato salad, then prepare at home and eat in moderation!
Wrapping Up
Potato salad is healthy as it keeps you packed with lots of vitamins and minerals. If you want it to be even more healthy, then use less unhealthy dressing.
Apart from that, if you are a diabetic patient or constantly suffering from high blood pressure, then eat in moderation or completely avoid eating potato salad.
On top of that, if you are pregnant, then store-bought potato salad is a big ‘NO’ for you! Try home-made potato salad instead.
Do let me know in the comment section which type of dressing you like the most!
Related Posts
Subscribe for New Racipies
Get mental health tips, updates, and resources delivered to your inbox.