
Bacon Fat Gingersnaps

Medically reviewed by Christiana George Updated Date: June 8, 2023

We’re going back to California tomorrow (or today rather, as I write these posts the night before) for the holidays and we’ll be gone an entire two-and-a-half weeks! There’s still so much to do, so I’m keeping this post short. And then I must return to packing and meeting last-minute work deadlines and cleaning out the fridge (urgh).
After that, I foresee freeeeedom and warm-ish weather and long drives down the 1. We’re putting up the tree with my family, seeing friends, and hitting up all our old haunts. One of these days, I will write a long ode to California, but for now, I’m leaving you with a recipe for bacon fat gingersnaps.

I’m guessing you can tell why these cookies are special. Yup! They’re made with bacon fat. While the idea is that you’ve been collecting bacon drippings all along, saving it in a little bowl so you can re-use it for other recipes (something I vividly remember my mom doing when I was younger), I had to go out and buy a pound-and-a-half of bacon especially for this recipe, and then spent the better part of an hour frying it up. Later that night, and for days after, we reheated the strips and used them for sandwiches and omelettes and other such delights. These foods all benefit from bacon, I’m sure you would agree, so it wasn’t too much trouble for me.
The cookies themselves taste smoky and exotic, hardly like bacon, although you can tell there’s something in there that contributes an inexplicable… savoriness? Huskiness? I’m definitely not a slap-bacon-on-it-and-call-it-a-day kind of gal, by the way. But I do like my ginger-flavored sweets, and I love the softness of these cookies. (which begs the question: are they technically gingersnaps then? Aren’t gingersnaps supposed to be, I dunno, snappy?)

I also love the origin of this recipe, which comes from Cathy Horyn, the renowned New York Times FASHION editor who got the recipe from her mother. Yes! So I suppose this recipe is an old-new take on a classic gingersnap recipe that is perfect for the holidays.

BACON FAT GINGERSNAPS
Adapted from Leite’s Culinaria
Makes 3 dozen or so
Ingredients:
- 3/4 cup bacon drippings (from 1 1/2 to 2 pounds bacon), at room temperature
- 1/2 cup granulated sugar, plus more for the work surface
- 1/2 cup brown sugar
- 1/4 cup molasses (not blackstrap) or cane syrup
- 1 large egg
- 2 cups all-purpose flour
- 1 1/2 teaspoons kosher salt
- 2 teaspoons baking soda
- 2 teaspoons ground ginger
- 1/2 teaspoon ground allspice
- 1/2 teaspoon ground cinnamon
Directions:
Mix all the ingredients together until a smooth, stiff dough forms. Wrap it tightly with plastic wrap and refrigerate for at least a few hours and up to 2 days.
Preheat oven to 350 degrees F. Line 2 baking with parchment paper. In a small bowl, pour about 1/4 cup sugar. Break off 1-Tbsp chunks of the cookie dough and roll them into balls. Then roll them around in the sugar to coat and place them on the baking sheets, 2 inches apart.
Bake the cookies 10 to 12 minutes, until dark brown. Let cool.
Related Posts






Subscribe for New Racipies
Get mental health tips, updates, and resources delivered to your inbox.
Are Rotisserie Chickens Healthy? – Let’s Find Out!

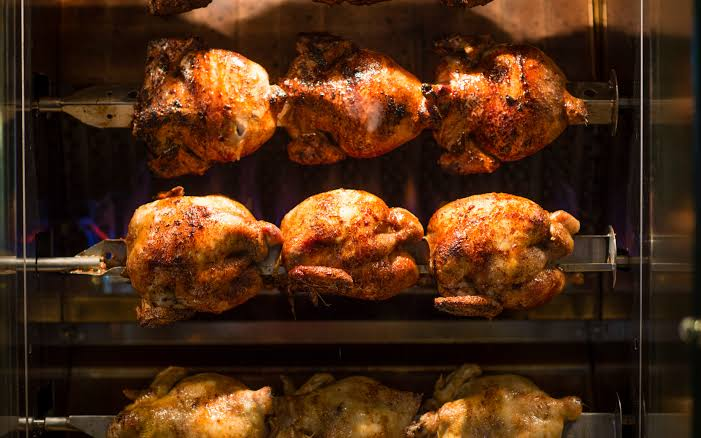
Rotisserie chicken is one popular food among people of all ages. Being incredibly flavorful, they are a pleasure to your taste buds.
However, it is quite natural to have one question coming to mind: are rotisserie chickens healthy?
Yes rotisserie chicken is healthy. It is packed with vitamins and minerals. It also contains a high amount of protein and vitamin B complex. From the creation of blood cells to the operation of the nervous system, it benefits all. It also improves skin health, mental function, and energy generation.
Still confused? Do not sweat! Because in this article, I have explained it all. And also provided tips to make it even healthier.
Read on!
Are Rotisserie Chicken Healthy to Eat?
For those searching for a lean source of protein, this rotisserie chicken is a wonderful option. And also, who either lack the time, inclination, or cooking ability.
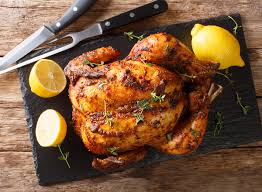
A variety of dishes can be made with chicken using this low-fat cooking technique.
In addition to helping the body create and maintain muscle, protein also helps the body regulate hormones and blood sugar.
Getting enough protein at a meal helps you feel satisfied for a longer period of time since it is processed more slowly than carbohydrates.
Rotisserie chicken supplies a variety of other crucial elements in addition to being a lean protein.
Rotisserie chicken has vitamins and minerals that are important for everything.
From the production of blood cells to the function of your nervous system. Plus, facilitates skin health, mental function, and energy generation.
A quick dinner starter is typically how people prefer it. Additionally, rotisserie chicken is a great way to increase your consumption of other nutrient-dense meals. For example, whole grains, veggies, and healthy fats.
Is It Okay to Eat the Skin of Rotisserie Chickens?
It’s likely that someone has advised you to avoid the skin of any fowl, and in general, it is sound advice. Despite the fact that the skin may be tasty, I usually tell people to avoid it because it contains saturated fat.
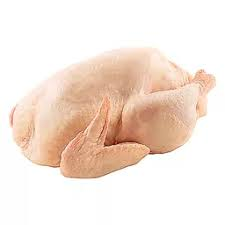
In fact, if you’re eating the breast, removing the skin can reduce the saturated fat by half, and if you’re eating dark meat, it can reduce it by a third.
It has been demonstrated that consuming saturated fat raises LDL cholesterol, which may increase the chance of developing cardiovascular disease.
However, it’s acceptable to eat some skin if you genuinely appreciate it and can’t imagine eating rotisserie chicken without it.
Just remember to include it in the amount of saturated fat you consume overall each day.
The American Heart Association advises limiting saturated fat consumption to 5 to 6% of total calories, or around 13 grams per day for people consuming 2,000 calories or less.
Health Benefits of Consuming Rotisserie Chicken
Rotisserie chickens are nutritious and low in fat. Particularly when you’re consuming white meat, unlike crispy or any other types of meat.
Rotisserie is cooked on a direct heat source, for example, an oven, fire, or perhaps a campfire.
Additionally, these hens can feed a whole family for a reasonable price. There is something for everyone between the breasts, drumsticks, legs, and thighs!
Let’s go over the top health advantages of rotisserie chicken.
Suitable Protein Source with Minimal Saturated Fats
There are many different sources of protein, but many people receive it from the meat and dairy they eat.
However, meats like pork, beef, and lamb that are high in protein also frequently have high levels of saturated fats.
On the other hand, chicken is a fantastic protein source and contains lower quantities of saturated fats.
Remove any skin or discernible fat before eating to make your rotisserie chicken even healthier.
Additionally, be mindful of your meal amounts since most people require 6-7 ounces of protein each day. Typically, half a chicken breast weighs about 3 ounces.
Plenty of B-Complex Vitamins in This Food
Despite the fact that chicken is typically connected with protein, it also contains a variety of other vital nutrients, such as niacin, and vitamins B3, B6, and B12.
These vitamins are necessary for the metabolism of fats and sugars as well as for the preservation of healthy cells.
Along with the B complex vitamins, this chicken is a satisfactory source of magnesium, potassium, and zinc.
The best part is that, as long as the skin is removed, you can consume all of these nutrients without gaining additional fat or cholesterol.
The chicken breast has the least amount of fat, and you can shred it for salads and soups to make it last longer while reducing the amount you eat.
Promotes Weight Loss
Every balanced meal needs some chicken on it.
Yet why?
Lean meat, such as that found in chicken, has little to no fat. Additionally, choosing grilled chicken results in the loss of harmful fats.
Consequently, eating chicken frequently will aid in your efforts to lose weight.
Maintains Body Muscle Mass
Rotisserie chicken, which is high in protein, aids in maintaining lean muscle mass, which is beneficial as you age.
Only a few reports have demonstrated a connection between mortality as well as muscle mass loss.
Reduces the Risk Of Cardiovascular Illnesses
Selenium, a mineral found in foods like chicken, guards against damage to cell membranes and prevents platelets from getting sticky, lowering the risk of cardiovascular diseases over time.
Side Effects of Rotisserie Chicken Consumption
However, there are some downsides, as well. Let us take a glimpse at those.
Possible Presence of Sodium
Since rotisserie chicken is packed with valuable minerals and high-quality protein, it is not the issue in and of itself.
However, the chicken may be extraordinarily heavy in sodium depending on how it is seasoned.
In addition to potassium and chloride, sodium is a vital electrolyte that aids in the delivery of water to your body’s cells.
Nonetheless, consuming too much salt might be harmful. If available, choose an unseasoned version to reduce potential salt.
Juicy, and seasoned just perfectly, this type of chicken possesses a near-flawless texture. plus, it provides a pleasing savor profile to boot.
Nonetheless, is this sort of cooking technique the healthiest for you?
Possible Addition of Sugar
Again, there is one main drawback of purchasing rotisserie chicken. That is, except for the visible delicate meat, you really have no idea what’s hiding beneath that crispy brown exterior.
But according to Consumer Reports, every rotisserie chicken is injected with a solution to keep it moist and flavorful. For instance, sugar could be a component of this solution.
Consider this: Would you sprinkle sugar on the chicken breast you are pan-frying?
Most likely not.
Some Unfavorable Additives
This item also brings a few other disagreeable elements. That includes additives such as carrageenan, natural flavors, as well as gums.
Take the (Hot) Freshness Guaranteed Garlic-Flavored Rotisserie Chicken from Walmart as an illustration.
Consider purchasing a rotisserie chicken from Whole Foods if you’re concerned about contaminants because organic chicken is the only ingredient.
More Tips for Making Rotisserie Chicken Healthier
Here I am including some more ways you can make the rotisserie chicken even healthier. Let us see what those are!
Choose the White Meat
Aim for White Flesh Rotisserie chicken from your local supermarket will have both white and black meat. Usually, dark meat contains more fat. The healthiest option is the white flesh from the chicken breast.
Are They Organic?
Although chicken raised more ethically is likely to be healthier and have a better quality of life, it is not a guarantee that it will taste better.
Try to stay away from any additives, including antibiotics, for the healthiest possible chicken.
When reading the nutrition label, anything you find difficult to pronounce is probably an addition or preservative. That reduces the nutritional value of the chicken.
Try to choose a bird that is USDA-certified organic in place of any that have ingredients like bromelain, ficin, monosodium glutamate, or papin on the label.
Add to It Later
Eating chicken with other foods rich in vitamins and nutrients is one method to make it healthier and better for you.
Your rotisserie chicken can be chopped up and added to a soup or diced and added to a power bowl with rice, lettuce, and other greens.
Portion Size to Watch
Half a chicken breast typically contains 3 ounces of protein, which is the recommended daily intake of protein according to the American Heart Association.
Even though chicken is healthy, eating too much of it is not good for you.
Now let’s go learn some FAQs on this topic.
FAQs
Is rotisserie chicken a good way to lose weight?
Yes, they are. Rotisserie poultry is typically protein-rich. Chicken that is high in protein can increase satiety. They also boost your post-meal calorie burn by as much as 35%!
Is rotisserie chicken good for your heart?
Even while rotisserie chicken is a convenient and delicious supper alternative, it can harm your heart. Chicken from a rotisserie is high in saturated fats and salt. Saturated fat consumption is one of the leading contributors to heart failure and cardiac illness.
Is rotisserie chicken processed meat?
Rotisserie chicken is typically processed, which means the meat is pre-seasoned in factories. That is before being delivered to stores. The tender meat frequently contains sodium and sugar. Also modified corn starch, as can be seen by a fast scan at the ingredient list.
Wrapping Up
Hope I have resolved your confusion of are rotisserie chickens healthy?
Now you know the answer. So, from now on you can add it to your meal without any hesitation. Just make sure you are following the right instructions and that is all.
This is all for now. Have an awesome day!
Related Posts






Subscribe for New Racipies
Get mental health tips, updates, and resources delivered to your inbox.