
Krispie Fruit Punch Truffles

Medically reviewed by Christiana George Updated Date: January 6, 2026
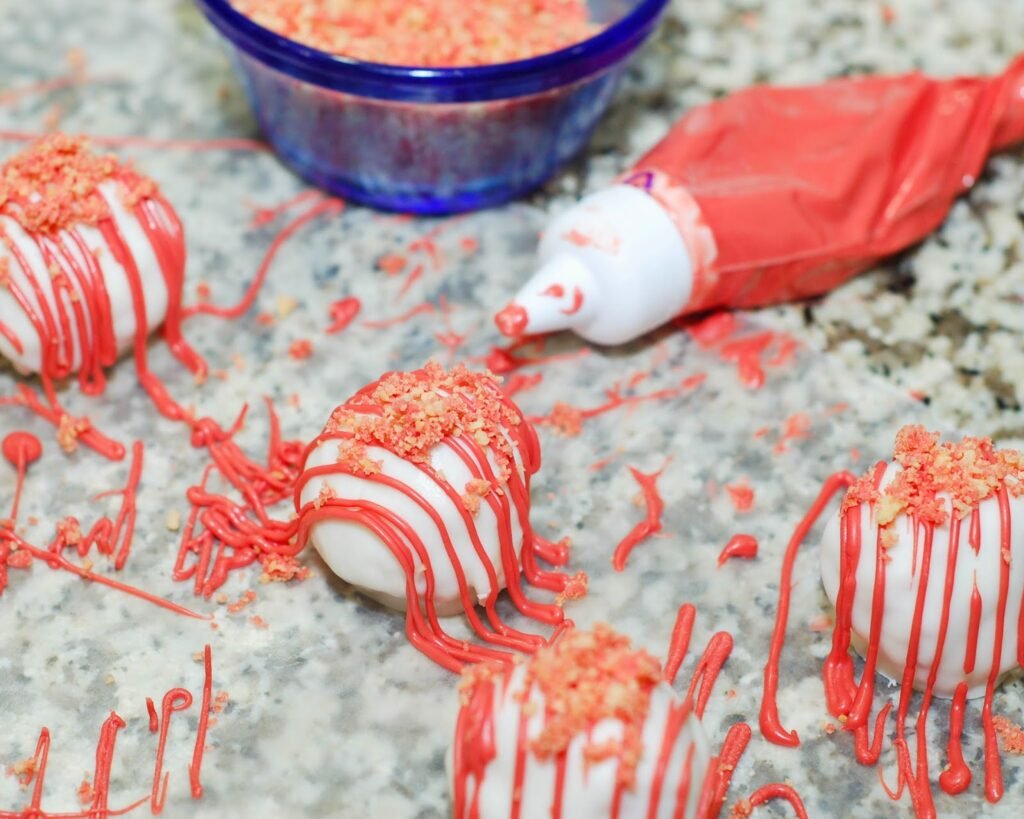

Well, we did it! We got our stubborn little four year old into a pre-school program. It has been a challenge with him refusing to potty train, but his teacher really wanted him in school and she made it happen. He wakes up every morning eager to go and doesn’t even care about leaving me. He is a smart little kid, but his stubbornness keeps him from getting things done and being on track with other kids his age.
He is making progress though. I just have to accept the fact that I look like an incompetent mom that doesn’t know how to potty train her child. Each child is different. He is nothing like his older sister. Oh well, on a happier note I made these lovely kid friendly Krispie Fruit Punch Truffles to continue celebrating summer and keep fall at bay.
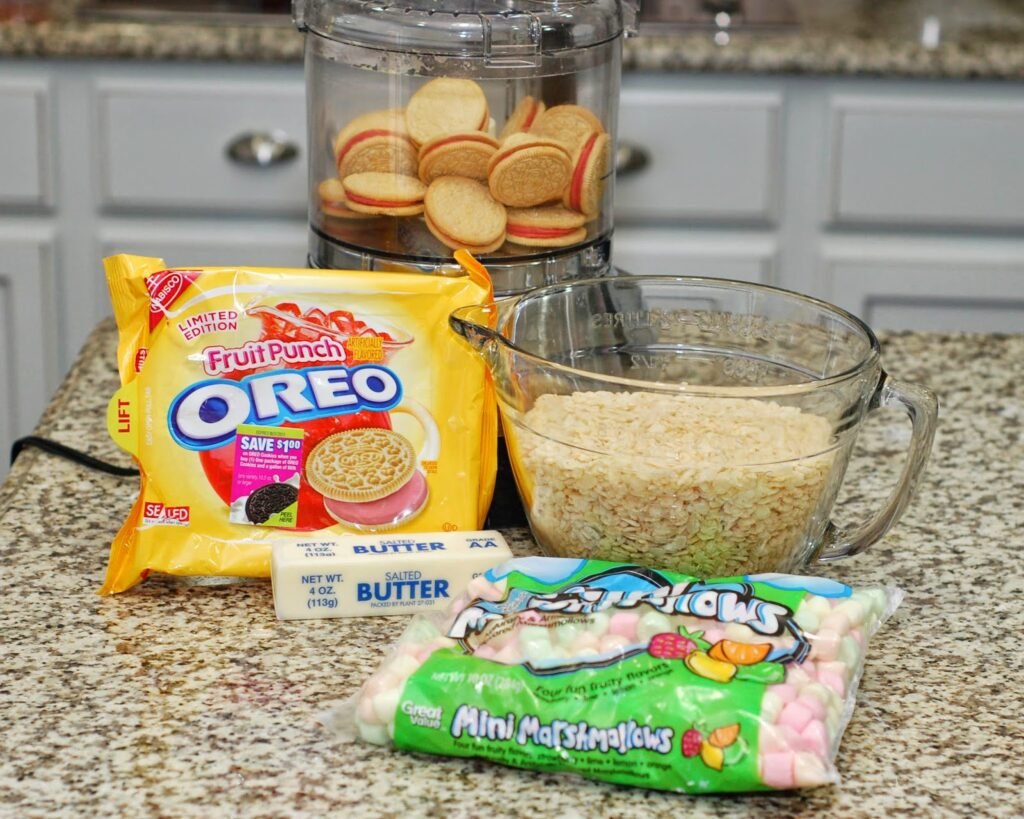
I am not a big fan of fruit punch flavor, but these Fruit Punch Oreos are not bad. A little too sweet for my taste, but the kids love them (of course). In keeping with the fruity flavor, I used fruit flavored marshmallows, but you can use regular ones if you like.
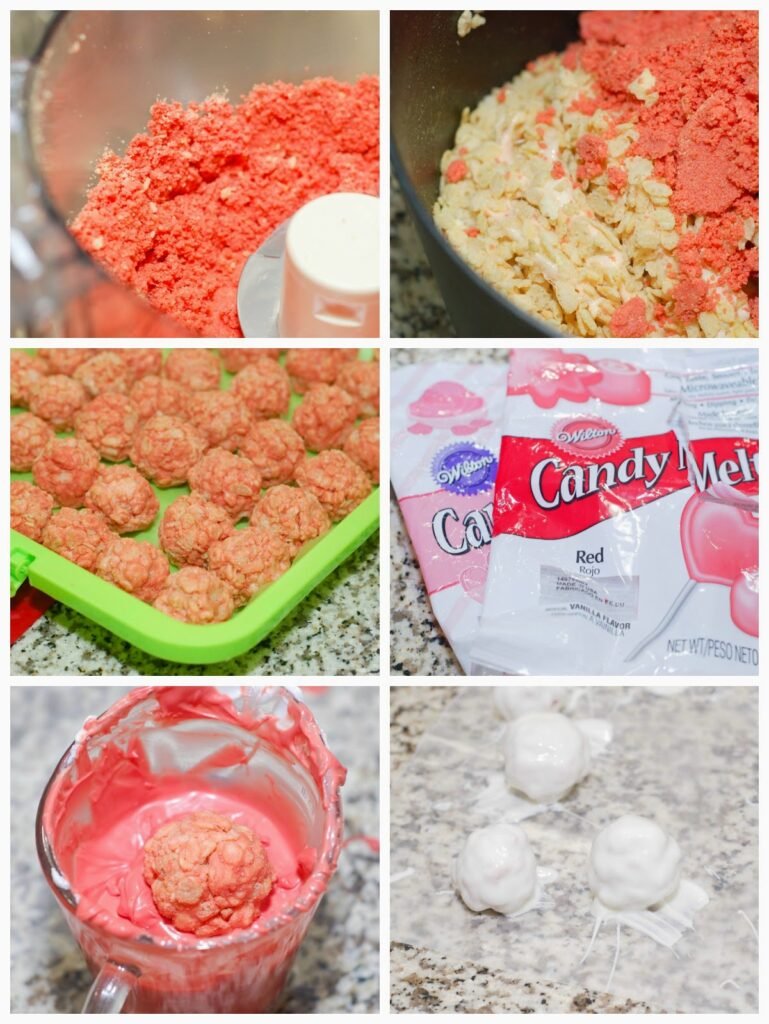
I was originally going to just make regular Rice Krispie Treats, but then I decided to have a little fun. Before the Krispie mixture set, I rolled it into one inch balls, then dipped them in candy melt and decorated. For the pink, I used a mix of red and pink candy melt to match the color of the cream in the Fruit Punch Oreos. For the white, I used vanilla Candiquik candy coating.
You can add more candy melt to the tops and/or sprinkles. I put aside some of the cookie crumbs to decorate. I used the Wilton Candy Melt Decorating Tip Set I had purchased to make the Candy Coated Oreo M&M’s for my son’s birthday. It works really well and if you need to reheat the candy melt, you just throw the whole thing in the microwave.
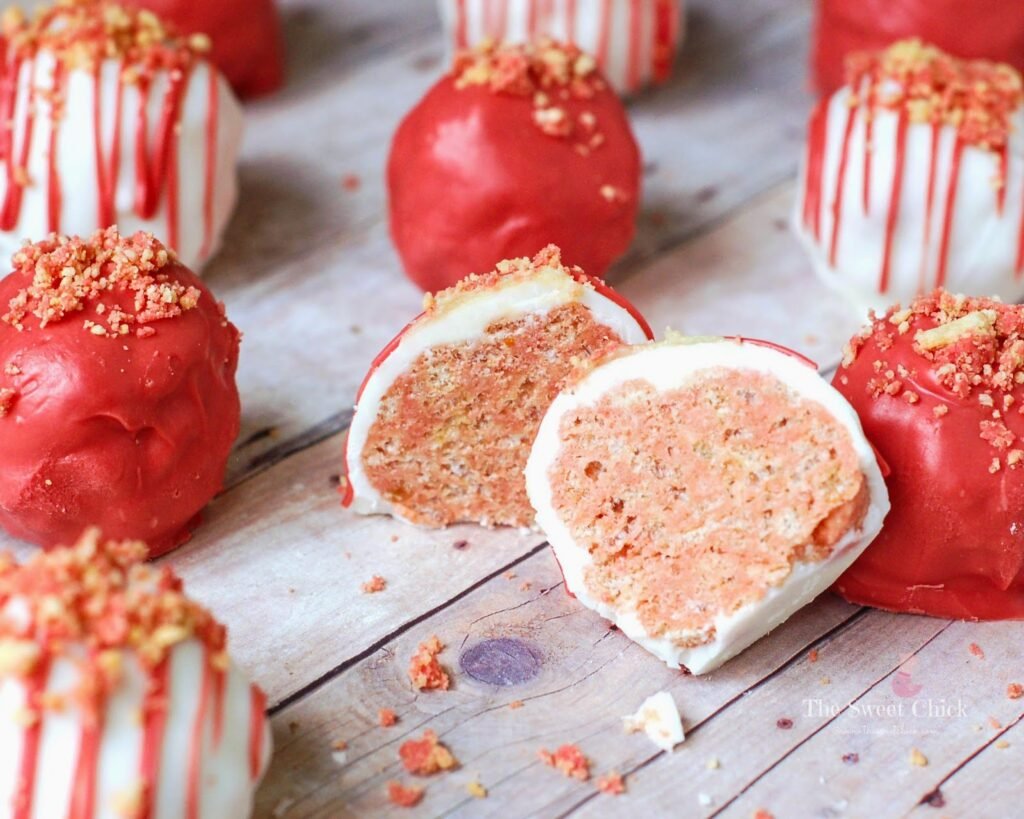
Kids will love these candy coated balls with a soft, chewy, fruit punch center. Plus, they can pitch in and help by rolling all the balls and decorating the tops. I handed my out to some very excited kids at my daughter’s bus stop.
Krispie Fruit Punch Truffles
by The Sweet Chick
Prep Time: 30 minutes
Cook Time: 5 minutes
Ingredients (48 truffles)
For the truffles
- 4 tablespoons butter
- 1 package (10 oz.) mini fruit flavored marshmallows
- 1 package 12.2 oz. Fruit Punch Oreos, divided
- 6 cups Rice Krispie Cereal
For the coating
- 1 package (16 oz.) Candiquik candy coating, vanilla
- 1 package (12 oz.) Wilton’s Candy melt wafers, red
- 1 package (12 oz.) Wilton’s Candy melt wafers, pink
Optional toppings
- cookie crumbs
- sprinkles
- candy melt drizzle
Instructions
For the truffles
Put Oreos in the food processor and chop/ grind until they are a dirt like consistency. (If you are going to use crumbs as a topping, put some aside now.)
In a large sauce pan, melt butter and marshmallows over low heat. Stir until completely melted.
Remove from heat and add Rice Krispie cereal and chopped Oreos. Mix until all is well incorporated.
Then pour the mixture into a greased pan or a cookie sheet.
Let cool slightly, then roll mixture into one inch balls and place on wax paper to set.
For the coating
After the balls are set, melt candy coating in the microwave as per directions on package. (The Candiquik you can melt in the container provided. For the Wilton’s candy melt wafers I use a glass container. I mixed 1/2 of the pink wafers with 1/2 the red wafers to get the color in the picture.)
Dip the Krispie balls into candy coating mixture until all covered. (I use a fork.) Once covered, remove and softly tap until excess candy melt falls off. Then place the balls on wax paper until the candy melt hardens.
For the optional toppings
If you are just adding cookie crumbs or sprinkles, add them before the candy melt hardens.
If you are adding candy melt drizzle, let the first coat harden, then add the drizzle. You can still add sprinkles or cookie crumbs to the drizzle before it hardens.
Keywords: no bake dessert snack Fruit Punch Oreos rice krispies marshmallows candy melt rice krispie treats truffles American summer
Related Posts






Subscribe for New Racipies
Get mental health tips, updates, and resources delivered to your inbox.
Are Pumpkin Puree Safe for Acid Reflux?

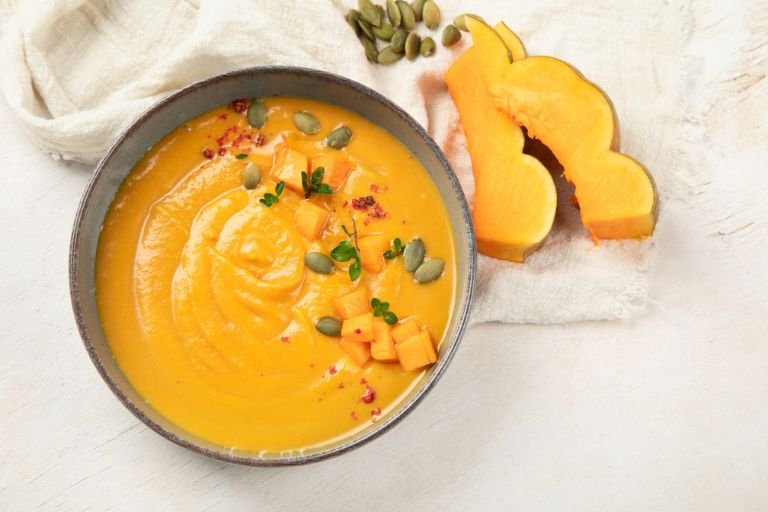
Pumpkin puree, made from cooked and blended pumpkin, is a versatile ingredient often used in soups, desserts, and savory dishes. Its naturally sweet and creamy texture makes it a popular choice for healthy recipes. But if you suffer from acid reflux or GERD (gastroesophageal reflux disease), you might be asking: “Is pumpkin puree safe for acid reflux?”
The good news is that pumpkin puree is generally safe for acid reflux sufferers. With its mild, low-acid nature, high fiber content, and rich nutritional profile, pumpkin puree can actually help soothe digestion and reduce reflux symptoms. However, portion size, preparation methods, and accompanying ingredients can all influence how well it works in a reflux-friendly diet.
In this article, we’ll explore why pumpkin puree is considered safe for acid reflux, its nutritional benefits, and tips for incorporating it into your meals without triggering symptoms.
Is Pumpkin Puree Acidic or Alkaline?
Pumpkin puree is considered a low-acid food, with a pH level ranging between 4.9 and 5.2. While this places it in the mildly acidic category, its overall effect on digestion is gentle, making it a safe option for most people with acid reflux.
Additionally, pumpkin puree has alkalizing properties when metabolized in the body, helping to neutralize stomach acid and reduce irritation in the esophagus. Compared to other acidic foods like tomatoes or citrus fruits, pumpkin puree is far less likely to trigger reflux symptoms.
Author Tip: Is Pumpkin Puree Acidic?
Nutritional Profile of Pumpkin Puree
Pumpkin puree is packed with essential nutrients that promote overall health and support digestion. Here’s what makes it a nutrient-dense, reflux-friendly food:
1. High in Fiber
- One cup of pumpkin puree contains about 7 grams of fiber, which supports healthy digestion, reduces bloating, and prevents overeating—one of the common triggers of acid reflux.
2. Low in Calories and Fat
- With only 80 calories per cup and virtually no fat, pumpkin puree is light and easy to digest, making it a perfect option for those managing reflux symptoms.
3. Rich in Vitamins
- Vitamin A: Promotes healthy mucous membranes, including those in the digestive tract, helping to protect the esophagus from stomach acid.
- Vitamin C: Reduces inflammation and promotes healing.
- Vitamin E: A powerful antioxidant that soothes and protects the digestive lining.
4. Contains Essential Minerals
- Potassium: Helps maintain electrolyte balance and supports muscle function, including the lower esophageal sphincter (LES), which prevents stomach acid from flowing back into the esophagus.
- Magnesium: Relaxes the digestive muscles and helps reduce reflux episodes.
5. High Water Content
- Pumpkin puree is about 90% water, which helps hydrate the body and dilute stomach acid, reducing reflux symptoms.
Also Read: Is Pumpkin Soup Acidic?
Why Pumpkin Puree is Good for Acid Reflux?
Research suggests that Pumpkin puree offers a range of benefits that make it suitable for acid reflux sufferers. Here’s why:
1. Gentle on the Stomach
- Pumpkin puree’s low acidity and smooth texture make it soothing for the stomach and esophagus, reducing the risk of irritation.
2. Aids in Digestion
- The fiber content in pumpkin puree helps regulate bowel movements, prevent constipation, and reduce bloating—key factors in managing acid reflux.
3. Prevents Overeating
- Its fiber and water content promote a feeling of fullness, preventing overeating, which is a common reflux trigger.
4. Reduces Inflammation
- Pumpkin’s antioxidants and anti-inflammatory compounds can soothe irritation in the esophagus caused by stomach acid.
5. Supports the Lower Esophageal Sphincter (LES)
- Minerals like magnesium and potassium help keep the LES functioning properly, preventing stomach acid from traveling back into the esophagus.
Tips for Using Pumpkin Puree in a GERD-Friendly Diet
To ensure pumpkin puree works well in a reflux-friendly diet, follow these tips:
1. Choose Unsweetened Pumpkin Puree
- Opt for pure, unsweetened pumpkin puree. Avoid canned pumpkin pie filling, which contains added sugars, spices, and preservatives that may trigger reflux symptoms.
2. Watch Your Portion Size
- Stick to 1/2 to 1 cup per serving. Even reflux-friendly foods can cause discomfort if consumed in large quantities.
3. Avoid High-Fat Additions
- Skip heavy creams, butter, or fried preparations when using pumpkin puree. Pair it with low-fat or non-fat ingredients instead.
4. Pair with Alkaline Foods
- Combine pumpkin puree with reflux-friendly ingredients like oats, bananas, or lean proteins to create balanced meals.
5. Avoid Spicy or Acidic Additions
- Refrain from adding spicy seasonings or acidic ingredients like vinegar or citrus to pumpkin puree dishes, as these can irritate the stomach and esophagus.
Related to Read: Are Pumpkin Seeds Safe for Acid Reflux?
Reflux-Friendly Pumpkin Puree Recipes
1. Pumpkin Oatmeal
Ingredients:
- 1/2 cup oats
- 1/2 cup pumpkin puree
- 1 cup unsweetened almond milk
- 1/2 teaspoon cinnamon (optional)
- 1 teaspoon honey (optional)
Instructions:
- Cook oats in almond milk as directed.
- Stir in pumpkin puree, cinnamon, and honey.
- Serve warm as a hearty, reflux-friendly breakfast.
2. Pumpkin and Banana Smoothie
Ingredients:
- 1/2 cup pumpkin puree
- 1 small banana
- 1 cup unsweetened almond milk
- 1/2 teaspoon vanilla extract
Instructions:
- Blend all ingredients until smooth.
- Serve as a refreshing, acid reflux-friendly snack.
3. Pumpkin Soup
Ingredients:
- 1 cup pumpkin puree
- 2 cups low-sodium vegetable broth
- 1/4 cup unsweetened almond milk
- A pinch of salt and pepper
Instructions:
- Heat pumpkin puree and vegetable broth in a pot over medium heat.
- Stir in almond milk and season with salt and pepper.
- Serve warm with a slice of whole-grain bread.
More Pumpkin Recipes: Pumpkin, Banana, & Apple Yogurt Smoothie
Pumpkin Dulce de Leche Chocolate Chip Cookies
Pumpkin Spice Crepes with a Cinnamon Mascarpone Filling
Frequently Asked Questions About Pumpkin Puree and Acid Reflux
1. Is pumpkin puree acidic?
Pumpkin puree is mildly acidic but has alkalizing effects when metabolized in the body, making it safe for acid reflux sufferers.
2. Can pumpkin puree trigger acid reflux?
Pumpkin puree is unlikely to trigger reflux. However, consuming it in large quantities or pairing it with fatty or spicy ingredients may cause discomfort.
3. Is canned pumpkin puree safe for GERD?
Yes, plain canned pumpkin puree is safe for GERD, but avoid sweetened or spiced varieties like pumpkin pie filling.
4. How much pumpkin puree can I eat if I have acid reflux?
Stick to 1/2 to 1 cup per serving to avoid overeating, which can put pressure on the stomach and trigger reflux symptoms.
5. What are other reflux-friendly vegetables?
Other reflux-friendly vegetables include zucchini, carrots, spinach, cucumbers, and sweet potatoes.
Final Thoughts
Pumpkin puree is a nutrient-dense, low-acid food that is generally safe and beneficial for individuals with acid reflux or GERD. Its high fiber and water content, along with its soothing properties, make it a great addition to a reflux-friendly diet.
Whether enjoyed in oatmeal, smoothies, or soups, pumpkin puree can help improve digestion, reduce inflammation, and prevent reflux symptoms when consumed in moderation. Just be sure to avoid high-fat or overly spiced preparations to get the most out of this versatile and healthy ingredient.
Related Posts



Subscribe for New Racipies
Get mental health tips, updates, and resources delivered to your inbox.