
Aunt Sassy Cake, Or Pistachio Layer Cake With Honey Buttercream

Medically reviewed by Christiana George Updated Date: June 8, 2023
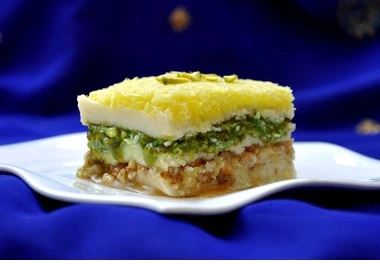
The search for the perfect wedding cake continues. Today I introduce to you, Aunt Sassy, the pluckiest pistachio cake you’ll ever meet, flavored with real pistachios (as opposed to pistachio extract, which a recipe my sister found called for) that impart the barest of green to four dreamy layers of cake. She’s wearing her Sunday’s finest, a lush buttercream laced with glossy honey (that I sort of butchered because I lack cake decorating skills. Sorry Aunt Sassy.)

In truth, the cake is not as forwardly pistachio-tasting as you might think. What it really reminds me of is a nut bread, dense yet moist, and textured in that whole-grainy way. This may, in part, be due to the fact that I hand-ground, using a mortar and pestle, the pistachios, an imprecise process that yielded not the fine grain that the recipe called for, but something a little coarser, more similar to sand. But no matter. I liked it, a lot. Chris did too, and I gave him all the cake tops to take to work so I wouldn’t end up snacking on them throughout the day.
But the true gem was the honey buttercream. It was superb, absolutely superb! It was wistfully velvety with the slight aftertaste of honey (meaning, not too sweet) and a lightness kind of sort of like whipped cream. I found ample excuses to conduct multiple taste tests: while scraping down the bowl, while filling the cake, while frosting the crumb layer (which I liberally applied for that very purpose), while cleaning out the bowl that I used to hold the crumb-filled frosting. And all the while, my brain kept saying ‘no, no, no, put down the spatula, Linda!’ because, being the sensible organ that it is, you can’t get past it the fact that the frosting is made almost completely of butter(!).
Other thoughts. It reminded me of a Swiss meringue buttercream, but did not turn stale-buttery or yellow over time. This is valuable information. Also, it’s egg-less. Actually, this is where I wish I could talk food history, because the method of making this frosting seems quite unusual. At its base, it’s a mixture of sugar, milk/cream, and flour that’s cooked over a low heat until it thickens. Is flour a common frosting ingredient? What is its history? Is it an old-fashioned Southern technique? That would excite me greatly.
Finally, regarding the cake as a whole, I’m thinking a three-layer cake, two of pistachio, one of chocolate, with this very buttercream frosting might be just the ticket.
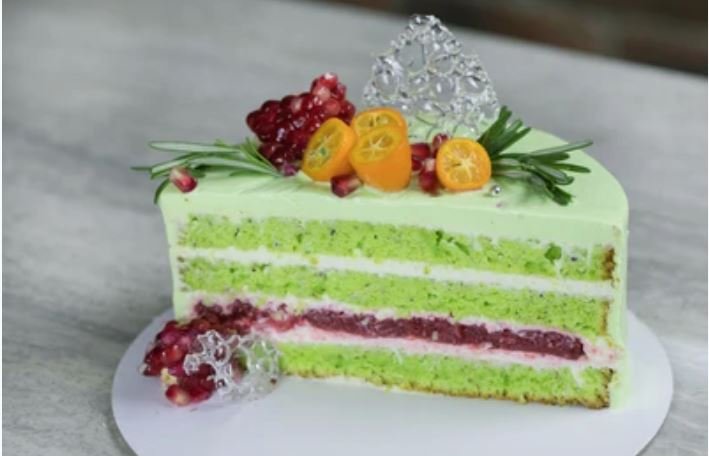
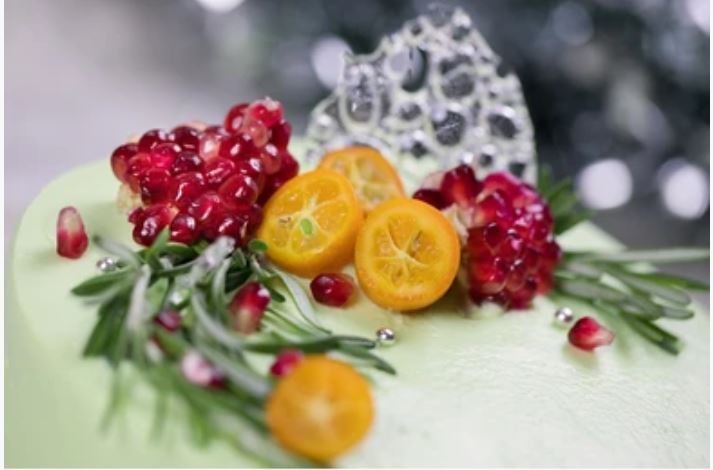
PISTACHIO LAYER CAKE WITH HONEY BUTTERCREAM
Adapted from Baked Explorations, via Oprah
Makes 1 six-inch 4-layer cake
Note: The original recipe called for vegetable shortening, which I decided not to use, because anything with the word ‘shortening’ in it sounds highly suspect to me. If you do decide to use it, replace half of the butter (1/2 cup) with 1/2 cup of vegetable shortening.
Ingredients:
For the pistachio cake:
1 cup shelled pistachios
2-1/2 cups cake flour
3/4 cup all-purpose flour
1 Tbsp baking powder
1 tsp baking soda
3/4 tsp salt
1 cup butter, softened
1-3/4 cups sugar, divided
1 Tbsp pure vanilla extract
2 large eggs
1-1/2 cups ice water
3 large egg whites, at room temperature
1/4 tsp cream of tartar
For the frosting:
1-1/2 cups sugar
1/3 cup all-purpose flour
1-1/2 cups whole milk
1/3 cup heavy cream
3 sticks unsalted butter, softened, and cut into small pieces
1 tsp pure vanilla extract
3 Tbsp good honey
Directions:
For the cake:
Preheat the oven to 325 degrees F. Butter four 6″ cake pans (or however many you have, but you’ll have to work in batches). Line the bottoms with circles of parchment paper, dust the pans with flour and knock out the excess.
In a food processor, pulse the pistachios into a coarse grind, remove 2 Tbsp, and set them aside in a medium bowl. Process remaining pistachios just until finely ground to a powder. Sift cake flour, all-purpose flour, baking powder, salt, and baking soda into the same bowl with the 2 Tbsp chopped pistachios. Stir in pistachio powder.
In a stand mixer using the paddle attachment, beat butter on medium speed until creamy, about 1 minute. Add 1-1/2 cups sugar and vanilla and beat until fluffy, 4 minutes. Scrape down the bowl, and with mixer on low speed, beat in eggs one at a time until well blended. Beat in the flour mixture in 3 additions, alternating with the cold water, beginning and ending with flour mixture. Beat until blended, scraping bowl; then beat batter 15 more seconds. Scrape into a large bowl.
With a clean bowl and using the whisk attachment, beat egg whites and cream of tartar on medium speed until foamy. With mixer on medium-high speed, add remaining 1/4 cup sugar and beat just until soft peaks form, taking care not to over beat. (For some reason, I did this by hand. It took some serious arm power, and I’m not sure I attained the foaminess that the recipe called for. Use your mixer if you can.). Gently fold whites into batter just until no white streaks remain.
Divide batter between prepared pans (or about an inch into each pan) and spread evenly. Bake 35 to 40 minutes, or until a toothpick inserted in center of cakes comes out clean. Transfer pans to wire racks and let cool 20 minutes. Turn cakes out onto racks, remove parchment paper, flip them over, and let cool completely.
Cake rounds can now be covered in plastic wrap and stored in the fridge overnight.
For the frosting:
In a heavy, medium saucepan, whisk sugar and flour until well blended. Add milk and cream and cook over medium heat until mixture thickens and comes to a boil, about 10 minutes. (This is where the quality of your pan comes through. Using a sub-standard saucepan like I did? Keep the heat on low and stir constantly.) Reduce heat to low and cook, stirring, for 2 more minutes.
Transfer the mixture to the bowl of a stand mixer. With the paddle attachment, beat the mixture on high speed until it cools completely, about 10 minutes. On medium speed, beat in the butter. It’ll gradually start incorporating into the mix and look more and more like frosting; it takes about 5 minutes. Increase the speed to medium-high until the frosting is fluffy and smooth, about 1 minute. Beat in honey and vanilla until incorporated. Taste for the honey and add more if necessary.
The frosting can now be refrigerated, covered, but before you use it, let it come to room temperature and mix it until it regains its fluffiness.
Assembling the cake:
I found that there was just enough frosting to frost the entire cake. Use about 1/2 to 3/4 cup of frosting in between layers.
Related Posts


Subscribe for New Racipies
Get mental health tips, updates, and resources delivered to your inbox.
Can You Eat Coral? Exploring Edibility, Risks, and Environmental Impact

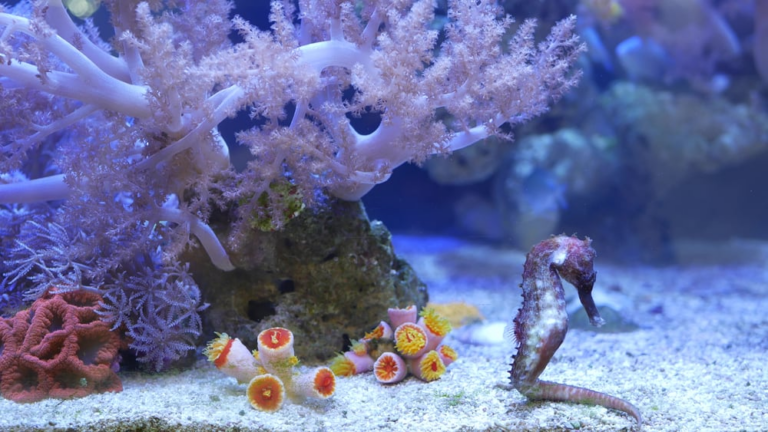
Maybe you’re just bored of the daily seafood we consume daily. And you just want to try something very new and interesting. So, you just decided to try coral as your seafood.
We know the idea of having coral seems pretty mouth-watering to you.
But now the question arises, can you eat coral?
Yes, you can eat but it’s not recommended. Coral reefs are consumed by a lot of fishes. But it isn’t edible for human beings. The major reason why they’re not edible is that coral reefs are hard as rocks. And they also produce different types of toxins that you need to know about.
We know that you’re still confused about choosing coral as your meal. Do not worry! We’ve got you back. You are going to find out your answer to all your questions and confusion.
Just read along with us.
Can You Eat Coral? Reasons Why You Should or Shouldn’t
Yes, but it’s not recommended. You can’t eat coral reefs as your seafood meals.
This might also come to your mind can coral reefs be poisonous? Yes, they can be poisonous and it is one of the reasons why coral-eating isn’t recommended.

Now, you already know that you can’t eat coral as food. But the question is why?
So, we discussed the major reasons behind it.
Reason 1: Corals Are Hard As Rocks
The coral reef’s main body is contained with basically sodium and calcium carbonate. This chemical substance is similar to hard rocks. And they also cause sharp edges on coral bodies.
Now definitely you’re asking yourself can you cook corals? Yes, you’ll be able to cook corals somehow but it won’t be amusing. Or it might not taste alright.
If you even manage to chew coral, it will definitely cut your insides. Eating coral will be harmful to your teeth, mouth, and throats. Your digestive system will be slowed down as well.
Reason 2: Corals Are Poisonous
Most corals produce toxic substances from their bodies. So, it is very unsafe to consume corals as food.
Speaking of poison, this may also concern you that can coral hurt humans? Yes, corals can hurt humans. Sometimes they sting for protection purposes. So, it’s better not to touch them.
Now you need to know about the side effects and the poisons corals produce. Not every species of corals produce toxins. The species which are toxic are Palythoa species and Zoanthus species. They each contain Palytoxin.
Palytoxin is very dangerous for human health. It has some life-threatening side effects as well. The side effects are,
- Flu includes cough, fever, headache, and sore throats.
- Skin issues include rash, allergies, and itching.
- Respiratory issues include chest pain, heavy breathing, and runny nose.
Reason 3: Corals Consist of High Calcium
Coral main bodies are mainly made of high calcium. Now, we all know that calcium is good for human health. But consuming corals will increase your calcium level to a whole new level.
High calcium levels in human bodies are called Hypercalcemia. This causes,
- Weakened bones
- Kidney failure or kidney stones
- The heart and brain can’t work properly
We discussed the core three reasons why you can not eat corals as a meal.
Reason 4: Corals Don’t Contain Nutrients
Nutrients are the sole reason why people consume food. But corals don’t contain any nutrients which can be helpful for human bodies.
The nutrients corals contain are only for their photosynthesis. And those are,
- Nitrogen
- Phosphate
- Iron
- Calcium
None of the nutrients are that helpful for human bodies. On the other hand, they might cause danger to health.
Reason 5: Corals Are a Part of the Ecosystem
Corals are a part of a huge role in the ecosystem. They are called the ‘Rainforests of the sea’ due to their colorful beauty.
As coral is a big part of the ecosystem, this question always remains. Is coral mining illegal? The answer is yes. Coral mining is harmless but it is illegal.

Core reasons why coral reefs are so important in the ecosystem are,
- Biodiversity: Coral reefs are holding the homes of all marine species in this world.
- Source of Food: Coral reefs manage food for more than 500 million people in the coastal areas.
- Tourism: Coral reefs manage the tourism industry of countries as well.
- Protection: Coral reefs help protect the coastal areas from natural calamities from the sea.
- Medicine: Coral reefs are also a part of calcium supplements for human health.
Being a part of the ecosystem, you might think how much is coral worth? Well, corals are pretty expensive. They are sold from ten thousand dollars to one million and upwards.
All these reasons are enough for you to avoid eating corals.
Related Article: Can You Eat Eel Skin? Exploring the Delicacy and Health Benefits
How to Identify Poisonous Corals
Now, you might also want to know if poisonous corals can be identified.
It is not possible to identify which corals possess poison in them. But you can always be extra careful about it.
- Keep your usage of corals minimum.
- Avoid touching corals with bare hands. Wear eyemasks and gloves before.
- Always keep the corals underwater.
- Keep the corals at a cool temperature as the toxins are inflammable.
But People Eat Coral Calcium – Why?
People can eat corals, it’s not forbidden. But it is better not to eat corals as a meal.
Corals are the powerhouse of calcium. They are mainly contained in calcium. People might not eat them as food but they can consume corals for calcium.
Calcium is a very important element of human health. It is important to keep our bones, nails, hair, and teeth healthy and strong. People eat coral calcium because,
- Coral calcium keeps our bone density healthy
- Coral calcium prevents muscle pain and other muscle diseases
- Coral calcium heals muscle and bones faster
- Coral calcium keeps our blood healthy
- Coral calcium also helps our brain to function properly
So, it is somewhat better to eat coral calcium but a limited amount.
How Harmful is Coral for Kids And Pregnant Women?
Coral reefs can be harmful to kids and pregnant women. The harmful side effects of coral reefs are that,
- Coral reefs can cause nausea or vomiting
- There can be a loss of appetite
- Kids can start losing weight in a very unusual way
- There can be frequent mood swings due to corals
- Headaches and tiredness can be also shown
- There can also be the symptom of unusual urination
So, it is actually harmful to kids and pregnant women.
Corals as Supplements for Human Health
Corals can be very useful sometimes. Corals are used as supplements for human health.
You definitely can’t eat corals as food. But you can consume corals as supplements. Corals contain high levels of calcium in their bodies. The supplements made from corals contain high calcium as well.
Some of us suffer from low levels of calcium in our bodies. By taking these supplements you’ll be able to have the perfect level of calcium. The supplements are usually made from dead corals.
Corals or Coral Mushroom? Are They The Same?
People sometimes get confused between corals and coral mushrooms. But let us tell you that corals and coral mushrooms are completely different. They are definitely not the same.
Coral mushrooms are a species of fungi. They basically look like corals. But coral mushrooms are usually found on the land, not water. On the other hand, corals are found underwater.
Coral mushrooms are not related to corals at all. They carry a lot of helpful nutrients, unlike corals. The nutrients are,
- Protein
- Copper
- Potassium
- Magnesium
- Calcium
Coral mushrooms are also very soft. They’re not hard as rocks like corals.
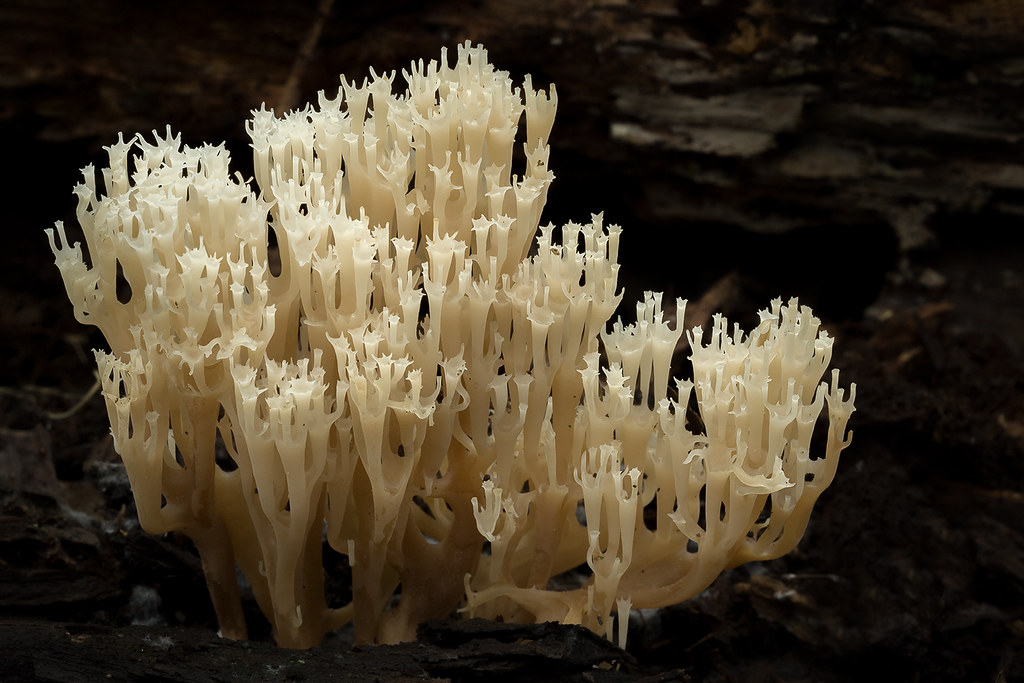
So, coral mushrooms are definitely edible and healthy for humans.
With coral mushrooms on the list, you might also think about which reef fish are edible. There are plenty of options out there. You can consume tuna, mackerel, yellowfin, salmon, and so on.
Related Article: Can You Eat Rock Bass? Things to Know About Rock Bass
FAQs
What Does Coral Taste Like?
Coral has a powerful pungent flavor. But also it is tough and almost impossible to chew. The coral reefs contain poisonous elements. The poisons that many corals release have the potential to have exceedingly negative adverse effects.
Where Can I Buy Table Coral?
Table coral is also present on the Lilypad Islands. Nearly straight southeast of the lifepod lies the Lilypad Islands. Through the biomes of Tree Spires and Purple Vents. Table corals half moon shaped. They are mostly in red and yellow colors.
Is Yellow Coral Edible?
Although reportedly edible, Samaria Flava is only of average quality. However, Ramaria Formosa and it are frequently mistaken for one another. If consumed, they are extremely dangerous and will give you stomach problems and diarrhea.
Conclusion
Hope we’re able to give you the answer to can you eat coral.
Now that you already know the answer. We hope that you’ll avoid consuming corals as food. And do let others know about how dangerous and hazardous corals can be.
If you actually want to try new seafood or coral-like food, please try coral mushrooms. Coral mushrooms are delicious and very nutritious. They definitely don’t contain any toxin substances.
Hope you’ll choose the right coral mushrooms. Have a great day! And take care of yourself.
Related Posts




Subscribe for New Racipies
Get mental health tips, updates, and resources delivered to your inbox.