
Salted Pumpkin Caramels

Medically reviewed by Christiana George Updated Date: June 8, 2023
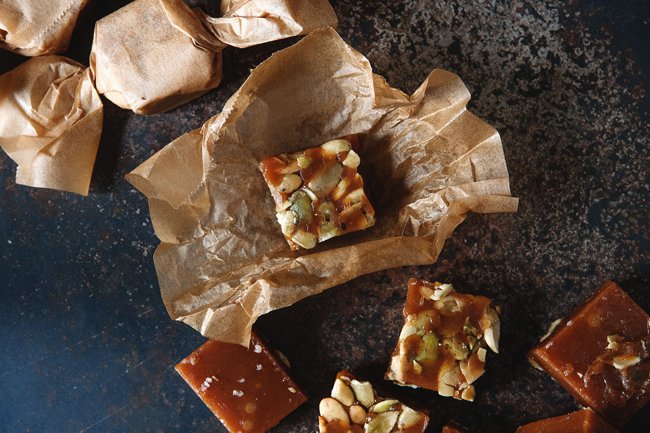
One of my biggest motives for food blogging is to fulfill these long-built-up desires to make foods I’ve never made before. What I mean is, it, the blog that is, and wanting to keep it reasonably interesting, becomes the impetus to try new things.
Take marshmallows for instance. Oh my gosh, I’ve been wanting to make them for years. Years! But what compelled me to finally go for it was this, my little online space, and wanting to share the results with all of you.
Which leads me to these caramels. Do you know how intimidating candy-making has always seemed to me? What with the scalding, spattering liquid, and the weird chemical properties of sugar that make it do wacky things at high temperatures, and the fact that I didn’t have a candy thermometer, it seemed too daunting.
But I did it. It may have taken two tries, but I did it. (I was really hoping it wouldn’t take three.)

There’s nothing that can quite prepare you for the execution of caramel-making. I mean, I know it’s not as exciting as sky diving, nor as important as, I don’t know, heart surgery or hostage negotiation, but the thrill you get out of it can be just as exhilarating. Should I switch from second-person to first? I don’t think many people would describe caramel-making as exhilarating, haha.
Let’s stick with second.
You start off with a huge vat of disparate ingredients, that you stir, stir, stir. It begins to foam and hiss, jump up and spatter onto the sides of the pot. And all the while, it’s slowly changing color, changing in aroma. Reaching bona fide caramel takes awhile, but you know you’re on to something when you begin to recognize the smell, and when it hits you full in the face, it’s as heavenly as it is familiar. You’ve smelled it before. It’s caramel.
It’s so affirming, the feeling that you’ve created something, like really created something, out of scratch, out of the simplest of ingredients. I felt this way the first time I made chocolate chip cookies successfully (we’ve all overbaked them, admit it!), the first time a loaf of yeasted bread came out of the oven with actual air pockets in it. Cooking and baking are incredibly positive experiences for me.

But before I get too ahead of myself, waxing poetic on the spiritual aspects of caramel-making, I should tell you, I don’t think mine came out quite right. They’re a bit too hard, so that you feel like you’re getting a jaw workout chewing on them. But they’re delicious nonetheless, with the taste of the pumpkin really complementing the caramel perfectly. Add to that roasted pumpkin seeds and the final flourish of sea salt, these candies are not cloyingly sweet at all. But they are perfectly suited for the season, or rather, the amalgam of two seasons, because we are at a crossroads right now, are we not?
On my first try, the hot sugar and cream mixture wound up turning into toffee, so at least I managed to avoid doing that again. The failure also taught me how important it is to calibrate your candy thermometer, because a couple degrees can make a huge difference. Mine is apparently off by four degrees, meaning it registers the temperature of boiling water as 216 degrees Fahrenheit rather than 212.
If you do decide to make these—and you should because they’re wonderful—I hope you feel as triumphant as I did, even if it’s your 87th time making caramel. And then give them away as fast as possible, because what’s a person to do with 81 pieces?!
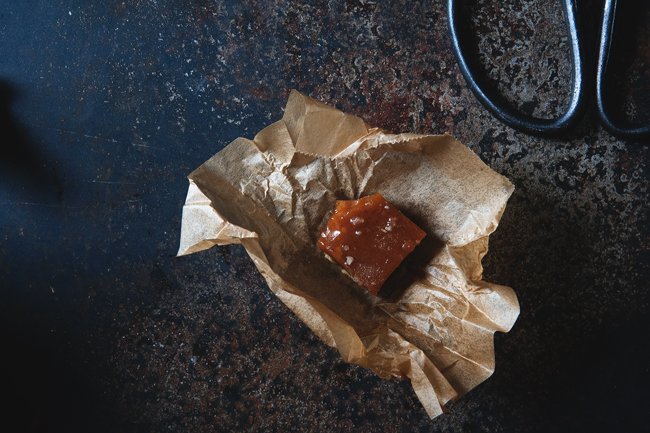

SALTED PUMPKIN CARAMELS
From Food52
Makes 81 1-inch caramels
Ingredients:
- 3/4 to 1 cup roasted pumpkin seeds
- 1-1/2 cups heavy cream
- 2/3 cup pumpkin puree
- 1 tsp pumpkin pie spice (1/2 tsp cinnamon, 1/4 tsp ground ginger, 1/4 tsp nutmeg, pinch allspice)
- 2 cups white sugar
- 1/2 cup light corn syrup
- 1/3 cup maple syrup
- 1/4 cup water
- 4 Tbsp unsalted butter, cut in chunks
- 1 tsp lemon juice
- 3/4 tsp sea salt
Tools:
Candy thermometer
Directions
Line the bottom and the sides of a 9-inch square baking pan with parchment paper. Butter the parchment on all the sides. Evenly spread out the pumpkin seeds on the bottom of the pan.
In a saucepan, combine heavy cream, pumpkin puree and spices. You want the mixture to be warm and foamy, but not boiling. Set aside.
In a second heavy bottomed pan, with sides at least 4 inches high, combine the sugar, both syrups, and water. Stir until the sugars are melted, Then let it boil until it reaches 244 degrees F. Then very carefully add the cream and pumpkin mixture, and slowly bring this mixture to 240 degrees F as registered on a candy thermometer. This will take awhile (around 30 minutes), but watch it and stir occasionally. You’ll want to stir more frequently once it hits 230 degrees to keep it from burning on the bottom of the pan.
As soon as it reaches 240 degrees, pull it off the heat and stir in the butter and lemon juice. Stir vigorously so that the butter is fully incorporated.
Pour the mixture into the prepared pan. Let cool 30 minutes, then sprinkle the salt on top. Let the caramels fully set (at least 2 hours) before cutting them into 1-inch squares. Wrap in wax paper.
Related Posts





Subscribe for New Racipies
Get mental health tips, updates, and resources delivered to your inbox.
Is Turmeric Acidic? Turmeric and Acid Reflux

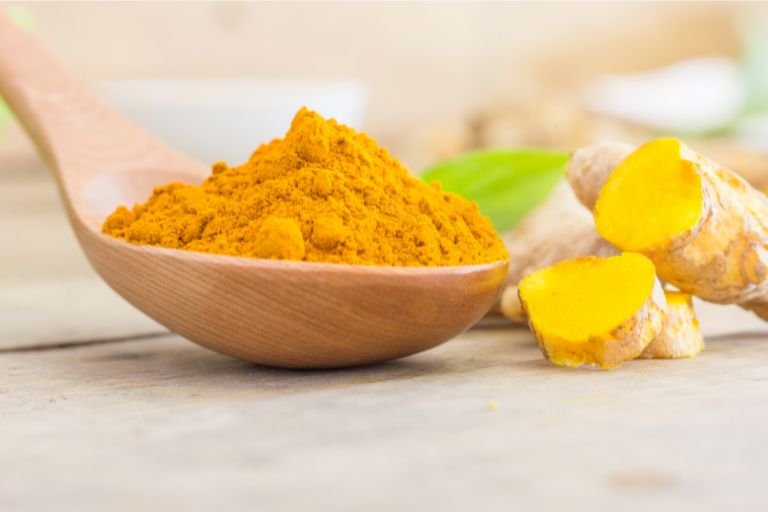
Turmeric, often referred to as the “golden spice,” is renowned for its medicinal properties and extensive culinary applications. From spicing up dishes to serving as a natural remedy for inflammation, turmeric has gained a reputation as a superfood.
However, if you’re someone who suffers from acid reflux or GERD (gastroesophageal reflux disease), you might wonder: “Is turmeric acidic, and can it help or worsen acid reflux?”
The good news is that turmeric is not highly acidic and has a pH level close to neutral. Beyond its neutral pH, turmeric’s active compound, curcumin, is well-documented for its anti-inflammatory and digestive-supporting properties, which can help manage acid reflux symptoms when used correctly.
In this article, we’ll explore turmeric’s pH level, its effects on digestion, and how it can be used safely to alleviate acid reflux.
Is Turmeric Acidic or Alkaline?
Turmeric is slightly acidic to neutral, with a pH level of around 6.0 to 7.0. Unlike foods with high acidity, such as citrus fruits or vinegar, turmeric’s pH level makes it less likely to aggravate acid reflux symptoms. In fact, turmeric is often used to balance the digestive system due to its soothing properties.
What makes turmeric unique is that it acts as an alkalizing agent once metabolized by the body, which means it can help neutralize excess stomach acid. This alkalizing effect makes turmeric a valuable addition to the diet for those managing GERD or other acid-related digestive issues.
Related to Read: Is Black Pepper Acidic?
Nutritional Profile and Benefits of Turmeric
Turmeric is more than just a spice; it’s a nutritional powerhouse with numerous health benefits. Here’s what makes turmeric a standout addition to a reflux-friendly diet:
1. Curcumin: The Star Compound
Turmeric’s active ingredient, curcumin, is a potent anti-inflammatory and antioxidant compound. It can help reduce inflammation in the esophagus caused by acid reflux and protect the stomach lining from damage.
2. Rich in Antioxidants
Turmeric is loaded with antioxidants that combat free radicals, reduce oxidative stress, and promote overall gut health.
3. Supports Digestive Health
Turmeric is often used as a digestive aid due to its ability to stimulate bile production, which helps break down fats and promote smoother digestion.
4. Anti-Inflammatory Properties
Chronic acid reflux can lead to inflammation of the esophagus. Turmeric’s anti-inflammatory effects can help soothe this irritation and support the healing process.
5. Natural Antimicrobial
Turmeric has natural antimicrobial properties that can help maintain a healthy gut microbiome by reducing harmful bacteria while promoting beneficial bacteria.
6. Low Caloric Content
Turmeric is low in calories and free of fat, making it a safe and lightweight addition to most diets.
Can Turmeric Help with Acid Reflux?
Turmeric can be beneficial for individuals with acid reflux when consumed in moderation and as part of a balanced diet. Here’s how it may help:
1. Reduces Inflammation
Acid reflux often leads to inflammation of the esophagus. The curcumin in turmeric helps reduce this inflammation, alleviating symptoms like heartburn and discomfort.
2. Soothes the Stomach Lining
Turmeric’s ability to protect the stomach lining can help prevent irritation caused by stomach acid, reducing the severity of reflux symptoms.
3. Promotes Healthy Digestion
By stimulating bile production and supporting the digestive process, turmeric can help reduce bloating and indigestion, which are common reflux triggers.
4. Fights Oxidative Stress
The antioxidants in turmeric protect the esophagus and stomach from oxidative stress caused by acid exposure, promoting tissue repair and overall gut health.
Caution with Excessive Use
While turmeric is generally safe, consuming it in excessive amounts or in concentrated forms (such as supplements) can irritate the stomach lining in some individuals, potentially worsening reflux symptoms. It’s always best to start with small amounts and monitor how your body reacts.
How to Use Turmeric Safely for Acid Reflux Relief?
To reap the benefits of turmeric without aggravating acid reflux, it’s important to use it correctly. Here are some tips:
- Start Small
Begin with small amounts of turmeric (about 1/4 to 1/2 teaspoon) in your meals and gradually increase as tolerated. - Avoid Spicy Combinations
Combining turmeric with spicy foods like chili powder can irritate the stomach. Stick to mild recipes. - Pair with Black Pepper
Adding a pinch of black pepper enhances the absorption of curcumin, making turmeric more effective. However, if you’re sensitive to black pepper, use caution, as it can also trigger reflux in some people. - Consume with Fat
Curcumin is fat-soluble, so consuming turmeric with healthy fats like olive oil, avocado, or coconut milk can improve absorption. - Opt for Golden Milk
Turmeric milk (also called golden milk) is a popular way to consume turmeric. Use almond or oat milk as a base to keep it reflux-friendly. - Avoid Concentrated Supplements
Unless advised by a healthcare provider, avoid high-dose turmeric supplements, as they can irritate the stomach in some individuals.
Turmeric Recipes for Reflux Management
Here are some simple and reflux-friendly ways to incorporate turmeric into your diet:
1. Turmeric Golden Milk
Ingredients:
- 1 cup almond or oat milk
- 1/2 teaspoon turmeric powder
- 1/4 teaspoon cinnamon (optional)
- 1/2 teaspoon honey (optional)
Instructions:
- Heat the milk in a saucepan.
- Stir in turmeric and cinnamon.
- Sweeten with honey if desired.
- Drink warm, preferably before bed, to soothe reflux symptoms.
2. Turmeric Rice
Ingredients:
- 1 cup cooked basmati rice
- 1/2 teaspoon turmeric powder
- 1 teaspoon olive oil
Instructions:
- Mix turmeric into the cooked rice.
- Drizzle with olive oil for a light, flavorful dish.
Related to Read: Is Saffron Rice Acidic?
3. Turmeric Smoothie
Ingredients:
- 1 banana
- 1/2 teaspoon turmeric powder
- 1/2 cup almond milk
- 1/4 teaspoon ginger (optional)
Instructions:
- Blend all ingredients until smooth.
- Serve as a refreshing and reflux-friendly snack.
Frequently Asked Questions About Turmeric and Acid Reflux
1. Is turmeric good for acid reflux?
Yes, turmeric can help manage acid reflux due to its anti-inflammatory and digestive-supporting properties.
2. Can turmeric worsen acid reflux?
In rare cases, excessive consumption of turmeric or concentrated supplements may irritate the stomach lining, worsening reflux symptoms. Always use turmeric in moderation.
3. Is turmeric tea safe for GERD?
Turmeric tea is generally safe for GERD sufferers when consumed in small amounts. Avoid adding spicy or acidic ingredients like lemon.
4. Can turmeric replace medications for acid reflux?
While turmeric can help manage symptoms, it should not replace medications prescribed by your doctor. Always consult a healthcare professional for personalized advice.
5. Are turmeric supplements safe for acid reflux sufferers?
High-dose turmeric supplements may irritate the stomach in some individuals. It’s best to stick to culinary turmeric unless recommended by a healthcare provider.
Final Thoughts
Turmeric is a slightly acidic to neutral spice with powerful anti-inflammatory and antioxidant properties that make it beneficial for managing acid reflux. When used in moderation and paired with reflux-friendly foods, turmeric can help soothe the esophagus, reduce inflammation, and promote healthy digestion.
Whether you’re sipping on turmeric tea, enjoying golden milk, or adding it to your favorite dishes, turmeric is a versatile and natural way to support digestive health.
However, always listen to your body and consult a healthcare professional if you’re unsure about incorporating turmeric into your acid reflux management plan.
Related Posts



Subscribe for New Racipies
Get mental health tips, updates, and resources delivered to your inbox.