
Donut Birthday Party Decorations

Medically reviewed by Christiana George Updated Date: December 19, 2022
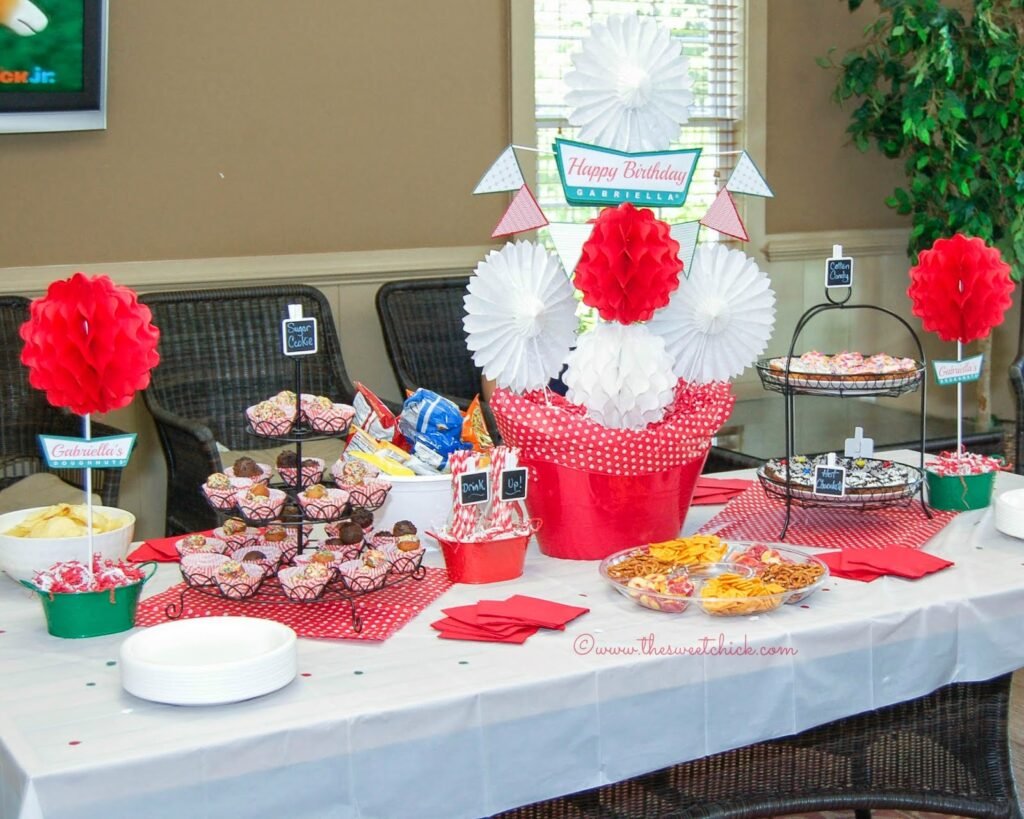
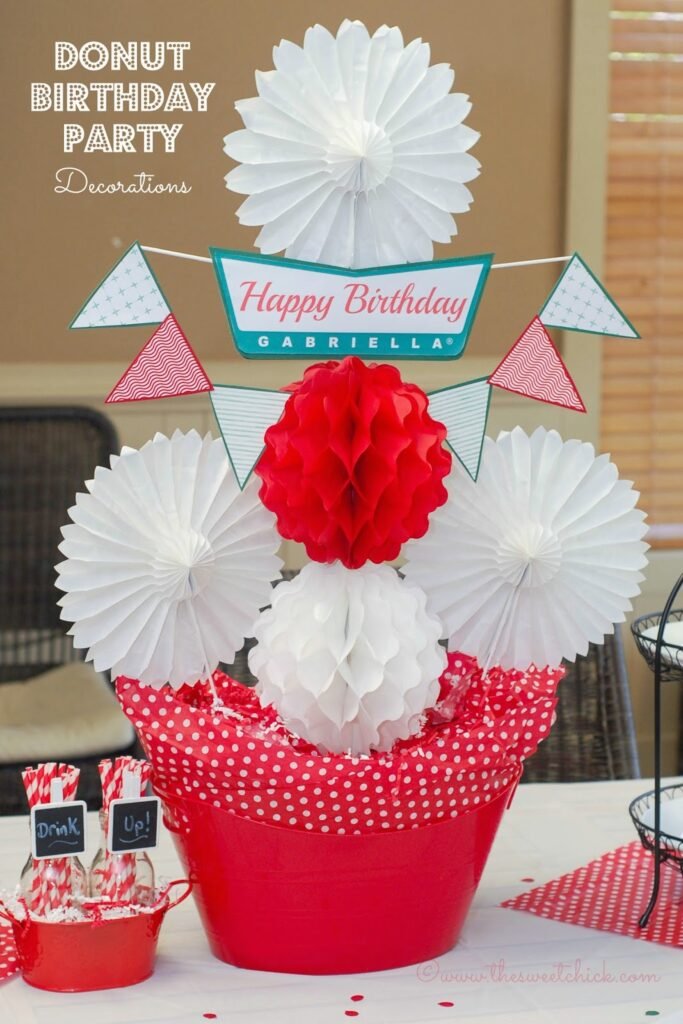
Well, since the decorations for my daughter’s birthday party came out even better than anticipated, I thought I’d share a few more photos. Since we now live down south, I thought a “Krispy Kreme” theme would be appropriate for the party and my daughter agreed. I found so many great ideas on Pinterest for decorations. The colors are what drew me in, maybe because they remind me of Christmas. Everything was fairly simple to put together, my daughter helped out with a lot of small details.

So the first thing I worked on was the invitation. This is a blown up version. The actual invite was about 4″ x 5″. I found the invitation online and through the magic of Photoshop Lightroom, I was able to erase all the information inside the circle and replace it with my own, using Picmonkey. The font is not exact, but the feel is still the same. I glued it to some green card stock I had in my scrapbook stash.

Next came the centerpiece. Originally I was planning on hanging everything, but then I decided I needed something easy to set up and easy to remove after the party. Party Pail supplied me with the white tissue fans, white honeycomb tissue ball, red honeycomb tissue balls, and red drink napkins. They have a lot of great party supplies for kids and adults at great prices. I was very happy with what they sent me. And my daughter was too.

For the base of the centerpiece I used a plastic drink bucket from Target. It was only $3. I lined it with some poke-a-dot tissue paper, also from Target. I filled the bottom of the bucket with green floral foam blocks I found at the Dollar Tree. I made two layers of blocks cutting and piecing them together to make them fit. I did not glue them to the bottom because I wanted to re-use the bucket, so I used wooden skewers to keep the blocks from shifting. Then I had my daughter paint some wooden dowels I bought at Walmart. I poked the dowels into the foam blocks and slid the tissue fans and honeycomb balls onto the dowels. For the fans, I did use a little clear tape to keep them secure. I covered up the blocks with some more tissue paper.
The Happy Birthday sign was made the same way as the invitation, a little Photoshop and a little Picmonkey. I printed it on regular white paper and glued it to the same green card stock as the invites. I made two and stuck them to the wooden dowel and to each other with my scrapbooking ZOTS adhesive dots. I slid two wooden dowels into the middle of the two signs to hand my bunting banner. For the banner, I used scrapbook paper and cardstock that I had on hand and matched the red and green colors. I glued them together with the ZOTS also and glued a corner to the red honeycomb ball.

I ended up making two small topiaries with the other red honeycomb balls. I found the green metal potting tins at the Dollar Tree, filled them with more green floral foam. This time I glued the foam to the tin with some tacky glue. I poked the skewer in and added the ball and the sign the same way as the centerpiece. Then my daughter glued some red and white shredded paper over the foam blocks. The shredded paper I found in the party aisle at the Dollar Tree.

I had also found a red tin that matched the green ones. I used it to store my paper straws that I had on hand. I bought them on Amazon. I placed the straws in some recycled frappuccino glass bottles from Target and surrounded them with more shredded paper. The chalkboard clothes pin signs are from T. J. Maxx.

I bought swim rings for party favors since they look like donuts and this was also a pool party. I bought the swim rings at the Dollar Tree along with some candy. I made some cute tags with all the kids names to thank them for coming to the party. My daughter helped put all the goody bags together.

And that’s it for decorations. I made a variety of baked mini donuts for the party, Birthday Cake Oreo Donuts, Cotton Candy Donuts, Hot Chocolate Donuts, Funfetti Donut Holes, and Sugar Cookie Donuts. I used the Sugar Cookie Donuts on top of this Funfetti cake and added some sprinkles and Birthday Cake M&Ms. The kids were all over the donuts. I guess I will have to make a bigger cake next time. Even though we didn’t serve any Krispy Kreme donuts, I still liked the theme. And I got all the kids Krispy Kreme hats for party hats. The party was a success and everyone liked the decorations.
This post may be shared at these fabulous parties.
Disclaimer: Party Pail did provide me with some products to review, but I was under no obligation to provide a favorable review. All thoughts and opinions are my own.
Related Posts






Subscribe for New Racipies
Get mental health tips, updates, and resources delivered to your inbox.
Firecracker Rice Krispie Treats

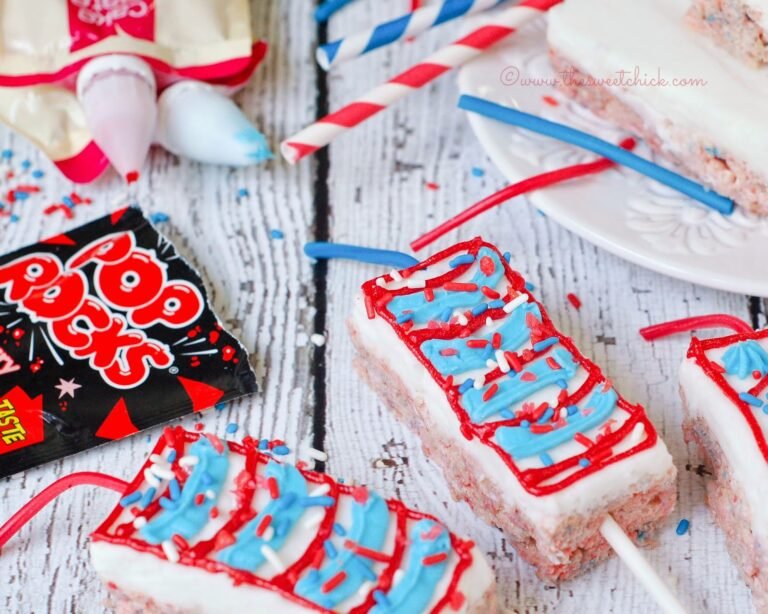
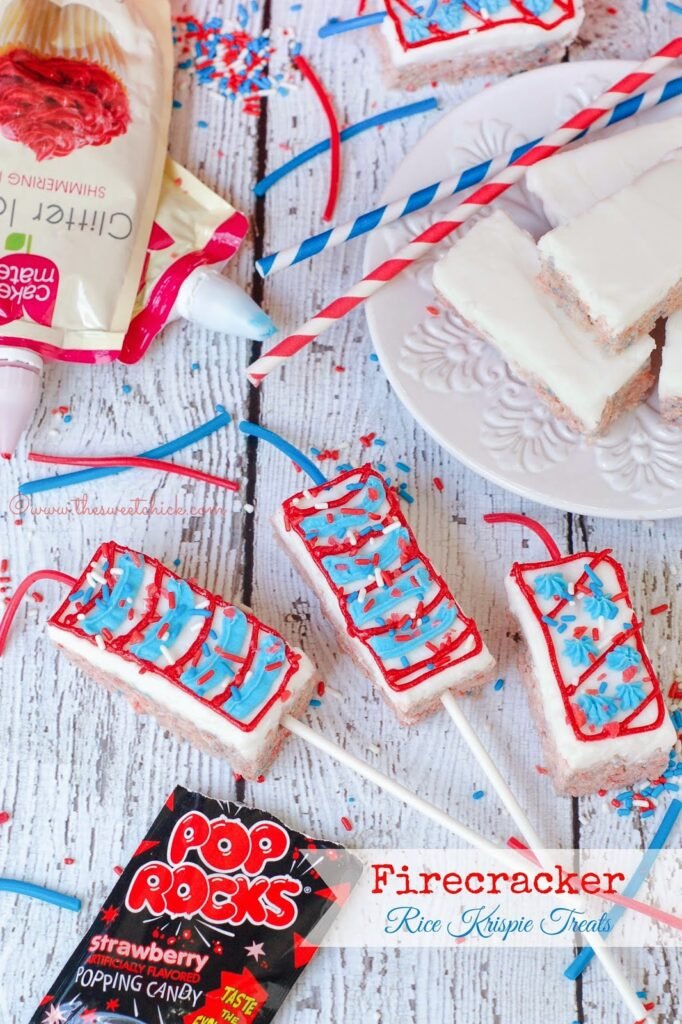
It’s almost time for the 4th of July. Time for picnics, cookouts, parades, and fireworks. Why not make some cute treats with the kids to celebrate. There is lots of fun packed into these Firecracker Rice Krispie Treats. They are full of strawberry marshmallows, sprinkles, colored frosting, blue and red Twizzlers, and Pop Rocks. Kids will enjoy decorating and eating these.
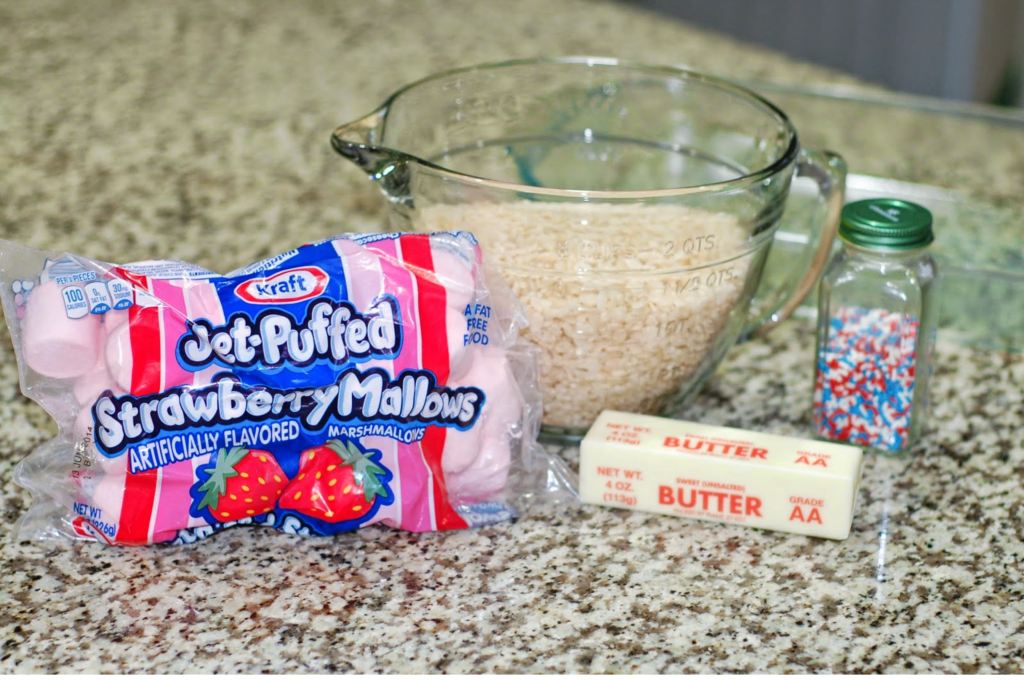
I used strawberry flavored marshmallows for these treats because that’s what I had on hand and I like the pick color it gives the Rice Krispies. For the sprinkles, I didn’t add them directly into the hot marshmallows because I didn’t want them to melt into one color. They did melt a little, but you can still distinguish the reds and blues.

For the frosting I used Wilton’s Buttercream in a stiff consistency. I used Wilton’s clear vanilla to keep the color bright white. Feel free to save yourself some time and buy a can of ready made white frosting if you like.
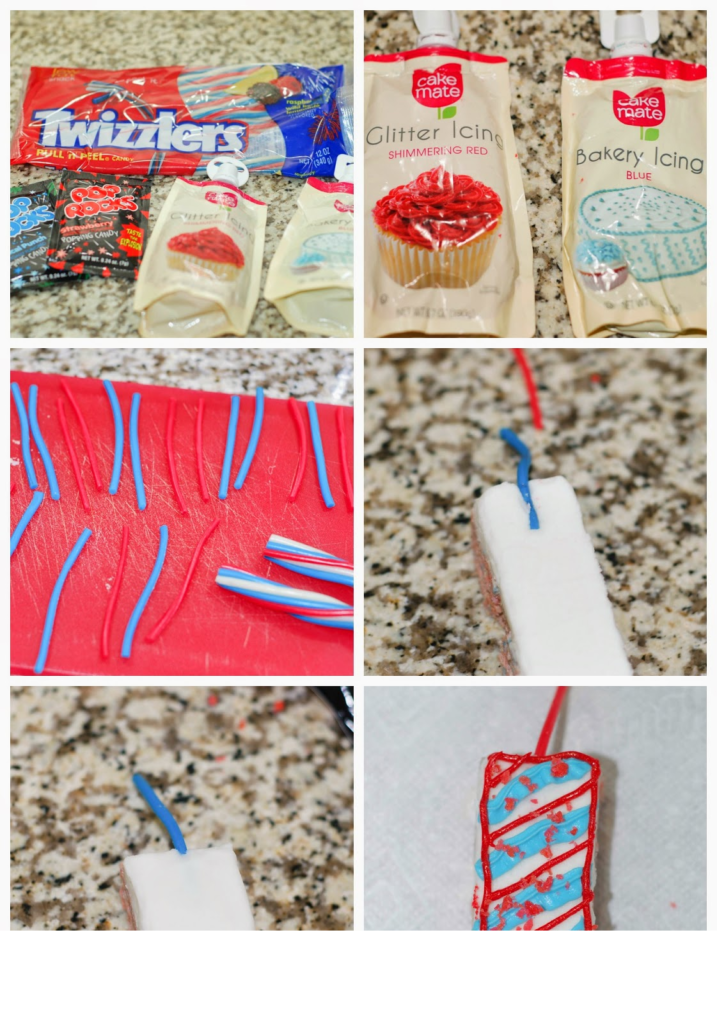
I found red, white and blue Twizzlers Pull n’ Peel. I separated out the colors and only used blue and red. I used Cake Mate decorating icing in shimmering red and blue (don’t forget to buy the screw on tips). You can also use gel icing or cookie icing. I only ended up using the red Pop Rocks because the blue ones were more of a light green. Once the frosting was set and the treats were cut into rectangles, I pressed the piece of Twizzlers into the icing and covered it back up with my fingers. The frosting is pretty malleable at this point.
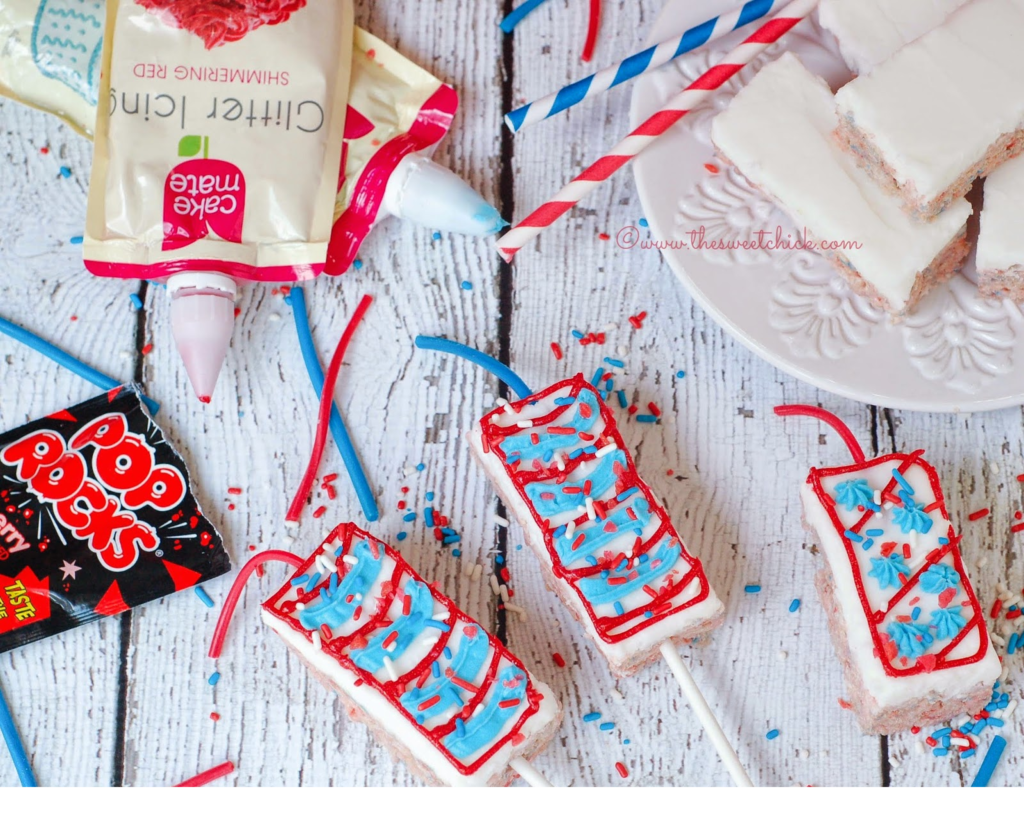
Then decorate however you like and sprinkle with Pop Rocks at the end. You can add more sprinkles too. If you are making these ahead of time don’t add the Pop Rocks until you are ready to serve because they do react with the frosting and end up melting. You want to make sure they keep their POP. You can add as little or as much as you want.
You don’t have to add the lollipop sticks, but if you do, you want to do it before you start decorating. And you are going to want to dip the tip of the stick into some melted candy coating before inserting it into the Rice Krispie treat. This will help make it more secure. You can use paper straws the same way. Come on, it’s time to get creative!
Firecracker Rice Krispie Treats
by The Sweet Chick
Prep Time: 30 minutes
Cook Time: 5 minutes
Keywords: no bake snack dessert rice krispies marshmallows frosting Twizzlers July 4th rice krispie treats American summer
Ingredients (27 treats)
For the treats
- 3 tablespoons butter
- 1 bag (8 oz.) Jet-Puffed Strawberry Mallows
- 5 cups Rice Krispies cereal
- 1/4 cup red, white, and blue sprinkles
For the frosting
- 1 cup vegetable shortening
- 1 teaspoon clear vanilla extract
- 2-3 tablespoons milk or water
- 4 cups confectioner’s sugar
- 1 tablespoon meringue powder.
For the toppings
- 1 package (12 oz.) Twizzlers Pull ‘n’ Peel candy in red, white, and blue
- 1 package (6 oz.) Cake Mate Glitter Icing in Shimmering Red
- 1 package (6 oz.) Cake Mate Bakery Icing in blue
- 1 package Cake Mate decorating tips
- 2-3 packages (0.24 oz. each) Pop Rocks in red
- 1/4 cup red. white, and blue sprinkles
Instructions
For the treats
In a large sauce pan, melt butter and marshmallows over low heat. Stir until completely melted.
Remove from heat , add the Rice Krispies and the sprinkles. Mix until all is well incorporated.
Then pour the mixture into a greased 9 x 13 pan or a cookie sheet and spread it evenly with a piece of waxed paper.
Place in fridge to cool and set.
For the frosting
In a stand mixer, cream together the vegetable shortening, vanilla, and 2 tablespoons milk/water.
Add the sugar and meringue powder and mix on low until the frosting comes together. If the frosting is too dry, add another tablespoon of milk/water. You want the consistency to be smooth and spreadable, but not too thin.
With a spatula, spread the frosting evenly over the cooled treats and place back in the fridge to set.
Once the frosting is set, cut into 27 rectangles with a sharp knife and remove from the pan/cookie sheet.
For the toppings
Take one rope of Twizzlers and cut it evenly in three parts, then take all the strands apart. Separate out the different colors.
Take a cut strand and push about a one inch length into the frosting at the top of the rectangular treat and with your fingers, gently push the frosting back over the strand to cover it. Repeat for all treats.
Then, using the different colored icing, decorate your treats as you wish with the different decorating tips.
Add sprinkles if you wish, then add the bits of red Pop Rocks.
Voila! Done.
Notes
If you wish to put these on lollipop sticks, do so before you decorate and dip the tips of the sticks in melted candy coating before inserting them in the treats. This will keep them secure.
These do not have to be kept refrigerated, but do keep them in an airtight container.
If you are making these ahead of time, don’t add the Pop Rocks until you are ready to serve.
Frosting Recipe from Wilton’s Class Buttercream Icing.
This recipe may be shared at these fabulous parties.
Related Posts
Subscribe for New Racipies
Get mental health tips, updates, and resources delivered to your inbox.