
Biscoff Rice Crispy Treats with Chocolate Topping

Medically reviewed by Christiana George Updated Date: June 8, 2023
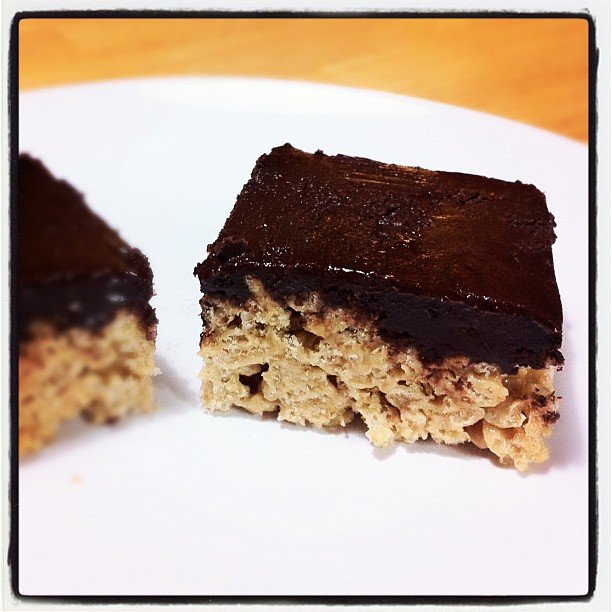
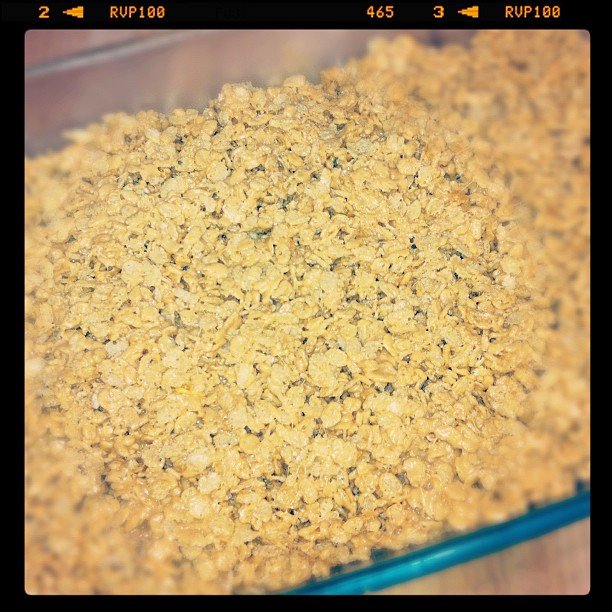
So I was in the mood for something Biscoff yesterday. I wanted to do something quick and easy, but totally delicious. My excuse was that I was making it for my daughter to bring to school. We have been eating way to many sweets lately in this house and hubby is not too happy. But of course he still continues to eat everything I bake. He tries to stay away, but he just keeps getting sucked in.
Anyway, I went on the Biscoff site to check out their recipes and found one for Rice Crispy Treats. Everyone loves Rice Crispy treats and they are easy to make. They would have been just delicious as they were, but I wanted a little something extra. I melted a bag of semi-sweet chocolate chips and spread it over the top of the Rice Crispy Treats
Biscoff Rice Crispy Treats with Chocolate Topping
Serves 4
INGREDIENTS
- 3 Tablespoons butter
- 1/3 cup of Biscoff Spread
- One 10 oz. package or about 40 regular marshmallows or 4 cups of miniature marshmallows
- 6 Cups rice crispy cereal
- 1 bag semi-sweet chocolate chips
- 2 Tablespoons butter
INSTRUCTIONS
Melt 3 tablespoons butter and Biscoff Spread in large nonstick saucepan over low heat. Add marshmallow and stir until completely melted. Mix in rice crispy cereal, stir until well coated. Spread the mixture using a buttered spatula or waxed paper evenly into a 13x9x2-inch pan coated with cooking spray. Let cool. Melt 1 bag chocolate chips and 2 tablespoons butter in double boiler. Spread chocolate over the top of the rice crispy batter. Cut into 2-inch squares when cool.
Oh my. Now they were super delicious.
Related Posts






Subscribe for New Racipies
Get mental health tips, updates, and resources delivered to your inbox.
Are Pumpkin Puree Safe for Acid Reflux?

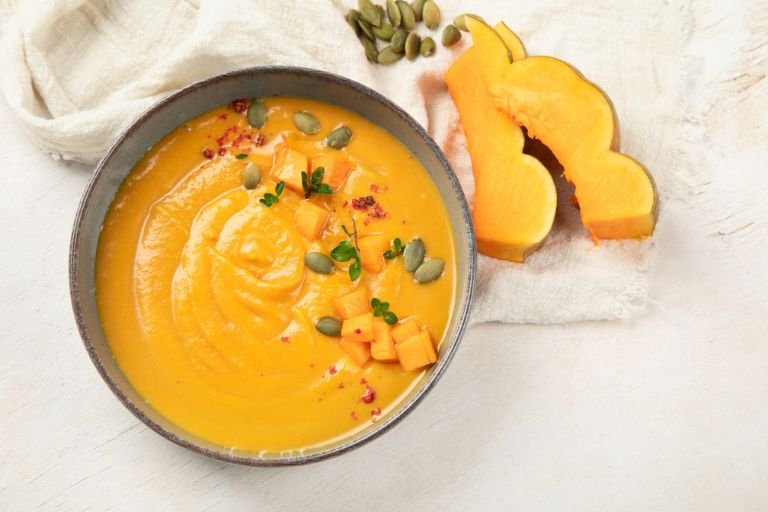
Pumpkin puree, made from cooked and blended pumpkin, is a versatile ingredient often used in soups, desserts, and savory dishes. Its naturally sweet and creamy texture makes it a popular choice for healthy recipes. But if you suffer from acid reflux or GERD (gastroesophageal reflux disease), you might be asking: “Is pumpkin puree safe for acid reflux?”
The good news is that pumpkin puree is generally safe for acid reflux sufferers. With its mild, low-acid nature, high fiber content, and rich nutritional profile, pumpkin puree can actually help soothe digestion and reduce reflux symptoms. However, portion size, preparation methods, and accompanying ingredients can all influence how well it works in a reflux-friendly diet.
In this article, we’ll explore why pumpkin puree is considered safe for acid reflux, its nutritional benefits, and tips for incorporating it into your meals without triggering symptoms.
Is Pumpkin Puree Acidic or Alkaline?
Pumpkin puree is considered a low-acid food, with a pH level ranging between 4.9 and 5.2. While this places it in the mildly acidic category, its overall effect on digestion is gentle, making it a safe option for most people with acid reflux.
Additionally, pumpkin puree has alkalizing properties when metabolized in the body, helping to neutralize stomach acid and reduce irritation in the esophagus. Compared to other acidic foods like tomatoes or citrus fruits, pumpkin puree is far less likely to trigger reflux symptoms.
Author Tip: Is Pumpkin Puree Acidic?
Nutritional Profile of Pumpkin Puree
Pumpkin puree is packed with essential nutrients that promote overall health and support digestion. Here’s what makes it a nutrient-dense, reflux-friendly food:
1. High in Fiber
- One cup of pumpkin puree contains about 7 grams of fiber, which supports healthy digestion, reduces bloating, and prevents overeating—one of the common triggers of acid reflux.
2. Low in Calories and Fat
- With only 80 calories per cup and virtually no fat, pumpkin puree is light and easy to digest, making it a perfect option for those managing reflux symptoms.
3. Rich in Vitamins
- Vitamin A: Promotes healthy mucous membranes, including those in the digestive tract, helping to protect the esophagus from stomach acid.
- Vitamin C: Reduces inflammation and promotes healing.
- Vitamin E: A powerful antioxidant that soothes and protects the digestive lining.
4. Contains Essential Minerals
- Potassium: Helps maintain electrolyte balance and supports muscle function, including the lower esophageal sphincter (LES), which prevents stomach acid from flowing back into the esophagus.
- Magnesium: Relaxes the digestive muscles and helps reduce reflux episodes.
5. High Water Content
- Pumpkin puree is about 90% water, which helps hydrate the body and dilute stomach acid, reducing reflux symptoms.
Also Read: Is Pumpkin Soup Acidic?
Why Pumpkin Puree is Good for Acid Reflux?
Research suggests that Pumpkin puree offers a range of benefits that make it suitable for acid reflux sufferers. Here’s why:
1. Gentle on the Stomach
- Pumpkin puree’s low acidity and smooth texture make it soothing for the stomach and esophagus, reducing the risk of irritation.
2. Aids in Digestion
- The fiber content in pumpkin puree helps regulate bowel movements, prevent constipation, and reduce bloating—key factors in managing acid reflux.
3. Prevents Overeating
- Its fiber and water content promote a feeling of fullness, preventing overeating, which is a common reflux trigger.
4. Reduces Inflammation
- Pumpkin’s antioxidants and anti-inflammatory compounds can soothe irritation in the esophagus caused by stomach acid.
5. Supports the Lower Esophageal Sphincter (LES)
- Minerals like magnesium and potassium help keep the LES functioning properly, preventing stomach acid from traveling back into the esophagus.
Tips for Using Pumpkin Puree in a GERD-Friendly Diet
To ensure pumpkin puree works well in a reflux-friendly diet, follow these tips:
1. Choose Unsweetened Pumpkin Puree
- Opt for pure, unsweetened pumpkin puree. Avoid canned pumpkin pie filling, which contains added sugars, spices, and preservatives that may trigger reflux symptoms.
2. Watch Your Portion Size
- Stick to 1/2 to 1 cup per serving. Even reflux-friendly foods can cause discomfort if consumed in large quantities.
3. Avoid High-Fat Additions
- Skip heavy creams, butter, or fried preparations when using pumpkin puree. Pair it with low-fat or non-fat ingredients instead.
4. Pair with Alkaline Foods
- Combine pumpkin puree with reflux-friendly ingredients like oats, bananas, or lean proteins to create balanced meals.
5. Avoid Spicy or Acidic Additions
- Refrain from adding spicy seasonings or acidic ingredients like vinegar or citrus to pumpkin puree dishes, as these can irritate the stomach and esophagus.
Related to Read: Are Pumpkin Seeds Safe for Acid Reflux?
Reflux-Friendly Pumpkin Puree Recipes
1. Pumpkin Oatmeal
Ingredients:
- 1/2 cup oats
- 1/2 cup pumpkin puree
- 1 cup unsweetened almond milk
- 1/2 teaspoon cinnamon (optional)
- 1 teaspoon honey (optional)
Instructions:
- Cook oats in almond milk as directed.
- Stir in pumpkin puree, cinnamon, and honey.
- Serve warm as a hearty, reflux-friendly breakfast.
2. Pumpkin and Banana Smoothie
Ingredients:
- 1/2 cup pumpkin puree
- 1 small banana
- 1 cup unsweetened almond milk
- 1/2 teaspoon vanilla extract
Instructions:
- Blend all ingredients until smooth.
- Serve as a refreshing, acid reflux-friendly snack.
3. Pumpkin Soup
Ingredients:
- 1 cup pumpkin puree
- 2 cups low-sodium vegetable broth
- 1/4 cup unsweetened almond milk
- A pinch of salt and pepper
Instructions:
- Heat pumpkin puree and vegetable broth in a pot over medium heat.
- Stir in almond milk and season with salt and pepper.
- Serve warm with a slice of whole-grain bread.
More Pumpkin Recipes: Pumpkin, Banana, & Apple Yogurt Smoothie
Pumpkin Dulce de Leche Chocolate Chip Cookies
Pumpkin Spice Crepes with a Cinnamon Mascarpone Filling
Frequently Asked Questions About Pumpkin Puree and Acid Reflux
1. Is pumpkin puree acidic?
Pumpkin puree is mildly acidic but has alkalizing effects when metabolized in the body, making it safe for acid reflux sufferers.
2. Can pumpkin puree trigger acid reflux?
Pumpkin puree is unlikely to trigger reflux. However, consuming it in large quantities or pairing it with fatty or spicy ingredients may cause discomfort.
3. Is canned pumpkin puree safe for GERD?
Yes, plain canned pumpkin puree is safe for GERD, but avoid sweetened or spiced varieties like pumpkin pie filling.
4. How much pumpkin puree can I eat if I have acid reflux?
Stick to 1/2 to 1 cup per serving to avoid overeating, which can put pressure on the stomach and trigger reflux symptoms.
5. What are other reflux-friendly vegetables?
Other reflux-friendly vegetables include zucchini, carrots, spinach, cucumbers, and sweet potatoes.
Final Thoughts
Pumpkin puree is a nutrient-dense, low-acid food that is generally safe and beneficial for individuals with acid reflux or GERD. Its high fiber and water content, along with its soothing properties, make it a great addition to a reflux-friendly diet.
Whether enjoyed in oatmeal, smoothies, or soups, pumpkin puree can help improve digestion, reduce inflammation, and prevent reflux symptoms when consumed in moderation. Just be sure to avoid high-fat or overly spiced preparations to get the most out of this versatile and healthy ingredient.
Related Posts



Subscribe for New Racipies
Get mental health tips, updates, and resources delivered to your inbox.