
Don’t Think Fat, Think Pork Belly: Dongpo Pork

Medically reviewed by Christiana George Updated Date: January 2, 2026

Though my sister and I were never picky eaters, my mom had to apply her persuasion skills every now and then to get us to eat the food she’d prepared. Every parent must have to figure out an angle, some way of coaxing their child into eating the undesirable, or else dinner quickly descends into an unpleasant affair.
My mom appealed to our vanity. Everything was “good for the skin”—tomatoes gave you a rosy blush, tofu made it silky. And pork belly, well, apparently the fat operated as some kind of lubricant, turning your skin soft and plush. She also insisted that what we were eating wasn’t fat, just the extremely thick epidermis of the pig.
C’mon.
I wasn’t stupid, even at the grand age of ten. But it wasn’t like I needed the prodding anyway. I loved meat, especially pork belly. Although I never registered that what I was eating was pork belly. You don’t think about such things when you’re a kid. It was only later, now, that I realize what cut of meat my mom constantly cooked.

I’m not going to lie, dongpo pork is really fatty. But that’s what makes it so good! Pork belly is used a lot in Chinese cooking: twice-cooked pork (my dad’s favorite), red-braised pork (my sister’s favorite), and dongpo pork. I was reminded of the prevalence of pork used in Chinese cooking while going through all these recipes—the Chinese character for meat usually signifies pork unless otherwise noted.
I never knew the origin story of this dish, but it’s actually named after the Chinese poet Su Dongpo, who apparently was banished to Hangzhou, then considered the boondocks I guess, to lead a life of poverty. He was a great chef, and actually invented dongpo pork as he was trying to improve on red-braised pork.
As the meat braised, it filled the apartment with the fragrant smell of Shaoxing wine… and made me feel slightly homesick. So I called my mom to tell her what I was doing, and you know what her response was? “Don’t eat too much of it! It will raise your cholesterol!”
C’mon, Mom. It’s good for my skin, remember?
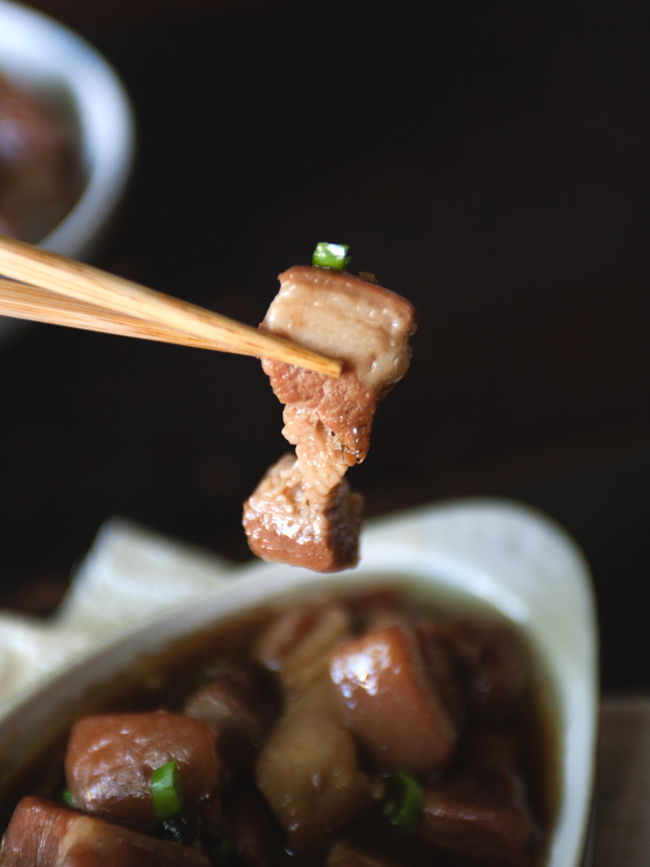

DONGPO PORK, a.k.a. BRAISED PORK BELLY
Adapted from Maameemoomoo
Serves 4
Ingredients:
1.5 lb. pork belly
1 Tbsp canola oil
2 scallions, chopped into 1-inch pieces
3 cloves garlic, peeled
3 Tbsp rock sugar or brown sugar
3 Tbsp soy sauce
3.5 cups lukewarm water
3 cups boiling water
1.5 Tbsp dark soy sauce
1/2 cup shaoxing wine
1 Tbsp cornstarch
Directions:
In a wok on medium heat, add oil. Saute scallions, ginger and garlic for 2-3 mins until fragrant. Add sugar and further saute until sugar starts to melt. Add soy sauce, dark soy and wine. Bring to a boil. Once boiling, turn off heat and add lukewarm water. Set aside.
While sauce is coming to a boil, slice pork belly into pieces about 2 inches thick. Place pork belly pieces on a chopping board or a baking pan and scald them on all sides with boiling water.
Place the pork pieces skin side down in a pan large enough to fit all the pieces together and add the earlier sauce mixture. Bring to boil. Once boiling, turn down the heat to a low simmer and braise the pork for 30 mins, covered. After 30 minutes, flip the pork belly pieces over and continue braising, covered, for a minimum of 3 hours, basting the skin occasionally.
When ready, remove pork belly pieces gently and set aside. Strain remaining sauce into a saucepan and bring to a low simmer. Mix cornstarch with 1/4 cup water and gently pour it into the sauce. Stir well until sauce becomes a shiny, sticky glaze. Turn off heat. To serve, gently place the pork belly onto a plate and spoon the sauce over. Serve with rice or noodles (my favorite!).
Related Posts






Subscribe for New Racipies
Get mental health tips, updates, and resources delivered to your inbox.
Is It Okay to Take a Jello Shot? Here are Some Surprising Facts

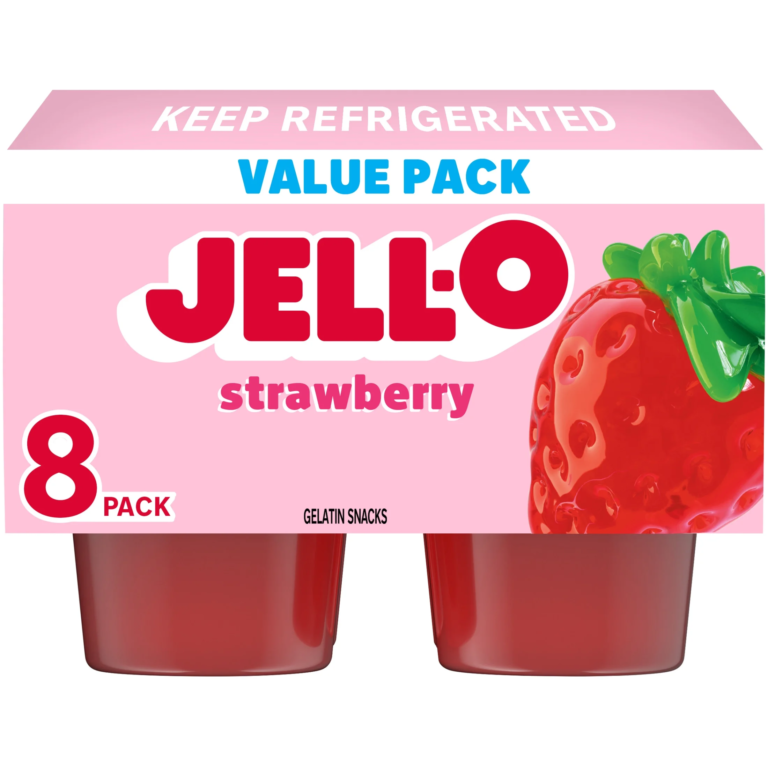
We love jello because it is fun and delicious. Besides, it is also versatile for different types of recipes. But it is most popular as a school lunch item and a hospital treat.
People hardly think that jiggly food can be unhealthy in any way. Yet, if you want to eat it, you should ask yourself: “Is jello healthy to eat, especially on a daily basis?”
Though jello is low in calories, it isn’t very healthy. Besides being low in essential nutrients like protein, fat, vitamins, and minerals, it also contains artificial flavors, colorings, and sweeteners. While you won’t gain weight from eating jello alone, regular consumption can lead to several health issues.
As a dessert, you can enjoy jello occasionally, but it’s not advisable to eat it regularly. In this article, we’ll explore the components of jello, its ingredients, potential benefits and drawbacks, and appropriate consumption.
Is Jello Healthy?
You might think that no fat, few carbs, and some protein make jello a healthy dessert. However, jello is largely devoid of nutritional value, even though it is low in calories.
Its primary content is sugar, which in excess is harmful. Despite its various health benefits and lightweight texture, jello isn’t a healthy snack and should not be consumed regularly.
Sugar-free jello can be a better option than regular jello, but it should still be consumed in moderation. For a healthier snack, you can try the sugar-free version.
Jello made from agar, a great vegan option, offers better qualities and nutritional benefits.
Jello: Properties and Nutritional Components
Jello isn’t a natural food but is made from gelatin, a protein derived from animal bones, skin, and cartilage, mostly from cows. Collagen is extracted from these sources to produce gelatin.
This gelatin transforms into the translucent, flavorless food we love when it is flavored, colored, and sweetened for use in desserts.
Apart from being low in calories, jello is also free of fat, fiber, and vitamins. However, it does contain some carbs, proteins, and a significant amount of sugar.
Since gelatin comes from a protein-rich source, it is often perceived as nutritious. This perception explains why jello is commonly served in school lunches and hospitals.
Nutritional Composition of Jello
| Nutritients of Jello | Composition |
| Carbohydrate | 19g |
| Fat | 0g |
| Protein | 1.6g |
| Sugar | 18g |
| Fiber | 0g |
| Sodium | 101mg |
| Calorie. | 84. |
What is Gelatin Made Of?
Gelatin comes from collagen, which makes up parts of the body like tendons, bones, and skin. The process involves boiling, drying, and treating these materials with an acid or base to extract collagen, which is then dried and made into powder.
This powdered gelatin is dissolved in boiling water to make jello. During cooking, the collagen transforms into a semi-solid state, giving jello its gel-like texture.
Since gelatin is animal-derived, many people opt for jello made from agar, a plant-based alternative, making it vegan-friendly.
Gelatin vs. Agar Agar
| Parameter | Gelatin | Agar Agar |
|---|---|---|
| Amount for Jello | 8 teaspoons per serving | 1 teaspoon per serving |
| Texture Outcome | Thinner texture | Thicker density |
| Usage | Softer foods like mousse and panna cotta | Both desserts and savory dishes like soup |
| Origin | Animal-derived from bones, tissues, or skin | Plant-derived from seaweeds |
| Setting Time | Easier to set by mixing in warm water | Longer setting time by boiling with water |
Health Benefits of Jello
1. Aids in Weight Loss
Jello is lightweight and fat-free. The carbs and proteins can make you feel full if consumed in sufficient quantities, and it is very low in calories, helping you eat less and build less fat.
2. Offers Hydration
Collagen, essential for skin health, is abundant in jello. The protein and amino acids help maintain skin hydration, making it more elastic and preventing wrinkles.
3. Maintains Gut Health
The amino acids from collagen in jello protect the intestinal lining, preventing damage and inflammation. Even without fiber, jello can promote normal bowel movements and good digestion.
4. Controls Blood Sugar
Gelatin in jello contains the amino acid glycine, which helps regulate blood sugar levels and prevent spikes. Glycine supplements are also used to manage diabetes.
5. Strengthens Bones and Joints
Collagen helps keep bones and joints in good shape by increasing cartilage density, strengthening connective tissues, and preventing joint damage.
6. Source of Good Protein
Jello contains beneficial amino acids from gelatin, which improve health in various ways. Despite being low in overall protein, the protein it does contain is of high quality.
Is Jello Healthy for Weight Loss?
While jello is low in calories and fat-free, it isn’t ideal for weight loss due to its lack of nutritional value. You can try sugar-free jello as a weight loss aid, but the benefits will be minimal.
For effective weight loss, include foods in your diet that are low in fat, carbs, and calories but rich in vitamins, minerals, and other nutrients.
Disadvantages of Jello
1. Bloating and Heartburn
For individuals with GERD, jello can cause acidity, leading to bloating and discomfort. In severe cases, it might result in heartburn.
2. Allergic Reactions
Jello contains artificial colorings and flavors that can cause allergies in some people, depending on their tolerance to these additives.
3. Excess Sugar Intake
Regular jello has a high sugar content, which can imbalance blood sugar levels if consumed frequently.
4. Risks of Critical Diseases
Artificial additives in jello can increase the risk of severe diseases such as cancer, heart problems, fatty liver, obesity, and diabetes due to excess sugar intake.
Is Sugar-Free Jello Good for You?
Sugar-free jello is a healthier alternative to regular jello, especially for those looking to reduce sugar intake or manage weight. However, it still lacks significant nutritional content and should be consumed in moderation to avoid adverse effects.
FAQs
Why do hospitals serve jello as a treat?
Jello contains gelatin, which can contribute to good health by providing collagen, strengthening connective tissues, and offering various amino acids. Gelatin also helps remove toxins from the liver, making it beneficial in hospital settings.
What happens if you eat too much jello?
Overconsumption of jello can lead to sugar build-up and increase the risk of chronic diseases such as diabetes, cardiovascular diseases, and liver problems. Jello should be consumed in moderation.
Is jello good for your brain?
The amino acid glycine in jello can enhance brain function by improving memory and focus. It also helps treat mental health conditions and improves mood.
Conclusion
So, is jello healthy? While jello isn’t inherently harmful and offers some advantages, it also has drawbacks. It’s best consumed occasionally, with sugar-free or vegan versions as healthier alternatives for more frequent intake.
Always consider the potential health effects of additives and sugar content, and enjoy jello in moderation as part of a balanced diet.
Related Posts






Subscribe for New Racipies
Get mental health tips, updates, and resources delivered to your inbox.