
Tartine Croissant Recipe

Medically reviewed by Christiana George Updated Date: June 8, 2023

Every now and again, I like to tackle big projects. I’m good at big projects. There’s something so reassuring about them, like you know there’s an end in sight, eventually, but it’s so far away that you’re not focused on it. Instead, you get to hunker down, keep your head low, and really sink yourself into the process. Drink some coffee while you’re at it, noodle around with other things while waiting (there’s always a lot of waiting).
BUT. Everything will be going swimmingly, until everything goes awry. That’s when, say, you open the oven to discover a hot tub’s worth of butter oozing around on the floor of your baking pan. It might be kind of like how Alexander Fleming felt when he realized he’d left a Petri dish uncovered in the lab—the horror!, the shame!, the contamination (him)!, the smell of frying croissants (me)!—except he discovered penicillin, and I ended up with rubbery croissants.
It’s in moments like these that your character will come through. You could give up, throw in the towel, decide to start down another path altogether. Knife-sharpening comes to mind, although that’s another one of those projects you could (and will be told to) spend a lifetime mastering. Or attempting the elusive scorpion pose. (I know, scary.) Alternatively, you could also decide to try again. According to my assessment, the latter demonstrates true grit. Or so I have to believe. Fine, mostly, I didn’t want to feel like I’d been defeated by a baked good.

So I took a step back and really tried to figure out where I’d gone wrong. I think it came down to one main reason: the butter hadn’t been soft enough when I’d started the lamination process. It seems that butter that isn’t sufficiently malleable will clump up and tear through the layers, resulting in lots of leakage points. Does that sound about right, seasoned croissant makers? But, a little leaking is normal too, and should not be a cause for concern. Along with a few other small tweaks, I felt ready to give croissants another go.
I’d initially made half a batch of plain croissants and half a batch of ham and cheese, but for my second attempt, I decided to pare down my expectations. If I could successfully make a batch of plain croissants, I could begin thinking about incorporating other ingredients. It’s kind of like how in Japan, sushi apprentices spend years mastering the art of making rice before they’re allowed to move on to even touching the other stuff. (Talk about integrity!)

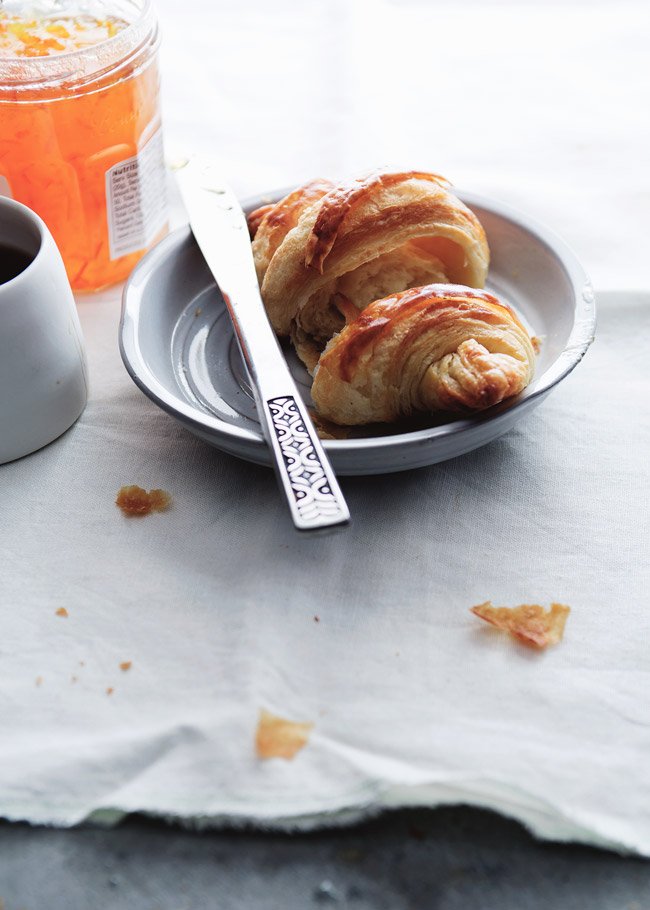
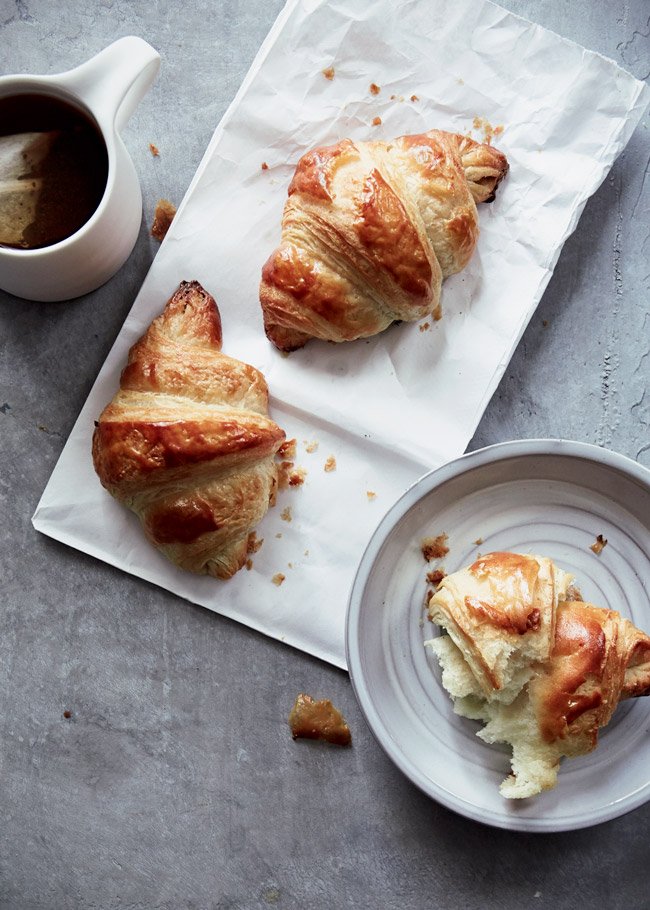
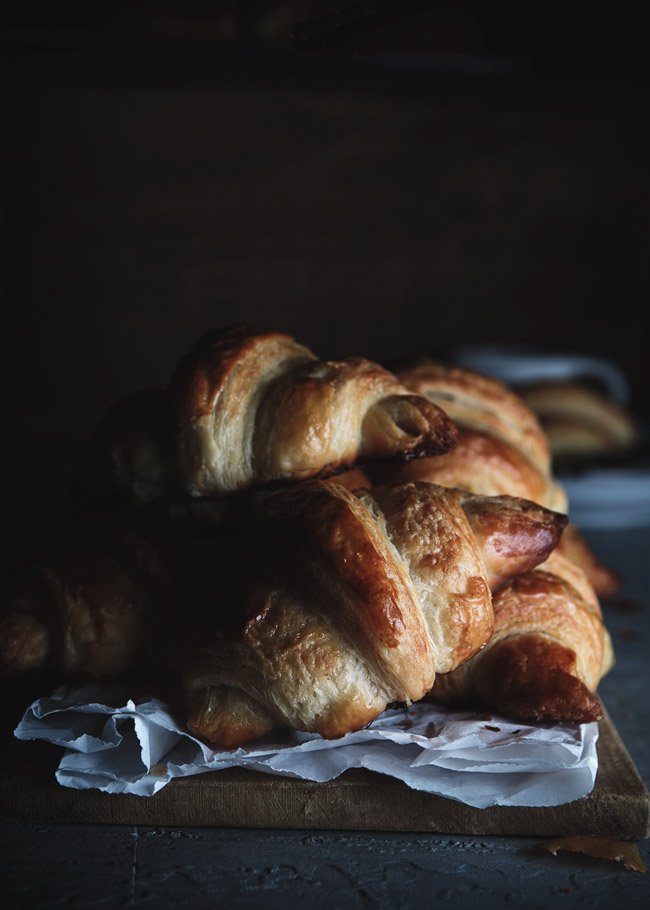
Of course you’re wondering how my second attempt went? Pretty well, I think. The insides were a bit doughier than I would’ve liked, but they actually tasted like croissants. Buttery, flaky, layers shattering upon contact. I love that initial tenderness of the innards when the croissants are pulled apart. They’re still steaming from their bake and taste incredibly luscious and fresh. I also love the way the tips burn slightly. They’re the crispest parts, all puff pastry-like and caramelized. And the shape, the shape! While svelte and long are generally qualities esteemed by women the world over, I love how cute and round mine came out. They’re like the Volkswagon Beetles of the croissant world.
I don’t know, I think Tartine just might approve.
TARTINE CROISSANTS Recipe
Adapted from Tartine
Makes 10
Ingredients:
- For the preferment:
- 6 Tbsp nonfat milk
- 1/2 T (or 1.5 t) active dry yeast
- 2/3 cup all-purpose flour
And everything else:
- 2 t active dry yeast
- 1 cup minus 2 T (or 14 T) whole milk
- 3 cups all-purpose flour
- 1/6 cup sugar
- 2 t salt
- 1/2 T unsalted butter, melted
- 2-3/4 sticks (or 22 Tbsp) unsalted butter, cool but malleable
- 1 egg & a pinch of salt for the egg wash
Tartine Croissant Recipe Directions:
For the preferment: Heat up the milk so it’s warm but not hot (I mixed whole milk with hot water that had been heated in the kettle earlier in the day to make warm-ish “nonfat” milk.) and pour it in a mixing bowl. Sprinkle the yeast on top, stir to dissolve, and mix in the flour until a smooth batter forms. Cover and let rise until almost doubled in volume, 2 to 3 hours (or overnight if stored in the fridge).
For the rest of the recipe: Make the dough. Transfer the preferment to the bowl of a stand mixer fitted with the dough hook. Sprinkle in the yeast and mix on low speed until incorporated, a minute or two. You can stop the mixer to scrape down the sides if needed. When the mixture is well-mixed, increase the speed to medium and mix for a few minutes. Slowly add in half the milk and continue to mix until the milk is fully incorporated. (This will take awhile. I helped the process along by stopping the mixer and scraping down the sides.) Reduce the speed to low, add the flour, sugar, salt, melted butter, and the rest of the milk, and mix until everything comes together in a loose, shaggy-looking dough, about 3 minutes. Stop the mixer and let the dough rest for about 15 minutes. Once again, turn on the mixer and mix until the dough is smooth and elastic, no more than 4 minutes. (Mixing encourages gluten growth, which is not what you want in this case, so try to keep the mixing time as short as possible.) Once you’ve achived a smooth dough, cover the bowl and let the contents rise in a cool place until the volume increases by about half, 1.5 hours.
Lightly flour a work surface and transfer the dough to the surface. Press it into a rectangle about 2 inches thick, wrap in plastic wrap, and place the dough in the fridge for about 4 to 6 hours.
About an hour before removing the dough, put the butter in the bowl of your stand mixer fitted with the paddle attachment, and mix it on medium-high speed for a few minutes. This part is important, as the consistency of the butter is really important for lamination. What you’re going for is butter that’s malleable, but not melting. It should still be cool but amorphous, not retaining its original shape. I found it helpful to stop and scrape the butter that had built up on the side of the bowl with a spatula and into a bowl. If you do this a few times, poking the butter out of the holes of the paddle, you’ll end up with soft but cool butter. Place the bowl in the fridge to firm up a bit.
Now the lamination begins: Lightly flour a work surface and take dough and butter out of the fridge. Unwrap the dough and set it on the surface. With a rolling pin, roll the dough into a pronounced rectangle 20 inches wide and 8 inches long. Make sure the long side is facing you. Starting from the left, spread the butter over 2/3 of the dough using a combination of your hands and a spatula to apply it evenly (leave a slight margin). Fold the uncovered third over the center third, then fold the left third over that. (It’s like folding a letter.) What you end up with is called a plaque. Seal the seams of the plaque so that the butter is sealed within the dough.
Now onto the second turn: Turn the plaque 90 degrees so that the long side is once again facing you. Again, roll the dough out to a pronounced 20′x8″ rectangle and fold it like you did earlier. All the while, feel free to scatter a little flour over and under the dough to keep it from sticking to the rolling pin/surface, but brush off excess flour as it will affect the final product. Wrap the plaque in plastic wrap and place it in the fridge for about 1.5 hours.
The third and final turn: Repeat rolling out the plaque and folding it. Re-wrap it in plastic wrap and place it back in the fridge for about 1 hour. (At this point, the dough can be frozen, but let it warm up by spending a night in the fridge before rolling it out.)
Shaping: This time, roll the dough out to a pronounced rectangle at least 22.5″ wide and 9″ tall. Using a sharp knife or pizza wheel, cut off the excess margins. You basically want a 22.5″x9″ rectangle with the sides all trimmed off. Using a ruler, slice the dough into five equal rectangles that are 4.5″ wide and 9″ tall. Slice each of these in half so that you have 2 right-angled triangles (with a long side about 10″).
Have a large baking sheet covered with parchment paper ready. To shape, position each triangle so that the base faces you. Take the two points of the base in your fingers and stretch them a bit. Then furl the base upwards into a roll. Continue rolling with your palms, and at the end, grab the last tip, give it a slight stretch, and tuck the point underneath the rolled dough.
Place the croissant on the baking sheet, giving it plenty of space (Please note: in the picture above of the raw croissants, they are way too closely-spaced!). After all the croissants have been placed on the pan, set the croissants in a draft-free, cool place for a final rise, 2 to 3 hours. I placed the baking sheet in a large empty plastic bag. (It keeps a skin from forming, inhibiting the rise.)
Preheat your oven at 400 degrees F. When the croissants are just about ready (they’ll be puffy, and when you push one with your fingertips, the indent will stay), prepare the egg wash by whisking together the egg, a pinach of salt, and a splash of water. Apply the wash with a pastry brush over all the surfaces and edges. Slide the croissants into the oven. After 5 minutes, reduce the temperature to 350 degrees F and bake another 20 minutes until the croissants are golden-brown. And if some butter seeps out, that’s totally okay.
Check More Recipes:
Apricot Raspberry Galette, Or Look What I Made!
Related Posts

Subscribe for New Racipies
Get mental health tips, updates, and resources delivered to your inbox.
Are Falafels Healthy? Tasty & Nutritious Chickpea Bites!

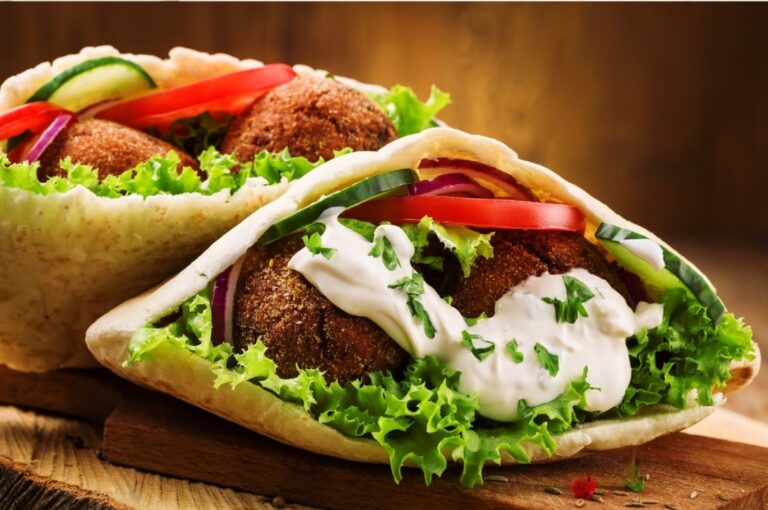
Falafels? Or do you call it vegan kebab patties?
Well, whatever you debate over the scrumptious flavorful Middle Eastern delicacy is worth drooling over. All these vegan patties contain chickpeas/ fava beans, some flour, garlic, onion, and spices.
Still, the question may arise- are falafels healthy?
Falafels are rich in unsaturated (good) fat but low in saturated (bad) fat and have zero cholesterol as a vegan option. The chickpeas/ fava beans in falafel are rich in protein, iron, copper, folate, manganese, and fiber. But, falafel patties are deep-fried, which may increase their calorie count.
Since this Middle Eastern street food has been increasingly gaining popularity as a main dish or starter in Europe and North American cuisines, it is essential to know its positive and negative effects on health.
Nutritional Chart of 1 Falafel Patty
One falafel patty, or 20 grams of falafel, contains the following nutritional value.
| Nutrients | Amount | % Daily Value* (DV) |
| Calories | 83 | |
| Total Fat | 7.3 g | 9% of DV |
| Saturated Fat | 0.5g | 2% of DV |
| Cholesterol | 0 g | 0 % of DV |
| Sodium | 30 mg | 1% of DV |
| Total carbs | 3.7 g | 1% of DV |
| Dietary Fiber | 0.9g | 3% of DV |
| Protein | 1.1 g | |
| Potassium | 39.3 mg | 1% of DV |
| Iron | 1% | |
| Manganese | 6% | |
| Copper | 5% | |
| Folate | 5% of DV | |
| Vitamin B6 | 18% of DV | |
| Vitamin C. | 2.3% of DV |
One of the best things about falafel is the predominance of monounsaturated fat vs saturated fat. This ratio and zero cholesterol make it an excellent vegan option for active but health-conscious individuals.
High protein and complex carbs make it an energy-boosting food for almost any activity. Iron, manganese, copper, folate, Vitamin B6, and C are bonuses for stronger immunity, brain function, and metabolism. The only concern is the high sodium that may trigger issues like high blood pressure.
Related Article: Are Honey Bunches of Oats Healthy? Truth Revealed!
Are Falafels Healthy? 4 Factors Make Them Healthy
If you are an avid lover of meatballs, I would suggest you give up on that and introduce falafels to your plate. Here are some ways falafels are healthy; that will make it love more.
Fact 1 of 4: Easy on Your Stomach
Falafels are delicious, healthy, and filling. Since their primary ingredient is chickpeas or fava beans, you get a substantial amount of fiber from them. And we all know how important fiber is for better digestion and easy bowel movement!
You can keep constipation at bay by including falafel in your meal. Besides, a study suggested that regular consumption of chickpeas can promote intestinal health.
Is Falafel Good For Weight Loss?
Yes, falafel can be a good option for weight loss when consumed as part of a well-balanced diet and in moderation. Falafel is typically made from ground chickpeas or fava beans, which are high in protein and fiber, and can help keep you feeling full and satisfied, which may aid in weight loss efforts.
However, it’s important to note that the way falafel is prepared and consumed can greatly impact its healthiness for weight loss. Traditional deep-fried falafel can be high in calories and fat, which can contribute to weight gain if consumed in excess. To make falafel a healthier option for weight loss, consider baking or air-frying them instead of deep frying to reduce the amount of added fat.
Fact 2 of 4: Rich in Unsaturated Fats than Saturated Fat
Falafels are rich in monounsaturated and polyunsaturated fats, which benefit cardiovascular health. All thanks to the chickpeas used here.
Is Falafel Good For Cholesterol?
Unsaturated fats in falafels help to increase good cholesterol and lower bad cholesterol. As a result, you can avoid any potential heart disease. Plus, the amount of unhealthy fat is significantly lower than the good ones, preventing weight gain.
Fact 3 of 4: Get All Your Protein Here
Chickpeas and fava beans are rich sources of protein, plus you aren’t getting any fat or cholesterol in return- unlike meats.
Is Falafel High In Protein?
Falafels are one of the most healthy protein-based snacks. A single patty of falafel has 1.2 grams of protein. So if you have one serving of it (4-5 patties), you get 25% of your daily protein requirement. How cool is that?
Also, adding fava beans to your falafel gives you a massive iron boost. Iron is an important micronutrient for our immunity that we often overlook.
Fact 4 of 4: Filling Snack with Low Calories
If you are feeling hungry in the middle of the day, falafels can be the snack to fill you up without adding many calories. The rich protein and fiber can keep you filled till dinner.
If you are watching your weight, you can try keeping a few patties of falafels in your evening snack regime.
Related Article: Are Quesadillas Healthy? [5 Surprising Reasons]
Is Falafel or Chicken Healthier?
If you’re following a plant-based diet, falafel would be a healthier choice. On the other hand, skinless grilled or baked chicken may be a better choice if you’re looking for a low-carb, high-protein option.
Let’s compare some general nutritional aspects of falafel and chicken to understand their health benefits better.
Falafel
- Vegetarian/vegan-friendly
- Made from chickpeas or fava beans, which are high in fiber and protein
- Provides essential vitamins and minerals such as iron, folate, and magnesium
- Often deep-fried, which increases fat and calorie content
Chicken (specifically skinless, grilled or baked)
- High in lean protein, which helps build and repair muscle tissue
- Contains essential vitamins and minerals such as B vitamins, selenium, and phosphorus
- Low in saturated fat and calories when compared to fried or processed versions
What Makes Falafels Unhealthy?
Traditionally, falafels are deep-fried in oil, which makes them unhealthy. Eating them at restaurants or on the streets is more likely unhealthy because they are fried in hydrogenated oil high in saturated fats and cholesterol. Despite being made from healthy ingredients- it is what makes them unhealthy.
As a result, falafel lovers across the globe suffer from gastric, heartburn, or constipation as short-term issues. Whereas eating every day can lead to the buildup of unhealthy fats in the body leading to high cholesterol and weight gain.
So, if you wish to eat falafels every day as a meal, make them at home. Whereas consuming them outside should be an occasional thing.
Related Article: Are Burgers Healthy? 6 Tips to Turn Burgers Healthier
Healthier Ways to Make Falafel
Since falafels are deep-fried, you can make them more nutritious by baking them on a baking sheet lined with parchment paper or foil. A falafel patty has 83 calories, whereas oil contributes about 17 calories.
So, if you bake them instead of deep drying them, you can cut down a lot of unhealthy fats and calories from the falafel. Also, they’ll taste great without a lot of fat.
Airfrying falafel will give you a similar healthy outcome by reducing the calories. There will be no additional oil in the air fryer, so you don’t have to worry about weight gain or cholesterol.
Or, if you want to keep up with the traditional method of deep frying, substitute regular frying oil with cooking oils like coconut, olive, or avocado oil.
Traditionally, falafels are made with ground chickpeas and fava beans bound with flour and mixed with spices and herbs. So, there isn’t any ‘unhealthy’ ingredient to swap.
But if you want to add an extra protein punch, try adding some lentils. Instead of flour, you can add corn starch for gluten-free and a low-carb binder.
Also, if chickpeas irritate your stomach, you can replace them with cauliflower. Cauliflower has a similar texture when ground and provides additional nutrients like vitamins C, K, and folate.
Related Article: Are Fish Sticks Healthy – 10 Healthy And Unhealthy Facts
Healthy Ways to Eat Falafels: When & How To Eat
Falafels are delicious little balls of fried goodness that can be stuffed into pitas, eaten as sandwiches, used in salads, or added to rice dishes. You can have them as an appetizer or snack or as the main ingredient in wraps and burgers, an alternative to unhealthy meat fillings.
If you enjoy falafels in restaurants, limit yourself to 2 to 3 patties occasionally. However, if it’s homemade or, even better, baked, you might be able to get away with 1 or 2 more because they’ll be less greasy than fried ones.
Ensure you avoid eating them late at night. When you’re hungry and want something quick to eat, falafels can be a bad choice. Although they are packed with good-for-you fats, calories can add up when you have too many at a time leading to weight gain and other problems.
Related Article: Are Burritos Healthy? [Benefits and Risks]
Who Should Avoid Falafels
However, falafel is healthy for most; several people may consider it second.
Keto dieters
You may wonder what the harmless falafels have to do with keto dieters. If you ask, “are falafels keto” the answer is no, it’s not. One of the main ingredients in falafels is white flour, used as a binder, providing most of the carb content of the delicacy.
Also, legumes like chickpeas and fava beans used in falafels are a rich source of carbs, which is a big no-no for keto dieters.
Irritable Bowel Syndrome
If you have IBS (irritable bowel syndrome), legumes like chickpeas can further trigger the digestive condition.
Related Article: Are Crackers Healthy? Should you avoid or eat crackers
FAQs
Is Falafel Healthy for Weight Loss?
Falafel can be a healthy option for weight loss when consumed as part of a well-balanced diet and in moderation. While falafels are typically made from ground chickpeas or fava beans, which are high in protein and fiber, they are also usually deep-fried, which can increase their calorie and fat content.
To make falafel healthier for weight loss, consider baking or air-frying them instead of deep frying. Additionally, portion control is important, as eating too many falafels, even if they are baked, can still contribute to weight gain. Pairing falafels with plenty of vegetables and choosing whole grain options for wraps or pita bread can also make them a more nutritious choice.
Are Baked Falafels Healthy?
Yes, baked falafels can be a healthy option. Baking falafels reduces the amount of added fat compared to deep frying, making them lower in calories and fat. They are still a good source of plant-based protein and fiber from chickpeas or fava beans. Pairing baked falafels with plenty of vegetables and whole grains can make them a nutritious choice for a balanced meal.
Can I eat falafel everyday?
While falafel can be a delicious and nutritious addition to a balanced diet, it’s not recommended to eat falafel every day. Falafels are typically fried or baked patties made from ground chickpeas or fava beans, which can be high in calories and fat. Eating falafels in moderation as part of a well-rounded meal plan is recommended.
Are falafels healthier than meat?
Falafels can be a healthier alternative to meat for those who follow a plant-based or vegetarian diet. They are generally lower in saturated fat and cholesterol compared to meat-based options. However, it’s important to note that the nutritional content of falafels can vary depending on how they are prepared and cooked.
Is falafel high in carbs?
Yes, falafel can be relatively high in carbs due to its main ingredient, chickpeas or fava beans, which are naturally high in carbohydrates. However, the specific amount of carbs in falafel can vary depending on the recipe and serving size. It’s important to consider portion sizes and balance it with other foods in your diet if you are watching your carbohydrate intake.
Is falafel a Superfood?
Falafel is not typically considered a superfood. While it can be a good source of plant-based protein, fiber, and various vitamins and minerals, it doesn’t have the same nutrient density as some other superfoods like kale, spinach, or quinoa. It’s important to consume a variety of foods as part of a balanced diet for overall health and well-being.
Final Thought – So Are Falafels healthy?
Well, you can make falafel a part of your meal, considering you are making them at home at self-inspection. These little patty balls are much healthier than much so-called healthy food. The best part is that they are filled with more good than bad, positively impacting your overall health.
However, try avoiding the store-bought deep-fried ones and opt for a healthier version – homemade or baked to get the full benefits.
Related Posts


Subscribe for New Racipies
Get mental health tips, updates, and resources delivered to your inbox.