
Brooklyn Blackout Cake

Medically reviewed by Christiana George Updated Date: June 8, 2023
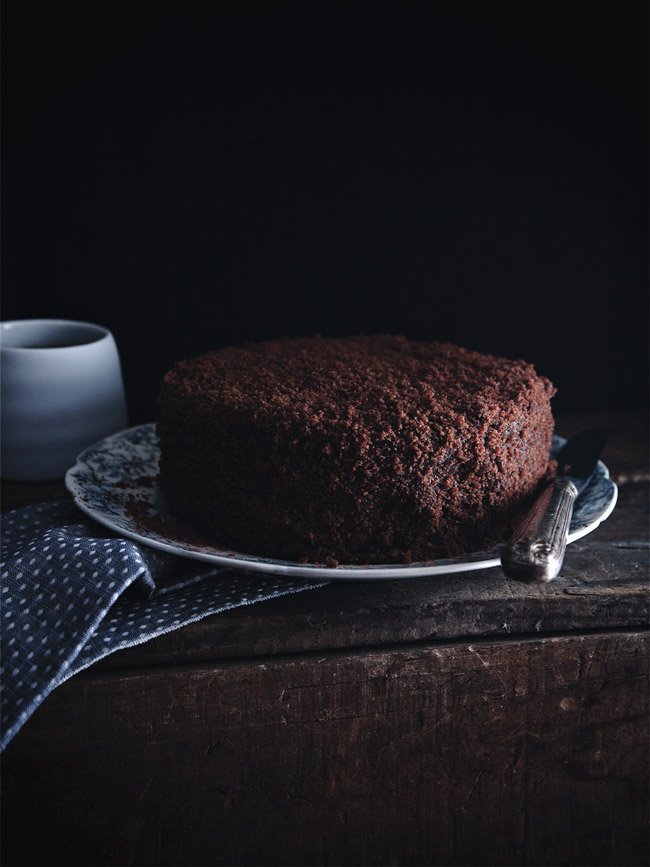
A proper celebratory cake should consist of at LEAST three layers, am I right? Unless the two layers are really thick, or the one layer is a flourless chocolate cake, or an olive oil cake, or something else rustic (and probably foreign). That being said, this cake features three teeny-tiny layers, so maybe it’s only technically a one-and-a-half layers tall. But that’s neither here nor there. The official story is, I made a three-layer cake, and that’s that.
The occasion? My birthday! (I know, I know, who makes their own birthday cake? Hello, a food blogger, duh!) We celebrated on Saturday, therefore the cake was consumed that day. I had to hustle to complete it because my original idea for a twenty-something-layer crepe cake flopped (also, I discovered that Trader Joes’s powdered sugar is slightly gray-colored. Ever seen a gray glaze on a cake? Probably not, because it’s gross-looking.)
For those unfamiliar with the Brooklyn blackout cake, it’s Americana at its finest. Its name was coined during World War II—the most patriotic name possible for a chocolate cake with chocolate pudding frosting and a chocolate crumb exterior, right?—and for a few decades, it reigned as one of the most delicious, iconic food items in the New York area. Unfortunately, the bakery that invented the cake went out of business, and it vanished. Well, not quite. It’s still plenty nostalgia- and saliva-inducing, but the original recipe is, like all good things, cloaked in secrecy.
You’ll find versions of it here and there, back-engineered attempts at recapturing the chocolate on chocolate on chocolate magic. Strangely, my favorite rendition isn’t from a bakery in the borough in which its name was clinched, but rather, from a tiny Upper East Side bakery called Two Little Red Hens, which turns out such a DENSE and MOIST slice, that I can only eat half of it (granted, Chris and I always order a slice of cheesecake along with it).
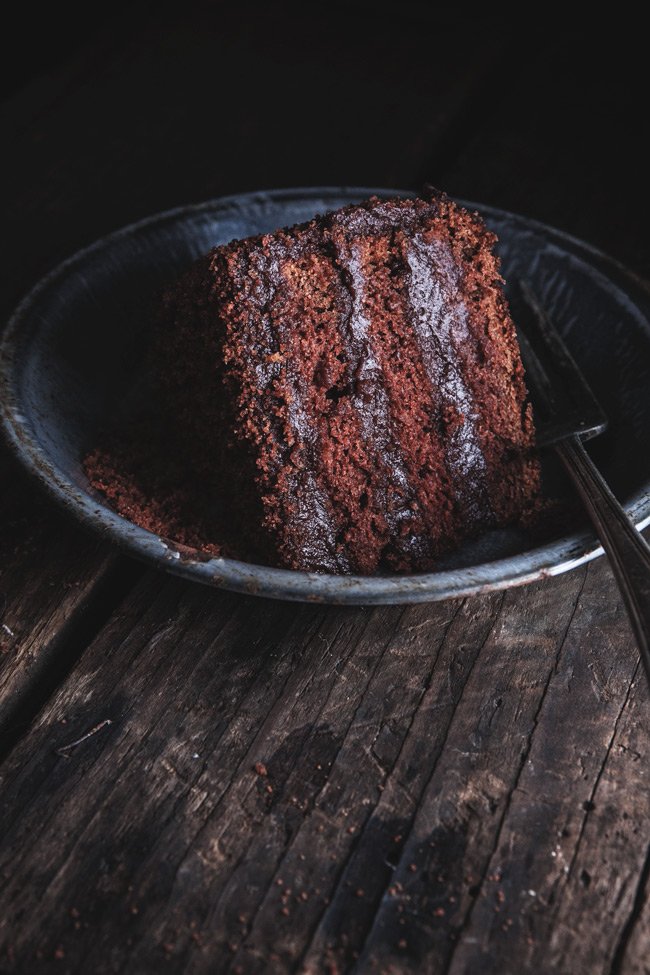
While the cake was consumed in its entirety, I did manage to save a slice so you could see the layers within. For what it’s worth, I found it a bit flat-tasting, lacking in depth, the frosting especially. I was surprised, since it’s from the Hummingbird Bakery cookbook, but then again, I did learn recently that there is such thing as too much chocolate. If you make it, let me know what you think. I may have to adjust my chocolate expectations.

BROOKLYN BLACKOUT CAKE
Makes one 3-layer 6-inch cake
Adapted from the Hummingbird Bakery Cookbook, via Hummingbird High
Note: This recipe was created by Hummingbird Bakery, a London bakery. Michelle wrote that she found the chocolate pudding difficult to make, but I used an immersion blender to mix the corn starch with the water and had no problems with the pudding coming together whatsoever. (A lot of Chinese dishes involve slurries, corn starch with water mixes used to thicken sauces, so maybe I’m just used to the weird properties of corn starch.)
Ingredients:
- For the frosting:
- 1-3/4 cups water plus 1/4 cup water, separated
- 1-3/4 cups granulated sugar
- 1/2 Tbsp light corn syrup
- 1/2 cup unsweetened cocoa powder
- scant 1/3 cup cornstarch
- 3 Tbsp unsalted butter, cold and cut into 1-inch cubes
- 1/4 tsp pure vanilla extract
For the cake:
- 3-1/2 Tbsp unsalted butter, at room temperature
- 10 Tbsp granulated sugar
- 1 egg, room temperature
- 1/4 tsp vanilla extract
- 1/6 cup unsweetened cocoa powder
- scant 1/2 tsp baking powder
- scant 1/2 tsp baking soda
- a pinch of salt
- 1 1/3 cups all-purpose flour
- 2/3 cup whole milk
Directions:
For the frosting: Ideally start on this the day before to give it time to cool fully. Combine 1-3/4 cups water, sugar, light corn syrup, and cocoa powder into a small sauce pan and bring to a boil over medium heat, whisking occasionally. In the meantime, combine the remaining 1/4 cup water with corn starch in a cup and mix with an immersion blender until dissolved. It’ll be relatively thin and uniformly opaque.
Slowly pour the corn starch mix into the sauce pan, whisking vigorously. Let the mix come back to a boil, whisking still. Continue whisking as the pudding thickens. It shouldn’t take more than a few minutes for it to reach a thick chocolate pudding-like consistency. Turn off the heat and stir in the butter, incorporating it completely. The pudding should be shiny and thick.

Pour the pudding into a receptacle, cover the surface with plastic wrap, and place it in the fridge until completely cool.
For the cake: Preheat the oven to 325 degrees F. Butter a 6-inch round pan, and lay a circular parchment paper round on the bottom.
In a stand mixer bowl, cream the butter and sugar until light and fluffy, about 5 minutes. On low speed, mix in the egg until it’s completely incorporated. Scrape down the sides of the bowl, then, on low speed, beat in the vanilla extract, cocoa powder, baking powder, baking soda, and salt. Continue mixing until just combined, then add about half the flour as well as the milk. When just combined, add the remainder of the flour, mixing until just combined.
Pour the batter into the prepared pan, and place it in the oven. Bake for about 30 minutes, until a skewer inserted in the middle comes out clean and the top bounces back a little when you push it. Let the pan cool for a minutes, then empty the cake onto a cooling rack to completely cool. Remove the parchment paper round.
Assembling: Slice off the domed top of the cake. Save it for the crumb topping. Carefully, slice the cake into three even-sized layers (they’ll be quite thin, so be careful). Proceed the way you’d normally assemble a layer cake, adding about 1/4 of the chocolate pudding frosting between layers. (When you take the pudding out of the fridge, it’ll be kind of hard to work with initially, but will become more malleable once it’s been worked with a spatula for a bit.) Cover the exterior of the cake with the rest of the chocolate pudding.
Finally, take that saved dome and process it in a food processor until it turns into fine crumbs. Using a sieve, spread the crumbs evenly across the top of the cake. With the remaining crumbs, cover the sides. I found this easiest to do by taking a handful and patting them onto the sides, first covering the bottom, then moving onto the top.
Related Posts



Subscribe for New Racipies
Get mental health tips, updates, and resources delivered to your inbox.
Biscoff Cookie Dough Pops

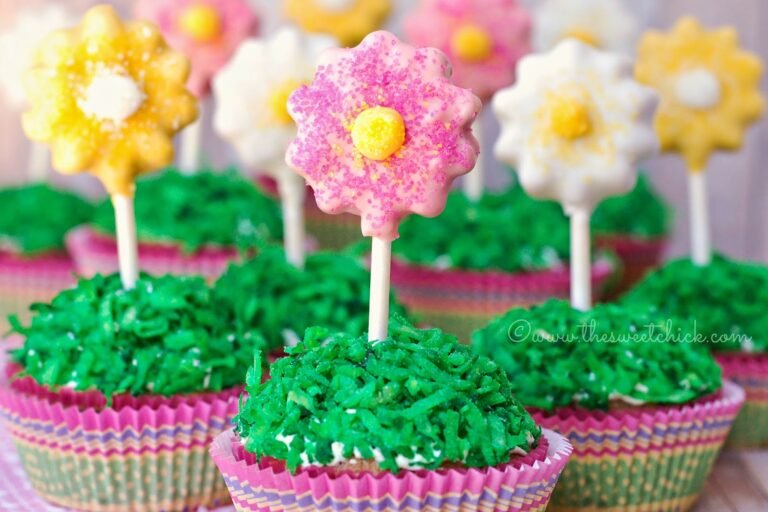

Do you buy your mother flowers on Mother’s Day? Well, how about making some instead. These Biscoff Cookie Dough Pops are perfect for a special occasion and a special person. Kids can also get in on the action, if they don’t eat all the cookie dough first. It is pretty irresistible. If you like Biscoff Cookie Spread, you are going to love Biscoff Cookie Dough. It’s a wonderful combination of Biscoff flavor and raw chocolate chip cookie dough (don’t worry, no eggs involved). You’ve gotta try it!

Even if you don’t want to make the flower pops, you can still make regular round pops or truffles with this cookie dough recipe. I think I like it even more than the plain cookie dough recipe I used for my Cookie Dough Bunny Truffles. I use Wilton’s meringue powder as my egg replacer, so these are egg free and totally edible raw.

The dough is not heavy. It doesn’t feel a ton of bricks. It light, fluffy and oh so good. You get the flavor of Biscoff, but less sweet. I love to bake with Biscoff, but by itself it’s sometimes a little too sweet. In this recipe I substituted some of the sugars for Biscoff so the sweetness is reduced. You could just grab a spoon and eat the whole bowl while watching tv or you can make some pretty flower pops like I did.

I bought these silicone lollipop molds at Walmart during the Easter season. Each pack came with 2 mold of 6 pops each with space to add a lollipop sticks which were included. I don’t make candy lollipops, but I knew I could use it to make cookie dough pops.
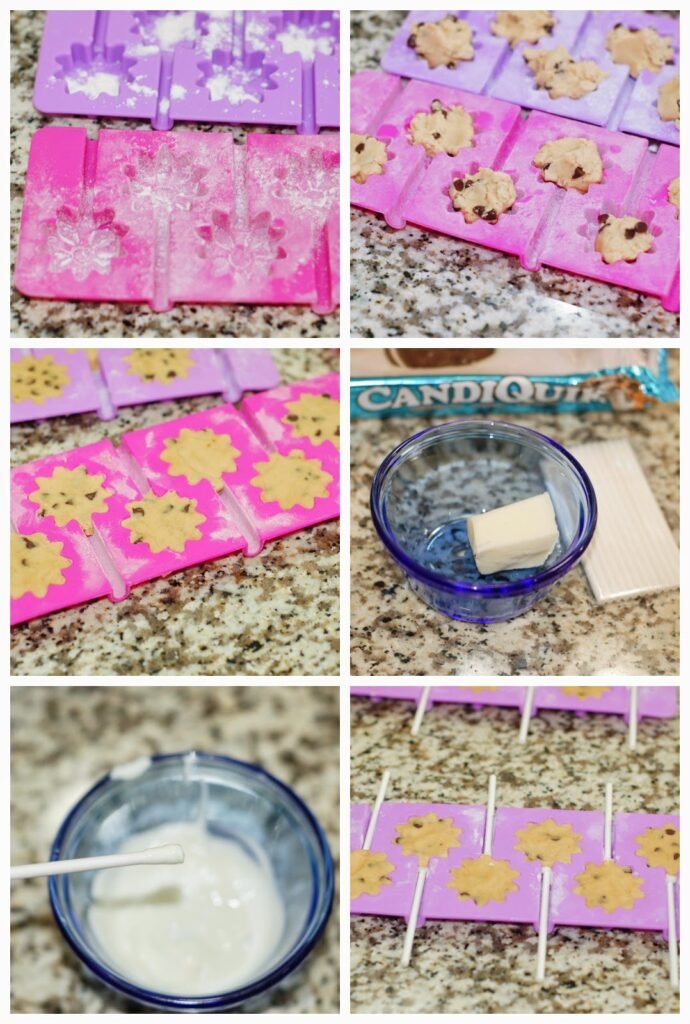
I just sprinkled some flour into the molds and shook out any excess. Then took a bit of dough and started pressing it into the molds until it was flush. To add the sticks, I first dipped them in some melted candy coating and then pushed them into place while placing my hand over the dough so the stick would go in straight. After that, it was time to pop them in the freezer. The first batch I left in there 4 hours because I was busy with other stuff, but the Bunny Truffles I had only placed in the freezer for a 1/2 hour and they were firm enough to remove from the mold. I all depends on how cold your freezer is.

You have to stretch and tug the silicone to loosen the pops. They came out great. Then it was time for dipping and decorating. You have to bring out only a few at a time from the freezer so the dough stays firm. My kitchen was very hot yesterday, so I had to be careful because once the dough softened up too much it fell off the stick. Also make sure your candy melt is not too hot.
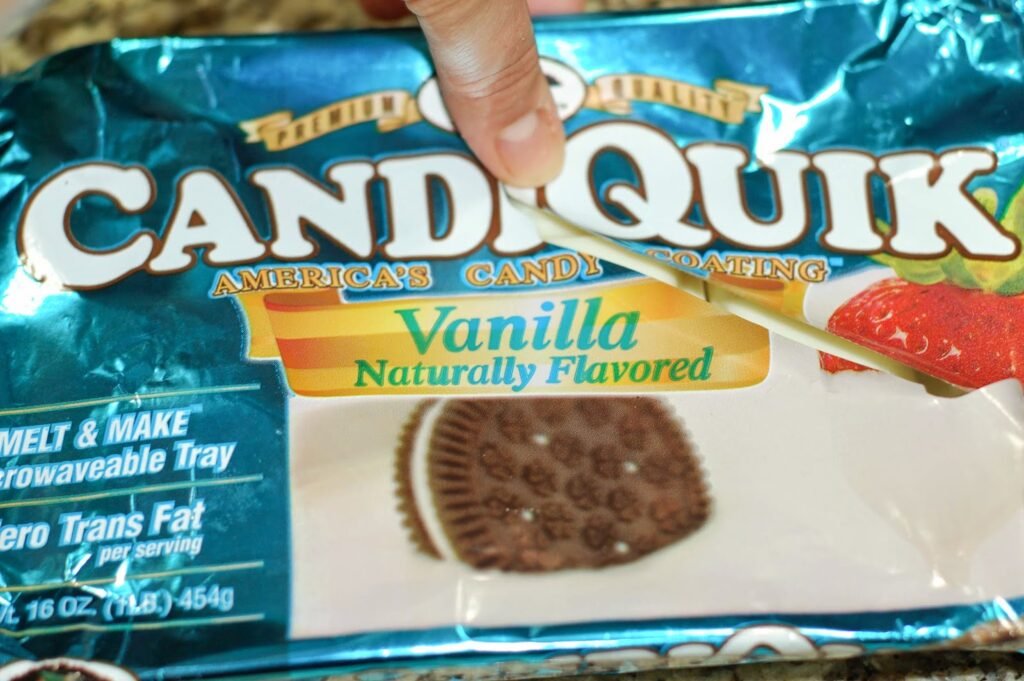
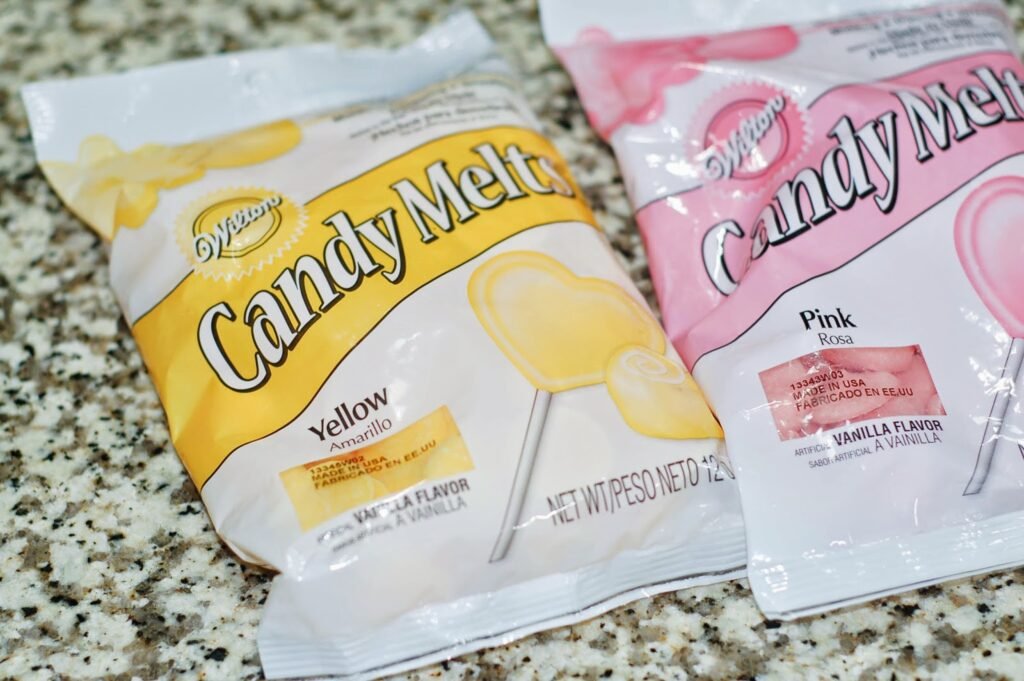
These are the three colors I used, but there are lots of different colors available. I also added some colored sugar crystals which I had in the pantry, to some of the pops. You add the crystals before the candy melt fully sets. Once the candy melt was set, I used a disposable candy decorating bag to pipe on the centers. Usually the candy melt sets fast, but like I said my kitchen was a little warm yesterday so I ended up having to place all my pops in the fridge to get the coating to harden. The weather here has been brutal this week. I also though of using pastel M&Ms for the centers, but I didn’t have any on hand.
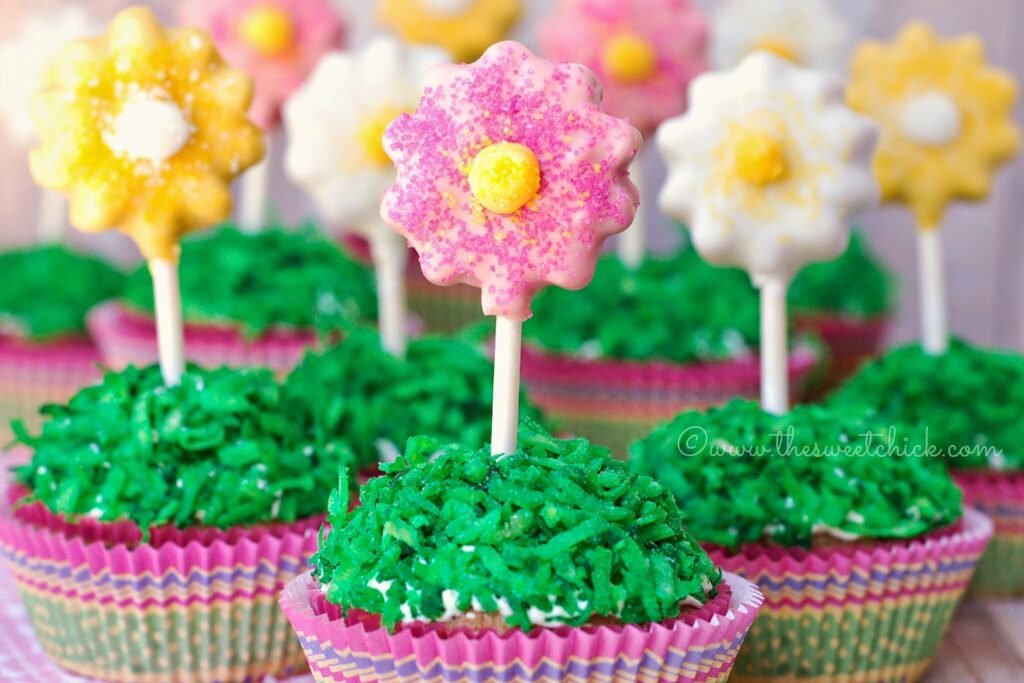
To give the flower pops a little more special treatment I placed them in cupcake. You can make any cupcakes you want and add some green frosting, then tint some coconut flakes with some green dye to make it look like grass and adhere them to the frosting. Just place the coconut flakes in a Ziplock bag, add some food coloring and shake it up. This is something the kids can do. Or if you want you can just make the pops and maybe add a cute paper leaf to the lollipop stick with a message. Whatever you do, enjoy your pops and make sure to share!
Biscoff Cookie Dough Pops
by The Sweet Chick
Prep Time: 2 hours
Keywords: no bake biscoff chocolate chips candy melt Mother’s Day pops truffles American spring
Ingredients (52 pops)
For the cookie dough
- 2/3 cup unsalted butter, room temperature
- 2 tablespoons brown sugar
- 1/4 cup granulated sugar
- 1/4 cup Biscoff cookie spread
- 1/2 teaspoon vanilla extract/paste
- 2 teaspoons meringue powder ( I used Wilton’s)
- 2 tablespoons water
- 1 3/4 cups all purpose flour
- 1/2 teaspoon baking soda
- 1/2 teaspoon salt
- 1/2 cup mini chocolate chips
For the candy coating
- 1 package (16 oz.) Candiquik Vanilla candy coating (white)
- 1 package (12 oz.) Wilton’s Candy Melt wafers (pink)
- 1 package (12 oz.) Wilton’s Candy Melt wafers (yellow)
Tools needed
- silicone flower pop mold
- 52 lollipop sticks
- 1 box (12) Wilton’s disposable candy decorating bags
Optional toppings
- pink, white, and yellow sugar crystals
Instructions
For the cookie dough
In a stand mixer, cream together the butter and sugars. Then add the cookie spread and vanilla, mix on low until well blended.
In a small bowl mix together the meringue powder and water, then add it to the mixer bowl and mix well.
In a medium bowl combine the flour, baking soda, and salt. Next add it to the mixer bowl a little at a time while mixing on low until dough starts to form.
Last, add the chocolate chips and mix until all incorporated.
Lightly dust your silicone molds with flour, removing any excess.
Add a small amount of cookie dough to each cavity pressing down with your fingers until cavity is full, and making sure the top of the dough is flush to the mold.
Place a Candiquik square in a small microwave safe bowl, and melt in the microwave according to instructions on the package (usually 30 second at a time until fully melted).
Dip the tips of the lollipop sticks into the candy melt, then carefully insert them into the bottoms of the flower. (I place my hand on top of the cookie dough while inserting the sticks to insure they would go in correctly.)
Place the molds in the freezer for 1/2 hour to 1 hour until they are firm enough to pop out of the mold. (I placed the pops in an airtight container and kept them in the freezer until it was time to dip them in the candy melt.)
For the candy coating
Using one color at a time, melt your candy coating in the microwave according to instructions on the package. Make sure your candy coating is not too hot, just warm. (If your candy coating is not smooth, you can add a little bit of vegetable shortening to it, 1/2 teaspoon at a time.)
Remove a small batch of cookie dough pops from the freezer and dip them in the candy melt. Swirl them around upside down a bit to remove any excess candy melt, then place them upright in a pop holder until the candy melt hardens. (I had to place mine in the fridge because my kitchen was a bit too warm that day.)
Repeat process for all pops, using the different colored candy coating.
For the centers of the flower pops, pour melted candy coating into a disposable candy decorating bag with tip cut off and add a small dot of candy coating in the middle. Make sure you candy coating is not too hot, wait for it to be just warm. It will make piping easier and will save you from burning your hands. (If your candy coating hardens up in the bag, just pop it back in the microwave for about 10 seconds or so.)
Once all the candy melt has set, you really don’t need to keep these pops refrigerated. Remember there are not eggs involved. Just keep them in an airtight container.
Optional toppings
If you are using sugar crystals, sprinkle them on before candy melt is completely set.
Enjoy!
Cookie dough recipe adapted from Chocolate Chip Cookie Dough Cake Pops by My Little Cupcake Blog
This recipe may be shared at these fabulous link parties.
Related Posts






Subscribe for New Racipies
Get mental health tips, updates, and resources delivered to your inbox.